
We’re ready to take a look at the first example in this chapter. We will work on a scene with per-fragment lighting that has three light sources.
Each light has a position and a diffuse color property. This means we have two uniforms per light. Perform the following steps:
- To keep things simple, we have assumed that the ambient color is the same for all three light sources. We have also removed the specular property. Open the ch06_02_wall_initial.html file in your browser.
- You will see a scene such as the one displayed in the following screenshot where two lights (red and green) illuminate a black wall:

- Open the ch06_02_wall-initial.html file using your code editor. We will update the vertex shader, the fragment shader, the JavaScript code, and the HTML code to add the blue light.
- Updating the vertex shader: Go to the vertex shader where you can see these two uniforms:
uniform vec3 uPositionRedLight;
uniform vec3 uPositionGreenLight;
- Let's add the third uniform here:
uniform vec3 uPositionBlueLight;
- We also need to define a varying to carry the interpolated light ray direction to the fragment shader. Remember here that we are using per-fragment lighting. Check where the varyings are defined:
out vec3 vRedRay;
out vec3 vGreenRay;
- And, add the third varying there:
out vec3 vBlueRay;
- Let's take a look at the body of the vertex shader. We need to update each of the light locations according to our position in the scene. We achieve this by writing the following:
vec4 blueLightPosition = uModelViewMatrix * vec4(uPositionBlueLight, 1.0);
- Notice that the positions for the other two lights are also being calculated.
- Let's calculate the light ray for the updated position from our blue light to the current vertex. We do that by writing the following code:
vBlueRay = vertex.xyz - blueLightPosition.xyz;
- That is all we need to modify in the vertex shader.
- So far, we’ve included a new light position and we have calculated the light rays in the vertex shader. These rays will be interpolated by the fragment shader.
- Let's work out how the colors on the wall will change by including our new blue source of light. Scroll down to the fragment shader and add a new uniform—the blue diffuse property. Look for these uniforms declared right before the main function:
uniform vec4 uDiffuseRedLight;
uniform vec4 uDiffuseGreenLight;
- Insert the following line of code:
uniform vec4 uDiffuseBlueLight;
- To calculate the contribution of the blue light to the final color, we need to obtain the light ray we defined previously in the vertex shader. This varying is available in the fragment shader. You also need to declare it before the main function. Look for the following:
in vec3 vRedRay;
in vec3 vGreenRay;
- Insert the following code right under it:
in vec3 vBlueRay;
- It is assumed that the ambient component is the same for all the lights. This is reflected in the code by having only one uLightAmbient variable. The ambient term, Ia, is the product of uLightAmbient and the wall's material ambient property:
// ambient Term
vec4 Ia = uLightAmbient * uMaterialAmbient;
- If uLightAmbient is set to (1.0, 1.0, 1.0, 1.0) and uMaterialAmbient is set to (0.1, 0.1, 0.1, 1.0), then the resulting ambient term, Ia, will be really small. This means the contribution of the ambient light will be low in this scene. In contrast, the diffuse component will be different for every light.
- Let's add the effect of the blue diffuse term. In the fragment shader main function, look for the following code:
// diffuse Term
vec4 Id1 = vec4(0.0, 0.0, 0.0, 1.0);
vec4 Id2 = vec4(0.0, 0.0, 0.0, 1.0);
- Add the following line immediately under it:
vec4 Id3 = vec4(0.0, 0.0, 0.0, 1.0);
- Scroll down to the following:
float lambertTermOne = dot(N, -normalize(vRedRay));
float lambertTermTwo = dot(N, -normalize(vGreenRay));
- Add the following line of code right under it:
float lambertTermThree = dot(N, -normalize(vBlueRay));
- Scroll to the following:
if (lambertTermOne > uCutOff) {
  Id1 = uDiffuseRedLight * uMaterialDiffuse * lambertTermOne;
}

if (lambertTermTwo > uCutOff) {
  Id2 = uDiffuseGreenLight * uMaterialDiffuse * lambertTermTwo;
}
- Insert the following code after it:
if (lambertTermThree > uCutOff) {
  Id3 = uDiffuseBlueLight * uMaterialDiffuse * lambertTermTwo;
}- Update fragColor so that it includes Id3:
fragColor = vec4(vec3(Ia + Id1 + Id2 + Id3), 1.0);
- That's all we need to do in the fragment shader. Let's move on to our JavaScript code. So far, we have written the code that is needed to handle one more light inside our shaders. Let's see how we create the blue light from the JavaScript side and how we map it to the shaders. Scroll down to the configure function and look for the following code:
const redLight = new Light('redLight');
redLight.setPosition(redLightPosition);
redLight.setDiffuse([1, 0, 0, 1]);

const greenLight = new Light('greenLight');
greenLight.setPosition(greenLightPosition);
greenLight.setDiffuse([0, 1, 0, 1]);
- Insert the following code:
const blue = new Light('blueLight');
blue.setPosition([-2.5, 3, 3]);
blue.setDiffuse([0.0, 0.0, 1.0, 1.0]);
- Scroll to the point where the uniforms list is defined. As mentioned earlier, this new mechanism makes it easier to obtain locations for the uniforms. Add the two new uniforms that we are using for the blue light: uDiffuseBlueLight and uPositionBlueLight. The list should look like the following code:
const uniforms = [
  'uProjectionMatrix',
  'uModelViewMatrix',
  'uNormalMatrix',
  'uMaterialDiffuse',
  'uMaterialAmbient',
  'uLightAmbient',
  'uDiffuseRedLight',
  'uDiffuseGreenLight',
  'uDiffuseBlueLight',
  'uPositionRedLight',
  'uPositionGreenLight',
  'uPositionBlueLight',
  'uWireframe',
  'uLightSource',
  'uCutOff'
];
- Let's pass the position and diffuse values of our newly defined light to program. Find the following lines, after the line that loads program, and make these necessary changes:
gl.uniform3fv(program.uPositionRedLight, redLight.position);
gl.uniform3fv(program.uPositionGreenLight, greenLight.position);
gl.uniform3fv(program.uPositionBlueLight, blueLight.position);

gl.uniform4fv(program.uDiffuseRedLight, redLight.diffuse);
gl.uniform4fv(program.uDiffuseGreenLight, greenLight.diffuse);
gl.uniform4fv(program.uDiffuseBlueLight, blueLight.diffuse);
Uniform Arrays
Coding one uniform per light makes the code quite verbose. Later on, we will cover how to simplify the code using uniform arrays.
Coding one uniform per light makes the code quite verbose. Later on, we will cover how to simplify the code using uniform arrays.
- Let's update the load function. We need a new sphere to represent the blue light, the same way we have two spheres in the scene: one for the red light and the other for the green light. Append the following line:
scene.load('/common/models/geometries/sphere3.json', 'blueLight');
- As we saw in the load function, we are loading the same geometry (sphere) three times. To differentiate the sphere that represents the light source, we are using local transforms for the sphere (initially centered at the origin). Scroll to the render function and find the following lines of code:
const modelViewMatrix = transforms.modelViewMatrix;

if (object.alias === 'redLight') {
  mat4.translate(
    modelViewMatrix, modelViewMatrix,
    program.getUniform(program.uPositionRedLight)
  );
  object.diffuse = program.getUniform(program.uDiffuseRedLight);
  gl.uniform1i(program.uLightSource, true);
}

if (object.alias === 'greenLight') {
  mat4.translate(
    modelViewMatrix, modelViewMatrix,
    program.getUniform(program.uPositionGreenLight)
  );
  object.diffuse = program.getUniform(program.uDiffuseGreenLight);
  gl.uniform1i(program.uLightSource, true);
}
- Add the following code:
if (object.alias === 'blueLight') {
  mat4.translate(
    modelViewMatrix, modelViewMatrix,
    program.getUniform(program.uPositionBlueLight)
  );
  object.diffuse = program.getUniform(program.uDiffuseBlueLight);
  gl.uniform1i(program.uLightSource, true);
}
- That’s it! Save the page with a different name and test it in your browser:
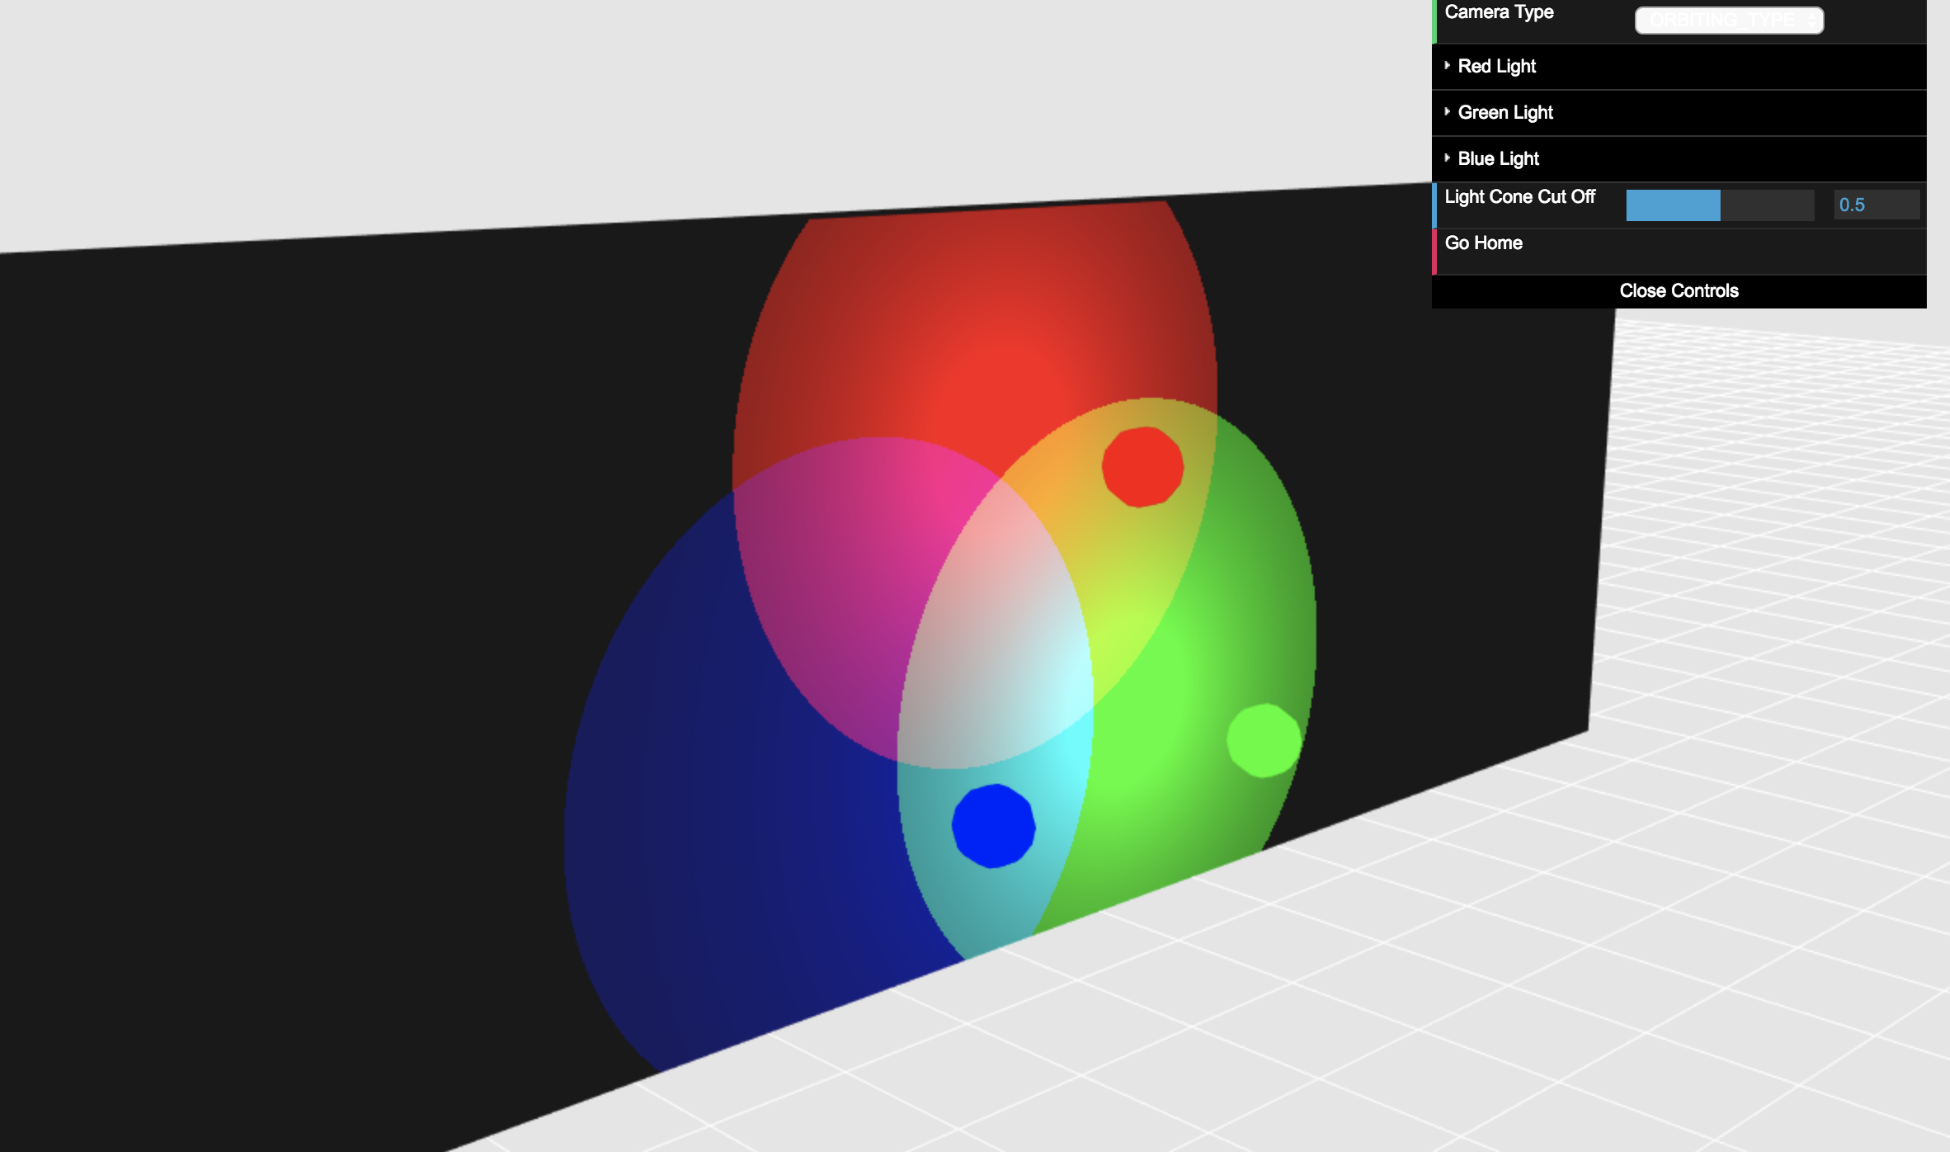
- If you do not obtain the expected result, please go back and check the steps. You will find the completed exercise in the ch06_03_wall-final.html file.
What just happened?
We have modified our sample scene by adding one more light: a blue light. We have updated the following:
- The vertex shader
- The fragment shader
- The configure function
- The load function
- The draw function
As you can see, handling light properties one uniform at a time is not very efficient. Later in this chapter, we will study a more effective way to handle lights in a WebGL scene.