
So far, we've seen how textures can be used to sample image data in a fragment shader, but we've only used them in a limited context. Some interesting issues arise when you start to investigate textures more closely.
For example, if you were to zoom in on the cube from the previous demo, you would see that the texture begins to alias:

As we zoom in, we can see that jagged edges develop around the WebGL logo. Similar problems become apparent when the texture is very small on the screen. Isolated to a single object, such artifacts are easy to overlook, but they can become very distracting in complex scenes. Why do we see these artifacts in the first place?
From the previous chapter, you should remember how vertex colors are interpolated so that the fragment shader is provided with a smooth gradient of color. Texture coordinates are interpolated in the exact same way, with the resulting coordinates being provided to the fragment shader and used to sample color values from the texture. In a perfect situation, the texture would display at a 1:1 ratio on screen, meaning each pixel of the texture (known as texels) would take up exactly one pixel on screen. In this scenario, there would be no artifacts:

Sometimes, the pixels in a texture are called texels. Pixel is short for Picture Element. Texel is short for Texture Element.
The reality of 3D applications, however, is that textures are almost never displayed at their native resolution. We refer to these scenarios as magnification and minification, depending on whether the texture has a lower or higher resolution than the screen space it occupies:

When a texture is magnified or minified, there can be some ambiguity about what color the texture sampler should return. For example, consider the following diagram of sample points against a slightly magnified texture:
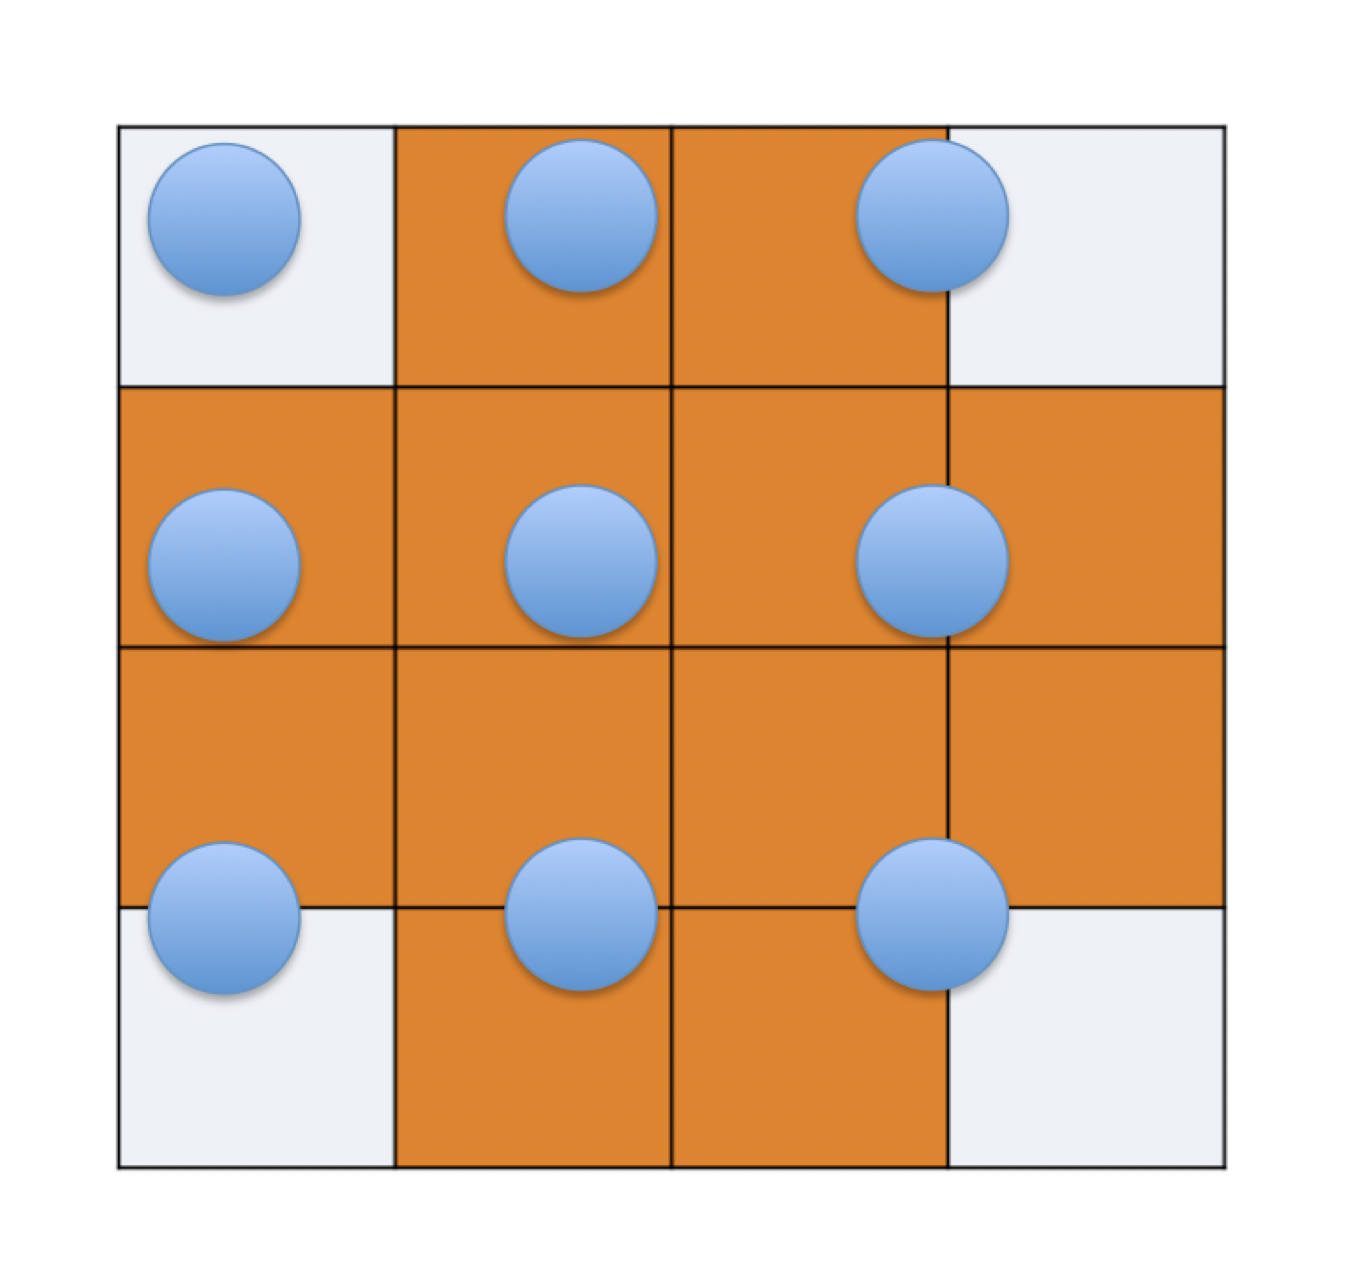
It's pretty obvious what color you would want the top left-hand side or middle sample points to return, but what about those texels in the middle? What color should they return? The answer is determined by your filter mode. Texture filtering allows us to control how textures are sampled and achieve the look we want.
Setting a texture's filter mode is very straightforward, and we already saw an example of how it works when we talked about creating textures:
gl.texParameteri(gl.TEXTURE_2D, gl.TEXTURE_MAG_FILTER, gl.NEAREST);
gl.texParameteri(gl.TEXTURE_2D, gl.TEXTURE_MIN_FILTER, gl.NEAREST);
As with most WebGL calls, texParameteri operates on the currently bound texture, and must be set for every texture you create. This also means that different textures can have different filters, which can be useful when trying to achieve specific effects.
In this example, we are setting both the magnification filter (TEXTURE_MAG_FILTER) and the minification filter (TEXTURE_MIN_FILTER) to NEAREST. There are several modes that can be passed for the third parameter, and the best way to understand the visual impact they have on a scene is to see the various filter modes in action.
Let's look at a demonstration of the filters in your browser while we discuss different parameters.