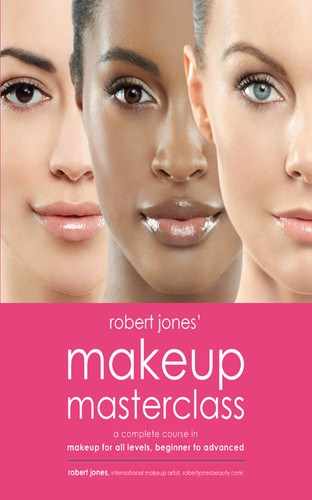
chapter 1
tools of the trade
One of the most confusing things about makeup is figuring out which products to choose. It’s hard to know what to buy, where to invest the bulk of your money, and where to maybe save a dollar or two. There are so many questions: Which formula of foundation would work best for you? Which type of blush will be the easiest to apply? Which type of eyeliner will meet your needs? Do you want to wear lipstick or lip gloss?
If you go to a department store, you’ll be hit with an endless number of products that the salesperson just wants to sell you. Many you do not need and probably will never wear. If you go to a drug store, there will be no one to help you, and you may not know what to do. Which is better?
The best solution is to educate yourself so you can make your best choices no matter where you are. In this chapter, we will discuss which products will best meet all your needs.

foundation
Foundation is the most important piece of makeup you will ever purchase. It can make your skin appear flawless and natural, with a healthy glow. It can cover imperfections and blemishes and smooth out uneven skin tones. The right one looks like you’re wearing nothing; the wrong one looks like you’re wearing a mask. The right one can erase years; the wrong one can add years. Wearing foundation correctly can do more for your appearance than practically any other makeup product. It can also be one of the most difficult to choose correctly.
When making your foundation choice, there are two things to consider. First, match your skin tone and depth so your foundation looks natural. Second, match your skin type with the correct foundation formula. For example, if you have oily skin, the oils can mix with the product and make your skin appear blotchy and uneven, so you need a foundation with oil absorbers in it. If you have dry skin, you need a foundation with moisturizers in it so it helps your skin look supple and fresh and keeps it from looking blotchy. Wearing the correct foundation formula for your skin type can help your foundation stay on longer and your skin look even and flawless.
My advice? Treat yourself to the best foundation you can afford. Higher priced foundations usually contain higher quality pigments that last longer and appear much more flattering. They also usually contain higher quality moisturizers and oil absorbers, helping them perform better. Cheaper foundations contain fewer, inferior pigments that usually don’t wear as long.
Your skin is the most important part of your makeup look, and making it look the freshest and most flawless is so important. Foundation and powder are the bases of flawless-looking skin, so you should try to buy the best.
You have a lot of options when it comes to foundation formulations. Thanks to modern technology, many foundations can appear almost invisible. There are all kinds of new light-reflecting ingredients in foundation that will hide your flaws without piling on lots of product. There are all kinds of new pigment technologies making it an almost pure pigment that adds straight coverage with no weight or texture. If you want more coverage from your foundation, choose one with more pigment in it rather than using more of the product. Choose from a variety of textures and formulas that will give you different coverages and finishes. A product’s consistency and the way it goes onto the skin is the key to even, flawless coverage.
The real goal is for your foundation to look as if you’re not wearing any at all. You simply give the illusion of having healthy, glowing, flawless skin. Your skin changes with the seasons and as you age, and you must change your foundation as well if you want to continue looking flawless and fresh.
liquid foundation. This is the most popular foundation and is suited to most—if not all—skin types. It is available in every type of formula, from oil-free, oil-absorbing for oily skin to moisturizing for dry skin. Liquid foundation gives varying degrees of sheer to medium coverage, depending on the brand and the formula, so you can choose the amount of coverage you want. Most can be layered to create more coverage. You can purchase it in a bottle or a tube. It gives you more coverage than a tinted moisturizer, but less than a crème or stick foundation.
liquid pigment. This liquid foundation is almost pure pigment, giving you great coverage without weight and texture. It can be used alone or added to other products such as moisturizers, primers, tinted moisturizers, bb creams, or other foundations. The more drops you use, the more coverage you get; you completely control the coverage. It’s great for all skin types, and it’s one of my favorite formulas for coverage and natural appearance.
crème foundation. Smooth and creamy, crème foundation is specifically formulated for normal to very dry complexions. It’s one of the most moisturizing formulas you can use. It gives the skin a natural finish while offering one of the highest of all coverages. It’s also versatile—even though it tends to have a thicker and heavier consistency, it can be made sheerer if you apply it with a damp sponge (which also allows you to control the coverage). Crème foundation is great for dry skin. However, if you have flaky skin, it can look cakey, and the result can be slightly dull and heavy-looking.

mousse foundation. This is a crème foundation that has a whipped consistency. Mousse foundations are formulated for normal to dry skin. Mousse generally comes in a jar rather than a compact, and it is usually lighter and sheerer than its compact counterpart. It evens out the skin tone without appearing heavy. Usually high in pigment and low in viscosity, it gives you great coverage while appearing almost invisible on the skin. I use mousse-textured formulas a lot because they seem to sink into the skin rather than sit on top of it. They give great coverage that appears very natural. They are fabulous on mature skin because they do not collect in fine lines like heavier crème formulas.
stick foundation. Stick foundation is essentially a neatly packaged crème foundation and concealer in one. Best for normal to dry skin, it is a good option if you want more coverage. It offers ideal maximum coverage for imperfections, as well as covering ruddy and uneven skin tones. Stick foundation will give you quick coverage, but it can look a little heavy on clear skin, on which a lot of coverage is not needed. The beauty of this formula is that you can dot it where you need it rather than applying it to your entire face. Then you can simply blend powder in and go.
crème-to-powder foundation. This is quick and simple! Formulated for normal to slightly oily skin, it has a creamy texture that dries to a powder finish; usually no additional dusting of powder is needed to set it. These formulas are kinder to oily skin than their crème counterparts because the powder helps cut down on excess shine. Once again, because it is a crème at heart, it will give you more coverage. It offers a little less coverage than its moisturizing crème counterparts (crème and stick), but more than a liquid or tinted moisturizer.
bb, cc, and dd creams. These are lightweight, low coverage versions of a foundation with lots of treatment. We started with bb (beauty balm) creams, which were designed to brighten and lighten the skin while moisturizing and providing sunscreen. Then we got cc (color corrector or coverage control) creams with light but better coverage and built-in primer, brightener, and anti-aging properties. Some boast as many as twelve functions in one product. Now dd (daily defense or dermatologically defining) creams provide additional long-term anti-aging benefits with the increased coverage that we got added from our cc cream. I’m sure the alphabet will continue on as innovations in science and beauty emerge.
tinted moisturizer. This is moisturizer with a little color added. This formula works best on normal to dry skin and gives you sheer, lightweight, breathable coverage with a fresh, nearly naked finish. It gives you the sheerest coverage of all the foundation formulas, and it’s ideal for use during the summer months when you feel like wearing next to nothing. It evens out your skin tone and is the easiest to apply due to its sheerness. Many brands contain sunscreen, which means one less step in the morning.
powder compact. This dual-finish powder foundation gives a quick and convenient sheer-to-medium coverage and is packaged in a nice neat compact. It is formulated for normal to oily skin; on dry skin, it will just look chalky. It goes on like a pressed powder but gives you slightly more coverage, because it contains emollients and pigments. It’s a great choice for young girls because it is low in oils and moisturizers, so it does not clog pores, cutting down on the risk of breakouts. Also, it is all the coverage that most young girls need and is easy for them to apply. You control the coverage by choosing your tool of application. Applied with a brush, it gives you sheer coverage. Applied with a sponge, it gives you more complete coverage.

pigmented mineral powder. Loose powder that adheres to the skin, pigmented mineral powder provides sheer to medium coverage. It is formulated for normal to oily skin; on dry skin, it will appear too chalky. In addition to giving you coverage, it also contains vitamins and minerals, which make it great for sensitive skin. It works much like a dual-finish powder foundation and is simple to apply with a brush or a sponge. Applied with a brush, it gives you sheer to medium coverage. Applied with a sponge, it gives you medium coverage (and if you apply enough layers, full coverage). With any tool, the more layers you apply, the more coverage you will get. Be careful, though: too much of this formula can look cakey, due to its powder consistency. It usually does not contain any preservatives, and like tinted moisturizer, it may also provide sunscreen.
airbrush foundation. This is foundation sprayed on the skin using an airbrush instead of being apply with conventional tools such as your fingers, a sponge, or a brush. It is a liquid and is released in a fine spray from the end of the spray gun (airbrush), giving the entire face complete coverage. This formula is known for its long wearability. Some formulas are water-resistant and some are waterproof. Because of the complete coverage aspect of it, it can create a mask-like effect.
aerosol spray foundation. This formula comes in an aerosol spray can. It gives you maximum coverage with staying power. Most formulas work on all skin types and are water-resistant. It was created to mimic what professional makeup artists call airbrushing (using a machine that sprays a fine mist of foundation). You simply spray it over your face, and it releases a mist of foundation, giving you complete coverage. After you spray it on, you can use a sponge or a brush to blend it in and help it look more natural. But it tends to look less natural and heavier than many of your other foundation options.
tip: If your skin tends to flake, make sure you exfoliate to get rid of that top layer of dead, dry skin before applying a crème foundation.
concealer
Concealer can be your best friend or your worst enemy. It comes in a multitude of formulations and textures. Different textures of concealers are used on different problem areas, so it’s important to match the texture with the problem area. For example, a concealer used to cover under- eye areas should always be moist and creamy, whereas a concealer designed to cover breakouts or broken capillaries should be much drier in texture so it will adhere better and last longer. If you use the wrong formula, it could draw more attention to what you are trying to conceal.
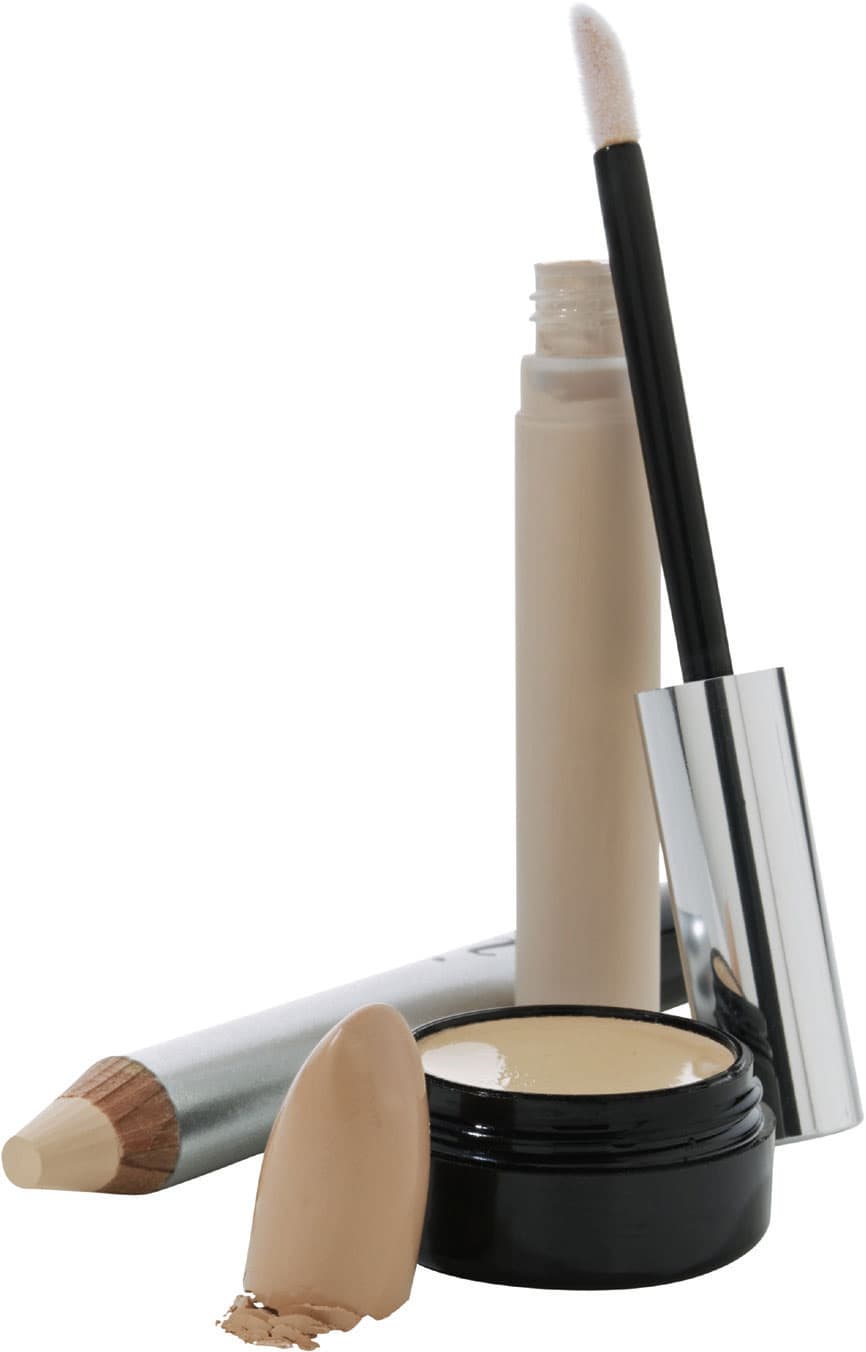
stick concealers. These full-coverage concealers can vary in dryness and texture; some are creamier and some are much less moist. They conceal everything from dark circles to more prominent blemishes and almost every skin discoloration. When using this formula to minimize under-eye circles, make sure the texture and consistency are creamy enough to blend well and keep the area hydrated so as not to accentuate fine lines. Because your most delicate skin is under your eyes, using a creamier texture will help keep this area looking its most flawless. If you are covering other types of spots on you face, such as blemishes, dark spots, or veins, choose a stick that is a little drier in texture so it will stay put and last longer.
pot concealer. This concealer provides similar full coverage to stick, but it is usually formulated with more moisturizing ingredients and is not quite as thick. It conceals any flaws you might want to hide. This is the concealer most commonly used by professionals because of its great coverage and versatility. There are many formulas out there, some drier and some with more moisture, so find the one that best fits your needs. Although usually creamy, it is also available in drier, oil-free formulas that are used to cover discoloration on the rest of the face (because the drier it is, the better it will adhere and longer it wears).
tube concealer. This has creamier texture than some other formulas. Tube concealer covers dark under-eye circles because it’s so moist, and it’s one of the easiest to blend. It will probably not have quite the staying power of some other (drier) formulas, so it may not be the best choice for other spots and discoloration. It provides terrific coverage and can be mixed with moisturizer or foundation to create a much sheerer product.
wand concealer. This option offers you one of the lightest and sheerest textures of all concealer formulas. These concealers give you the least coverage, but they blend in most easily and look very natural. They will sometimes settle into fine lines if not completely blended (due to the nature of the texture). If the proper shade is used, you may apply it without a foundation because it will blend so easily into bare skin. A lot of these formulas now contain light-reflecting particles to help disguise imperfections, making up for their lesser coverage with just as much camouflage. Wand concealers provide a quicker, slightly denser coverage than liquid foundation, but less than most other concealer formulas, and they are fabulous for a fast repair (because they’re convenient to carry). Some dry to a powder finish that is great for covering facial blemishes because the powder clings, making it longer wearing.
pencil concealer. These concealers effectively cover tiny imperfections such as broken capillaries, blemishes, veins, and any other tiny flaws. You simply draw it on—draw it all along a vein or draw it right on a blemish or any other spots. With an exact color match, flaws can be pinpointed without a lot of blending. Their dry texture helps their long wearability, as well as giving them great staying power. Pencil concealers are also terrific for fixing lip lines. Use it around the outer edge of your lips to erase your natural lip line (so that you can draw on your new one) or prevent lip color from bleeding. No other formula compares to the convenience in carrying this product with you.
oil-free compact. These concealer formulations are best used on the face to hide pimples and spots. They are usually of a longer wearing, drier texture that will not irritate breakouts and will stay right where you put them. Because of their long wearability, they effectively cover age spots and hyperpigmentation (any type of spot on the face). But keep in mind that because of their dry texture, they are the wrong choice for covering under-eye dark circles; they will make the area appear dry and cakey.
highlighting pen. This amazing product contains light-refracting particles, which reflect light to bring forward recessed areas of the face and hide minor flaws. This is not a concealer; it’s a highlighter (I stress this because many people are confused about the pen’s usage). Everywhere you use it will come forward visually, making it appear even with the rest of the face. In other words, it highlights (brings out) recessed areas, such as the dark shadows created by bags, wrinkles, deep creases, and the inside corners of your eyes. You simply apply it to the shadowed area and it brightens it, making it appear less distinct.
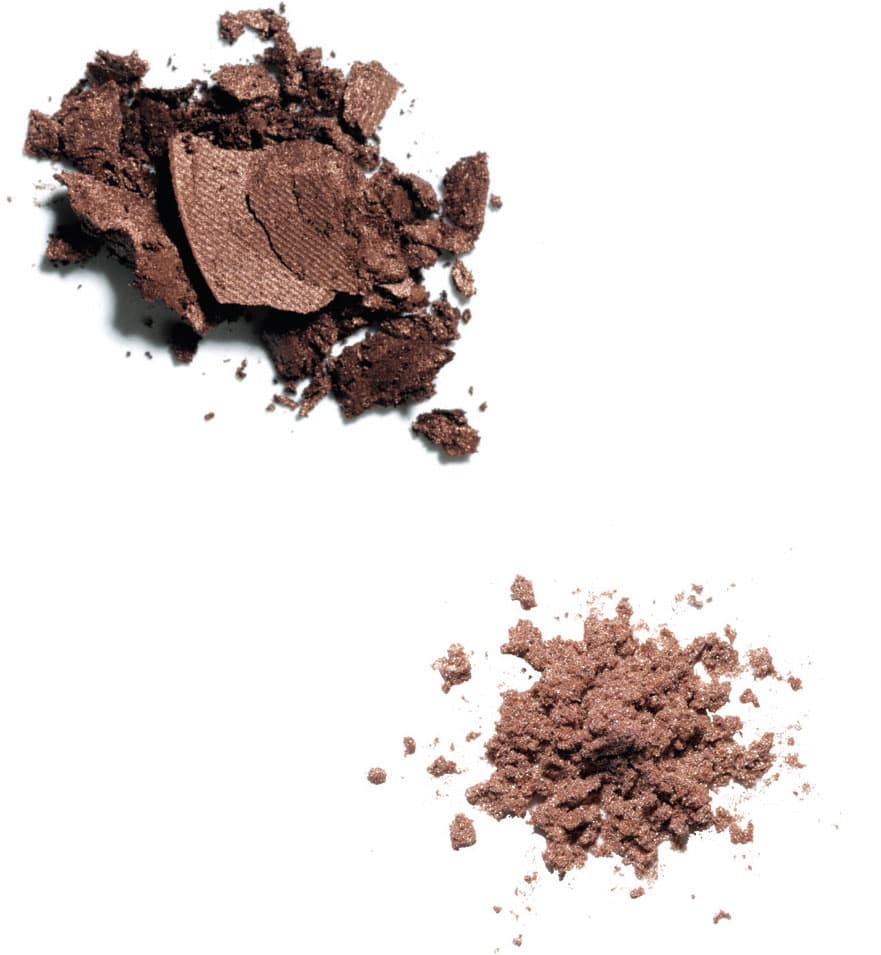
powder
Your makeup will not last the day unless you set it, and that is what powder does for you: it sets everything in place. If you don’t powder, when you apply your color products, they will catch on different areas of the skin and look blotchy instead of going on evenly and smoothly. Powder is the finishing step that helps the skin appear smooth and natural. You can even brush it on over a clean, moisturized face for a fresh, no-makeup look.
Powder comes in two basic forms: loose and pressed. Both will set your makeup and absorb excess shine and oil. Loose powder is more oil-absorbing than pressed powder. I always prefer to use loose powder when I am first setting foundation and concealer. It gives a better finish and prevents the need for touch-ups longer. Pressed powder is wonderful because it is easy to carry and use for touch-ups throughout the day. If you have oily skin, powder is a must because it prevents excess shine from the oils in your skin, which can draw attention to textural flaws.
Your powder should be milled as fine as possible. The finer a powder is milled, the higher the quality and the less likely it is to cake on the skin. Finer-milled powders will feel more like velvet, whereas less-milled powders feel grittier.
eyebrows
I find that most people benefit from some brow color. You may not need a lot of filling in, but some will help define and perfect your brow. Each type of brow color will give you more complete coverage or a softer, more natural effect. Choose the formula that helps you fill in slightly or replace what is just not there.
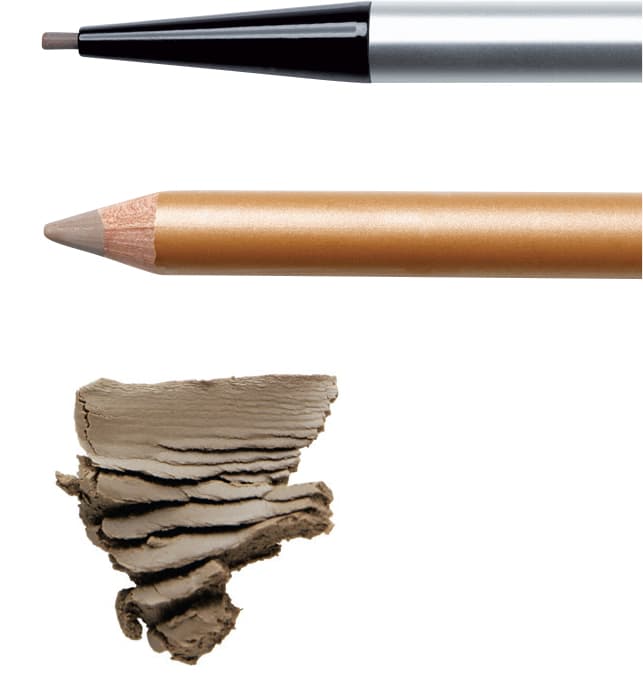
eyebrow pencil. Pencil is the most precise and most common formula used to define the brows. It will give you full coverage and color. It usually has a slightly waxier consistency than other makeup pencils to help it adhere better to the brows and last longer. Formulas that are a little drier and harder give the most natural application. The more strokes you make, the more natural the application will look. Eyebrow pencils come in two forms, mechanical and wood. A mechanical pencil (if it is a good one) will not need to be sharpened. Simply twist it; the product will extend out, and you can apply away. If your pencil is wood, you control the point. Sharpen it before each use. The sharper the point, the better the application.
crème. This is the most dramatic-looking brow color. It gives you full coverage when trying to fill in and define your eyebrows. It is a matte crème that is applied with a narrow, stiff-angled eyebrow brush, and it is best to set it with eyebrow powder so it will last and not smudge. I find that it’s the least natural-looking option. Even when set with eyebrow powder, it still can smudge, especially on oily skin. If you are a novice or want a subtle look, this is not your best choice.
powder. Powder brow color is a matte, no-shimmer powder with a very high pigment content. Powder provides the most natural look when filling in your eyebrows. It is all you need when you are just filling in slightly—maybe the shape of your brow is there, but it’s sparse and you need to add a little bulk. In this case, powder is the ideal choice because it will look totally natural, not like you just drew your brows on. It is usually applied with a narrow stiff-angle eyebrow brush (see here). It can be used to set brow crèmes, and it helps give pencils even more coverage and lasting power when you are creating a brow from nothing. I often layer powder with pencil for more coverage and more precise application.
pomade. Pomade is a matte, creamy, long-lasting, usually water-resistant brow color. It creates a very dramatic look, much like crème brow color without the smudging and smearing. It’s great if you need a lot of filling in because it gives such complete coverage. It controls wild hairs while adding color and giving coverage. Because it is smudge-proof and matte, it does not have to be set with powder, but I do like to follow it with a little powder color to soften the look of it.
brow gel. This is basically a hair gel (or hair spray) for the eyebrows. If your brows seem to look out of place and don’t lie perfectly, gel can keep them where you want them. Brow gels are available in tinted or clear formulas. The tinted formulas (also called brow mascara) will not necessarily fill your brows in, but they will make the hairs you do have look fuller and more noticeable, which might be all you want or need, while keeping everything in place. The clear formulas can help set the color (pencil or powder) you already applied, while keeping your eyebrow hairs in place. I am not a big fan of the tinted versions, but I love the clear to keep brows looking great all day.

mascara
How could you live without mascara? You shouldn’t. It’s the most important element of your eye makeup because of the definition it creates. Full, thick, dark eyelashes help open up your eyes and make you look your absolute best.
Multiple formulas will give you a variety of results. Of course, your application technique will also make a difference in your results (see here). Choose the formula that will help you achieve the look you want.
thickening mascara. This mascara coats each individual lash from root to tip with particles that add bulk and help them look thick and full. It is formulated with dark pigments, thicker waxes, and silicone polymers, which are what create the density. This formula is the thickest of all formulas because the goal is to increase lash size. Yes, sometimes size really does matter!
lengthening mascara. This contains plastic polymers that cling to the tips of your eyelashes, making them appear longer. This formula is thinner than a thickening formula, so it will not add the bulk.
defining mascara. Defining mascara coats each individual lash, keeping them separated and defined. If a mascara is labeled as defining, it usually means that it does not contain any extra building particles that add bulk and length to your eyelashes; it simply coats each lash with color for subtle definition. Defining mascara usually appears the most natural.
waterproof mascara. When something is labelled waterproof mascara, the formula has been shown not to smudge or smear when subjected to (submerged or totally dowsed in) water or tears in tests. Most formulas of mascara are available in a waterproof formula. It’s a bit harder to remove than other formulas, so make sure you have a good eye-makeup remover for cleansing.
water-resistant mascara. Water-resistant mascara will hinder smearing and smudging, but not as fully as waterproof formulas. It resists rather than entirely preventing the penetration of water, while being easier to remove than waterproof.
curling mascara. This mascara is supposed to help curl your eyelashes as you apply it. The theory is that they contain polymers that contract (shrink) once applied, causing your eyelashes to curl and lift. I have not found these mascaras to do enough curling to get the benefits you need and prevent you from needing to use an eyelash curler.
choosing a mascara wand
The bristles and shape of your mascara wand can affect your results just as much as your mascara’s formula and your application technique. There are a ton of wand options out there today—everything from a rubber brush to a comb. Let’s discuss just a few key things to consider when deciding what you want and need from your brush or applicator. But keep in mind that, with any wand, you still ultimately have control of your finished look because it depends on the application technique you choose. (See here.)
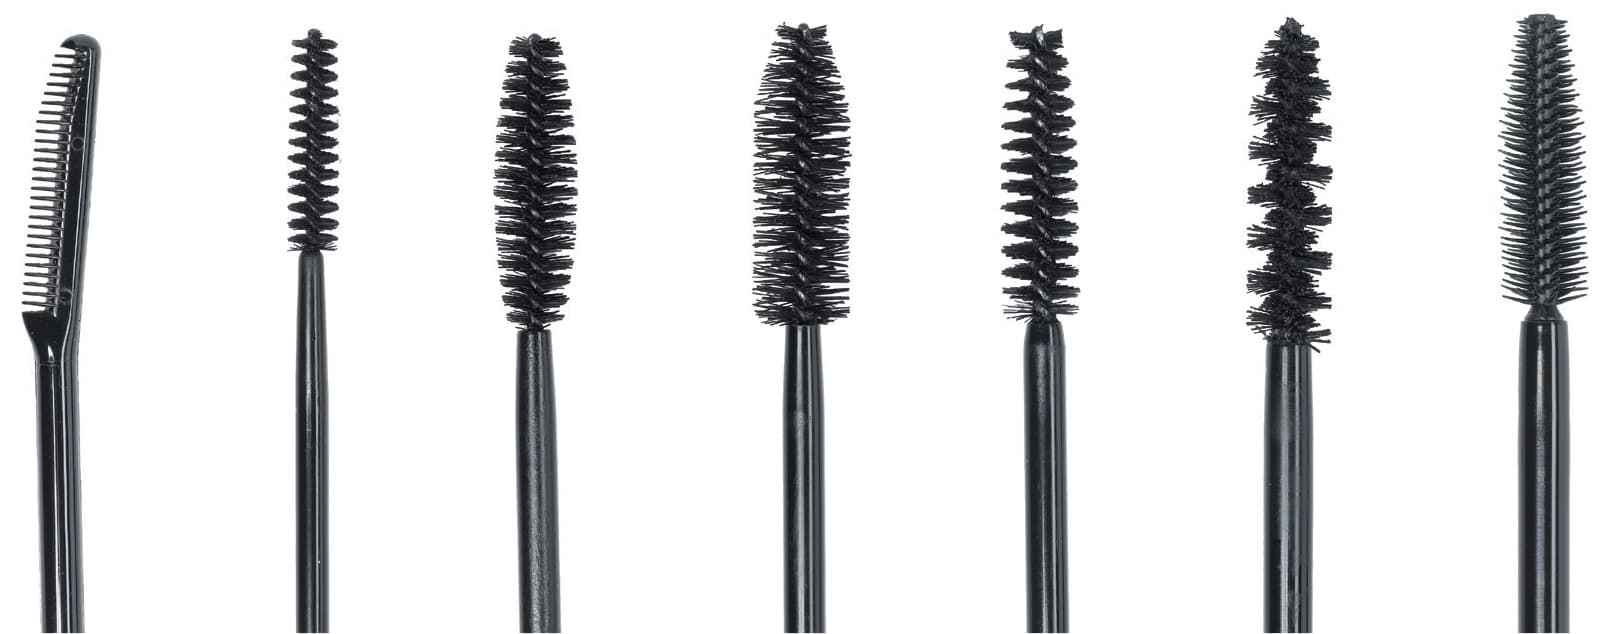
• A wand that has long, fat, full, thick, dense bristles will help thicken and lengthen your eyelashes as you apply your mascara because it will coat each lash with product.
• A wand with short, dense bristles (it might even resemble a screw) will help define your eyelashes because it allows you to coat each lash with a nice thin coat of product from the root to the tip.
• A wand with bristles that taper from short at the tip to longer in the middle or base (it might also taper from thin to thick to thin, like a football), will define, thicken, and lengthen. It enables you to do detailed defining work with the tip (where the tip bristles are shorter), while giving you volume and length from the bristles in the middle (where the bristles are longer and fuller).
• A wand with rubber, widely spaced bristles will define and separate your eyelashes, giving you a thin, even coating on every lash.
• A wand shaped like a comb will define and separate each lash. It will give you a thin coat of product while combing and separating each lash, eliminating clumping and preventing eyelashes from getting stuck together.
tip: It’s always better to apply multiple thin coats of mascara rather than one thick, clumpy coat.
eyeliner
Eyeliner is an option, not a have-to, when applying your makeup. There are definite benefits to wearing eyeliner, but only if you choose the right formula for your desired effect. Badly applied eyeliner will make you look harsh and make your eyes appear smaller, whereas properly applied eyeliner will open up your eyes, making them look bigger.

pencil eyeliner. Pencil is the most commonly used eyeliner, simply because it is the easiest to control and mistakes are easy to fix. There are many pencil textures available. Some are drier and harder, and some are creamier and glide on effortlessly. In the past, many people felt the need to soften their hard, dry pencils with a lighter or a match. Thankfully, most pencils now contain silicone, which enables them to glide on smoothly and makes them easy to smudge and blend. The best choice is a pencil with just enough silicone to glide on easily, but not so much that it smears or travels. Make sure your pencil is at least water-resistant, so it will stay put and not smudge. Pencils come in both mechanical and wood formulas. A mechanical pencil might not need to be sharpened, depending on the brand; simply twist it so the product extends out and apply. If your pencil is wood, you control the point. Sharpen it before each use to get the best application. The sharper the point, the better the application.
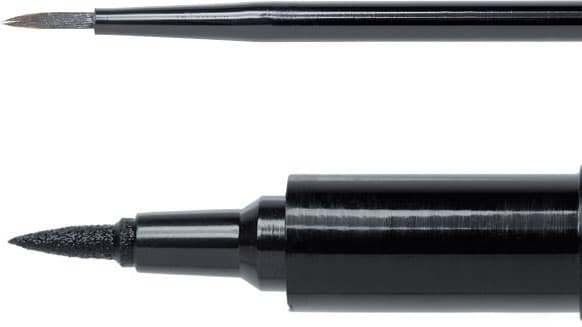
liquid eyeliner. This is a colored liquid that is applied with a fine-tip applicator for precision. You will find multiple applicator options, depending on the brand and formula—everything from a fine-tipped brush (the most common) to a felt-tip pen to a pointed, sponge-tip applicator. Liquid liner is usually long-wearing and looks the most dramatic. Because of this, it might not be the best choice for you if you want to create a soft definition along your top lash line. Liquid liner is a good choice to use after you apply strip false eyelashes because you can successfully conceal the band with it. Liquid eyeliner should only be applied along the top lash line, never along the bottom lash line, where it looks too harsh and unnatural.
tip: You can turn any eye shadow into a liquid-looking eyeliner. Simply dampen your eyeliner brush and it sweep it across your favorite eye shadow.
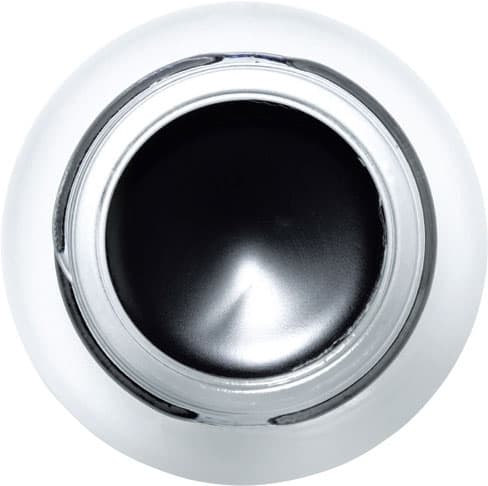
crème or gel eyeliners. These eyeliners are usually packaged in a pot and are applied using a fine-tipped brush. They will give you a similar effect to liquid eyeliner, which means they will appear quite dramatic. Also, because they look much like liquid eyeliner, you should only apply them along the top lash line, never along the bottom lash line, where they will look too harsh and unnatural. One big positive is the fact that they dry much quicker than liquid, which makes them much easier to use without smearing them all over the place. They also tend to be very long-wearing.
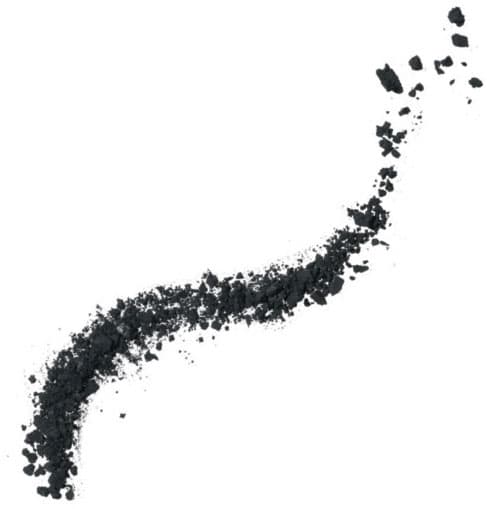
cake eyeliner. Cake eyeliner is a pressed powder–like product that is usually applied with a damp eyeliner brush. It may look like an eye shadow, but it is more heavily pigmented and denser in texture. Most formulas (the more classic versions) work best using a damp brush, but with some formulas, you can use your brush dry. Using a cake formula that works dry will give you a much subtler effect. When applied with a damp brush, it gives you much more dramatic definition. Dampened cake eyeliner will give you a similar effect to liquid eyeliner, but it’s much easier to control.
tip: You can use any powder eye shadow to line with; all you need is the right brush to create the effect you want to achieve. This will give you the most natural and subtle definition along your lash line.
eye shadow
Eye shadow can do so much to bring attention to your eyes and wake up your face. It can reshape your lids to make them look their most beautiful. When choosing eye shadow, consider both the texture and the finish. Both make an enormous difference in the effect they create and how dramatic they look. Most important, depending on your goals, some choices are better than others. Let’s arm you with all the knowledge you need.
texture
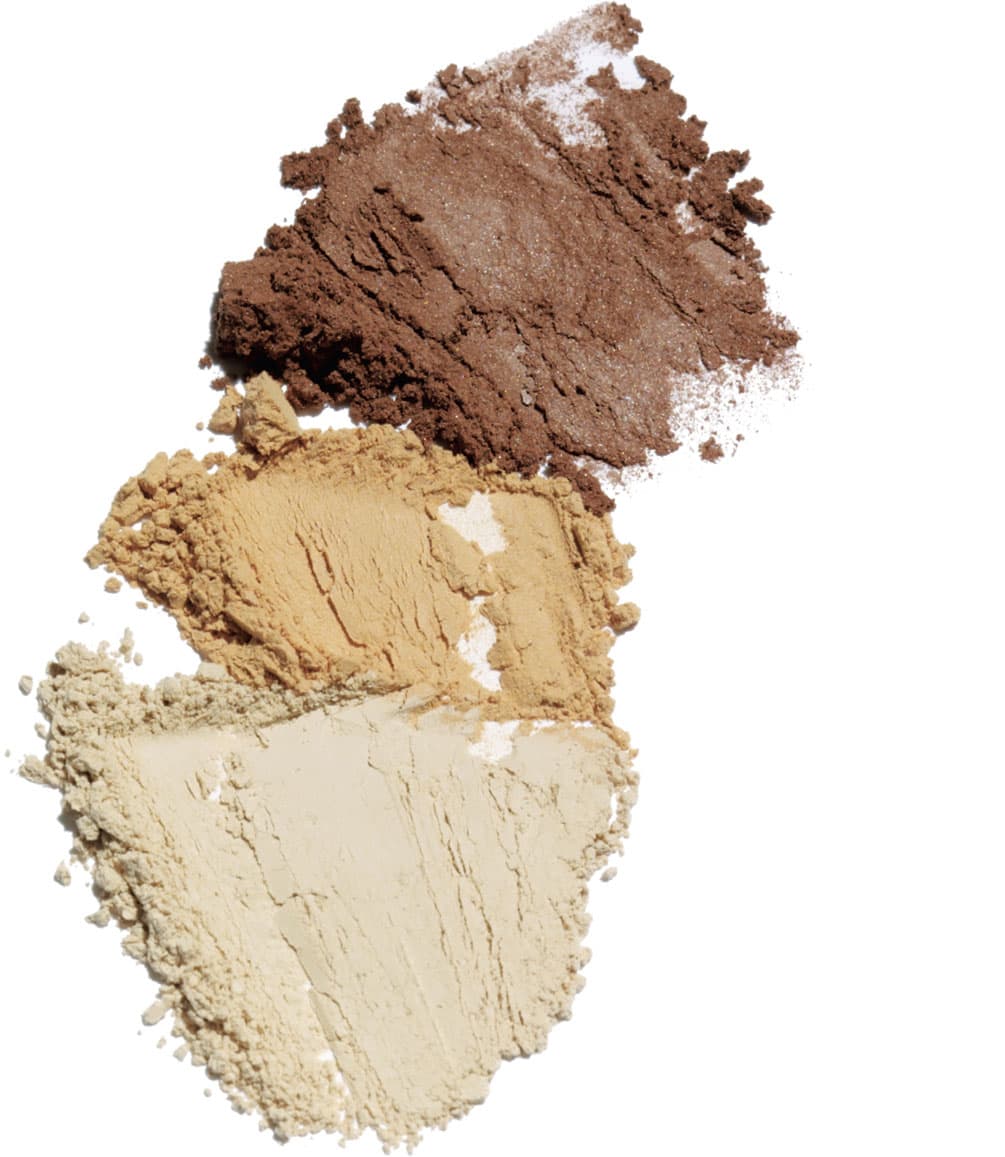
powder. These shadows come either loose or pressed. Both formulas vary in finish from matte to shimmer and from iridescent to frosty. The pressed version is the most popular and the easiest to use because it blends so well. Most makeup lines offer the largest color choices in this texture. Loose powder eye shadows (which are usually a purer color pigment) work great and blend as well as their pressed counterparts, but you must be a little more careful of shadow fall-off. (This is no big deal: after dipping your applicator in shadow, just make sure to tap the excess off before you apply). Powder shadows can be applied with a brush, sponge-tip applicator, or your fingers, but a brush gives you the best blend and results.
crème. These shadows are available in every finish; the most popular are shimmers, frosts, and mattes. They are great if you have dry eyelids. Be careful, though, because many crème shadows can crease. However, there are some crème eye shadows that dry to a powder finish. Many, if not most, are at least water-resistant; some are waterproof and long-wearing. For more intense color, layer a crème eye shadow on first and follow it with a powder eye shadow. This will make them harder to blend, so make sure you place the color where you want it when you first apply it.
pencil. These are eye shadows put into a convenient pencil form. They are useful for around the eye, close to the lash line, because they are sharpened to a point and can be applied with precision. They also work great anywhere on the eyelid. Their precision makes it easy to get the product right where you want and need it (whether it be the lash line, crease, or brow bone). After application, simply smudge the line with your finger, a sponge-tip applicator, or a brush to blend and create the effect you want.
liquid. Liquid shadows usually come in a shiny, metallic finish, and they are the hardest to use. Because liquid shadow doesn’t blend easily, you must be precise (make sure you get it right where you want it from the start), so it’s best when applied with a brush. Liquid is usually used either as an eyeliner or applied close to the lash line for color intensity.
finish
matte. Matte finish has absolutely no shine or shimmer to it. Mattetextured eye shadows are the best for creating a natural, no-makeup look. They usually contain a higher level of color pigment, and they work well for reshaping and defining the eye. A matte finish is the best for midtone shades, which need to look very natural. A matte shadow will draw absolutely no attention to any fine lines or crepe-like texture on your eyelids.
shimmer. Shimmer shadows have a subtle sheen and give a hint of sparkle. They offer great, sheer coverage; when you sweep on the color, you can still see the skin underneath. They usually contain multiple shades of mica (the shiny particle) that are sheer and transparent, softening their appearance on the skin. Because the mica is see-through, it is less likely to collect in fine lines. Light shimmer shadows work great for highlighting and bringing out recessed areas of the eyelid. Dark shimmer shadows are ideal for adding drama without being as harsh and intense as matte shades because the shimmer particles reflect light and soften the final effect.
satin. Satin shadows fall in between matte and shimmer. They are shinier than a matte, but have no sparkle or shimmer to them, so they give the eyelid a sheen without appearing sparkly or glittery. They are great for dry lids to create a natural look without turning as ashy as a matte shadow might. A satin finish is easy to wear and works well on all skin types.
frosted. Frosted shadows have the absolute most shine or sheen to them. They can actually look reflective. A frosted eye shadow gives you a much opaquer coverage than a shimmer shadow, completely covering the skin underneath it. The mica (the shiny particle) in a frost is usually one shade, most often a silvery white, and each little fleck of mica is opaque as well. Because of this, they create the most drama and change in color when used, but the little flecks of mica can collect in fine lines and draw more attention to them. They usually come in fun, light pastel shades as well as great metallic shades.
blush
Blush can be one of your best friends or, again, one of your worst enemies if chosen wrong. It can bring a gorgeous glow to your cheeks and give you an amazing sexy flush. But because some people find it hard to use correctly, they just steer clear of it.
The formula, texture, and finish can make the biggest difference in whether your blush is your friend or your enemy. Most textures of blush come in multiple finishes, from matte and shimmer. Some formulas are easier than others to apply and use, while some have a much greater staying power. Different formulas also can give you differing degrees of coverage; some are sheer and some contain heavier pigments, giving you more coverage and intensity of color.

powder. Powder blush is color pigment set in a powder base. It’s the most popular type of blush because it’s the easiest to control and use, and therefore, it’s usually available in the widest range of shades. Applied with a soft blush brush, it gives a dusting of color that works well with the majority skin types. Powder blush is the best choice for oily skin, but if you have really dry skin, this formula might not be your best friend. It’s wonderful for combination and normal skin. It is usually packaged in a pressed form (the most convenient and easy to carry), but can also be found in a loose version. Some formulas are matte, and some contain shimmer. The matte version tends to look the most natural and will not accentuate textural flaws in your skin.

crème. This blush is color pigment set in a crème base. It has a fresh dewy finish that gives the face a luminous, natural glow. It is great for normal to dry skin, but an especially good choice for dry skin because it slides easily over the surface and blends into the skin. It works best when applied after your foundation and before your powder so it can blend in more easily. Unfortunately, if you have oily skin, crème blush is not your best choice because it will not wear well. And it does not work well on skin with large pores because it tends to accentuate them. It’s great for those who do not need or want to wear foundation. Just apply it with your fingers, a sponge, or the appropriate brush and work it into your skin. You can also layer it under powder blush for more intense color and longer wear.
gel. Gel blush contains color pigments wrapped within silicone particles. It works best on people with normal to dry skin because it won’t last on oily skin. It smooths nicely onto bare skin to create a pretty, sheer, translucent glow. That’s not to say you can’t use it with foundation; you can. Just make sure you apply it before you powder. It is long-lasting, looks natural, and is easy to use. You can use your fingers or a sponge to apply it and then smooth it into the skin.
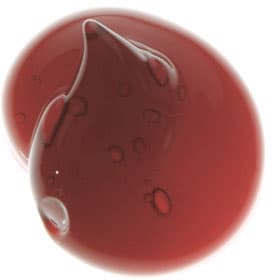
liquid. This blush or tint is a liquid that stains the skin temporarily. It works on all skin types. It is applied like the gel blush, but it’s a little more difficult to work with—it must be blended quickly due to its staining quality. (Practice will make perfect!) It’s waterproof, so you can expect it to last all day. Just like with gel blush, you can use either a sponge or your fingers to apply it and blend it into your skin.
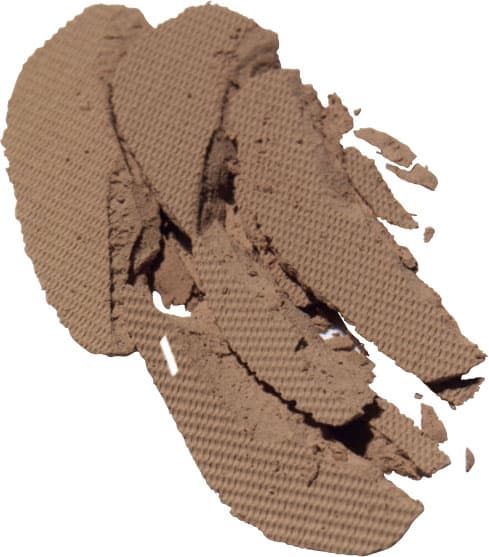
bronzer
Bronzer is the secret to having an eternal glow. Everyone can benefit from it. I do not think I have ever applied makeup to anyone’s face and not used bronzer. Bronzers also come in multiple textures and finishes, and choosing the right formula is the key to achieving the desired effect.

powder. Like powder blush, powder bronzer is easy to control and blend. It comes pressed into a compact, loose in a tub, or even pressed into small balls or beads in a jar. This formula works on most skin types (normal, combination, and oily), but it might not be your best choice if you have very dry skin. Powder bronzers vary in finishes from matte to a heavy dose of shimmer. In most cases, I choose a matte finish (except for really dark skin tones; a little shimmer can give you a glow) because I think it looks the most natural. Also, because bronzer covers such a large area of your face, too much shimmer could draw attention to textural flaws. Swept across strategic areas of the face with a brush, it can bring the skin to life.

crème. Like bronzing powder, crème bronzer is used to give your face a sun-kissed glow. You can find it in a stick or even in compacts. This formula works best on normal to dry skin, especially dry. It comes in a multitude of finishes, from matte to shimmer. Make sure you apply it after your foundation and before you powder so it blends beautifully. It’s also a good choice when you don’t want to wear foundation but want that little extra glow because it will blend beautifully onto bare skin. It can be applied with your fingers, a sponge, or a foundation brush.

gel. Gel bronzer, like powder and crème, will help give you that sun-kissed glow. This formula works best on normal to dry skin. The main difference is that it will give you a much sheerer wash of color. This is basically a sheer gel containing color pigments, which makes it very easy to blend into the skin. If you are trying to cover a large area of skin (legs, arms, or body), this formula will be the easiest to apply and blend. Most often, this formula comes packaged in a tube. It comes in multiple finishes. Always apply it before any powder products so it will blend well.
lip color

Lip color is so personal. One formula does not work for everyone. Some people want a lot of coverage and moisture from their lipstick or gloss, while others just want a sheer wash of color that looks and feels like it isn’t even there. You will find a variety of textures of lipstick and lip glosses out there, with a variety of finishes. Play, test, and try until you find what you like. But keep in mind that moisture is always good for your lips; it keeps them full and supple-looking.
matte lipstick. Matte lipstick delivers sophisticated and intense full coverage with absolutely no shine. Because of its formulation, it stays on longer than other lipsticks, but it can be drying and may give your lips the feeling and appearance of being dehydrated. With up-to-date technology, there are now some matte formulas that are not quite so dry and dehydrating, but they will not last as long as drier versions. Matte lipsticks are great in dark, intense shades because they stay put and won’t smear very easily. You can always make a matte lipstick appear more luscious by applying a lip gloss on top.
crème lipstick. This contains more emollients than matte lipstick and provides a full coverage of moist (though not shiny) color. Most cosmetic lines offer the largest selection in this formula because it is the most versatile and popular. It wears quite well without being as dehydrating as matte lipstick. Keep in mind that there will still be different degrees of moisture in crème lipsticks, depending on the formulation and the brand. Crème formulas can have a natural, frosted, or shimmer finish, and the finish you choose can dramatically affect how your lips appear.
sheer or glaze lipsticks. These give you a glossy, sheer wash of see-through color that allows your natural lips to show through because they are not formulated to cover opaquely. This formula contains color pigments wrapped in a transparent hydrating gel, adding color while making your lips feel moist and full. The coverage will last longer than a gloss, but not as long as a crème lipstick. It’s terrific for a quick fix because due to its sheerness, it doesn’t have to be applied with precision.
long-wearing lipstick. Long-wearing lipstick is a heavily pigmented, usually very matte, formula with a dry texture so it stays put and is long lasting. It will almost stain the lips with very full coverage and very drying and dehydrating. I personally hate these formulas because they tend to make your lips look smaller and shriveled. Luscious full lips are always more beautiful, and this formula will not make that happen. Some formulas will come with a gloss to wear on top to combat the negative effects. But this cuts down on their wearability because anytime you add moisture it shortens the life of a lipstick.
frost. This finish provides a shiny, metallic appearance to a lipstick. The metallic appearance is created from small flecks of a shine-producing material, which are solid and reflective, mixed into the lipstick formula. A high concentration of these particles gives more opaque coverage and can make the lips appear a bit dry. They’re not the best choice giving your lips a luscious pout! They are good when used for layering on top of a satin-finished lipstick to lighten up the depth of a shade.
shimmer. This finish provides a beautiful, lustrous, glowing appearance to a lipstick. This finish is created by mixing tiny particles that produce shine into the formula. The difference between frost and shimmer is that the particles used in a shimmer finish are not opaque—they are sheer and see-through, so they just create a glow without being extremely reflective. There are also multiple colors of these reflective particles instead of a single color, like in a frosted formula. They have a nice, easy-to-wear, medium amount of coverage and can make lips look fuller.
gloss. This lip product adds extreme shine and moisture to your lips. I love lip gloss, mainly because it immediately adds fullness and makes your lips look kissable. It delivers a sheer to medium layer of color coverage. The only problem is that it does not have a very long wear life, so it is going to need frequent reapplication. Although it doesn’t last terribly long, gloss gives a fresh-and-alive look to all age groups. Used correctly, it can make the lips look fuller and sexier. You’ll find it packaged in a wand, tube, or pot. Some formulas do give more coverage than others and some formulas now also offer longer-wear, (still a gloss; consider the source), so test drive a few to find a formula or brand that will give you what you need. Some key words that might give you a clue to the wear time: luster, lacquer, gel, plastic, rich, or glass could mean longer wear life, while crystal, wet, transparent, glaze, or juicy could mean a high shine factor but probably shorter wear time. Play away!
lip liner. Lip liner is a pencil that helps define and reshape your lips. It helps correct your lips’ shape, as well as prevent lip color from bleeding into fine lines. It can also be used over the entire lip, and then topped with a lipstick or lip gloss. Either way, a layer of lip liner greatly improves the staying power of any lip color. Lip liner comes in two forms: mechanical and wood. A mechanical pencil might not need to be sharpened; simply twist, the product will extend out, and you can apply away. If your pencil is wood, you control the point; just sharpen it before each use because the sharper the point, the better the application.
essential tools
As with anything that you do in life, using the right tools to apply makeup will make your job much easier. Let’s go through a variety of makeup tools: what they do, what makes some better than others, what to look for when buying them, and how to use them. For all the tools in this chapter, visit www.robertjonesbeauty.com to get what you need.
brushes
There are so many shapes, sizes, and types of brushes out there that it can become confusing when choosing. Unfortunately, price does make a difference: the better brushes are more expensive. Brushes in makeup artists’ lines tend to be designed better and give you better shape options. Also, different brush head shapes make a difference in the effect they create.
Here are some key points to consider when choosing your brushes:
• The bristle. There are several types of bristles, from natural to synthetic, and each can make a difference in your application. For powder, you will always get better application from a natural bristle because the cuticles on the hair pick up and lay down the particles of the powder better than a synthetic bristle. With a crème product, most times you will use a synthetic bristle so it doesn’t absorb the moisture from the product. Let’s discuss all the options:
– squirrel. The highest quality, most expensive option, squirrel is a natural bristle, so it gives you an even, smooth application. It’s used for powder products, not crème. It is the softest of all the bristle choices. Many companies, including mine, have stopped using squirrel because no factory can guarantee that the animal is not killed in harvesting its hair for the brushes. For all other hair types, the animals are just given a haircut.
– pony. A pony bristle is one step below squirrel in quality. It is often used for powder and blush brushes because of its length, but can also be used to create other brushes. A natural bristle, it’s used for the application of powder products dry. Even though the name may not suggest it, this bristle feels quite soft.
– sable. Sable is a high-quality bristle, one step down from pony. It is commonly used in the creation of eye shadow brushes; it’s rarely used for larger brushes because of its length. This is also a natural bristle, so it will give an even, blended application. It’s most often used for the application of powder products dry, but it can be used wet or damp for application of crèmes. Using it while damp is not the best choice when applying foundation. Because it’s a natural bristle, it will absorb all the liquid from your foundation.
– black silk. This is the next level down, but there are many levels of quality black silk products, even some as high quality as squirrel. It is actually a treated version of goat hair that makes it feel softer and smoother in its application. A natural bristle, it’s best when used dry with powder products.
– goat. Goat is the least expensive natural bristle used in making brushes. Thanks to its cost and wide availability, it’s the most commonly used of all the natural bristles. It’s often used for blush and bronzer brushes because of its length and cost-effectiveness. Sable hairs are too short to be used for longer-bristled brushes, so often goat hairs are used in their place; for example, in blush, powder, and bronzer brushes. Like the other natural-bristle brushes, it’s used for applying powder products dry. Some treated goat bristles, however, can be used for creme, liquid, and foundation application. Because of the size of their cuticles, they will not absorb all the liquid, making them a great tool.
– synthetic. A synthetic bristle is specifically designed for applying liquid and crème products. It will not absorb the moisture or liquid out of a product. It can be used to apply powder products as well, but it will not do as good a job as a natural bristle due to its lack of cuticles to grab and distribute the powder. This is the best bristle choice for foundation, concealer, and many eyeliner brushes because of its compatibility with crèmes and liquids and its ability to be used damp. It is also easy to clean, yet another reason it works well for foundation and concealer brushes.
• The handle. Make sure you choose a handle shape that feels comfortable in your hand. It’s key to how easy a brush is for you to use. I find that shorter handles work better. If they are too long, they never pack easily and can cause the brush to feel off balance in your hand. The extra length gets in the way.
• The head shape. The contour and shape of the head of a brush makes all the difference in how it applies a product. The length, the tapering of the hairs, density, quality, and stiffness all affect application. Shorter, denser hairs give you more precise application, although you still want tapered ends to prevent lines. Longer, more flexible eye shadow brush bristles will give you a softer application of color. Eye shadow blending brushes are longer, softer, and more flexible to allow you to blend color without completely removing it. Blush and bronzer brushes need to be very dense and full, while again staying flexible, for more color deposit and a softer blended application. An eyebrow brush needs bristles that are stiffer and compact for a more precise placement of color. Concealer brushes need to come to a bit of a point for exact application. The ends of eyeliner brushes are usually flatter and blunter to create an exact line.
eyebrow/eyelash brushes

#1. This is the perfect brush for applying color and shaping your eyebrows. Its short, stiff bristles and narrow angle will give you an exact application. The firmness of this brush is vital to its ability to give precise placement of color. The edges of the angle are also tapered for softness of color and to help blend. It’s traditionally used for application of eyebrow powder and crème brow color, but it’s also your best friend for blending eyebrow pencil once applied.
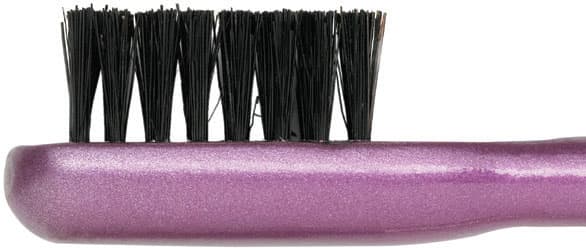
brow brush. I know it may look like a toothbrush, but it’s not. It’s for grooming and shaping your eyebrows and for trimming brows because of it can brush the entire brow. It’s also great for blending everything after all color applications, softening it and making it look more natural.
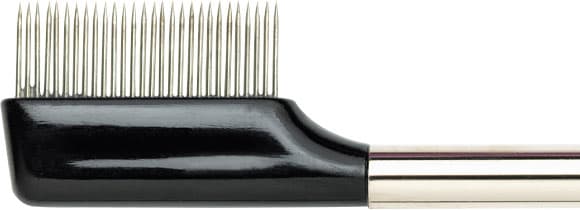
eyelash comb #3. An eyelash comb is a must for your eyelashes. After applying mascara, combing your eyelashes will help separate every lash while removing any clumps. The fine metal teeth allow exact precision (its plastic counterpart can’t get the separation that the metal teeth can).
eye shadow brushes
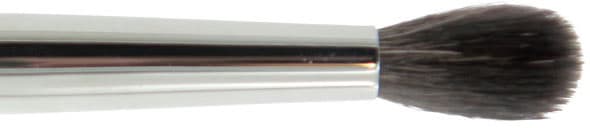
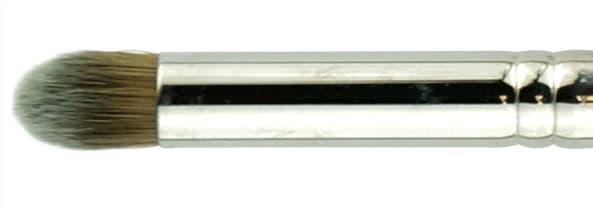
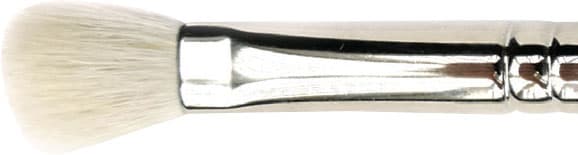
#11. This tapered, natural-bristle brush expertly applies your favorite midtone shade in the crease with precision, from the outer corner of your eye to the inside corner. The shape helps apply your color right where you want it while helping blend it. It can also be used as a blending brush, due to the length of its bristles and their softness.
#20. Don’t be fooled by this brush’s large size. Its precisely tapered, natural bristles are amazing for creating exact creases. It allows you to get the right placement while its soft beveled bristles create the perfect crease. It’s the go-to brush for eye shapes, such as deep-set eyes, for which you really need complete control of your midtone.

#14. This sable brush is for applying your highlight shade at the inside corner of your eye and the lower lash line (which you will discover opens the eyes for a wide-eyed look). You can also use it for smudging liner and detailed color application.

#13. This is a miracle brush you shouldn’t be without. Its precision-shaped, natural bristles are perfect for applying your favorite shade of eye shadow along the lower lash line while giving you a smudged and blended effect with no harsh lines. You can also use it for creating a very defined line of color in the crease of the eye (creating a cut crease).

#19. This is the ultimate smudging brush. Made of natural bristles, its shape is beveled, with a slightly blunt end, allowing you to smudge your color as you apply it, never creating any harsh lines. Its unique shape is also perfect for using after you’ve applied color with another brush to smudge it out.

#30. This precision brush, made of pony hair with the edges tapered for blending, is for applying your most intense shade of eye shadow along the lash line and into the outer corner of the crease of the eye. Its shape is ideal for creating a wide variety of looks and effects.
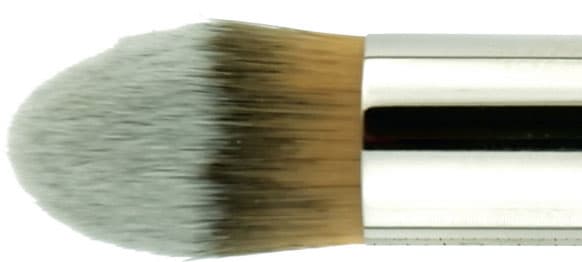
#22. This sable eye shadow brush is for precisely applying a highlight shade to your brow bone and eyelid. It’s also a go-to brush for applying color anywhere whenever you want a brush with a slightly stiffer feel. Because of its bristle shape and texture, it works perfectly for crème shadows.
#27. This natural-bristle brush is the perfect size and shape for applying color over a large area of your lid. Its long, soft bristles give you ultimate flexibility and makes it the must-have tool for creating a smoky eye.

#38. This brush’s natural bristles are a shorter length and beveled to give you great control, whether you use it to apply a shadow as a smudged liner or to smudge out your pencil. It’s perfect for controlled blending.
#16. This detailed blending brush is made from the softest natural bristles. The long length of the bristles, with their slightly blunt end, blend your shadows while keeping everything very detailed. The only way to get a perfect blend with your eye shadows is to have a clean brush that you use just for blending, and this is that brush. It’s a must-have for detail freaks.

#28. This super soft, natural-bristle brush is perfect for all-over blending. It’s a must when you’re wearing more than one eye color. Keep this brush free of color so you can use it to blend multiple shades.
tip: When applying a powder product, use a brush with natural bristles. For crème products, use a brush with synthetic bristles. When applying a crème-to-powder product, you can use either.
eyeliner brushes

#41. This is my secret weapon for eyes that grab attention; it’s a tiny brush with big results. Use this synthetic-bristle brush to push color into your lash line, which makes your eye color really pop and your eyelashes look thick. It’s also perfect for very detailed lining.
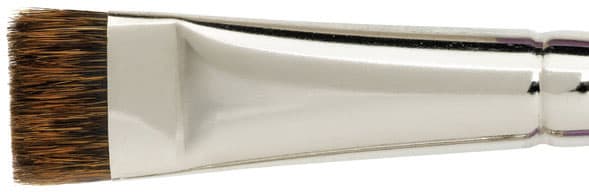
#18. Use this wide, flat, natural-bristle brush to precisely apply a line of bold or soft eye color along the lash line and blend it up onto the lid. It makes your application easy because of its shape; simply lay the brush flat on the lid along your lash line and brush up. It’s great for helping you create a smoky eye.

#40. This is a flat, synthetic-bristle brush used to line and define eyes with eye shadow or to apply powder over your pencil liner to create a subtler effect. It is also great for blending your pencil without adding color; simply brush across the pencil you applied to smooth the line. It’s perfect for wet or dry use.

#42. This is the perfect liquid/gel eye liner brush because of its shape.
complexion/face-perfecting brushes
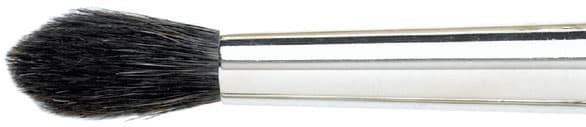
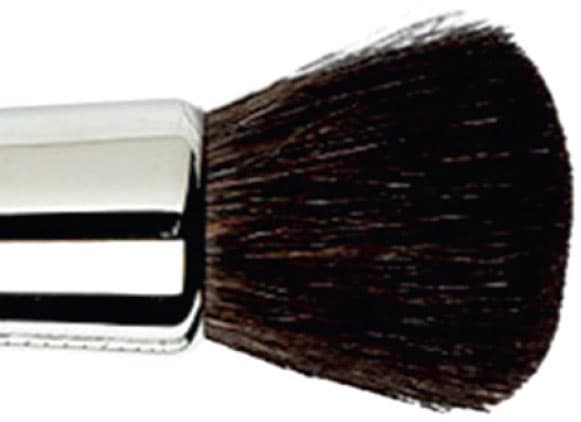
#70. This big and fluffy black silk brush is for brushing on loose powder smoothly, giving you sheer, even application. The black silk bristles increase the softness and quality of application. The slightly tapered head shape assists with your application.

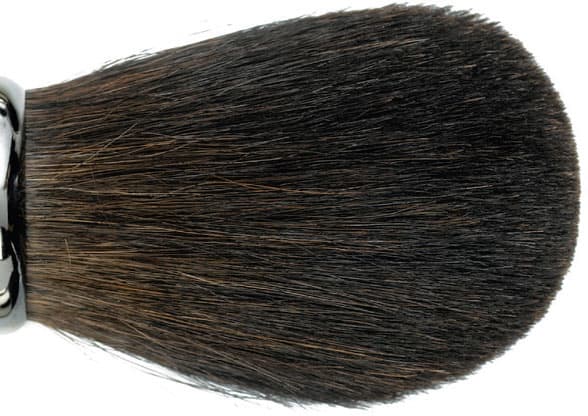
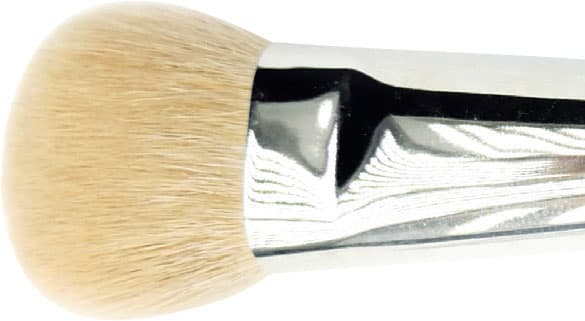
#73. This natural-bristle brush is versatile and irreplaceable! So many uses, so little time. Because of its size and beveled shape, it is perfect for loose and pressed powder application, unbelievable for removing excess loose powder after powder puff application, and priceless for very detailed blush and face contour application.
#74. Nothing works better when applying powder foundation than a natural-bristle brush with tapered edges. They prevent streaking and give you even coverage, with the softest application. Don’t forget that with a brush like this, size does matter, so you can reach all the detailed areas of the face.

#76. This natural-bristle brush is the ultimate for detail powdering. Because of its shape and size, nothing beats it for powdering in small areas, such as under your eyes and eyelids. There is no better brush for applying powder highlights and face shimmers with precision.
#60. This is the ultimate blush and bronzer brush. It’s made with the softest natural bristles, which are the absolute best for applying blush or bronzer. Its full, dense, long bristles, round shape, and expert tapering blend your blush or bronzer for the most professional application.
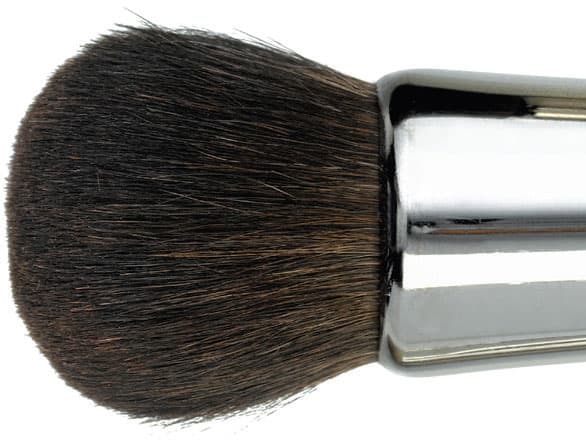
#64. This apple-popping blush brush is made of the softest, highest quality natural bristles. The round, dense, full, tapered shape applies color to the apples of the cheek without creating any hard or definite edges. It’s the perfect shape for applying crème blush, if you don’t like using your fingers.

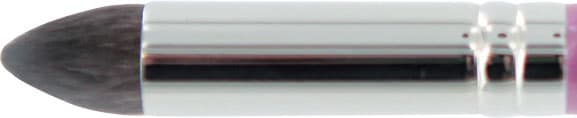
#50. This synthetic-bristle brush is used to apply concealer with exact precision. Its pointed, tapered shape allows you to cover spots or flawed areas of the face without over-blending or overworking your concealer. Without this brush, you can’t cover the tiny flaws that you want to disappear. A concealer brush is an absolute must-have.
#53. This updated pointed shape is amazing for concealing. This synthetic-bristle brush is perfection for concealing larger areas or in curved areas of your face, like under your eyes and around your nose. Talk about fast, perfect application!
#54. Use this tapered, pointed, synthetic-bristle brush to apply crème or liquid foundation. It gives a smooth, even application, producing a flawless finish to your skin. It’s the first foundation brush that works for stippling. And it’s the best tool for end-of-the-day touch-ups, when you don’t want to start over but need a fix.
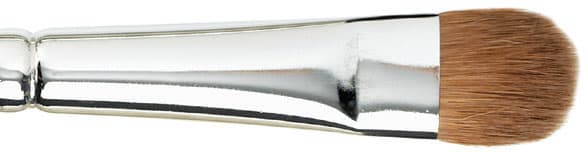
#58. This custom-made natural-bristle flat brush head allows you to buff foundation onto your skin. It distributes pigments evenly, creating a totally flawless, air-brushed finish. It also works well for women with acne, large pores, scarring, or rosacea because it doesn’t force the foundation into the pores, but instead brushes over them. It bristles are perfect for crème-to-powder foundation.
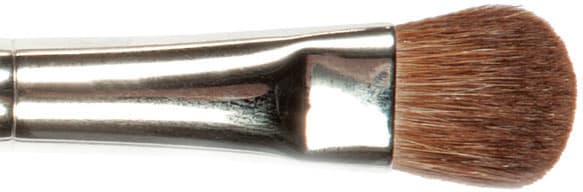
#59. This brush has luxuriously soft, densely packed natural bristles arranged in an oval shape. Nicknamed “the stippling brush,” it’s the go-to brush for applying and stippling out your concealer. It’s the perfect brush for shading or blending creamy or powdery products.
lip brushes

#80. Use this lip brush with a fine tapered point for applying lipstick and lip gloss with precision. If you apply lipstick with a brush, it will last longer, and if you apply lip gloss with a brush, it will look shinier.

#81. This soft sable lip brush with a fine tapered point is perfect for applying lipstick and lip gloss with precision. The benefit of a pull-apart top is that it’s perfect for travel or your purse, convenient for touch-ups anytime.
eyelash curler
No matter which option you choose, the goal is the same: to curl your eyelashes, opening up your eyes, making them look bigger and more awake (see here).
classic crimp curler. The most widely used, this version is used only before applying mascara, never after. Make sure that the rubber pad or pads have curved edges to create a better curl, not a crimp. Replace your curler at least once a year and the rubber piece at least once every six months.
precision-detailed curler. This curler works like a crimp curler, but its width makes it easier to get at the root of your eyelashes. I use it to curl the far inside and outside corner eyelashes that most crimp curlers miss. It is easier to use on short eyelashes. It’s the only lash curler that works for certain eye shapes, such as deep-set eyes, which a classic crimp curler cannot get into the socket and to the base of the eyelashes.
heated curler. This miracle product is a must-have! It works after you apply your mascara. If you try to use a crimp or precision-detailed curler after applying mascara, it could rip eyelashes out and cause clumping. The heated curler uses the mascara as a curling catalyst, which helps the curl last all day. This curler will curl even the most stubborn eyelashes that no other curler will.
tweezers
Good-quality tweezers are the only way to get your eyebrows perfectly shaped. Get a pair with slanted tips, which will allow you to be as detailed as needed and get every little hair without the danger of injury. Good-quality tweezers can be sharpened when they become dull and will no longer reach the smallest hairs. (The packaging will usually give you an address to which you can send them to be sharpened.)
sponges
When choosing a sponge, consider the texture and quality. The better the quality, the better-looking the application. Price can definitely matter. Different shapes make it easier to get makeup where you want it. The material a sponge is made from will also affect the application.
Today, you have many choices: your traditional triangular wedge, oval, and round sponges. One of my latest favorite tools is a new egg-shaped sponge called the beautyblender. What makes it so amazing is the texture and shape, allowing you to create an airbrushed finish to your foundation. It’s also latex free.
powder puff
The best puffs are usually fluffy with a soft velour texture. The beauty of a puff is that it allows you to really push the powder into the skin, creating a smooth, evenly applied, flawless finish. It’s a good idea to invest a little more and get a good-quality powder puff so you can launder it to keep it clean. Use it for applying pressed or loose powder.
makeup overhaul
If you’re a makeup junkie, or if you haven’t cleaned out your makeup drawer in years, it’s time for an overhaul. I’m willing to bet you have at least some makeup you shouldn’t or just don’t wear. Time for a fresh start.
On your first pass through your collection, throw out anything you haven’t worn in the last year to year and a half. If you haven’t used it within that time frame, you’re not going to. Plus, colors change in makeup just like they do in fashion, so even if you were to go back to it, it could be out of style.
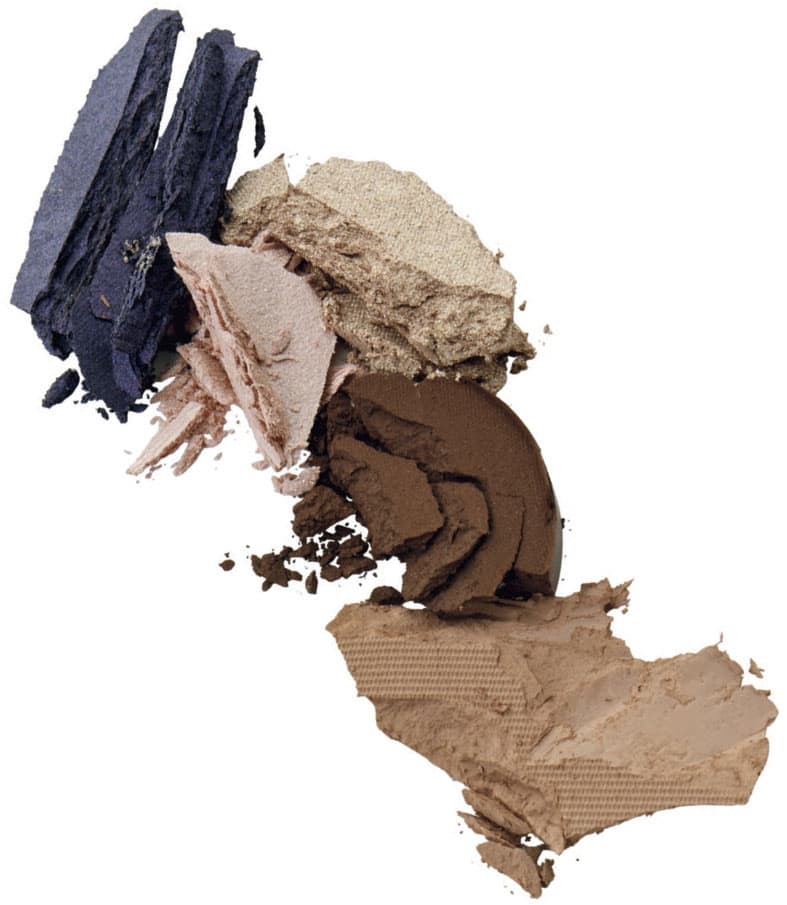
For your second pass, let’s talk real expiration dates. Believe it or not, makeup really does expire—just check out the chart opposite. Use it to decide which products in your makeup drawer and bag to keep and which to toss based on their age. And of course, if a product changes color or starts to smell, it has gone bad. Throw it away.
As you’ll see on the chart, some products last much longer than others. Things you put around your eyes that can breed bacteria—such as mascara—need to be changed out much more often. Creamy things that you double dip in should also be changed regularly because they can breed bacteria too. Natural or organic products, because they don’t contain any preservatives, go bad relatively quickly. Powders last much longer.
Makeup manufacturers are not by law required to put expiration dates on their products, but most do feature a symbol that tells you how long it’s good after being opened. It is a picture of an open jar with a number followed by the letter m, for the number of months you have after you open it.
How you store your makeup also makes a difference. Keep it dry and out of the sun and heat. The more temperature controlled you keep it, the longer it will last. If it goes from cold to hot and hot to cold too many times, it can go bad much quicker.
how long does your makeup last?
These timelines are based on makeup industry and health industry recommendations.
product |
before opening |
after opening |
primer |
3 years |
2 years |
foundation: jar, stick, pump, or tube |
3 years |
1 year |
foundation: pot or compact |
3 years |
6 months |
foundation: powder |
5 years |
2–3 years |
concealer: stick, tube, compact, or pot |
3 years |
1 year |
concealer: sponge tip |
3 years |
6 months |
powder |
5 years |
2–3 years |
blush: powder |
3 years |
2 years |
blush: crème |
3 years |
1 year |
bronzer: powder |
3 years |
2 years |
bronzer: crème |
3 years |
1 year |
mascara |
3 years |
3 months |
liquid eyeliner |
3 years |
3 months |
gel eyeliner |
3 years |
6 months |
eye primer |
3 years |
6 months |
eyeliner pencil |
6 years |
2 years |
eye shadow: powder |
3 years |
2 years |
eye shadow: crème |
3 years |
1 year |
brow pencil |
6 years |
2 years |
brow powder |
3 years |
2 years |
brow pomade |
3 years |
1 year |
brow gel |
3 years |
1 year |
lip liner |
6 years |
2 years |
lipstick |
3 years |
2 years |
lip gloss |
3 years |
2 years |
lip balm |
3 years |
2 years |
organic products |
6 months |
6 months |