chapter 3
skin deep
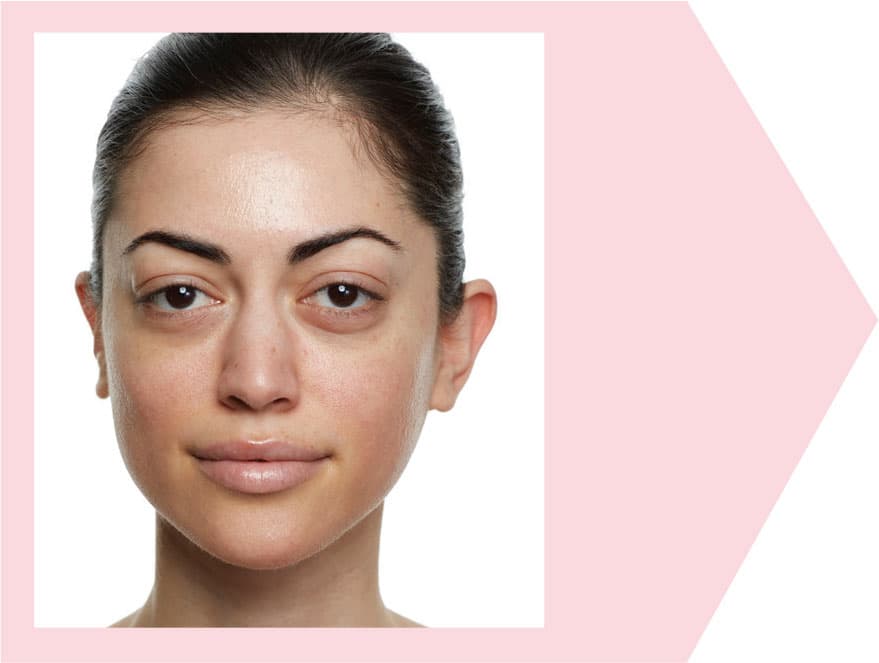
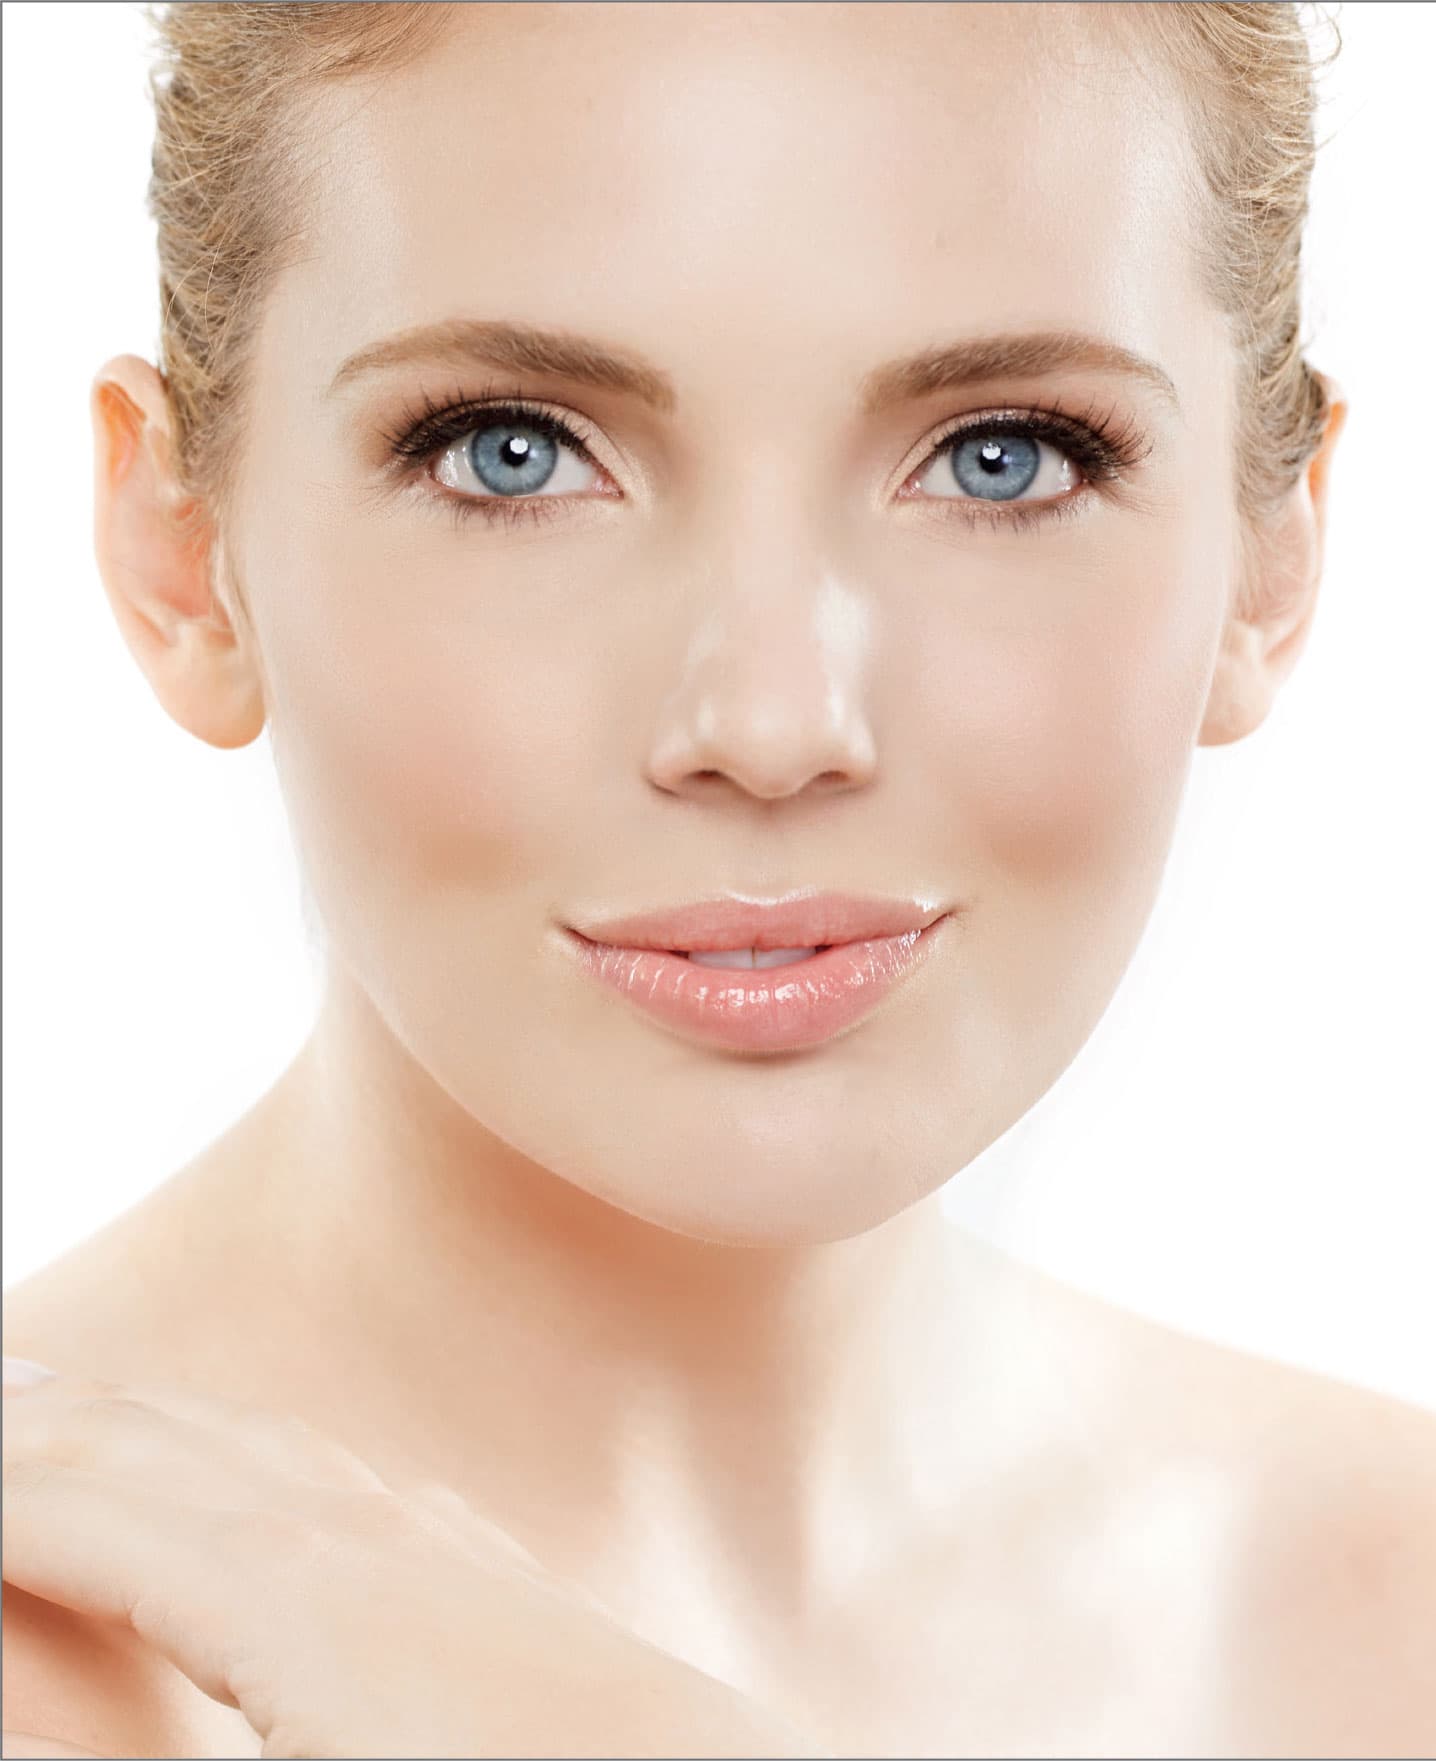
Not only will flawless skin make you look your most beautiful, it will also make you look younger. Studies have shown that most people associate discoloration and uneven skin tone with age. In this chapter, we are going to learn how to create the illusion of youthful and flawlessness.
Now let’s be realistic: flawless is subjective. I don’t want you to expect to look like a cover model when we are finished, but we can certainly make you look your most beautiful. I will show you how to cover all the flaws you don’t want to see.
Remember, practice makes perfect. Don’t expect to always get it right the first time you try a new technique! Sometimes it is not until the second or third time that it clicks. If you try something and it doesn’t work, just wash it off and try again.

how to prepare your skin
The first step to making your skin look its most flawless is preparing and priming it before you apply foundation or concealer. I spend easily as much time prepping the skin for foundation and concealer as I do applying it (sometimes more).
Why prep and prime the face?
• Everything goes on more smoothly.
• Everything stays more flawless longer.
• It helps prevent fine lines from being as visible.
• Your pores will be less visible.
• It helps create a natural glow to the skin.
Here’s how to get started.
apply moisturizer
The first step to preparing your skin is to apply moisturizer. Without it, you won’t get the flawless application that you deserve. Moisturizer evens out the porosity of your skin, so that everything that follows will adhere evenly and smoothly. No matter what your skin type is, you need to start with moisturizer. Some people with oily skin think they don’t need moisturizer, but there is a huge difference between oil and moisture; if you’re using the right formula of moisturizer, it will absorb the oil while supplying your skin with all the moisture it needs.
Begin with a freshly washed face and apply your moisturizer while your face is damp, so it goes on more evenly. Take about a quarter-size amount of product, warm it up in your hands, and press it into your face with your palms. The warmth of your hands and pressing it in marries it with your skin, giving it a beautiful glow. Moisturize your entire face and neck. Moisturizer is most effective when it’s left to absorb for a few minutes before you apply your makeup. It must be completely dry before you apply anything else.
use eye crème
While you’re waiting for the moisturizer to be absorbed, apply eye crème and lip balm so they too have time to absorb before you put anything on top of them. Be very generous with your under-eye crème. Your under-eye area is one of the areas of your body with the fewest moisture glands—and many times the most fine lines—so it can use all the moisture it can get. Moisturizing this area will also help prevent your concealer from creasing.
exfoliate your lips
Keep your lips looking fresh and luscious by exfoliating them. You should exfoliate your lips regularly to keep your lip texture smooth and soft, so your lip color will always go on perfectly. Do this right after you shower. Just apply a generous amount of lip balm and wait a few minutes for it to absorb. Using a soft-bristle toothbrush or a towel, brush your lips vigorously and then apply more lip balm when you’re finished.
apply primer
This could be considered an optional step, but for me it’s a must. Primer seals in your moisturizer, helps your foundation go on more evenly, and helps it last longer. It sometimes even contains light-reflecting properties that help diminish the appearance of some of your small flaws, so it can help your skin appear fresh-looking all day. It helps prevent foundation and concealer from seeping into fine lines. It also helps prevent your foundation color from altering due to your skin’s natural oils because it creates a barrier between those oils and your foundation. Both silicone-based and gel-based formulas do an excellent job. People with oily skin tend to prefer the gel-based formula because of the way the silicone-based formula feels on their skin, but either one can be used on any skin type. Primer is best applied with your fingertips so you can feel where it is going and how much you are applying. Apply it after your moisturizer and eye crème and before your foundation.
foundation
Now that your skin is prepped, it’s time to apply foundation. Choosing the right shade of foundation seems to be the hardest thing for most people to do, so don’t feel like a failure if you’ve found it difficult too. Here’s what you need to consider when picking your shade and formula.
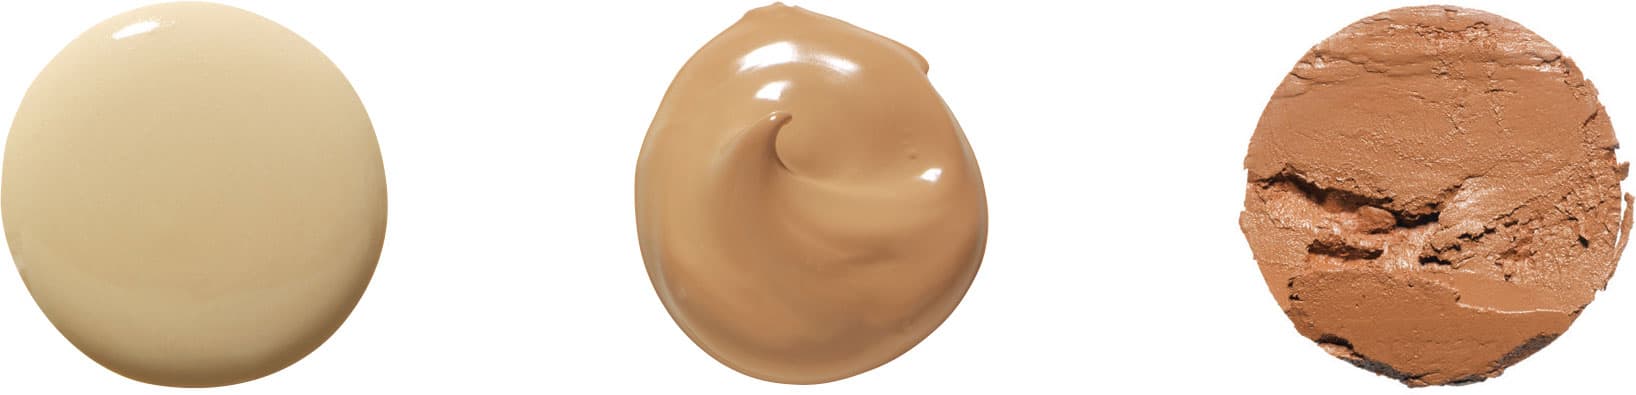
1. What is the undertone of your skin (olive, yellow, pink, golden orange, or warm brown)?
2. What is the depth level of your skin (pale porcelain all the way to deep ebony)?
3. What is your skin type (oily, dry, combination, sensitive, or normal)?
4. How much coverage do you want (sheer, medium, or full)?
5. What type of finish do you want your foundation to give your skin (matte, satin, dewy, or luminous)?
stripe test
If you have ivory or beige skin tone, conduct the stripe test from your jaw down onto your neck because we want to match your neck. People with ivory or beige skin tend to have redness in their faces, but not in their necks, so it’s important to get a true match for the neck. We do not want to apply foundation to your neck—only to your face—so it is imperative that it match your neck and you can stop your application at your jaw. Start by applying stripes of three different foundation shades from your jaw to your neck, making sure to completely blend them. Then, wait a few moments to see if the color shifts or changes as it settles into the skin.
The only way to get an exact shade match for your foundation is to do a stripe test. Here’s how:
1. Find a spot with natural light.

2. Try multiple shades to make sure you have the perfect match.

3. The shade that matches your neck is the right shade.

If you have bronze or ebony skin tone, conduct the stripe test from your cheek down to your jaw. Many people with these skin tones have multiple shades of skin within their face. (Also, some people with these skin tones have what is called facial masking, lighter skin on the interior of the face and darker skin on the outer edges of the face; if you do, see here.)
Stripe testing from your cheek to your jaw will cover any skin tone variations. Start by applying stripes of three different foundation shades from your cheek to your jaw area, making sure to completely blend them. Wait a few moments to see whether the color shifts and let them settle into your skin. Select the one that most closely matches your neck.

tip: The best way to keep shine away on oily skin is to use blotting papers to absorb excess oil before you powder. You’ll use less powder to eliminate shine.
what is your skin’s undertone?
A crucial step in creating flawless skin is choosing the right undertone for your foundation. When looking at your face and neck, it is sometimes hard to see your true undertone because of discoloration from the sun and other irritants. But there is another place you can check: the inside of your arm. You wouldn’t stripe-test it because it is usually paler than your face and neck, but there’s less of a chance for discoloration there, so it’s easier for you to see your skin’s true undertone.
If you have ivory or beige skin, you will have one of three basic undertones: olive, yellow, or pink. Most people with these skin tones benefit from a foundation with a yellow or olive undertone. A foundation with a yellow or olive undertone will add color and life to the skin, making you look younger.
One of the most common mistakes people with ivory or beige skin make is choosing a foundation with a pink undertone when they don’t need it. Even if you have pink in your face, remember that we’re matching the neck. The only people who need a pink undertone are people with pink in their faces and necks. Many people think that the pink undertone is adding color to their skin, when it is doing the opposite. It will age you because the pink undertone will make your skin look ashy and old.
If you can’t see your undertone, ask yourself: Do I tan easily? If the answer is yes, you will probably need a shade with an olive undertone. If the answer is, “I don’t know about easily (I might even burn a little first), but I can get a tan,” your skin probably has a yellow undertone. If your answer is, “I always burn rather than tan when I go out in the sun, I couldn’t tan if my life depended on it,” your skin probably has a pink undertone.
Yellow foundations can visually counteract skin conditions such as rosacea and broken capillaries. If you have one of these conditions or ruddy skin tones, you might feel that foundations with a yellow undertone look too yellow because you’re used to seeing all the red in your face. Give it time! Your skin will start to absorb the foundation and work with it better, and your eye will get used to seeing the red neutralized. You’ll soon notice a more even, natural, flawless looking skin.
If you have bronze or ebony skin, your undertones are distinct, so match them exactly. They can range from yellow to golden-orange to warm brown. It is also quite possible for you to have multiple shades of skin on your face. Many times, there are lighter areas right above the eyebrows and in the cheek area, with darker areas around the mouth and along the jaw. Don’t be afraid to use multiple shades of foundation because by doing so, you can even out your skin. Make sure you apply the correct shade of foundation just to its appropriate shade of skin. If there is a drastic difference between the center of your face and the outer area of your face, see here for more on facial masking.
If you have very deep bronze or ebony skin, you might benefit from brightening (not lightening) your skin. After you have applied your appropriate foundation shade, take a shade of foundation that is one or two shades lighter (in depth) than your natural shade and blend it into the center of your face (the center of your forehead, underneath your eyes, on top of your cheekbones, down the center of your nose, and the tip of your chin). This will give you just a slight, beautiful glow, waking up the appearance of your skin.
What is your skin’s depth level?
The depth level of your skin is how light or dark it appears to the naked eye. The paler your skin is, the lighter its depth level is; the darker your skin is, the deeper its depth level is. Match your foundation to your skin’s depth level. Choosing a foundation that is too light in depth for your skin can make your face appear lighter and paler than your body, which could age you. Don’t choose a shade that is a lot darker than your natural depth level because it will just make your face look darker than your neck and body, which could make your face look muddy and dirty.
What is your skin type?
Using the appropriate formula of foundation for your skin type can make an enormous difference. For example, if your skin type is dry and you do not use a foundation with moisturizers in it, it could accentuate your fine lines (because of lack of moisture). Your dry skin could also absorb the foundation because it’s trying to get all the moisture it needs, making it disappear during the day rather than lasting. If your skin type is oily and you do not use a formula with oil absorbers in it (to absorb the excess oil your skin secretes), it could draw attention to facial texture flaws such as large pores and uneven skin texture. If you have combination skin, I would suggest using a foundation with oil absorbers to keep your t-zone (the center of your forehead, nose, cheeks, and chin) from getting too shiny and accentuating textural flaws. If your skin type is normal, your options are much more open.
skin types at a glance
Here are the different skin types, their characteristics, what they need, and which formulas of foundation work best on them.
skin type |
characteristics |
needs |
best foundation |
dry |
lacks emollients; less elastic; rarely breaks out; feels tight after cleansing; usually small pores; less elasticity; mature skin (very often) |
moisturizing foundations; formulas containing emollients and antioxidants; exfoliating regularly |
liquid (moisturizing); mousse; tinted moisturizer; bb, cc, and dd creams |
normal |
neither too oily nor too dry; smooth and even texture; medium to small pores; few to no breakouts; healthy color |
pH-balanced products; exfoliating a couple times a week |
liquid (all types); crème (all types); mousse; tinted moisturizer; dual-finish; mineral powder; bb, cc, and dd creams |
oily |
gets shiny fast; usually highly elastic; large pores; can break out often; prone to blackheads; wrinkles less |
oil-free products; non-comedogenics; products enriched with oil absorbers; exfoliating regularly |
liquid (oil-free); mousse; crème-to-powder; dual-finish; mineral powder |
sensitive |
sensitive to many products; burns very easily; flushes easily; blotchy (could have dry patches); more susceptible to rosacea; thin and delicate; prone to irritation |
hypoallergenic; fragrance-free moisturizing formulas; formulas without chemical sunscreens; best when you can choose formula made for sensitive skin |
liquid (water-based); mousse; tinted moisturizer; dual-finish; mineral powder; bb, cc, and dd creams |
combination |
a mixture of two of the above skin types; usually oily in the t-zone; has a combination of large pores in some areas and smaller pores in other areas; most common combination is oily and normal |
may need to use multiple products to appease both areas; exfoliating regularly |
liquid (all types); crème (all types); mousse; bb, cc, and dd creams; mineral powder |
tip: If you have an extreme combination skin type—very oily and very dry—don’t be afraid to use two formulas of foundation, one with oil absorbers for the oily areas and one with moisturizers for the dry areas. That way, you are giving your skin exactly what it needs, where it needs it.
How much coverage do you want?
This has a little to do with personal preference (do you feel more comfortable with more or less coverage?) and more to do with what you need to look flawless. The sheerer the foundation, the more natural it will look. But you need enough coverage to aid you in covering whatever flaws you do not want to see. Consult chapter 1 (here) for a guide to which foundation gives you the right amount of coverage for your skin type. Just remember, sometimes more coverage is about choosing a foundation with more pigment, not adding on more of it.
what type of finish do you want your foundation to give your skin?
Your foundation’s finish can have an enormous impact on the final look of your skin. Keep in mind that some work better with certain skin types than others. Here are the four basic types:
matte. Matte is a great choice for almost every type of skin, from normal all the way to oily. The only exception is severely dry skin because it could make it look even drier. A matte finish works best on skin with imperfections such as breakouts, scars, and discoloration. (The more matte the skin, the more flawless it will appear because shine just accentuates textural flaws.) A matte finish gives you the best coverage and works well on oily skin because it contains no oils, so it will not increase the shine. However, use a light hand because if you apply it too heavily, it can appear mask-like.
dewy. Dewy works great on dry skin because it adds moisture. It is wonderful for most skin types, except oily skin, on which it can increase the shine and showcase any flaws, such as surface bumps or blemishes. Dewy foundation is not the best choice during summer or in high-humidity areas because it can appear too shiny or greasy instead of just dewy.
satin. The most common foundation finish, satin works on almost all skin types, except for excessively oily skin. It gives the skin a soft, smooth appearance. This finish is extremely kind to skin texture. It isn’t as flat as matte, which has no sheen at all, or as shiny as dewy. It makes the skin look young and fresh.
luminous. This works well on almost all skin types. Its light-reflecting properties help hide tiny flaws and lines by reflecting light off the surface of the face. It is also great for giving the skin a healthy glow. Steer clear of this formula if you have oily skin because it could just end up making your face look greasy and oily.
tip: The more matte your skin, the more flawless it will appear. When in doubt, go matte.
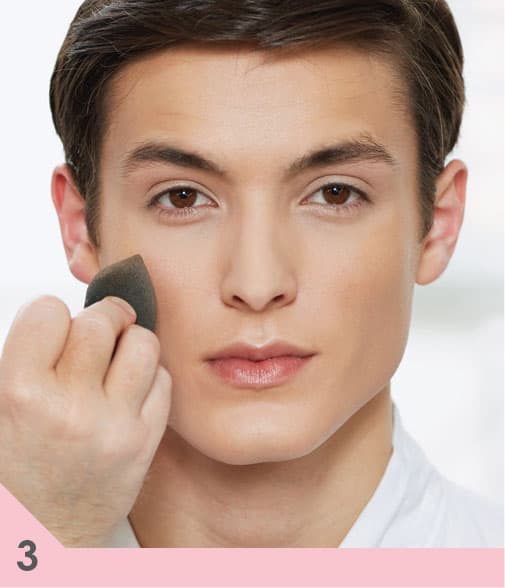
applying foundation
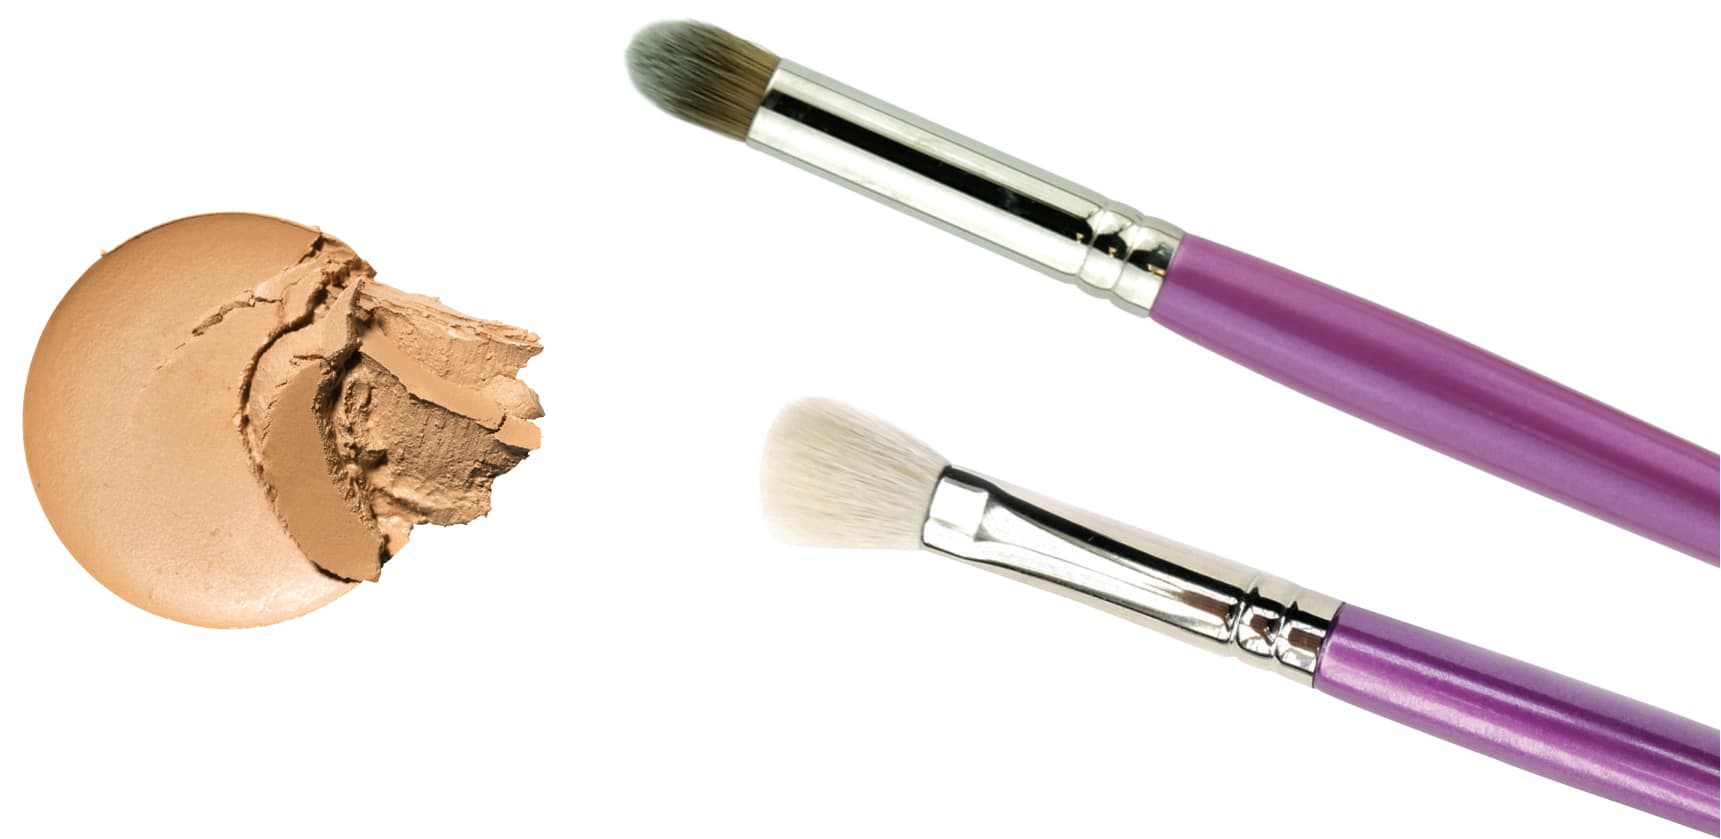
When applying foundation, you have three basic tools to work with. All three can give you great application; the best choice for you is the one you work with best.
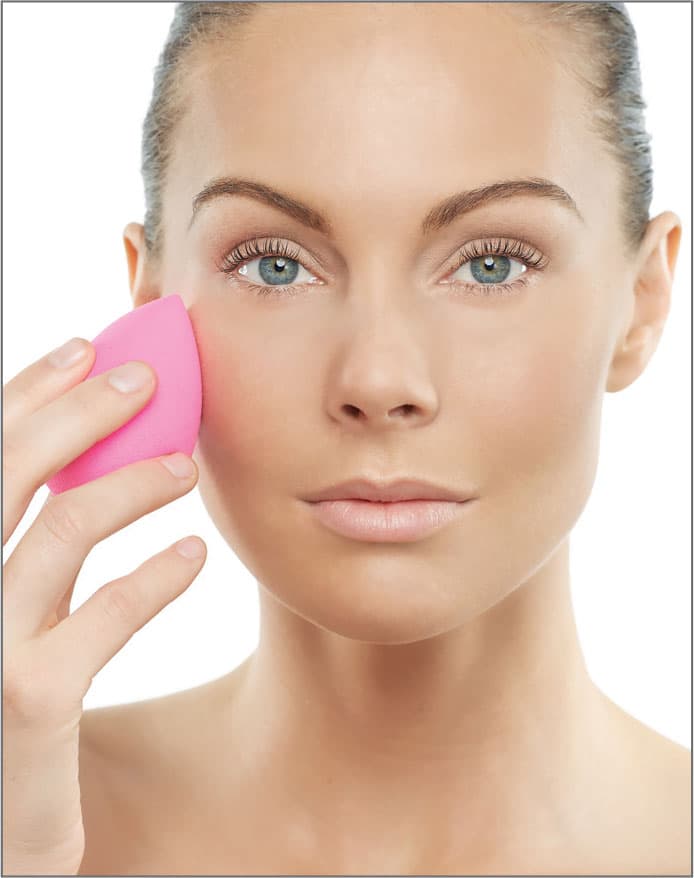
• A sponge is the most sanitary because people are most likely to wash it or throw it away after using it. You must clean it after every use because there is no way to get perfect application from a sponge with dried-up foundation from two days ago in it. The cleaner the tool, the better the application. Sponges also help immeasurably with the blending process. I love sponges. I really feel like I can get the foundation and skin to look like one because I can blend so well. You are in control of your coverage with a sponge. If you stipple (use a patting motion), your sponge will give you more coverage, and if you use it to glide foundation across your face, it will give you less coverage. Always use your sponge damp to help it glide across the skin easier and absorb less product. The higher quality the sponge, the more flawless the application. In the case of sponges, price does matter.
• A brush blends well, so it gives you great coverage. The head of a liquid foundation brush is tapered in its design to promote smooth, even coverage, helping your foundation blend as you apply it. It’s great if you want a little extra coverage. It’s also excellent for touching up the foundation you’ve worn all day. If you want to go out in the evening but you don’t want to cleanse your face and start over, you can apply more foundation right on top of the product you’ve had on all day. You can’t do that with a sponge or your fingertips. Always wash a liquid foundation brush after every application. Liquid foundation brushes are easy to wash because they are made of synthetic bristles, so they wash more easily and dry faster than natural-bristle brushes. The cleaner the tool, the better the application.

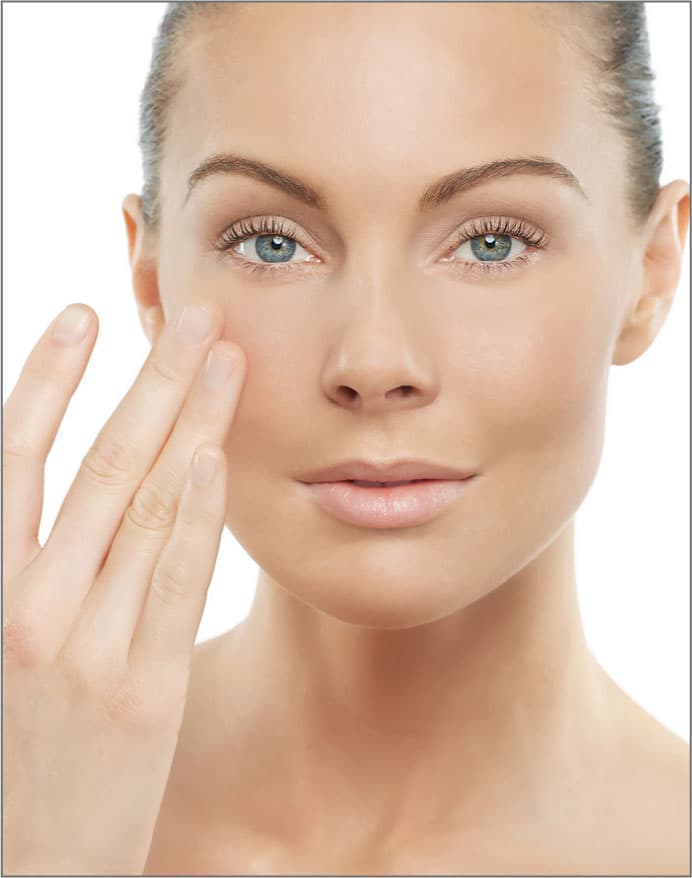
• Don’t have a brush or sponge handy? No problem because the third tool is your fingertips. Just make sure to wash your hands after you’ve applied your moisturizer and treatment products and before you apply your foundation. The residue from the treatment products can compromise the integrity of your foundation and diminish the amount of coverage it provides. Your fingers can give you beautiful, smooth coverage. They’re my least favorite tool only because I feel like I can get a better finish with a sponge or a brush. But again, if they’re the tool you work best with, they’re your perfect application tool.
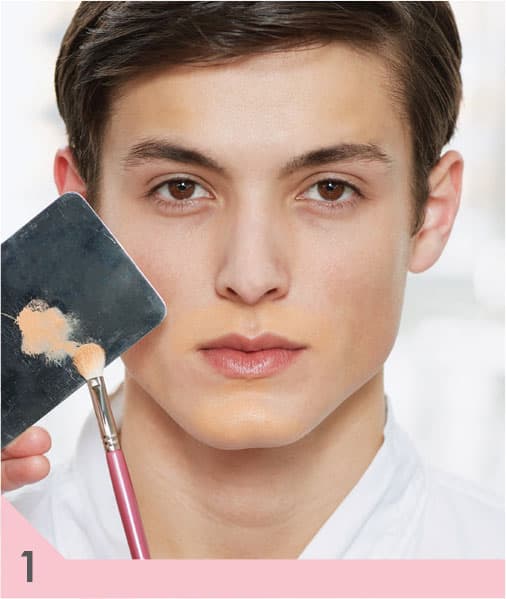
The center of your face always needs the most coverage, so begin your application there and work outward. You can dip your tool in foundation and apply it directly to your skin, or you can start by dotting foundation on your cheeks, forehead, chin, and nose and then blend it outward. Finish with your final strokes blending downward to make sure all the small facial hairs lie flat.
After application, give the foundation a couple of seconds to dry and then blot it with a tissue to absorb any excess moisture left from the product. Even though powder will absorb excess moisture too, this simple blotting step can really enhance the staying power of your foundation. Be sure to finish with a light dusting of powder. If you have really dry skin, you do not have to powder your entire face: just dust your T-zone (center of forehead, nose, cheeks, and tip of the chin). Many people with dry skin still get shiny T-zones.
tip: The best way to achieve a natural look is to first go over your entire face with a sheer application of foundation and then go back and apply either another layer of foundation or concealer to any small imperfections.
concealer
The secret to concealing everything you do not want to see is applying concealer to just the discolored skin. Learn to color within the lines, just like when you learned to color as a child!
There is only one problem with concealer: Designed to stick, it’s drier and thicker than foundation. That means it can draw attention to fine lines, especially if you use too much. Choose the right formula for the job. A formula that is too moist can “travel,” slipping into creases and fine lines, drawing attention to them. A formula that is too dry is bad for the delicate skin around your eyes and can draw attention to those same flaws. Experiment to find the right formula for you. Consult chapter 1 (here) for options.
You also need to choose the right concealer color. When you’re just concealing slight discoloration, you should choose the same shade as your foundation or one shade lighter. For extremely dark discoloration, choose a shade that is two levels lighter than your foundation.
If a discoloration is only slight, first try to cover it with a second layer of your foundation before you break out the concealer. Or apply a second foundation, such as stick foundation, that gives more coverage to just the areas that need it. For severe discoloration, you should be more concerned about color correcting than going lighter. For ivory skin, use yellow or a very pale peach for purple or blue discoloration (think dark circles). Don’t use a concealer that’s too light in depth because it can draw more attention to whatever you are trying to cover. For dark brown spots or redness, use intense yellow. If you have beige skin and want to conceal purple or bluish discoloration, peach will be your best friend. For brown spots and redness, yellow is again what you’re looking for. The deeper the beige, the deeper the peach—to almost light orange—you will need to prevent dark circles from going ashy while counteracting the purplish-blue color.
If you have bronze skin, golden orange corrective concealer is your hero. The deeper the discoloration, the more orange and less golden you want. If you have ebony skin, you will want a deep burnt orange corrective concealer on those deep dark spots to help lighten and brighten their depth and bring them up to match the rest of your skin.
Follow your corrective color concealer with a concealer that matches your natural skin tone to ensure a match. If you’re using a concealer that matches your foundation exactly, apply it either before or after your foundation. But if you’re using one that is lighter than your foundation or color correcting, apply it first. Stipple (use a patting motion) your foundation over it, making sure everything is blended and concealed to perfection.
Concealers are very different from foundations. They are drier, they’re more heavily pigmented, and they “grab” powder differently. So, be careful when you powder over a concealer. It is best to use a lighter shade of powder on any area that you have heavily concealed. If you use the same shade of powder as on the rest of your face, the concealed area will grab the powder and appear darker.
Perhaps you have experienced that proud moment when you concealed a dark spot on your cheek. You used your concealer brush to apply concealer just to the discolored skin and then you stippled all around the edges to blend it in. You looked in the mirror and voilà! No spot. Next, you applied your foundation, stippling it over the area that you concealed to preserve your concealer. Then you powdered to set everything, and suddenly the spot was back. What happened was that the concealer, because of its texture, grabbed the powder that matched your foundation (and your face) and shifted darker. Using a powder that is a shade or two lighter, just on the concealed area, will prevent this from happening.
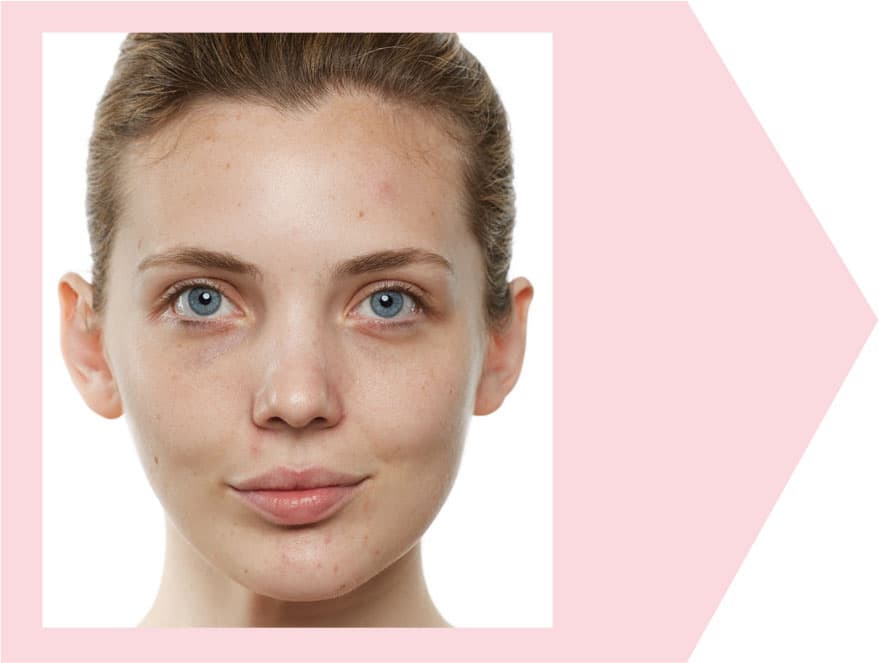
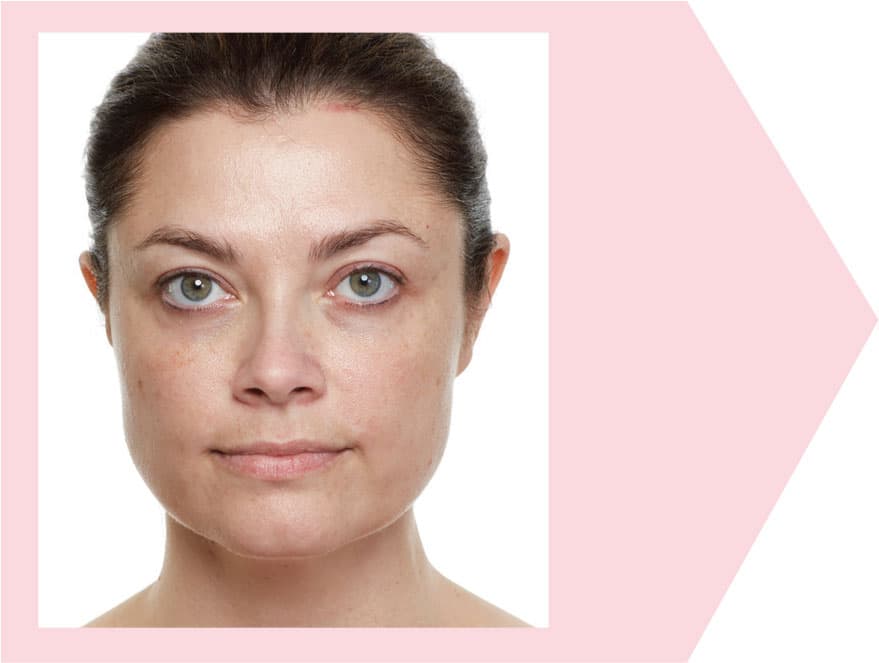
Let’s face it: Very few people have flawless skin. Yet almost everyone is obsessed with perfection! Everything from sun damage to genetics can affect the surface of your complexion, especially as you get older. Fortunately, we can disguise most imperfections. In the pages that follow, let’s discuss the techniques you need for specific situations.
dark circles
Concealer can draw attention to fine lines, most often those around the eye. The under-eye area contains fewer oil glands than anywhere else in your body, so it needs plenty of moisture. The moister and suppler you make this area before you apply your concealer, the better the results will be.
Serious dark circles call for serious concealer. Your best option is to use color corrective concealers, which must be applied before your foundation. If you have ivory skin, yellow may be your hero, but for more severe circles, try light peach. If you have severe dark circles on beige skin, you will find that peach correctors will help keep the area from going ashy, especially on deeper beige skin. If you have deeper beige skin, the peach might need to lean a little toward light orange when the dark circle is truly severe. If you have bronze skin, you want an intense golden-orange concealer, but if your dark circles are too severe, you will need it to lean more orange than golden. If you have severe dark circles on ebony skin, you will want a deep orange to help fight that deep brown, almost black, color.
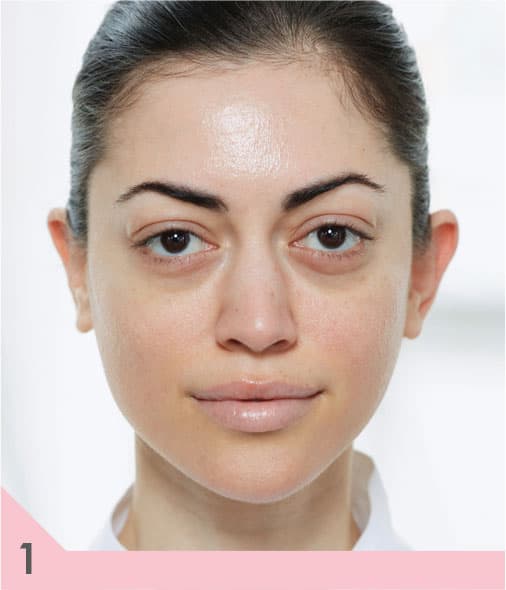
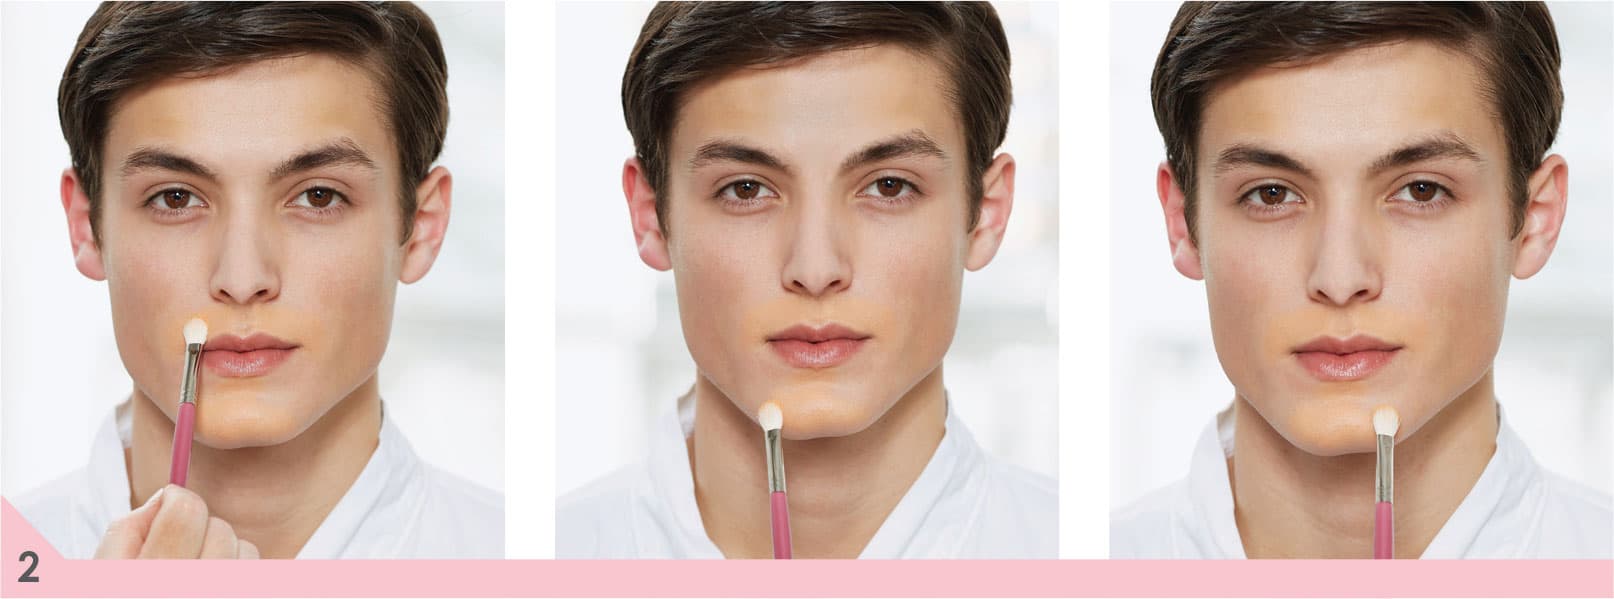
1. Prepare the area underneath your eye: Apply eye crème and let it soak in for a couple of minutes. If the area is really dry, apply an extra layer and let it dry and soak in, too. Be generous with your eye crème because it’s next to impossible to “over-moisturize” this area. Just be sure to blot off any excess crème after a few minutes with a sponge or tissue. Using eye crème will help your concealer adhere, and if the skin under your eyes tends to be dry, your concealer won’t cake up and draw attention to any fine lines you might have.
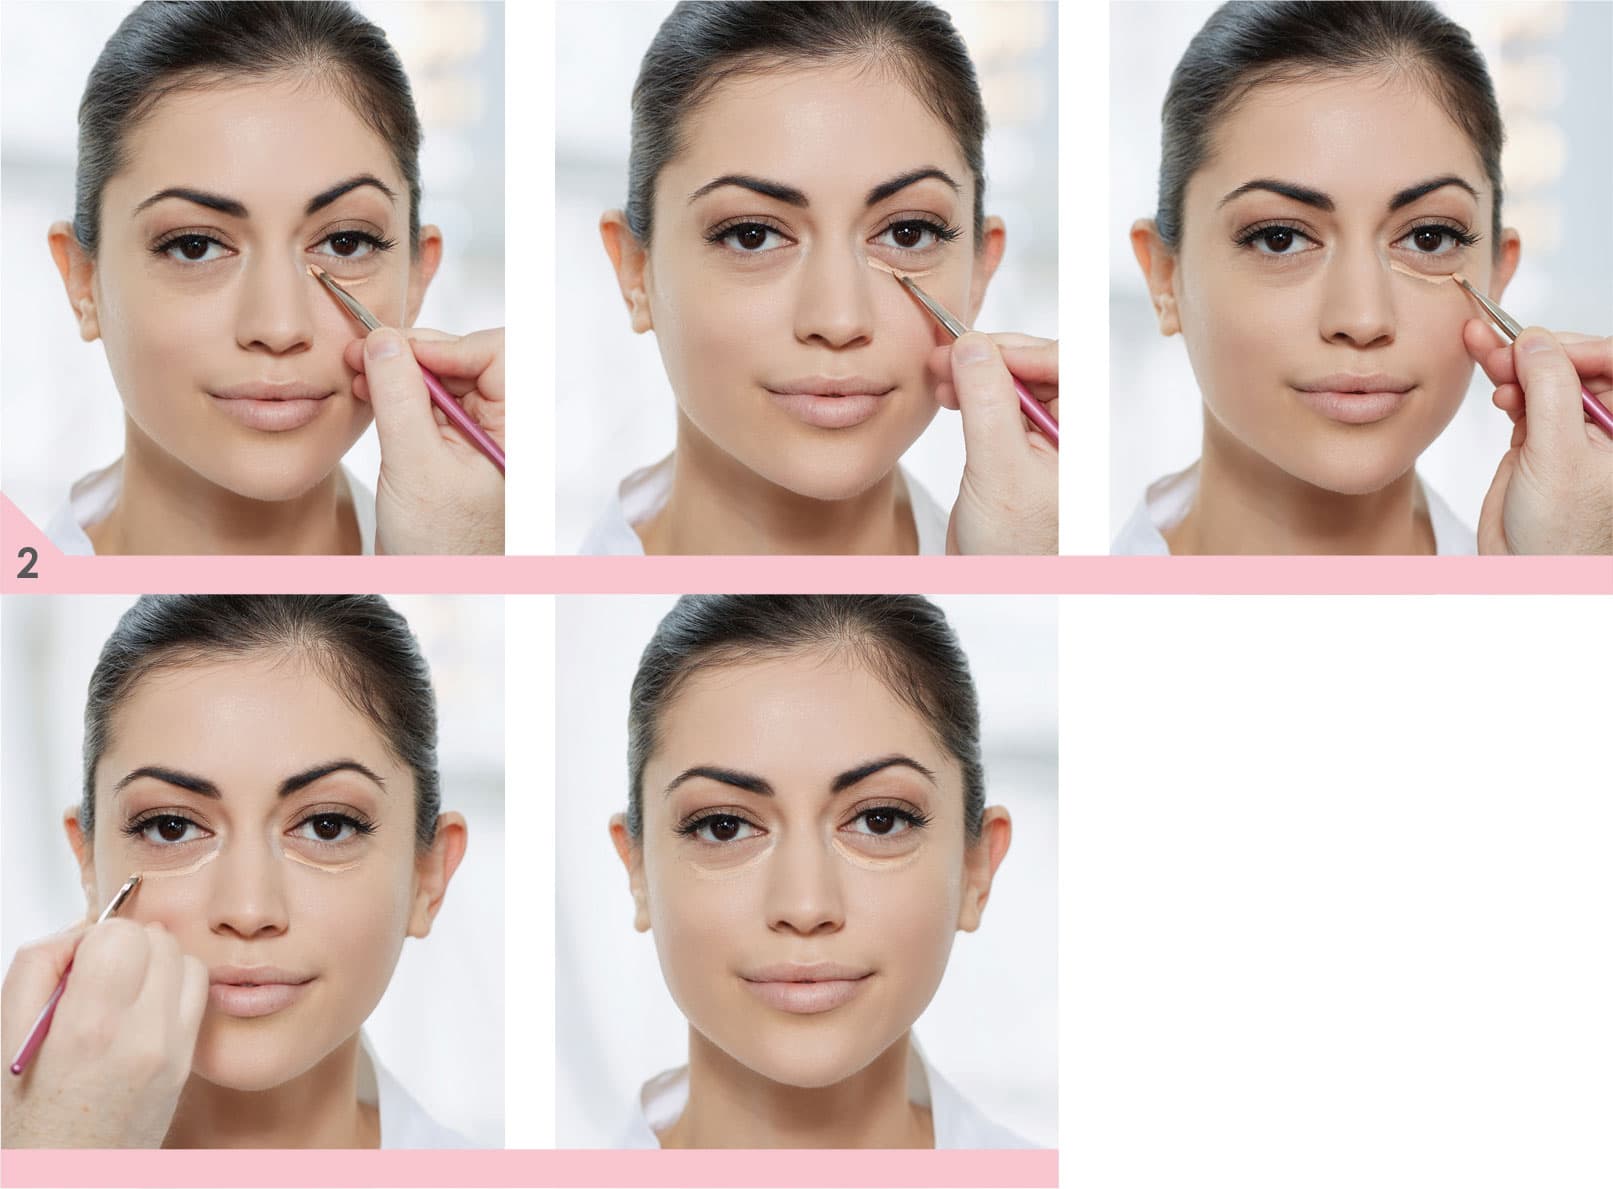
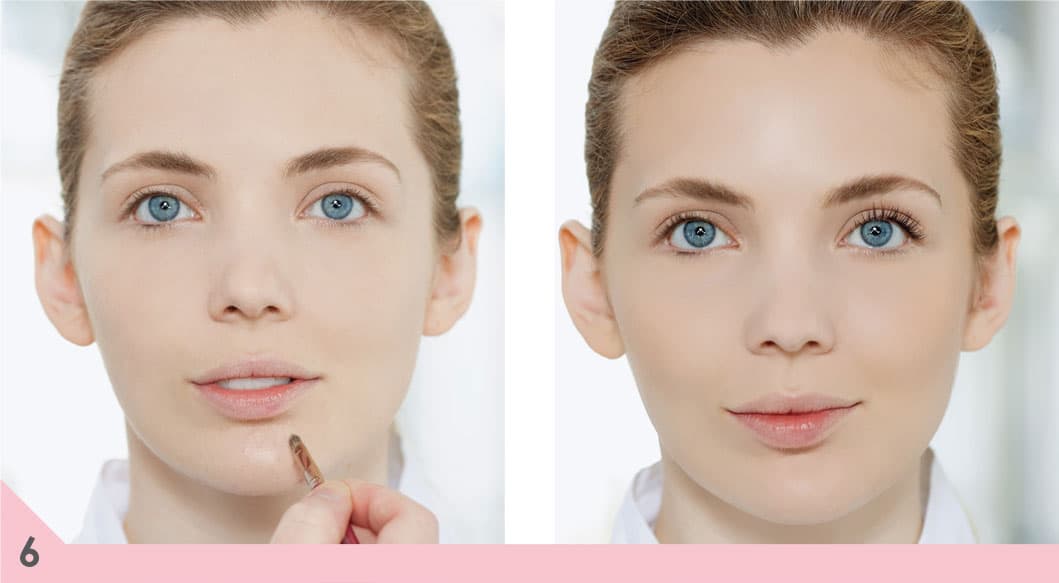
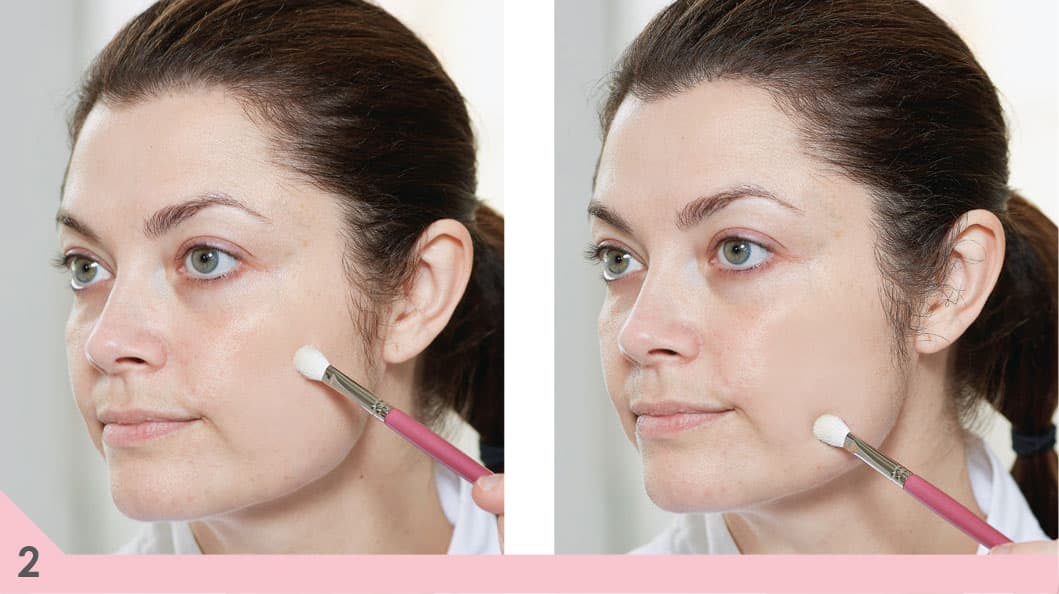
2. Using a brush, apply concealer along the line of demarcation—where the discoloration begins on your skin. Brush the concealer up and over the entire discolored area. You never want to extend the concealer past the line of demarcation onto the skin that you are trying to match. If you do, you will lighten skin that is already the correct color, and you’ll be back where you started—with two uneven shades of skin.
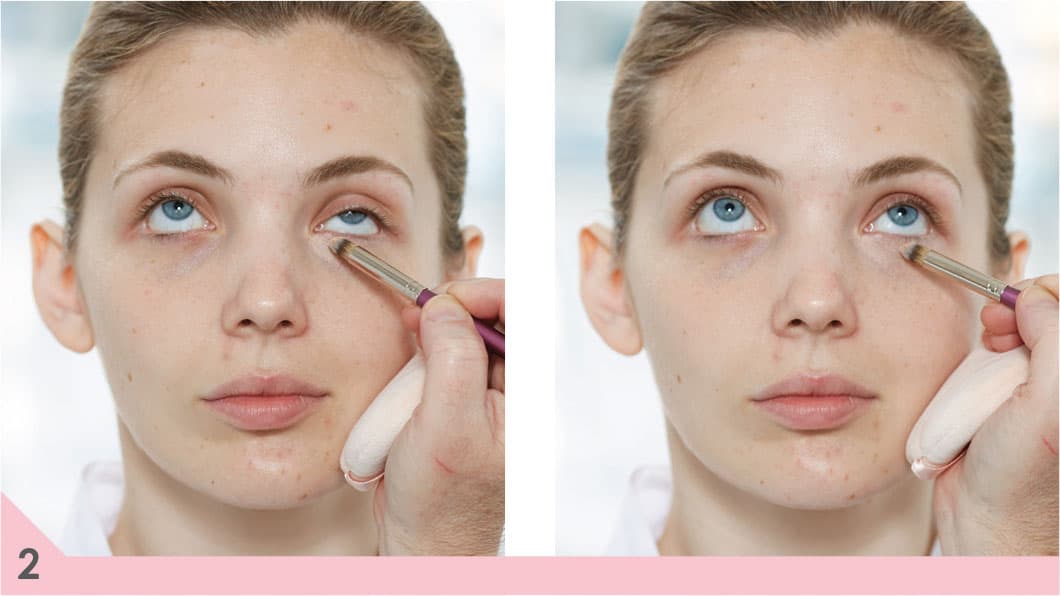
3. With your finger or a stippling brush, stipple the concealer along the line of demarcation. This blends in the texture of the concealer, making it invisible. Be sure to conceal any darkness in the inside corners of your eyes or your eyelids, if necessary.
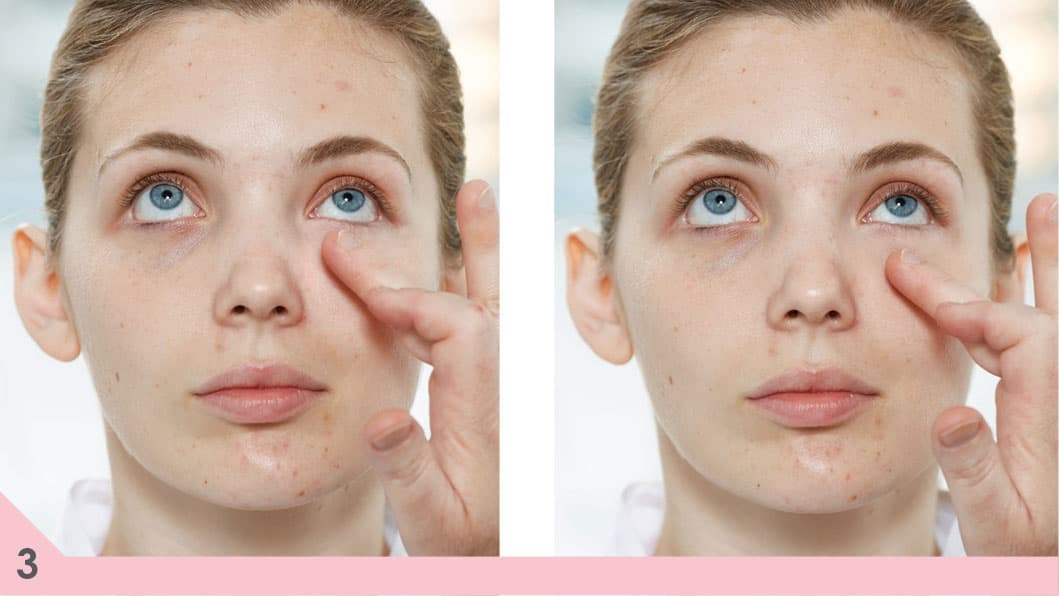
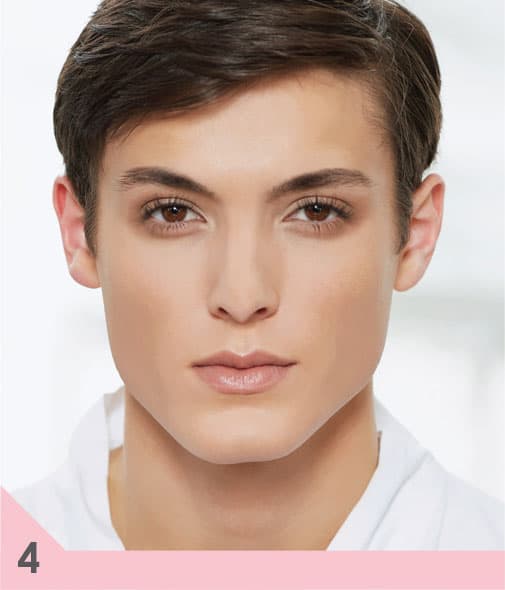
4. Stipple your foundation over the concealed area. You don’t want to wipe away what you just concealed. You can see what a difference staying within the lines makes—here with one eye concealed and on not.
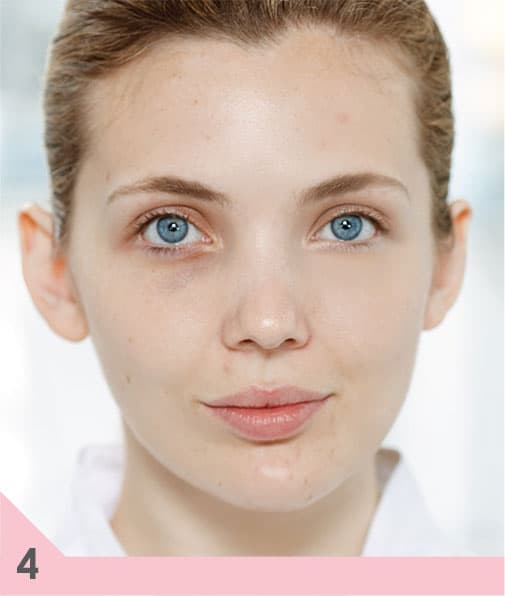
5. Finish with a light dusting of powder to set your handiwork.
under-seye puffines
Under-eye puffiness is when the area under your eyes is raised and puffed. The fact that you are usually lit from above accentuates this puffiness because it creates a shadow right underneath the puffy area. You cannot improve the appearance of under-eye puffiness by swiping a light concealer under the eye. That’s because anything we lighten will stand out even more. Our goal is to disguise the puffy area, not make it more prominent.
You can outsmart the puffy area by highlighting the area just underneath it, where the puffiness creates a shadow. By highlighting the shadowy area, you will bring it out, making it appear even with the rest of the face, not indented. Because most people look directly at you, your puffiness will appear even with the rest of your skin.
1. Apply your foundation.
2. Use a highlighting pen (see here) just underneath the puffiness, right where the shadow is being created. Make sure not to extend the product up onto the puffy area because it will just make it look puffier. The highlighting pen has light-reflecting properties, making the recessed area come forward so it’s even with the rest of the face.
3. With your finger or a stippling brush, stipple all along where you applied the highlighting pen. This will blend in the color and texture, making it invisible.

4. Powder lightly and move on with your life.


dark circles and puffiness
If you have dark circles and puffiness, you will need to take one extra step:
1. Apply concealer to your dark circles first, making sure to only apply it to the discolored skin. Stipple all the edges to blend.
2. Apply your foundation.
3. Apply a highlighting pen right underneath the puffiness, where the shadow is being created (as in step 2 previously).
4. Use your finger or a stippling brush to stipple all along the area where you applied the highlighting pen to blend in the color and texture, making it invisible.
5. Lightly powder and you’re done.
blemishes
To minimize facial blemishes or pimples, use a concealer with a dry texture so it will cling better to the blemish, last throughout the day, and not irritate the skin or initiate more breakouts.
When choosing a concealer, opt for one with a drier texture and a depth level that is not lighter than your foundation. Your concealer should match your skin exactly. A light concealer will only make the blemish seem larger because everything we lighten extends forward.
1. Most of your concealing will happen after you apply your foundation for maximum coverage. If there is redness from irritation, start with a light layer of a yellow concealer to neutralize the redness.

2. With your finger or a stippling brush, stipple to blend in your concealer.
3. Apply your foundation.
4. Using a brush, apply concealer directly to the blemish.

5. With your finger or a stippling brush, stipple to blend the edges all around the blemish into the skin. Stippling blends in the texture of the concealer, making it invisible.

6. Optional: Many times, you might find you want to add a second layer for extra coverage. If you think it would help, apply that second layer and stipple.
hyperpigmentation or melasma
Hyperpigmentation is a common condition in which patches of skin become darker in color than the normal surrounding skin. This darkening occurs when an excess of melanin, the brown pigment that produces normal skin color, forms deposits in the skin. Hyperpigmentation can affect people of every skin tone. You might have seen it in the form of age spots, which occur due to sun damage. Many women develop them during menopause. These small, darkened patches are usually found on the hands, face, or other areas frequently exposed to the sun.
Melasma spots are similar in appearance to age spots, but are larger areas of darkened skin that appear most often because of hormonal changes. Pregnancy, for example, can trigger an overproduction of melanin that causes “pregnancy masking” (or chloasma) on the face.
If you are prone to hyperpigmentation, stay out of the sun and wear lots of sunblock. Sun exposure just increases the problem. You could have one large spot (more common with pregnancy masking) or multiple small spots. Apply concealer only to the areas that are discolored. If you extend the concealer past the line of demarcation, you will lighten skin that is already the correct color, re-creating multiple shades of skin.
If you have deep brown discoloration on ivory or beige skin, use a yellow pigmented concealer. The deeper the brown and the deeper beige your skin tone, the more your concealer should shift to a dark peach or light orange. If you have bronze or ebony skin tones, use a concealer with a golden orange undertone, all the way into orange depending on how deep the spot is. This will help neutralize the spot color.
1. Using a brush for precision (unless you have a very large spot, in which case you can use your fingers or a sponge), apply your concealer only to the dark, discolored area. Color within the lines. If there are multiple spots, cover each one separately.

2. Using your finger or a stippling brush, stipple all around the outer edges of every spot that you concealed. This will blend in the texture, making the area look completely natural.
3. Apply your foundation, making sure to stipple it over the areas where you applied your concealer. If you were to wipe your foundation over these areas, you could remove the concealer; stippling prevents that.
4. Finish with a light dusting of powder to set everything and make it last throughout the day.

broken capillaries or veins
The trick here is to apply concealer only to the areas of discoloration. Color within the lines. This can be a little difficult with broken capillaries or veins because we must be so exact, but keep practicing and your makeup will get better every day.

A concealer brush will make this process much easier because it is so precise. Or, using a concealer pencil for concealing veins is amazing. You simply draw it right along the vein.
1. Use a concealer brush or pencil to draw a line of concealer right along the broken capillary or vein. You can’t just conceal the general area; you must apply it only to the vein. If you extended the concealer past the edges of the vein or broken capillary, it will lighten the skin you’re trying to match, disguising nothing.
2. Using the tip of your finger or a stippling brush, stipple all along where you applied your concealer. This will blend in the texture of your concealer and make it look completely natural.
3. Next apply your foundation. As with any time you apply foundation over concealer, stipple your foundation over the concealed area.
4. Powder to set everything and help it last all day.
rosacea
Rosacea is an area of redness on the skin, usually a general area of redness with some darker red spots. It most commonly occurs in the cheek area and across the nose, as well as the chin and sometimes the forehead. A lot of women start to develop slight cases after they start having the hormonal changes of menopause. And other people have rosacea their whole lives.
1. Make sure the rosacea area is as smooth and moist as possible. Most times it is dry and flaky and needs to be exfoliated. But you cannot exfoliate it with normal exfoliators, which would just irritate the area. Do it with moisturizer: Slather a heavy moisturizer over the entire area and let it sit for about 5 minutes. Then with a damp nubby washcloth, lightly rub in a circular motion. The moisturizer will have softened the dead dry skin and the washcloth will roll it right off. Now cleanse and moisturize like normal, and the area will be nice and smooth.
2. To counteract the redness of rosacea, you will need a yellow-based concealer. Apply a thin layer of concealer to the entire area and to all areas that are red. This thin layer will get rid of the general area of redness, but you will probably be left with a few darker areas still showing through.
3. Using the same concealer, go back and apply another layer to the darker areas that are still showing through (but only to the spots that are still visible). By covering in two steps, you do not have a thick layer of concealer over a large area of your face, so your skin looks more natural.
4. Stipple all around the outer edges of the area you concealed to blend in the texture.
5. Apply your foundation, making sure to stipple rather than wipe your foundation over the areas you just concealed. If you were to wipe on the foundation, it could remove the product where you just concealed.
6. Finish with a light dusting of powder.
Most people, after they conceal their rosacea, do not want to wear blush. They just got rid of the excess color in their cheeks, and the last thing they want to do is add some back. If you do want color back in this area, choose something very natural. An excellent choice is just a little bronzer for color rather than blush.
vitiligo or hypopigmentation
Vitiligo (also called hypopigmentation or leukoderma) is a chronic skin condition that causes loss of pigment, resulting in irregular pale patches of skin. You’re dealing with light spots (spots with no pigment) on the skin to conceal. As with dark spots, the trick is to color within the lines when applying your concealer because if the concealer extends past the line of demarcation, you will once again have multiple shades of skin.

What makes vitiligo so different is that instead of using a concealer to lighten a spot, we actually need one to deepen a spot. The deeper your skin tone is, the deeper your concealer will need to be. If you have beige skin, you will probably need a shade of concealer only one to two levels darker than your natural skin. But if you have bronze or ebony skin, you will probably need a shade two to three levels darker than your natural skin tone.
1. Using a brush for precision (unless it is a large spot, in which case you can use your fingers or a sponge), apply your concealer only to the light discolored area. If there are multiple spots, cover each one separately.
2. Using your finger or a stippling brush, stipple all around the outer edges of every spot that you concealed. This will blend in the texture, making the skin look completely natural.
3. Apply your foundation, making sure to stipple it over the areas on which you applied your concealer. If you were to wipe your foundation over these areas, you could remove the concealer; stippling on foundation will prevent this.
4. Finish with a light dusting of powder to set everything and make it last throughout the day.
facial masking
Facial masking is a condition that sometimes affects people with bronze or ebony skin tones. It means your skin has a natural “mask,” a tendency to be darker around the outer edges of your face and lighter on the interior. It will take two shades of foundation or concealer to correct this.
Correcting facial masking is different from any other concealing that you will do because when you are dealing with facial masking, there are actually three shades of skin to consider: the light area in the center of your face; the much darker area all around the outer perimeter of your face (your forehead, jawline, and around your mouth); and the color of your neck and body, which is usually lighter than the outer edges of your face, but darker than the center.
1. Conduct a stripe test from your cheek down to your jaw to determine the two foundation or concealer shades you will need to create a more even complexion (see here and here). One shade will brighten the darker areas and one will deepen the lighter areas. You can’t use just one shade because there is no way one shade can lighten the darker area to match the lighter area; you also don’t want to deepen the lighter area to match the dark (because remember, the darker area is darker than your neck and body). The goal of your stripe test is to find the two shades that, when applied to the opposite areas of your skin, meet in the middle (or make each area match the other). You want to slightly lighten the dark area and slightly deepen the light area.
2. Apply the lighter shade of foundation to just the darker areas on your face.
3. Apply the darker shade of foundation to just the lighter areas on your face. Applying the appropriate shade of foundation to the correct shade of skin will correct your skin tone and make your skin look even and flawless.
4. You will have to wait until you have finished evening out your skin tone to decide what powder shade you will need. When you have, apply powder to set your makeup.
scars
Scars are especially tricky to conceal, because a scar is an area of skin that has no pores, and pores are what makeup clings to on the skin. Foundation just slips right off. You will need a special concealer—one that has a much drier texture than, for example, one you would use under your eyes—to get it to adhere to the scar.
If you have a concealer that is drier in texture and designed to conceal scars, here’s how to use it:
1. With a concealer brush, apply your concealer directly to the scar (and only to the scar).
2. With your finger or a stippling brush, stipple all around and along the edges of the area where you applied your concealer. This will blend in the texture of your concealer and make it invisible.
3. As you are applying your foundation, when you reach the area you just concealed, stipple the foundation over your scar. Don’t wipe it on—you don’t want to expose the scars you just concealed.
4. Lightly powder to set your makeup so it will last all day.
If you do not want to invest in multiple concealers, you can adjust your normal concealer so that it will adhere to the scar:
1. Lightly moisturize the scarred area.
2. Powder the scar with a tiny bit of loose powder. The moisturizer should give the powder something to cling to.
3. With a concealer brush, apply your concealer directly to the scar (and only to the scar). The concealer and powder will mix together, creating a drier texture so it can adhere to the scar.
4. With your finger or a stippling brush, stipple all around and along the edges of the area on which you applied your concealer. This will blend in the texture of your concealer and make it invisible.
5. As you are applying your foundation, when you reach the area you just concealed, stipple it over your scar. Don’t wipe it on, or it could remove the concealer-powder blend.
6. Powder lightly to set your makeup so that it will last all day.
For acne scars, which create texture variation in your skin, keep everything as matte as possible. You want to make sure you keep all the oils and shine away all day, so blot often and use loose powder to matte the skin.
Keep the finish of your color products in mind as well: Any sparkle or shimmer in your blush or bronzer, for example, will make your skin look shiny, accentuating your textural flaws. The more matte the skin, the more flawless it will appear.
Finally, resist the temptation to try to fill in the “valleys” by applying too much foundation and concealer. Trying to cover up the textural flaws with thick, heavy layers of concealer and foundation will just make your skin look caked. A nice, smooth matte layer will make you look fresher and will make your skin look its most flawless.
tattoos
When you are covering a tattoo, it is probably not going to be where you will also be applying foundation. That is, it will likely be on your neck, wrist, ankle, or the like—not your face. Because you won’t be applying any foundation over the tattoo, you need to make sure you have an absolutely perfect color match. You also need a product that is drier in texture than foundation so it sticks better and stays put all day.
Your tattoo is likely to be much darker than the skin it is on (most tattoos have purplish-blue, almost black borders). If that’s the case, your goal is to over-lighten the tattoo and then bring it back down to the color of the skin.
You will need three different concealer colors to accomplish a natural looking cover. The first is a peachy color for ivory skin, a deep peach for beige skin, an even deeper peach, almost light orange, for dark beige skin, an orange for bronze skin, or a deep burnt orange for ebony skin. The second is a light concealer (lighter than your skin tone), and the third is an exact skin match.
1. Color within the lines as much as possible! Using a concealer brush and your color-correcting concealer, color directly over the tattoo. Build the color; start with less and add layers rather than putting too much on initially.
2. Stipple the first layer with your finger or a stippling brush.
3. With a brush, sponge, or powder puff, apply a thin layer of a transparent setting powder—one designed specifically for applications such as this.
4. Using a concealer brush, apply another layer of your color-correcting concealer directly over the tattoo, again trying to stay within the lines.
5. Stipple with either a stippling brush or a foundation brush, so you don’t remove too much product.
6. Stipple over the entire tattoo area with a foundation brush or sponge and the lighter skin tone concealer.
7. Stipple again with a stippling brush or sponge.
8. Change to the natural skin tone concealer and stipple over the entire tattoo area of the tattoo with a foundation brush or sponge.
9. Finish with a final dusting of powder to set the area.
tip: Don’t be afraid to add more translucent powder between layers and stipple over the area again with more product. This will help the product stick and stay put.
beards
The trick to covering a five o’clock shadow is using the right color-correcting concealer and not necessarily a certain amount of concealer. Due to the darkness and tone of the shadow, you will need something in the peachy to orange family. If you have ivory skin, use a light peach. If you have beige skin, use a darker peachy color. If you have dark beige skin, use a deep peach going into an almost light orange. If you have bronze skin, you will need orange. And if you have ebony skin, you will need a deep burnt orange. These shades will counteract the dark brown to almost black shadow created from the shadow.
1. Using a foundation brush, concealer brush, or sponge, depending on how large the area you’re covering is, apply your color-correcting concealer. Stay within the lines (that is, only apply concealer to the shadowed area).
2. With your finger, a stippling brush, or a sponge, stipple all around the edges to blend in the concealer and the texture.
3. Apply foundation normally (see here), except when you get to the beard area, stipple it so you don’t remove any of the concealer and you get maximum coverage.
4. Powder to set your foundation. Consider using a no-color transparent setting powder on your beard so it doesn’t darken the concealed area.

powder
Powder sets your foundation, polishes your look, and adds a smooth, velvety softness to your skin. Because loose powder contains more oil absorbers than pressed powder, I prefer to use it to set the foundation. You can always use pressed powder for touch-ups throughout the day because it is fast and easy to carry.
Choose a shade of powder that matches your foundation. The powder will reinforce everything you have applied (foundation, concealer, highlighting pen). You can also use a translucent powder, which is fine for paler skin tones. It is less opaque than other powders, but it is not colorless, and it can often appear unnatural and ashy on dark beige, olive, bronze, and ebony skin tones. The one time translucent powder is helpful is when powdering areas that have been heavily concealed on ivory or beige (but never bronze or ebony) skin.
There are several ways to apply both types of powder:
• A brush is the easiest and most commonly used tool. It will give you a nice light powder coverage. It is great for blending, but you must be careful not to over-blend and brush off what you apply. For best results, apply a little bit of powder at a time with a brush, instead of applying it all at once, to ensure smooth, even coverage. If you are using loose powder, simply dip your brush in powder and then tap it in the palm of your hand (or the top of the powder jar) to remove the excess. Apply what’s left on the brush to your face. Then use your brush to pick up the powder that’s left in your palm or the top of the jar and finish applying it to your face.
• A powder puff offers the most coverage. Press your puff into the powder, tap the excess off in the palm of your hand, and then roll what is left on the puff onto your skin. Then grab the leftover powder in your palm with the puff and finish applying it to your face. Pushing it into the skin makes your foundation and powder appear as one with your skin; it looks more natural while giving you complete coverage. To finish, lightly sweep your face with a brush, using gentle downward strokes to remove any excess powder.
• A fingertip works well for the lightest powder application. It’s a terrific way to powder underneath the eyes, especially when you don’t want to draw attention to fine lines. Just dip your finger in loose powder. Rub it in the palm of your hand to brush off the excess and then trace your finger over the area underneath your eyes to set your concealer.
• A sponge works well for tight areas and is great for spot powdering. It will give you maximum coverage like a puff does.