Graphics are very important to games and they can also be one of the main performance bottlenecks if not handled correctly. With SDL 2.0 we can really take advantage of the GPU when rendering, which gives us a real boost in terms of the speed of rendering.
In this chapter we will cover:
- The basics of drawing with SDL
- Source and destination rectangles
- Loading and displaying textures
- Using the
SDL_imageextension
In the previous chapter we created an SDL window but we have yet to render anything to the screen. SDL can use two structures to draw to the screen. One is the SDL_Surface structure, which contains a collection of pixels and is rendered using software rendering processes (not the GPU). The other is SDL_Texture; this can be used for hardware-accelerated rendering. We want our games to be as efficient as possible so we will focus on using SDL_Texture.
We need some images to load throughout this chapter. We do not want to spend any time creating art assets for our games at this point; we want to focus entirely on the programming side. In this book we will use assets from the SpriteLib collection available at http://www.widgetworx.com/widgetworx/portfolio/spritelib.html.
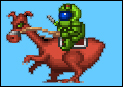
I have altered some of these files to allow us to easily use them in the upcoming chapters. These images are available with the source code download for this book. The first one we will use is the rider.bmp image file:
First we will create a pointer to an SDL_Texture object as a member variable in our Game.h header file. We will also create some rectangles to be used when drawing the texture.
SDL_Window* m_pWindow;
SDL_Renderer* m_pRenderer;

SDL_Texture* m_pTexture; // the new SDL_Texture variable
SDL_Rect m_sourceRectangle; // the first rectangle
SDL_Rect m_destinationRectangle; // another rectangle
We can load this texture in our game's init function for now. Open up Game.cpp and follow the steps to load and draw an SDL_Texture:
- First we will make an assets folder to hold our images, place this in the same folder as your source code (not the executable code). When you want to distribute the game you will copy this assets folder along with your executable. But for development purposes we will keep it in the same folder as the source code. Place the
rider.bmpfile into this assets folder. - In our game's
initfunction we can load our image. We will use theSDL_LoadBMPfunction which returns anSDL_Surface*. From thisSDL_Surface*we can createSDL_Texturestructure using theSDL_CreateTextureFromSurfacefunction. We then free the temporary surface, releasing any used memory.SDL_Surface* pTempSurface = SDL_LoadBMP("assets/rider.bmp"); m_pTexture = SDL_CreateTextureFromSurface(m_pRenderer, pTempSurface); SDL_FreeSurface(pTempSurface); - We now have
SDL_Textureready to be drawn to the screen. We will first get the dimensions of the texture we have just loaded, and use them to set the width and height ofm_sourceRectangleso that we can draw it correctly.SDL_QueryTexture(m_pTexture, NULL, NULL, &m_sourceRectangle.w, &m_sourceRectangle.h);
- Querying the texture will allow us to set the width and height of our source rectangle to the exact dimensions needed. So now that we have the correct height and width of our texture stored in
m_sourceRectanglewe must also set the destination rectangle's height and width. This is done so that our renderer knows which part of the window to draw our image to, and also the width and height of the image we want to render. We will set both x and y coordinates to0(top left). Window coordinates can be represented with anxandyvalue, withxbeing the horizontal position andythe vertical. Therefore the coordinates for the top-left of a window in SDL would be (0,0) and the center point would be the width of the window divided by two forx, and the height of the window divided by two fory.m_destinationRectangle.x = m_sourceRectangle.x = 0; m_destinationRectangle.y = m_sourceRectangle.y = 0; m_destinationRectangle.w = m_sourceRectangle.w; m_destinationRectangle.h = m_sourceRectangle.h;
- Now that we have a loaded texture and its dimensions, we can move on to rendering it to the screen. Move to our game's
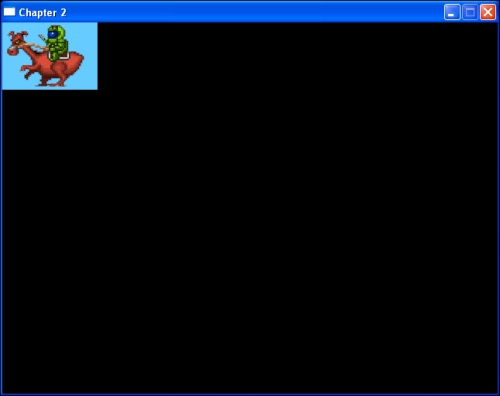
renderfunction and we will add the code to draw our texture. Put this function between the calls toSDL_RenderClearandSDL_RenderPresent.SDL_RenderCopy(m_pRenderer, m_pTexture, &m_sourceRectangle, &m_destinationRectangle);
- Build the project and you will see our loaded texture.