
Now that we have something drawn to the screen, it is a good idea to cover the purpose of source and destination rectangles, as they will be extremely important for topics such as tile map loading and drawing. They are also important for sprite sheet animation which we will be covering later in this chapter.
We can think of a source rectangle as defining the area we want to copy from a texture onto the window:
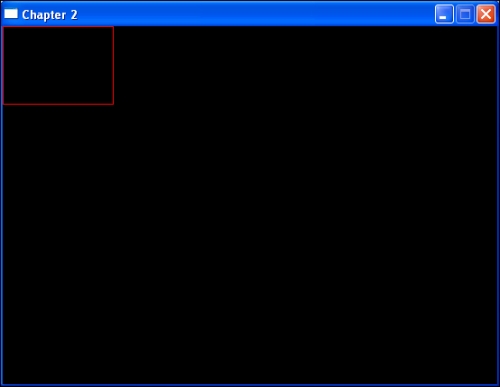
- In the previous example, we used the entire image so we could simply define the source rectangle's dimensions with the same dimensions as those of the loaded texture.
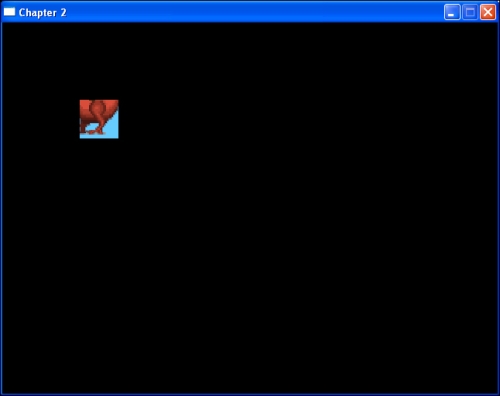
- The red box in the preceding screenshot is a visual representation of the source rectangle we used when drawing to the screen. We want to copy pixels from inside the source rectangle to a specific area of the renderer, the destination rectangle (the red box in the following screenshot).
- As you would expect, these rectangles can be defined however you wish. For example, let's open up our
Game.cppfile again and take a look at changing the size of the source rectangle. Place this code after theSDL_QueryTexturefunction.m_sourceRectangle.w = 50; m_sourceRectangle.h = 50;
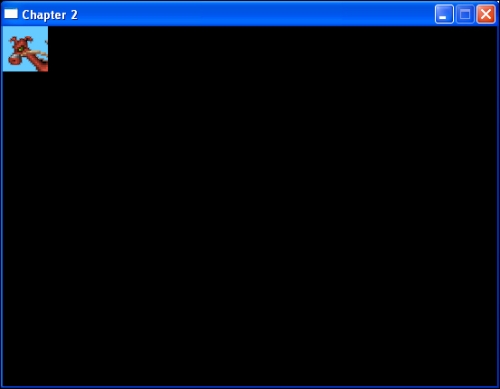
Now build again and you should see that only a 50 x 50 square of the image has been copied across to the renderer.
- Now let us move the destination rectangle by changing its
xandyvalues.m_destinationRectangle.x = 100; m_destinationRectangle.y = 100;
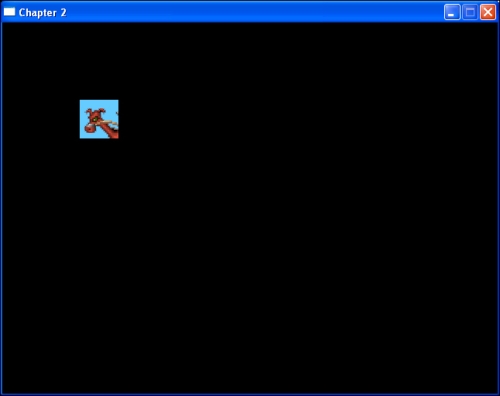
Build the project again and you will see that our source rectangle location has remained the same but the destination rectangle has moved. All we have done is move the location that we want the pixels inside the source rectangle to be copied to.
- So far we have left the source rectangle's
xandycoordinates at 0 but they can also be moved around to only draw the section of the image that you want. We can move thexandycoordinates of the source to draw the bottom-right section of the image rather than the top-left. Place this code just before where we set the destination rectangle's location.m_sourceRectangle.x = 50; m_sourceRectangle.y = 50;
You can see that we are still drawing to the same destination location but we are copying a different 50 x 50 section of the image.
- We can also pass null into the render copy for either rectangle.
SDL_RenderCopy(m_pRenderer, m_pTexture, 0, 0);
Passing null into the source rectangle parameter will make the renderer use the entire texture. Likewise, passing null to the destination rectangle parameter will use the entire renderer for display.
We have covered a few different ways that we can use rectangles to define areas of images that we would like to draw. We will now put that knowledge into practice by displaying an animated sprite sheet.
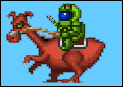
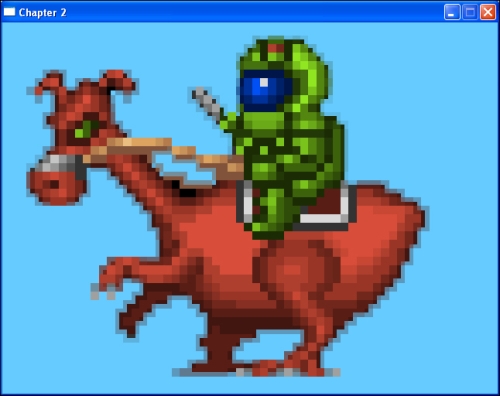
We can apply our understanding of source and destination rectangles to the animation of a sprite sheet. A sprite sheet is a series of animation frames all put together into one image. The separate frames need to have a very specific width and height so that they create a seamless motion. If one part of the sprite sheet is not correct it will make the whole animation look out of place or completely wrong. Here is an example sprite sheet that we will use for this demonstration:

- This animation is six frames long and each frame is 128 x 82 pixels. We know from the previous section that we can use a source rectangle to grab a certain part of an image. Therefore we can start by defining a source rectangle that encompasses the first frame of the animation only.

- Since we know the width, height, and location of the frame on the sprite sheet we can go ahead and hardcode these values into our source rectangle. First we must load the new
animate.bmpfile. Place it into your assets folder and alter the loading code.SDL_Surface* pTempSurface = SDL_LoadBMP("assets/animate.bmp"); - This will now load our new sprite sheet BMP. We can remove the
SDL_QueryTexturefunction as we are now defining our own sizes. Alter the size of the source rectangle to only get the first frame of the sheet.m_sourceRectangle.w = 128; m_sourceRectangle.h = 82;
- We will leave the
xandyposition of both rectangles at0so that we draw the image from the top-left corner and also copy it to the top-left corner of the renderer. We will also leave the dimensions of the destination rectangle as we want it to remain the same as the source rectangle. Pass both rectangles into theSDL_RenderCopyfunction:SDL_RenderCopy(m_pRenderer, m_pTexture, &m_sourceRectangle, &m_destinationRectangle);
Now when we build we will have the first frame of the animation.
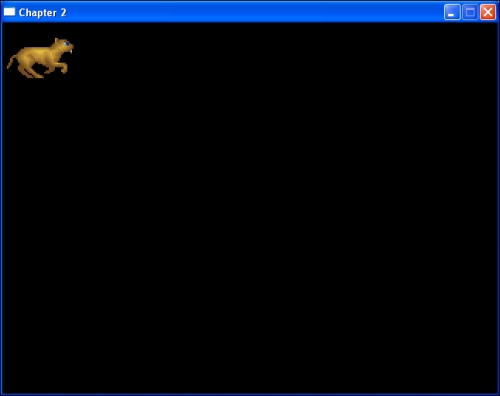
- Now that we have the first frame, we can move on to animating the sprite sheet. Each frame has the exact same dimensions. This is extremely important for this sheet to animate correctly. All we want to do is move the location of the source rectangle, not its dimensions.

- Every time we want to move another frame, we simply move the location of the source rectangle and copy it to the renderer. To do this we will use our
updatefunction.void Game::update() { m_sourceRectangle.x = 128 * int(((SDL_GetTicks() / 100) % 6)); } - Here we have used
SDL_GetTicks()to find out the amount of milliseconds since SDL was initialized. We then divide this by the amount of time (in ms) we want between frames and then use the modulo operator to keep it in range of the amount of frames we have in our animation. This code will (every 100 milliseconds) shift thexvalue of our source rectangle by 128 pixels (the width of a frame), multiplied by the current frame we want, giving us the correct position. Build the project and you should see the animation displayed.
In most games, players, enemies, and so on, will move in more than one direction. To allow the sprite to face in the direction it is moving we will have to flip our sprite sheet. We could of course create a new row in our sprite sheet with the frames flipped, but this would use more memory, which we do not want. SDL 2.0 has another render function that allows us to pass in the way we want our image to be flipped or rotated. The function we will use is SDL_RenderCopyEx. This function takes the same parameters as SDL_RenderCopy but also takes specific parameters for rotation and flipping. The fourth parameter is the angle we want the image to be displayed with parameter five being the center point we want for the rotation. The final parameter is an enumerated type called SDL_RendererFlip.
The following table shows the available values for the SDL_RendererFlip enumerated type:
|
SDL_RendererFlip value |
Purpose |
|---|---|
|
No flipping | |
|
Flip the texture horizontally | |
|
Flip the texture vertically |
We can use this parameter to flip our image. Here is the revised render function:
void Game::render()
{
  SDL_RenderClear(m_pRenderer);

  SDL_RenderCopyEx(m_pRenderer, m_pTexture,
  &m_sourceRectangle, &m_destinationRectangle,
  0, 0, SDL_FLIP_HORIZONTAL); // pass in the horizontal flip

  SDL_RenderPresent(m_pRenderer);
}
Build the project and you will see that the image has been flipped and is now facing to the left. Our characters and enemies will also have frames specifically for animations such as attack and jump. These can be added to different rows of the sprite sheet and the source rectangle's y value is incremented accordingly. (We will cover this in more detail when we create our game objects.)