
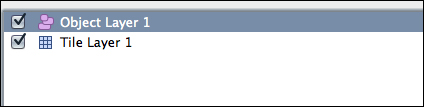
The final topic we will cover in this chapter is loading objects from our Tiled map file. This is extremely useful and takes the guesswork out of placing objects within a level. Open up the Tiled application and we can create our first Object Layer by clicking Layer | Add Object Layer. This will create a new layer called Object Layer 1 as shown in the following screenshot:
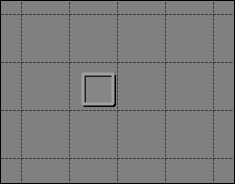
We can create objects and assign any values and properties we want on these layers. First we will create a rectangle. Press R and click anywhere on your tile map, you will see a small square appear, as shown in the following screenshot:
Right-click on this square and click on Object Properties…. This will bring up the object properties dialog as shown in the following screenshot:
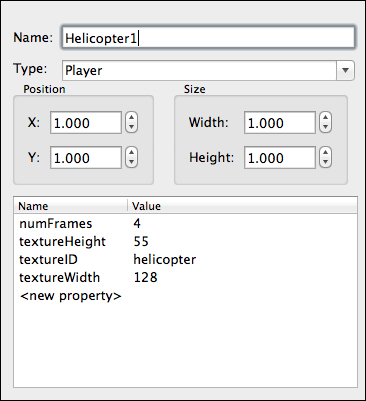
Here, we can set the values we want our object to have, just like our previous state XML files. Go ahead and fill in the dialog box as shown in the preceding screenshot. The positions and sizes of this dialog box deal in tiles, not pixels, so x = 1 is actually x = tile width and so on. Saving this map will add our new object layer to the map file:
<objectgroup name="Object Layer 1" width="60" height="15">
  <object name="Helicopter1" type="Player" x="32" y="32" width="32 height="32">
    <properties>
      <property name="numFrames" value="4"/>
      <property name="textureHeight" value="55"/>
      <property name="textureID" value="helicopter"/>
      <property name="textureWidth" value="128"/>
    </properties>
  </object>
</objectgroup>
We are also going to use another property list to load in our textures for this map. Map | Map Properties will bring up the map properties dialog as shown in the following screenshot:
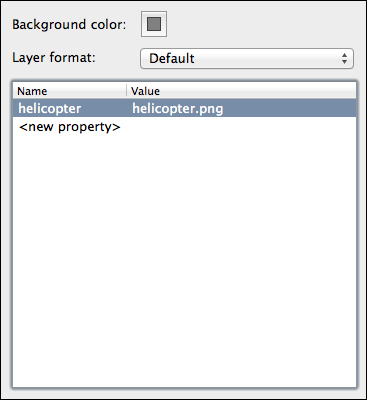
Here we can add the textures we need for this map's objects. The saved file will now have an additional property list for us to parse through:
<properties>
  <property name="helicopter" value="helicopter.png"/>
</properties>
Back in our project we will now create a new layer type called ObjectLayer. Create ObjectLayer.h and we can add the following code:
class ObjectLayer : public Layer
{
  public:
  virtual void update();
  virtual void render();

  std::vector<GameObject*>* getGameObjects()
  {
    return &m_gameObjects;
  }

  private:

  std::vector<GameObject*> m_gameObjects;
};
We will also define these functions in ObjectLayer.cpp:
void ObjectLayer::update()
{
  for(int i = 0; i < m_gameObjects.size(); i++)
  {
    m_gameObjects[i]->update();
  }

}
void ObjectLayer::render()
{
  for(int i = 0; i < m_gameObjects.size(); i++)
  {
    m_gameObjects[i]->draw();
  }
}
Our ObjectLayer class is very simple. It only needs to draw and update the objects for that layer. Now let's parse our ObjectLayer. We will need two new functions in the LevelParser class:
void parseTextures(TiXmlElement* pTextureRoot);

void parseObjectLayer(TiXmlElement* pObjectElement,std::vector<Layer*> *pLayers);
The
parseLevel function must now include these functions and pass in the correct XML node:
// we must parse the textures needed for this level, which have been added to properties
for(TiXmlElement* e = pProperties->FirstChildElement(); e != NULL;e = e->NextSiblingElement())
{
  if(e->Value() == std::string("property"))
  {
  parseTextures(e);
  }
}
We will alter the way we were searching for tile layers to also search for object layers:
// parse any object layers
for(TiXmlElement* e = pRoot->FirstChildElement(); e != NULL; e = e->NextSiblingElement())
{
  if(e->Value() == std::string("objectgroup") || e->Value() == std::string("layer"))
  {
    if(e->FirstChildElement()->Value() == std::string("object"))
    {
      parseObjectLayer(e, pLevel->getLayers());
    }
    else if(e->FirstChildElement()->Value() == std::string("data"))
    {
      parseTileLayer(e, pLevel->getLayers(), pLevel->getTilesets());
    }
  }
}
Now we need to define the new functions; parseTextures is a very small and simple function:
void LevelParser::parseTextures(TiXmlElement* pTextureRoot)
{
  TheTextureManager::Instance()->load(pTextureRoot->Attribute("value"), pTextureRoot->Attribute("name"), TheGame::Instance()->getRenderer());
}
It gets the texture values and adds them to the TextureManager. The parseObjects function is a little longer but not particularly complicated:
void LevelParser::parseObjectLayer(TiXmlElement* pObjectElement, std::vector<Layer*> *pLayers)
{
    // create an object layer
  ObjectLayer* pObjectLayer = new ObjectLayer();

  std::cout << pObjectElement->FirstChildElement()->Value();

  for(TiXmlElement* e = pObjectElement->FirstChildElement(); e != NULL; e = e->NextSiblingElement())
    {
      std::cout << e->Value();
      if(e->Value() == std::string("object"))
      {
        int x, y, width, height, numFrames, callbackID, animSpeed;
        std::string textureID;

        // get the initial node values type, x and y
        e->Attribute("x", &x);
        e->Attribute("y", &y);
        GameObject* pGameObject = TheGameObjectFactory::Instance()->create(e->Attribute("type"));

        // get the property values
        for(TiXmlElement* properties = e->FirstChildElement(); properties != NULL; properties = properties->NextSiblingElement())
        {
          if(properties->Value() == std::string("properties"))
          {
            for(TiXmlElement* property = properties->FirstChildElement(); property != NULL; property = property->NextSiblingElement())
            {
              if(property->Value() == std::string("property"))
              {
                if(property->Attribute("name") == std::string("numFrames"))
                  {
                    property->Attribute("value", &numFrames);
                  }
                else if(property->Attribute("name") == std::string("textureHeight"))
                {
                  property->Attribute("value", &height);
                }
                else if(property->Attribute("name") == std::string("textureID"))
                {
                  textureID = property->Attribute("value");
                }
                else if(property->Attribute("name") == std::string("textureWidth"))
                {
                  property->Attribute("value", &width);
                }
                else if(property->Attribute("name") == std::string("callbackID"))
                {
                  property->Attribute("value", &callbackID);
                }
                else if(e->Attribute("name") == std::string("animSpeed"))
                {
                  property->Attribute("value", &animSpeed);
                }
              }
            }
          }
        }
        pGameObject->load(newLoaderParams(x, y, width, height, textureID, numFrames, callbackID, animSpeed));
      pObjectLayer->getGameObjects()->push_back(pGameObject);
    }
  }

  pLayers->push_back(pObjectLayer);
}
We load the object in a very similar way to the state parser, yet this time we must check for the name of the property rather than grabbing the attribute directly:
if(property->Attribute("name") == std::string("numFrames"))
{
  property->Attribute("value", &numFrames);
}
We can then create the object just like the state parser:
pGameObject->load(new LoaderParams(x,y,width,height,textureID,numFrames,callbackID, animSpeed));
And add it to this layer's game object array:
pObjectLayer->getGameObjects()->push_back(pGameObject);
Once we have loaded all of the objects for this layer, we can push it into our Level layer array:
pLayers->push_back(pObjectLayer);
Run the game and you will see our helicopter in the PlayState again.
