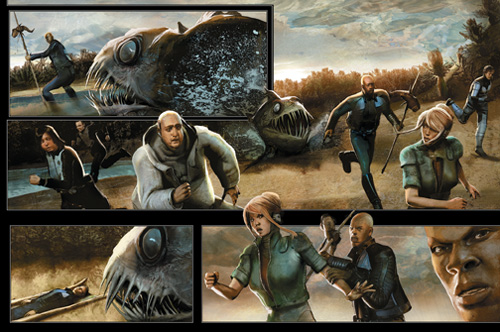
Second page from graphic novel Anomaly.
I am an award-winning comic book creator, writer, illustrator, fine artist, and educator. I cocreated the popular Witchblade comic, which was also a television show. I also created numerous other comic titles from Captain Wonder to Hellcop, which is currently in development for a feature film. I am finishing a 375-page graphic novel titled Anomaly. Besides owning and creating tutorials for www.digitalarttutorials.com, I am a teacher of comic art at Minneapolis College of Art and Design and a contributor to 3D World and ImagineFX magazine. My work is in the permanent collection at the Smithsonian Museum.

Okay, here is how to make a fully textured mesh. This technique can be used for anything from details on costumes to full-blown sets (see Figure 7.1).
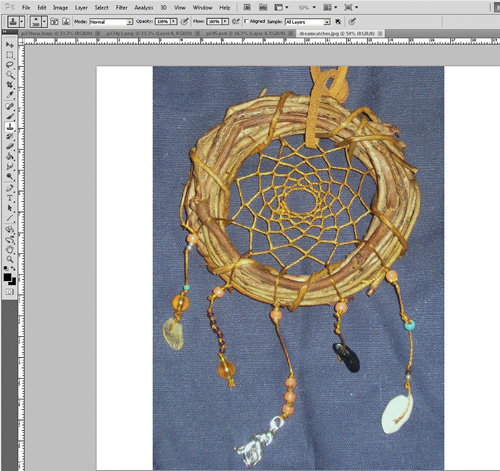
I start with the image I want to have created as a 3D mesh.
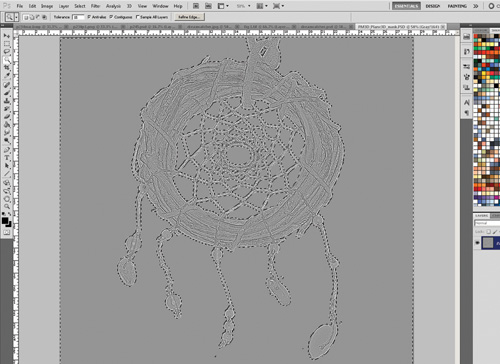
I chose this image because it would probably take a few hours to create a model of it using conventional methods—and more time to texture it. I begin in Photoshop with the image. I isolate what I want to make into the mesh, as if I’m making a silhouette of the shape, using a selection tool. Once the dream catcher is selected, I copy it to another layer (see Figure 7.2).
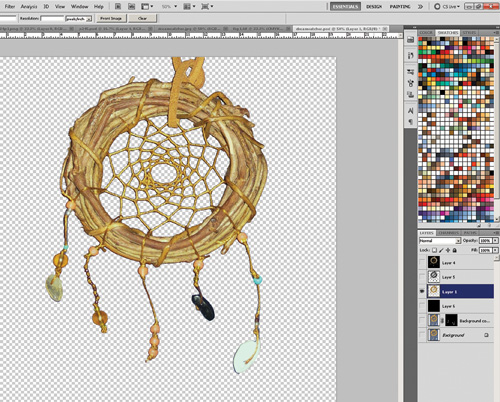
I load that new layer as a selection (by holding the Ctrl/Cmd key on that layer in the Layer menu) and make a new layer above the copied layer. I fill the silhouette selection of the dream catcher with black and begin to rough in its shape with a soft white brush. What I am making here is a rough “height map” of the dream catcher.
This does not need to be too detailed, because my texture map will drive most of the detail on this model anyway. I just want the general shape here. I drop the opacity of this layer to about 60% so I can see the detail of the original image below. I save this out as a JPG and name it (see Figure 7.3).
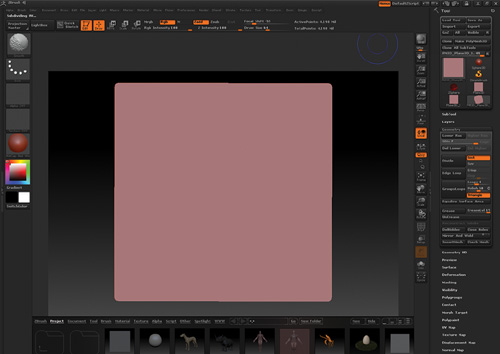
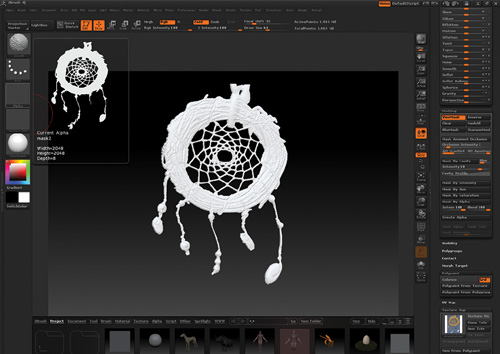
Moving to ZBrush, I start by loading Plane 3D. I make sure I am in Edit mode and then convert the image to a polymesh by using the Make PolyMesh3d button. Next, I use the ZPlugin UV Master to give the image UV coordinates. Then I subdivide the polymeshed Plane 3D. High res is necessary here to drive the detail in the mesh I will be creating; I go to about 4 million polys (see Figure 7.4).
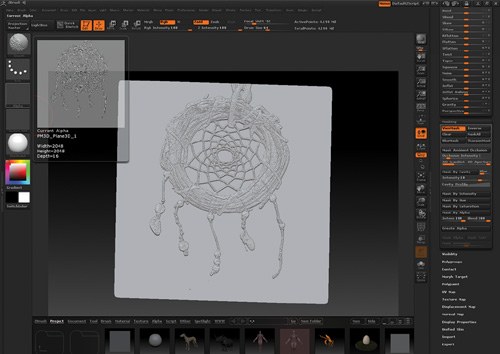
I load the JPG I made of the “height map” version of the dream catcher as an alpha. Now in the Masking menu, I choose Mask by Alpha. The alpha appears on the plane. I go to Deformation, turn the plane a bit so I can see the effect, and increase the Inflat setting. My dream catcher shape pokes out of the plane (see Figure 7.5).
I clear the mask and create a new one, but first I make my UV map 4096 so I have high detail to work from. I choose Mask by Cavity and then Create Alpha (see Figure 7.6).
I export that alpha. In Photoshop, it’s easy to select all the areas where the mesh isn’t and fill them with black, and fill the areas where the mesh is with white (see Figure 7.7).
I save and load this image into ZBrush as a new alpha. In the Masking menu, I use Mask by Alpha, Inverse. Next, in the Visibility menu, I select HidePt. I’m left with just my dream catcher (see Figure 7.8). It’s one sided, so I’m going to fix it.
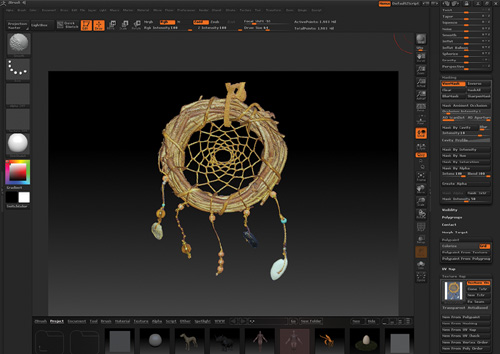
I need to delete the geometry I have hidden. Under the Geometry menu, use Del Lower and then Del Hidden to get rid of the hidden mesh. In that same panel, I use Mirror and Weld set to Z only. My dream catcher now has a backside. Next, I import the original color texture, go to the Texture Map menu, and turn Texture On (see Figure 7.9).
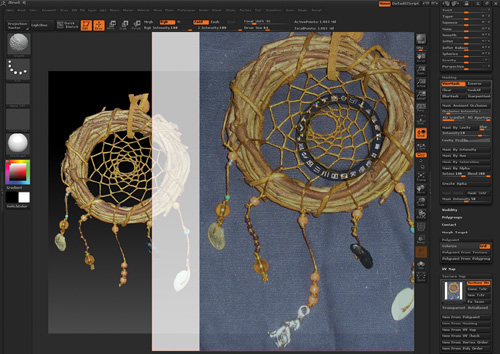
I select my imported map, and bingo bongo I have a fully textured model in a matter of minutes. I clean up any jagged geometry using Deformation/Polish. I recommend loading the original color file in SpotLight to clean up any textures (see Figure 7.10).


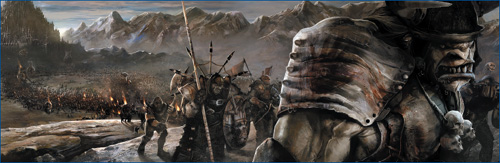
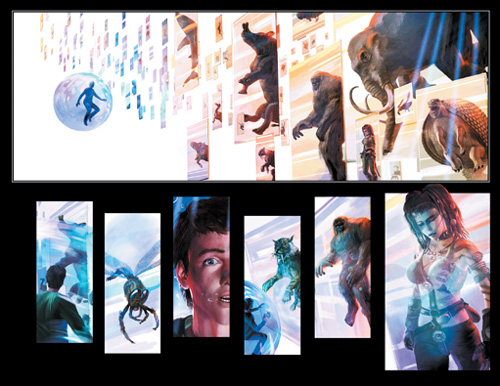
From Anomaly graphic novel. Some texture, prop, morph on each character is done in ZBrush.
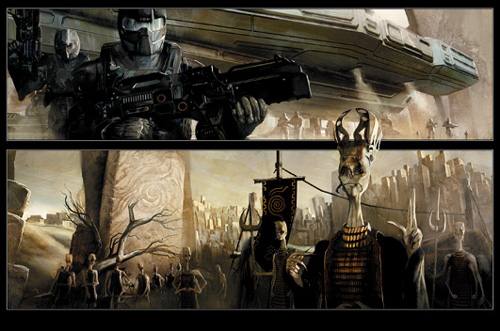
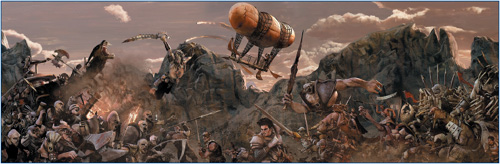
Page from Anomaly graphic novel. Terrain, morphs, and texturing done in ZBrush.

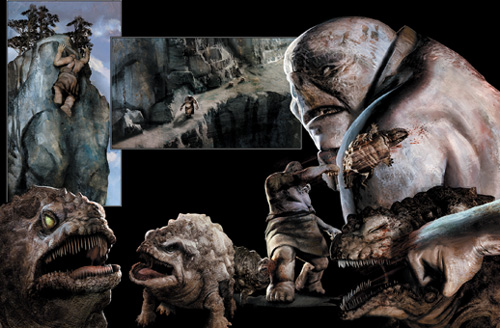
Examples of characters customized in ZBrush for use in Poser.