Chapter 2. Mariano Steiner

Mariano Steiner

“The Little Monk.”

About the Artist

I was born in São Paulo, Brazil, in 1987. I’ve been a big fan of comics, movies, and games ever since I can remember. Nowadays, as a computer graphics (CG) artist, I see my dreams coming true. I’m passionate about anatomy, which for me is the main goal of any good work. So I always update my studies to grow as an artist. I’m currently employed as a freelance character artist at Tribbo Post, one of the biggest post-production companies in Brazil.

Artist’s Statement

Artist’s Statement

A good piece of art is made up of inspiration and devotion. God is in the details! I try to push my limits in every work, improving and testing new techniques and focusing on a good result.

Techniques

Technique 1: The Little Monk

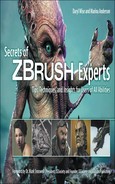
  1. The base mesh creation is a simple and quick process. I care more about the structure and the polygon amount on each part than the shape. I need to think where I’m going to include more details and add more ZSpheres to it. I’m careful with weird polygons caused by ZSpheres approximation, because they can ruin the model’s symmetry on the next steps. See Figure 2.1.

    Base mesh creation.

    Figure 2.1. Base mesh creation.

  2. I block the main shape of my character. I don’t care about the polygon count. Using the Move Brush or the new Move Brushes, I reshape my ZSpheres base mesh until I’m satisfied. In this step, I decide all the proportions—cartoony or realistic, human or creature. See Figure 2.2.

    Shaping.

    Figure 2.2. Shaping.

  3. I block the body anatomy, sculpting the basic muscles and bone shapes. I do it in a simple form, with not too many polygons, just to visualize the body type of my character. The head and the hands have a lot more polygons than the body, because they are the most detailed parts of the model, and the rest will be covered by cloth.

    I block the whole body anatomy, even if most of it will be covered by cloth. This way the clothing process becomes a lot easier. I never go too far with this initial anatomy blocking because after the pose I have to resculpt almost everything. In this case, I keep the T-posed model until the fourth subdivision level. See Figures 2.3 and 2.4.

    Anatomy blocking part 1.

    Figure 2.3. Anatomy blocking part 1.

    Anatomy blocking part 2.

    Figure 2.4. Anatomy blocking part 2.

  4. I pose my models with Transpose or Transpose Master. This method is not perfect, so I resculpt most of the model here to adjust body distortions, muscle tensions, and so on. I don’t go 100% on the anatomy blocking because I don’t want to waste work. I search for pose references so I can keep the model’s pose realistically balanced. See Figure 2.5.

    Posing.

    Figure 2.5. Posing.

  5. The last thing I pose in this character is the hands, because I depend on the staff position to do it. I first put the staff in the correct position, and then I adjust the arms and hands to actually grab it, also using Transpose.

    After that I refine all the muscles and body shapes to fit the pose and its muscular tension. See Figure 2.6.

    Hands posing.

    Figure 2.6. Hands posing.

  6. For this character, I create everything with ZBrush. The Mesh Extraction is a useful tool for this. I just have to mask where I want to put cloth and extract it, like the pants area (mask the legs) or the bracelets fabric (mask the forearm). After extracting the mesh, I inflate it a little bit and then sculpt it as a piece of fabric. I also use ZSpheres to model the “ropes” on the bracelets; then I flatten the surface to look like a fabric strip. With the same process, I create his black belt, the “kimono” suit, and his shoes. For sculpting cloth folds, I mostly use the Standard Brush with LazyMouse and the Slash 2 Brush. See Figures 2.7 and 2.8.

    Clothing part 1.

    Figure 2.7. Clothing part 1.

    Clothing part 2.

    Figure 2.8. Clothing part 2.

  7. In this step, I review all the SubTools one by one and refine them, adding more folds on the cloth. With the Rope Brush, I detail the fabric strips on the forearm and legs; force the face expression a bit; add wrinkles, veins, and hair; and work more on the hands. I basically finish the model. I also add a bit of color on the SubTools to make them different from each other. See Figures 2.9 and 2.10.

    Refining part 1.

    Figure 2.9. Refining part 1.

    Refining part 2.

    Figure 2.10. Refining part 2.

  8. To finish the model, I search for a few alphas on the Internet. Using the ShadowBox feature, I use the alpha in the Mask Brush to create my kung-fu support. No big deal. I just adjust the ShadowBox resolution to 800 instead of 128 (default) so I can get more details from my alpha and make it a polygon mesh. I also add a fabric texture to my cloth using a simple fabric alpha and add the same kung-fu symbol from the pedestal to his back.

    In this case, my initial idea was to do a clay render. But now I start to test some render settings and want to put some color paint on the body. So with the Clay Brush (without Zadd), Color Spray, and a simple dots alpha, I Polypaint the model to create some color variations and make the model look a little bit more real. I don’t use ZAppLink or SpotLight to paint with photos because my intention is to create a cartoonish look.

    I start to render, with the settings shown in Figure 2.13. For the composing, I take three renders in each position, and each render has a different light direction (main light, fill light, and backlight). After that, I compose the renders in Photoshop, make a few color corrections, and it’s done! See Figures 2.11, 2.12, and 2.13.

    Alpha detailing work and finishing part 1.

    Figure 2.11. Alpha detailing work and finishing part 1.

    Alpha detailing work and finishing part 2.

    Figure 2.12. Alpha detailing work and finishing part 2.

    Render settings.

    Figure 2.13. Render settings.

Insights

Q&A

Q1:

What motivates you or your work?

I’ve always been a big fan of movies and games, so that is my main focus. Being motivated by those is not easy with so many great artists working in this industry. I have to always push my studies further to be able to compete with artists from Pixar, Digital Domain, or Blizzard, for example. This objective is what motivates me to keep moving on.

Q2:

Who/what are your inspirations and influences?

I take my inspiration from life! Is there anything more inspiring than that? I pay so much attention to everything—from people to buildings—and this gives me many ideas for work. And, of course, I check out forums and artist websites every day.

Q3:

Which artists do you admire? Why?

They are too many to say. But if I have to say a name, it would be Stan Lee. His work made me what I am today. Stan Lee is one of those amazing guys who can lay down on the bed and think, “Man, I really did something cool with my life.”

Q4:

When did you start using ZBrush?

I started using ZBrush about a year after I started with 3D. I remember being in college when I played with ZBrush for the first time. It was an amazing experience.

Q5:

Describe your creative process and workflow. How does ZBrush fit?

ZBrush is part of my day. I use it in pretty much every step of my work, from the concept of a character straight through to finalizing.

Q6:

What’s your workflow? Do you create from scratch with ZSpheres or import geometry from another package to work on/develop?

That depends. I do have a few base meshes I use to work, but I usually start from scratch with ZSpheres. It’s so much easier to set shapes and proportions with it, and after that I can always retopologize my mesh the way I need it. This way I can free my mind of any restrictions and just let the art flow.

Q7:

What are some of your favorite ZBrush features? How do you use them?

ZSpheres is the most amazing feature for me. It breaks all the software’s technical limitations and lets me sketch anything in just a few minutes.

Q8:

Are you using ShadowBox to make base meshes? How?

Yes, I am! But I use it mostly for inorganic modeling. It’s an amazing tool that makes it a lot easier to model hard edge pieces.

Q9:

Are you using any of the new brushes in ZBrush, like the Move Elastic Brush?

Yes! Move Elastic and Move Topological are amazing brushes, as are all the Deco Brushes.

Q10:

What are you using for hard edge modeling?

I’m working a lot with the hPolish and mPolish Brushes because they made hard edge sculpting a lot easier. I also use the new Clip Brushes.

Q11:

What tools do you most often use to texture? SpotLight? Image Plane? Projection Master? ZAppLink?

I most often use Image Plane and ZAppLink. They are my favorites because they rarely crash or give me any kind of trouble, and they are functional.

Q12:

How do you use Best Preview Render (BPR) for rendering out your final image?

I use it a lot now. I like to present my models in clay, so I use a simple setup with strong shadows values, no shadow blur, and two or three different light positions.

Q13:

Are you using Photoshop overlay for your final image?

Always! I render many passes with ZBrush or any other application so I have better control of my final image. I do main light, backlight, occlusion, depth, lighting, and shadows. With Photoshop, I can blend them and do a fine final composition.

Q14:

ZBrush lighting is much more complex than ever before. Do you use any of the advanced features? Which ones? Do you use material generating?

I don’t take things too far with ZBrush rendering. I do use it for better presentation of my models, but I don’t take up too much time setting up a material or a light. I use BPR (Best Preview Render) with shadows, occlusion, and depth. I sometimes use it with SSS (Subsurface scattering), too. But when I have to do something complex, I still prefer to take everything to 3dsMax and render it there.

Q15:

Which ZPlugs do you use? How?

I use Image Plane a lot at work. Many times I have concept art and I have to make the 3D model exactly like that, so I load the concept as an image plane and sculpt my 3D character with ZSpheres or some base mesh. I also find that the SubTool Master to import new objects, merge, or mirror SubTools is useful. Decimation Master is also part of my day for clay render models approval or simply to reduce the polygon count for retopology.

Q16:

What are your favorite new sculpting tools?

ShadowBox is an amazing tool that saves a lot of time with inorganic models. The new brushes also make things easier and faster. ZBrush is a complete sculpting software; all that new stuff from now on is just a plus!

Q17:

How do you use customizable tools in ZBrush?

I don’t customize anything on ZBrush. I do everything with what I have, and I think that is enough. The only thing I like to customize is the shaders.

Q18:

What are some of your time-saving tips when using ZBrush on a work project or for personal artwork?

I always work with the lowest subdivision level possible! I do as much as I can in each subdivision level before dividing the model again. This makes the file faster to work with and with the fewest crash chances. Also, I go for shapes before details. I try to improve the whole shape of a character or an object before I take it to the next level. This way I avoid filling the model with fine details in case I have to go back to redo the shape for any reason and lose all the fine detail work I did.

Q19:

What advice do you have for artists working with ZBrush?

Anatomy! Always study the anatomy of things, both human and nonhuman. This is what being a great ZBrush artist is all about. The rest is practice and inspiration.

Q20:

What do you wish someone had told you when you started with ZBrush?

“Forget your characters and creatures for some time, and focus on anatomy studies.”

Knowing that can save a lot of time.

Q21:

How has ZBrush helped you successfully define your own graphic/artistic style?

It has helped with everything, definitely. ZBrush is my main modeling application, and it’s where I find myself doing what I like, in the way that I like.

Resources

Links

Gallery

Gallery

“ShowTime strip.”

Gallery

“ShowTime_Front.”

Gallery

“The Yellowstone Beast.”

Gallery

“Indian Bust.”

Gallery

“Marvel’s Rhino.”

Gallery

“Comiccon_Agent Zero.”

Gallery

“Spawn.”

Gallery

“The Villager_Sample.”

Gallery

“Thor.”

Gallery

“The Mercenary_Front.”

..................Content has been hidden....................

You can't read the all page of ebook, please click here login for view all page.
Reset
3.144.255.55