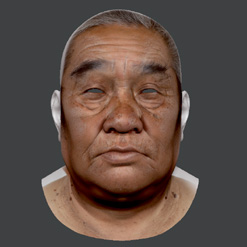
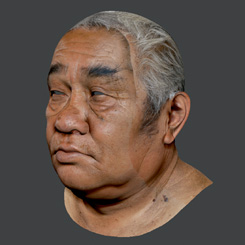
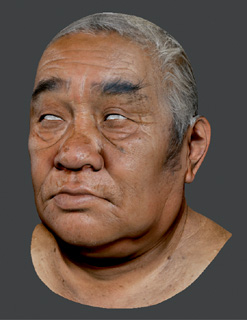
Chapter 3. Christian Fischer

Christian Fischer

“Survivor.”

About the Artist

I have been a character artist working at Crytek in Frankfurt, Germany, for more than two years. Before that, I worked and lived in Hamburg, Germany, where I was born. I have fun modeling humans realistically and testing new 3D tools and workflows. In my spare time, I work on improving my 3D skills, spend time with my girlfriend, and participate in sports.

Artist’s Statement

Artist’s Statement

For my work, I try to get as many references as possible. I appreciate valuable feedback from people who know what they are doing. Luckily, I have some great colleagues at work who give me honest feedback. That’s the key to getting better.

Techniques

Technique 1: SpotLight

In ZBrush 4, Pixologic introduced a new Texturing tool called SpotLight.

In this technique, I show a way to texture a head using photo references with the help of some of its features.

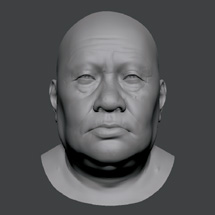
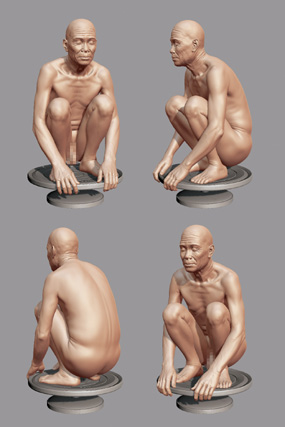
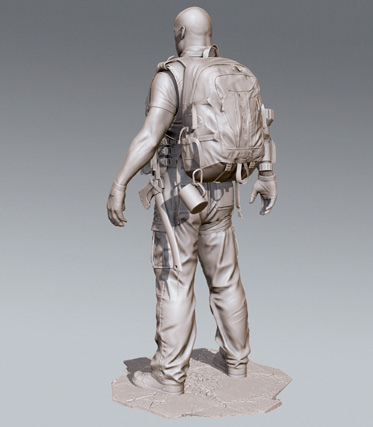
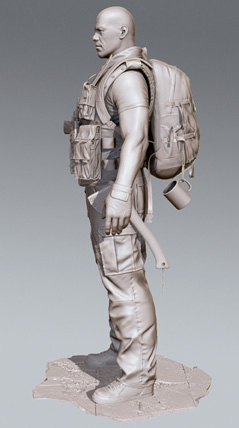
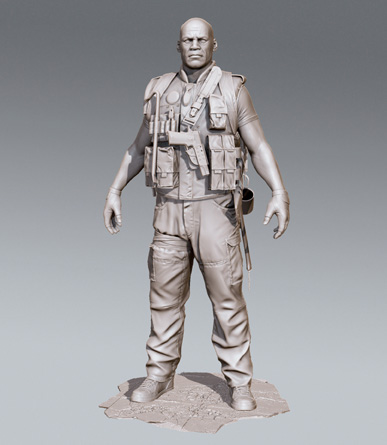
  1. I load my mesh. It doesn’t have to have UV mapping because I will use Polypaint, which stores the color information directly in the polygons of the mesh. To work best, I make sure that I have enough polygons for getting all the information from the texture into the Polypainted head. In my case, the head has around 2 million polygons (see Figure 3.1).

    Head ready for texturing.

    Figure 3.1. Head ready for texturing.

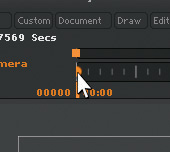
  2. In the top menu, I go to Movie, TimeLine, Show to activate the TimeLine in the interface. I rotate my mesh to the front view and set a key by clicking in the TimeLine (see Figure 3.2).

    TimeLine key for the front view.

    Figure 3.2. TimeLine key for the front view.

  3. I repeat step 2 by rotating the mesh to the side view and clicking in the TimeLine again (see Figure 3.3).

    TimeLine key for the side view.

    Figure 3.3. TimeLine key for the side view.

    Tip

    It works best for me not to subdivide my mesh too quickly. I always try to get the most out of my mesh before subdividing. That way I’m focusing on the bigger shapes before going into details.

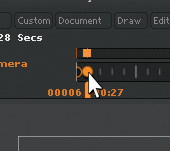
  4. Now I can toggle between the different views by using the left and right arrow keys on the keyboard. In this case, I only project the textures from a front and a side view.

    Tip

    Storing these views is useful because later in the texturing process, you can check the texturing result from all angles and then switch back to the view that matches the actual projection image. You can create as many keys for different views as you need.

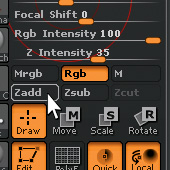
  5. To be able to paint on the mesh, I activate Colorize under Tool, Polypaint. I select the Standard Brush and make sure that RGB is turned on while Zadd and Zsub are turned off (see Figure 3.4).

    Brush settings for Polypainting.

    Figure 3.4. Brush settings for Polypainting.

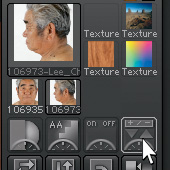
  6. I import the photos I want to use for texturing by going to Texture, Import and selecting all the textures I need. After importing, I select the photo from the front and click the right button with the + and − symbol on it (see Figure 3.5).

    Send the image to SpotLight.

    Figure 3.5. Send the image to SpotLight.

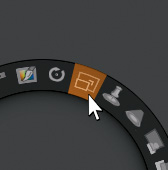
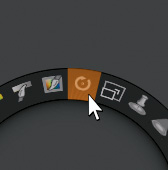
  7. The image is now active in SpotLight, and a dial contains different tools to manipulate the image in various ways (see Figure 3.6).

    SpotLight dial with various tools.

    Figure 3.6. SpotLight dial with various tools.

  8. I switch to my stored front view using the arrow keys and try to match the image as close to the mesh as possible by scaling and rotating it. The Scale Image button is shown in Figure 3.7, and the Rotate Image button is shown in Figure 3.8.

    Scale Image button.

    Figure 3.7. Scale Image button.

    Rotate Image button.

    Figure 3.8. Rotate Image button.

  9. I click on the icon and drag left and right. To better see if the texture matches the mesh, I change the Opacity of the photo by clicking and dragging the corresponding button (see Figure 3.9).

    Opacity button.

    Figure 3.9. Opacity button.

    Another way to make the texture match the mesh is by using the Nudge Brush. By using this brush, I directly deform the texture (see Figure 3.10).

    Nudge button.

    Figure 3.10. Nudge button.

    Tip

    For moving the actual SpotLight dial and changing the pivot for scaling and rotating, you can click and drag the orange circle in the middle of the dial.

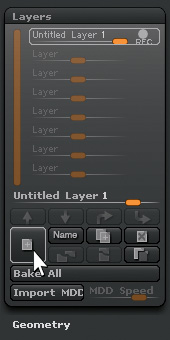
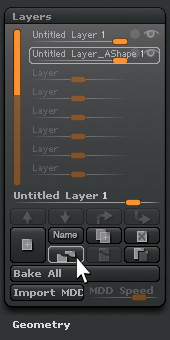
  10. I prefer to match texture and model by deforming the mesh to the texture. For the deformations as well as the Polypaint, I create a new layer under Tool, Layers (see Figure 3.11).

    New layer for sculpting and painting.

    Figure 3.11. New layer for sculpting and painting.

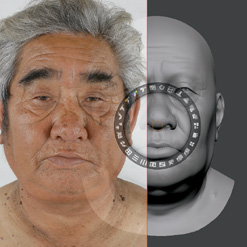
  11. I use the Move Brush to match the model to the texture. As soon as I’ve matched everything, I use the Opacity button to dial down the intensity of the image and press the Z button to hide the SpotLight dial. Now I can paint the texture on the model using the Standard Brush. To check the result, I press Shift+Z to temporarily deactivate SpotLight (see Figure 3.12).

    Result after applying front projection.

    Figure 3.12. Result after applying front projection.

  12. I save the actual SpotLight by going to File, Save SpotLight. This is useful for projecting the texture again at a later point because all texture changes and positions are saved within this file.

  13. Because I want to get rid of the mesh deformations I did with the Move Brush, I go to the Layers menu, deactivate Record mode by clicking the REC button, and click the Split Layer button (see Figure 3.13).

    Split layer into two distinct layers for shape and Polypaint.

    Figure 3.13. Split layer into two distinct layers for shape and Polypaint.

  14. I disable the second layer ending with Shape by clicking the Eye button right next to it. The mesh looks correct again, and the texture still fits.

  15. For the side view projection, I repeat steps 5 to 10 with the photo from the side and by using the corresponding stored side view. I also make sure that X Symmetry is switched on to texture both sides of the head simultaneously. I don’t care if I paint over the texture I painted from the front because I will erase parts from the side view projection later. Now I have four layers in the Layers menu, of which the two “shape” layers are disabled.

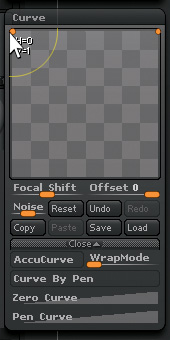
  16. I go to the Brush menu, Curve and modify the curve for the Standard Brush as shown. This is important for getting a clean line when erasing color from the side view projection (see Figure 3.14).

    Modified brush curve.

    Figure 3.14. Modified brush curve.

  17. I start erasing color from the side projection by activating Record mode for the layer and holding down the Alt button while painting away areas in the front of the face (see Figure 3.15).

    Result after applying side projection.

    Figure 3.15. Result after applying side projection.

  18. To get rid of the seam, I create another layer, switch back to the stored side view, and activate SpotLight. By lowering the RGB intensity of the Standard Brush to around 15, I paint away those seams and then save my image by clicking on File, Save As (see Figure 3.16).

    Final image.

    Figure 3.16. Final image.

    Tip

    By saving the file instead of the tool, you have your timeline views stored in case you want to use the textures later.

Insights

Q&A

Q1:

What motivates you or your work?

What motivates me most is the work of my colleagues. Seeing people ambitious about their work constantly pushes me to give my best. Also, I frequently check different online communities to see what people around the world create. If I see some great sculptures or drawings by other people, it gives me a boost.

Q2:

Who/what are your inspirations and influences?

I almost exclusively model humans, so reality is my biggest inspiration. It is hard, for example, to make a human face look realistic because people immediately notice anything that is off. I try to get as many references as possible, not only photos but sculpts by other artists I admire and who do their job well.

I also have a big reference folder full of images by classical sculptors. Those old masters were so unbelievably good without all the technology we have today.

Q3:

What is your workflow?

I often create a simple base mesh in Autodesk Softimage and try to move over to ZBrush as quickly as possible. But this is probably because I’m still so used to creating my base meshes in Softimage. With all the new Mesh Creation tools in ZBrush, I am starting to use ZBrush more to create my base meshes. Because I have to retopologize the high poly models later anyway, I try to spend as little time as possible creating them.

Q4:

What are some of your favorite ZBrush features? How do you use them?

My favorite feature is masking because it is so intuitive and integrated. If I want to quickly open a mouth, all I have to do is switch to Transpose mode and use auto masking by pressing Ctrl and dragging onto the mesh to mask the upper lip. Then I can use either the Transpose tools or the Move Brush to modify the lower part of the mouth. Also, I find the auto smooth function of Ctrl-clicking on the mesh or inverting the mask by Ctrl-clicking off the mesh to be very intuitive. Another masking-related feature I frequently use is Mask by Intensity, found under Tool, Masking.

If I have a textured face and want to add pores and small details from the texture, I use the Masking submenu to create a mask based on the texture map applied to the mesh. I can even sharpen the mask and then either use the brushes to sculpt in details where needed or just use Inflat under Tool, Deformation to create irregularities in the skin based on the texture.

Q5:

Which ZPlugs do you use? How?

The ZPlugs I use most often are Decimation Master for reducing the number of polygons while preserving all the shapes and SubTool Master. SubTool Master is great not only for giving the character a final pose but also for making changes on multiple SubTools at the same time without having to merge them.

Q6:

What are your favorite sculpting tools?

When it comes to brushes, my favorite one is definitely the Clay Buildup Brush, which is new in ZBrush 4. I also love the different Smoothing Brushes. If I want to smooth out bumps while trying to keep the overall shape, the Smooth Directional Brush is awesome. It is really worth testing all the Smoothing Brushes because some work better in certain occasions than others. There is an alternate Smooth Brush accomplished by holding down the Shift key, clicking on the mesh, and then releasing the Shift key before moving the brush to smooth out the surface.

Q7:

How do you use customizable tools in ZBrush?

It is great to be able to completely customize the interface to optimize my workflow. I update my interface with tools I use most often and that aren’t mapped to hot keys.

I also have a custom menu where I place some frequently used tools that otherwise would be in some submenu spread around the interface.

I have this custom menu mapped to a hot key so that it pops up directly under my mouse when I need it. Macros are another great way to automate almost any task. All those possibilities of modifying ZBrush to my own needs makes it user friendly.

Q8:

How has ZBrush helped you successfully define your own graphic/artistic style?

Before I used ZBrush, I was concentrating too much on the edgeflow since the wireframe of an object is what you see most of the time. With ZBrush, I focus more on the shapes and then do the topology when the design is finished.

ZBrush even allows me to create a face from a simple box and then later deal with the edgeflow, which is a great advantage.

Resources

Links

Gallery

Gallery

“Bruce.”

Gallery

“Eddie.”

Gallery

“Head Studies.”

Gallery

“Minyin.”

Gallery

“Survivor-Back View.”

Gallery

“Survivor-Side View.”

..................Content has been hidden....................

You can't read the all page of ebook, please click here login for view all page.
Reset
3.129.23.181