
Putting It Together
Your final task in this chapter is to write a program that casts rays at a sphere and draws the picture to a canvas. Any ray that hits the sphere should result in a colored pixel (red, for example), and any miss should be drawn in black. The result will be a silhouette of the sphere—not three-dimensional, but definitely round!
Here are a few hints to help you along. Stop reading at any time if you feel like you’ve got a handle on the solution!
Hint #1
Think as if you’re trying to cast the shadow of your object onto some wall behind it, as in the following figure.

You cast each ray from some starting point toward some point on the wall that corresponds to a position on your canvas. If the ray intersects the sphere, a shadow is cast, which you’ll mark with a colored pixel.
Hint #2
Figure out how far your ray’s origin is from the sphere. Also, decide where your wall will be. Moving the ray origin closer to the sphere will make the sphere in the drawing larger. Moving it farther away will make the sphere smaller. Moving the wall will do similarly. For the sake of a place to start, try these values:
| | # start the ray at z = -5 |
| | ray_origin ← point(0, 0, -5) |
| | |
| | # put the wall at z = 10 |
| | wall_z ← 10 |
Then decide how large your wall needs to be. Because you’re using unit spheres, the maximum y value for the sphere is going to be 1. With that, you can extrapolate between the ray origin and the wall to see how large the wall should be, as shown in the figure.
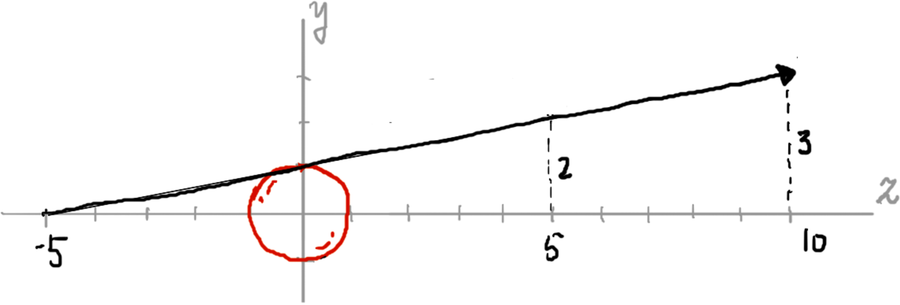
So, with the wall at z = 10, it needs to be at least 6 units across in order to capture the sphere’s entire shadow. Give yourself a bit of margin, and call it 7. (Just assume the wall is a square.)
| | wall_size ← 7.0 |
Hint #3
Decide how large you want your canvas to be (in pixels). A canvas 100 pixels on a side is probably good for starting with. (Larger images will take exponentially longer to render.)
| | canvas_pixels ← 100 |
Once you know how many pixels fit along each side of the wall, you can divide the wall size by the number of pixels to get the size of a single pixel (in world space units).
| | pixel_size ← wall_size / canvas_pixels |
Then, assume you’re looking directly at the center of the sphere. Half of the wall will be to the left of that, and half to the right. Compute that size.
| | half ← wall_size / 2 |
Since the wall is centered around the origin (because the sphere is at the origin), this means that this half variable describes the minimum and maximum x and y coordinates of your wall.
Hint #4
Now that you know the origin of every ray, the dimensions of your canvas, and the size of your wall, you can compute, cast, and intersect rays. The following is one possible way to approach it, in pseudocode:
| | canvas ← canvas(canvas_pixels, canvas_pixels) |
| | color ← color(1, 0, 0) # red |
| | shape ← sphere() |
| | |
| | # for each row of pixels in the canvas |
| | for y ← 0 to canvas_pixels - 1 |
| | |
| » | # compute the world y coordinate (top = +half, bottom = -half) |
| » | world_y ← half - pixel_size * y |
| | |
| | # for each pixel in the row |
| | for x ← 0 to canvas_pixels - 1 |
| | |
| | # compute the world x coordinate (left = -half, right = half) |
| | world_x ← -half + pixel_size * x |
| | |
| | # describe the point on the wall that the ray will target |
| | position ← point(world_x, world_y, wall_z) |
| | |
| | r ← ray(ray_origin, normalize(position - ray_origin)) |
| | xs ← intersect(shape, r) |
| | |
| | if hit(xs) is defined |
| | write_pixel(canvas, x, y, color) |
| | end if |
| | |
| | end for |
| | |
| | end for |
Don’t forget to save the canvas to a file at the end!
Note the highlighted lines, where the world y coordinate is calculated. In world space, the y coordinate increases as you go up, and decreases as you go down. But on the canvas, the top is at y = 0, and y increases as you go down. Thus, to render the circle correctly, you have to flip the y coordinate, which is accomplished by subtracting it from its maximum value (the top of the wall, or half).
If all goes well, you should see a circle, much like the following:
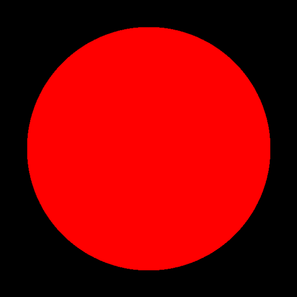
Congratulations! This is the silhouette of your sphere, drawn to your canvas one ray at a time.
Once you’ve got that much working, try deforming the sphere with some transformations and see what happens. Here are some ideas:
| | # shrink it along the y axis |
| | shape.transform ← scaling(1, 0.5, 1) |
| | |
| | # shrink it along the x axis |
| | shape.transform ← scaling(0.5, 1, 1) |
| | |
| | # shrink it, and rotate it! |
| | shape.transform ← rotation_z(pi / 4) * scaling(0.5, 1, 1) |
| | |
| | # shrink it, and skew it! |
| | shape.transform ← shearing(1, 0, 0, 0, 0, 0) * scaling(0.5, 1, 1) |
When you’ve had about as much fun as you can stand with this, move on. A silhouette is effective, but you can do much better. In the next chapter, you’ll add lighting and shading to make that sphere look three-dimensional!