
Using Bounding Boxes to Optimize Large Scenes
One of the most computationally expensive things a ray tracer does is find the intersections between a ray and an object, and what makes things even worse is that it has to do this repeatedly for every pixel. To render a scene of ten objects to a small 200×200 canvas, your ray tracer must perform at least 400,000 intersection tests, plus however many additional intersections are needed to generate shadows, reflections, and refraction. Adding insult to injury, the majority of those rays won’t even come close to most of the objects in a typical scene.
What a waste, right? If only you could test just the objects that were reasonably close to any given ray…
The good news is that there are a variety of different techniques for teaching your ray tracer how to do this. They’re all a bit beyond the scope of this book, but let’s take a quick look at one of the least complicated: bounding boxes.
If that term seems familiar, it’s probably because you saw it used back in Chapter 12, Cubes, when the cubes were called axis-aligned bounding boxes (AABB). The idea behind this optimization is to use these cubes, or bounding boxes, to contain a group of other objects. Then, when intersecting the group with a ray, you first test the ray against the bounding box. If the ray misses, testing anything inside the box is pointless, because it would have to miss them as well.
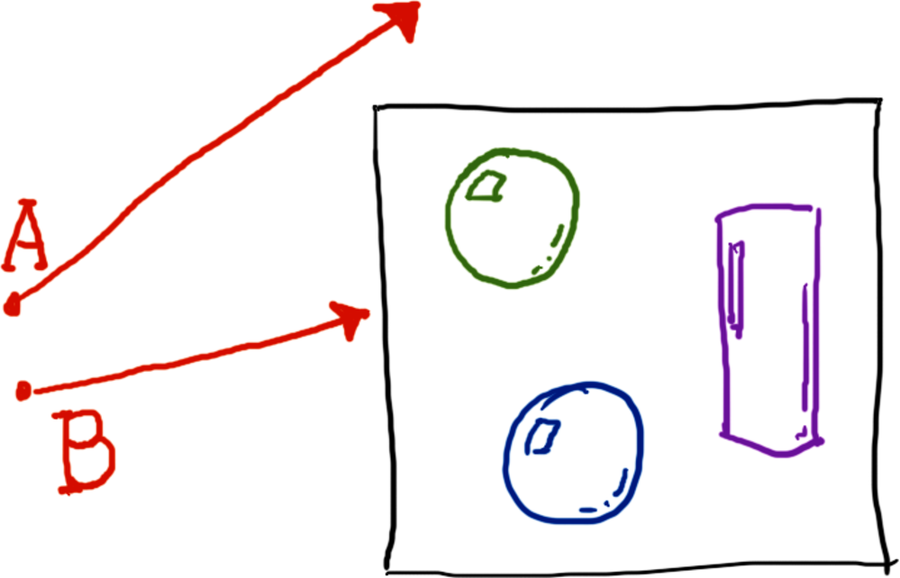
The following figure illustrates this with a bounding box that contains three shapes. Since ray A misses the bounding box, there’s no need to see if it intersects any of the shapes inside it. However, because ray B does intersect the box, you’d need to try that ray against the shapes it contains.
I won’t walk you through this one, but give it a try anyway. Although implementing this definitely has some fiddly bits, I have faith in you! Here’s a basic outline of what you’ll need to do:
- Create a Bounds structure that describes the minimum and maximum extents (coordinates) for the box. You can store these as two points, where one has the minimum x, y, and z coordinates and the other has the maximum.
- Make a bounds(shape) function that returns the bounds for the given shape, in object space. This is the untransformed bounds, so a sphere (for example) will always extend from -1 to 1 in x, y, and z. Some shapes (planes, untruncated cylinders, and others) will extend to infinity in one or more dimensions, so make sure you can handle that case.
- Make a bounds(group) function that converts the bounds of all the group’s children into “group space,” and then combines them into a single bounding box. This is one of those fiddly bits! Here are two tips, though. First, to convert a point from object space to its parent space, multiply the point by the object’s transformation matrix. Second, when transforming an entire bounding box, first transform all eight of the cube’s corners, and then find a single bounding box that fits them all. If you can’t quite see why you’d need to transform all eight points, imagine rotating the box 45° around any axis, and then figure out what the new axis-aligned bounding box ought to look like.
- Reuse your cube’s intersection algorithm, changing it so that it accepts AABBs at arbitrary (but still axis-aligned) locations. To do this, you’ll need to change the -1 and the 1 in the check_axis function to be, respectively, the minimum and maximum value for the axis being tested. So, if you are testing the z axis, and the bounding box goes from z=-5 to z=3, you’d use -5 instead of -1, and 3 instead of 1.
- Make the local_intersect(group, ray) function first test the ray against the group’s bounding box. Only if the ray intersects the bounding box should the ray be tested against the children.
As an example of how much this technique can help, I put together the following scene of more than 280 marbles with glass and metallic textures:
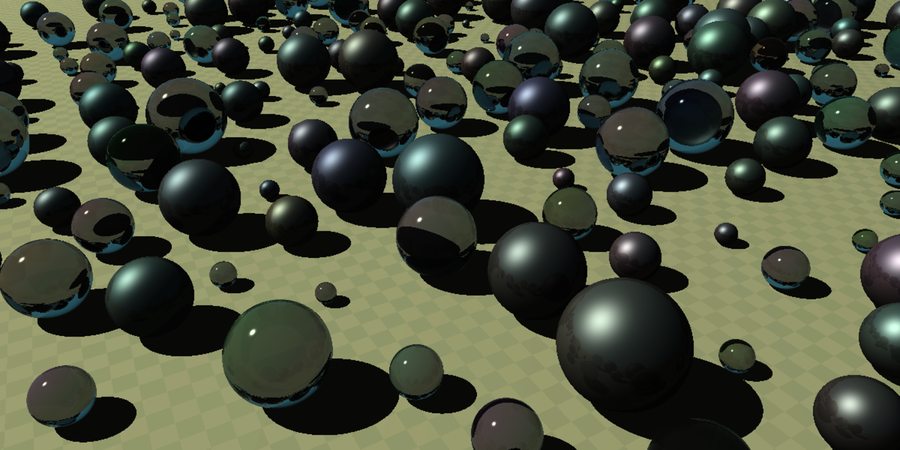
Rendered without bounding boxes at 1200x600 pixels, this image required more than 1.8 billion intersection tests, of which only 1% ever actually hit anything. By using sixteen bounding boxes, though, and arranging them in a 4x4 grid so that all the marbles were covered, the render required only a bit more than 180 million intersection tests, with 10% hitting something. That’s an order of magnitude better, just by adding bounding boxes!
Here’s the caveat, though: as with any optimization, it’s not a guaranteed win in every situation. Not every scene will benefit from bounding boxes, and some might even see worse performance (depending on the objects in the scene and how you organize them).
Still, it’s a useful optimization, and it will earn its keep in the next chapter, Chapter 15, Triangles. Give it a shot!