Dynamic balance
determines how the rig will
behave when rotated
A rig that is in dynamic balance will pap flat. The central post will remain vertical, regardless of the speed of rotation.
What's the big deal about dynamic balance? A rig out of dynamic balance will wobble, drift, or precess around the vertical axis as it is panned.
Imagine filming an actor. Headroom is carefully set, but the sled is not in dynamic balance. At some point, the actor moves, and a pan is required. Instead of the sled's balance maintaining headroom and helping you get the shot, the rig tilts up, down, or rolls off level.
To counteract the rig's unwanted behavior, you must add extra force at the gimbal. You can no longer rely on the sweetness of the bearings to make the pan. You must constantly intercede to keep everything level and moving, and this is not very good for precision operating.
How do we achieve dynamic balance?
We bring a rig into dynamic balance by first balancing statically as described earlier. A long drop time (3 to 4 seconds) is helpful for achieving a fine state of static balance. The monitor is where we want it, and the sled is at the right length.
A rig in dynamic balance is balanced statically so that it hangs perfectly upright, but a perfectly statically balanced rig may not be in dynamic balance. How can we tell the difference? Only by spin balancing.
myth-buster
“you can statically balance a Steadicam into dynamic balance.”
Not so! Static balance does not guarantee the Steadicam will pan flat.
Spin balancing the steadicam
After everything is balanced so the central post is perfectly vertical, we give the rig a spin and watch how it behaves. We don't spin the rig very fast.
If the rig pans flat, we are in luck. But if the rig wobbles, it is out of dynamic balance, and our task is to discover the specific condition of static balance that also puts the rig in dynamic balance.
Thankfully, this is easy to do. We do not want to move the monitor — it's where we want it. Instead, we move the battery slightly in or out, and we move the camera in the opposite direction to rebalance the rig statically. But which direction should we move the battery?
While there are ways to figure this out by watching the sled spin, there are only two possible directions to move the battery and you always have a 50% chance of getting it right without thinking. So stop scratching your head and move the battery in or out a half inch or so. In or out; it's your choice. But make your decision quickly and be sure to remember which direction you moved the battery.
Now you can fine tune the static balance by moving the camera in the opposite direction. When all is perfect and level again, give the rig another spin.
Now make the judgment call. Is it better or worse? Close? If it's better but not perfect, move the battery about one-third the distance in the same direction. If worse, move the battery in the opposite direction beyond the first mark. Static balance and spin test again and again until it pans flat.
If we start the static balancing process with the camera c.g. about 3/4 inch behind the center post, we will always be close to dynamic balance. Three or four spin tests should get one very close to perfect dynamic balance.
Note: Extend the docking bracket so the rig wont hit the stand. Have an assistant hold the stand while you spin balance.
What if the battery won't go far enough?
You may find that you can't move the battery out far enough to dynamic balance the sled. If this is the case, you must either move the monitor in or add weight to the battery. If you can't move the battery in toward the post enough, you must move the monitor out or add weight to the monitor. The design of your sled may limit your options or force you to make alterations to get your sled into dynamic balance.
One key to quick dynamic balancing:
If the monitor e.g. is above the battery e.g., the camera e.g. will always be behind the centerline of the central post, usually about 3/4 inch.

How much time should you spend spin balancing?
Trimmed for the same headroom, the post with the tilt head remains vertical. Without a tilt head, dynamic balance is lost.
It depends, like everything else, on the shot, and a little bit on your equipment.
If there is going to be a whip pan, or simply a lot of pans, it's a good idea to get the rig into good dynamic balance.
If your sled doesn't have a tilt head, it's generally not productive to spend a lot of time getting the rig in perfect dynamic balance. When headroom is set by taking the rig out of perfect vertical trim — and thereby taking it out of dynamic balance — the rig will not pan flat.
The more you tilt the sled, the worse the panning will be.
If the sled has a tilt head, the nominal tilt for headroom can be set with the head. The post can remain vertical and the rig stays in dynamic balance, so it's really worth the time to get your sled into dynamic balance.
However, with any rig it's better to start close to dynamic balance and then trim a bit for headroom than it is to ignore dynamic balance altogether. The closer you are to dynamic balance to start, the better the rig behaves. Who knows, maybe the next shot has a whip pan or requires almost no trimming.
Get reasonably close to dynamic balance, and move on to some ether task.
Step by step: dynamic balance
- Extremely critical: all elements (camera, monitor, and battery/electronics) must be lined up on the same axis.
- To start, the rig must be in static balance, with a slow drop time of 3 or more seconds and the camera about 3/4 inch behind the center post.
- With the rig on the balancing stud, give it a spin. If the rig pans flat, you are in dynamic balance. If it doesn't, go to the next step.
- Move the battery in or out about 1/2 inch. Adjust the camera for static balance. Spin again.
- Is it worse? Then move the battery in the opposite direction, 1/2 inch from the original position. If it is better, move the battery 1/4 inch in the same direction Adjust the camera for static balance.
- Repeat these steps until the rig pans flat.
One way to think about dynamic balance
Take a big T-handle Allen wrench and spin it. Spin it with the handle horizontal, vertical, upside down, at any angle you want, and it always wants to spin on the axis of the shaft. Simple.
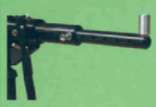
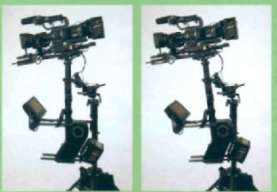
Early Steadicams were designed like the wrench: the monitor and battery were on the same plane, and the central post rose at 90° to that plane and at the common eg. of those elements. (See photo of Model I at right.) We always balanced the camera with its e.g. directly over the post, adding it like a second T-handle to our wrench model.
The first Steadicams panned nice and flat, just like an Allen wrench in our hands.
However, the monitor was not in a great place for viewing or flipping for low mode. Beginning with the Model II Steadicam, the monitor was raised up, and we developed a situation like the wrench angled up, but the Steadicam's central post is vertical.
When the Model II Steadicam was panned, the camera was content to pan flat, but the monitor and battery tried to rotate around an imaginary shaft at 90° to the plane and passing through the common e.g. of the monitor and battery. The result was an uncontrolled, squirmy gyration rather than a nice, flat pan. Almost unbelievably, Garrett and other pioneers learned to compensate quite well for this imbalance, even when making whip pans.
The trick we need to learn: As th monitor is raised, we need to adjust the battery and the camera so that the axis the Steadicam wants to pan on is coincident with the axis of the real post. If we achieve this condition, we are in dynamic balance, and the rig will pan flat.
This might sound difficult to achieve (and the math that describes it is a bit complex), but it's a fairly straightforward concept to grasp.
Here it is, without the math
Figure 1 shows a Steadicam like the Model I, with the monitor and battery on the same horizontal plane.
Figure 2 shows a “modern” Steadicam, with the monitor raised up a bit. This is the model we want to emulate, but we'll come back to it later.
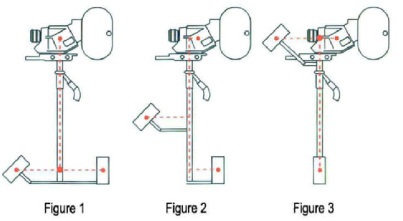
Figure 3 shows an absurd arrangement of pans, with the monitor all the way up, level with the camera — just like the Allen wrench upside down. Note that the battery must be moved directly in line with the post. The whole thing is just like Figure 1 upside down. and physics is only interested in the mass of a part, not its function. When thinking about dynamic balance, forget that it's a monitor, battery, or camera. It's just some masses rigidly connected in different arrangements.
What we can learn from these drawings is how to balance dynamically as the monitor is raised up toward the camera. As the monitor is raised, the camera must move to the rear and the battery must move toward the post.
We now know that if the monitor is raised, the camera e.g. will always be aft of the center post. From experience and from mathematical models, we've learned to start balancing a big Steadicam with the camera's e.g. about 3/4 inch behind the centerline of the post. It's somewhat less with smaller Steadicams, less if the camera is really heavy, and somewhat more if the is light Then we can spin balance the sled to quickly get into dynamic balance.
We also know that the more the monitor is raised (as a percentage of the total Steadicam length), the more the camera must move to the rear, and the more the battery must move closer to the post. This fact can help us when we are in dynamic balance and we change the length of the Steadicam — it gives us a clue whether to move the battery in or out to achieve dynamic balance. We move the battery farther in if we raise the monitor height, and we move the battery out if the monitor is lowered. Again, we must consider raising or lowering the monitor as a percentage of the total length of the Steadicam.
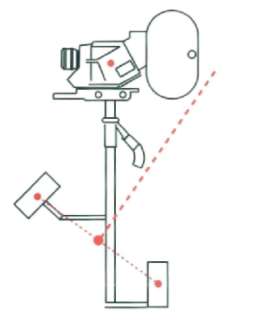
In Garrett's prototype with an optical viewfinder, the battery e.g. is directly under the camera eg.
It is also possible to use a dynamic balance computer program to find near perfect dynamic balance for any configuration, or to virtually manipulate your Steadicam and find out what happens when you move or add components, change cameras,etc.
Dynamic balance, another empirical method:
- Start with the camera e.g. directly over the center post!
- Balance with the battery. You know you are not in dynamic balance. But you know you must move the camera back and the battery in.
- Move the battery in by 1/4 inch or 1/2 inch increments, and balance with the camera until it pans flat.
And another- even quicker, but requires some measurements:
- Balance with the camera e.g. directly over the post. Measure the battery e.g. horizontal distance from the post.
- Measure how much (percentage wise) the monitor is raised, and move the battery in by that percentage. Rebalance with the camera. Dynamic balance! …or very close.
Some other dynamic balancing tips
Make some marks! After you balance your rig a few times, you will get a better idea of where the battery generally is for your normal setup. Find a way to remember or mark this position. Every setup is slightly different, and every added accessory or change of monitor position changes dynamic balance. A few marks can make your life easier.
Don't spin the rig very fast Dynamic forces grow with the square of the speed of rotation. Even at 120rpm, the dynamic forces are several orders of magnitude greater than the static forces on the rig. A fast spin test won't indicate how the rig will pan at regular panning speeds.
Also, there are specific speeds at which a fast panning rig that is out of dynamic balance will pan flat, but the rig will wobble at other speeds.
The camera weight is irrelevant to dynamic balance. This little fact great news for mentally overloaded operators. It means we can change lenses, focus motors, and/or add or subtract accessories to the camera with no consequence for dynamic balance. We just rebalance statically, and we are back in dynamic balance, ready to fly. A very detailed dynamic balance primer, with all the mathematics and formulas, as well as a Microsoft Excel spreadsheet with the dynamic balance program can be found on vww.steadkam.cam or www.steadicam.ops.com.
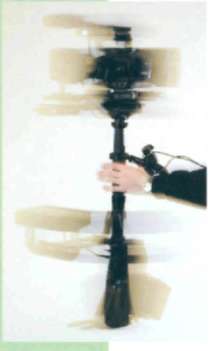
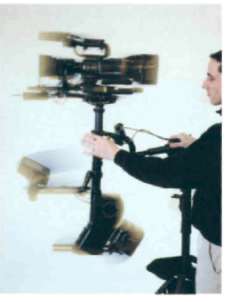
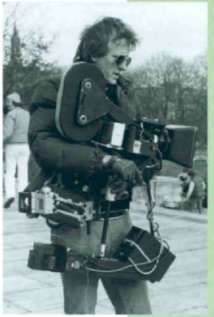
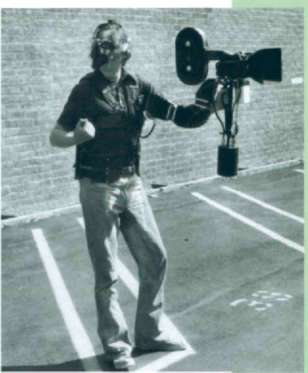
Don't stand like this (above) trying to balance the rig “no hands.” This posture is not how you'd operate, so you are not properly training your muscles. See below for the proper way to stand.

A word about efficiency
both on the set and learning to operate
A clear understanding of how the Steadicam works, combined with time saving procedures for balancing and adjusting the rig, will make your operating life easier.
Assembling and balancing the rig, putting on the vest, adjusting the arm, etc., are not creative tasks. They might appear amusing or mysterious to the uninformed, but they are routine tasks. Spend the time to learn how to do all these basic things quickly and efficiently, so you can have as much time as possible for the creative aspects of operating — which, of course, include the finer points of balancing for the shot.
It's really important to understand that each time you work with the rig, you are learning something. Whether it's muscle memory, or adjusting the rig, you learn. So don't do things or learn habits that are bad for your operating.
Don't swing the rig around, or make switches while standing still, or any number of crazy things you would never do for a shot.
Most Steadicams weigh a lot. Practice is limited. Have an exercise or two in mind before you pick up the rig. Wandering around the house (day after day), chasing the dog (more than a couple of times), might be fun, but you don't learn very much, very fast.