Inertial augmentation and balance
An operator can arrange the major components of the Steadicam to change the sled's inertial character. Expanding the sled increases angular inertia, and compressing the sled reduces angular inertia.
Moving the components around gives the rig a different feel — from slow and elegant to quick and light — similar to handheld shooting.
The most useful technique to change the sled's angular inertia is to extend or compress the central post and/or to place the monitor and battery closer or farther from the central post.
The other technique is to add mass to the sled. Heavy cameras and monitors make for slower and more stable rigs. A monitor that weighs 8 pounds has twice the inertia of a monitor that weighs 4 pounds in the same position. But adding weight is generally painful, and a lot of weight must change before there's a noticeable change in the rig's behavior.
The good news is that intertia increases
with the square law, so a small extension
of the rig adds a lot of inertia.
For instance, extending the monitor from the central post is easy to do, adds no weight to the rig, and the effect is dramatic. When we extend the monitor, we also extend the battery to preserve both static and dynamic balance, and the extended battery also increases inertia.
The downside to the “extend your components” technique is that the flexing of the rig increases by the cube law. A monitor twice as far from the post generates four times the inertia in pan, but it is also eight times more prone to vibration.
Long rigs also tend to hit more things, including the operator. Switches are hard to make with the battery fully extended.
Note: You should practice all the exercises with long rigs, short rigs, rigs with lots of pan inertia, and rigs with very little pan inertia.
Weighing the advantages
Each arrangement of parts is a compromise. We want a rig that is light enough to carry along, small enough to fit alongside us, yet also extended enough to reduce its angular response in the right axes and stiff enough not to vibrate. A tall order.
Above: This rig is extremely hard to tilt while easy to pan. It is out of inertial balance.
Below: Short post with monitor and battery all the way out is just the opposite.

Achieving inertial balance
Inertial balance is a term we use to describe the relative angular inertia in all three axes. Because of the design of the sled, the tilt axis is more inert than the roll axis. Generally, the least inert axis is pan.
Sometimes the inertial differences between these three axes can make operating difficult.
For instance, creating a very long rig by extending the central post (or using a superpost) creates a lot of additional inertia in tilt and roll, but it has no effect on the pan inertia. The relative difference between the axes has changed significantly, and the rig may feel very strange to operate — light and whippy in pan, but ponderous and slow in tilt and roll.
This condition may or may not be good for the shot, and it's up to the operator to use inertial balance well.
Extending the monitor and battery will increase the angular inertia in the pan axis, so that it is more in line with that of the tilt and roll axes. The rig may feel more normal -slow and ponderous in all three axes.
Why bother with inertial balance?
Many operators do not change the inertial balance of their sleds. Sometimes the sled's design does not provide enough extension to make a significant change in the sled's behavior. Even with rigs that do expand significantly, some operators are wedded to a particular “feel” and don't want to mess with what they are used to. Changing the monitor position also means that the operator must find dynamic balance all over again.
The sled's design limitations are tough to change, but the operators attitude should be a bit more malleable. You can take advantage of moving masses around to help you get the best balance for the shot (static, dynamic, and inertial) or you can work harder with less precision, but with a rig that you are used to.
If you can take a little time off the set to play with the various configurations possible with your rig, you will become more comfortable with altering your normal configuration.
Think of altering your rig's behavior as another line dance or another mode like low or long mode. A rig that feels different is just another tool in your repertoire that you can use if you want.
You can make marks for various presets, so you can change the rig's inertia and get it into static and dynamic balance quickly.
Remember: Camera weight has no effect on the placement of the ether components for dynamic balance, so the marks you create for the monitor and battery with your practice camera will work with any camera you fly.
Adding extra masses
You can attach additional weights or gyros to increase inertia and resist rotation. Additional weights also add momentum to the Steadicam as it rotates, and a Steadicam with extra weights feels just like a really big Steadicam. Gyros create an artificial inertia and arc quite different (see page 256)
Antlers™
A commercial version of added weights is called Antlers™. They have a no-tools and quick release design that allows the operator to quickly alter the orientation, distance, and mass to suit different shot requirements.
In essence, Antlers are just an extension of the basic Steadicam idea, to add masses to the camera at some distance to increase inertia.
The Steadicam's design places masses only on one side of the camera (below in high mode, above in low mode). This design allows the camera operator to hold the Steadicam close while moving about.
Antlers take advantage of another space that is often (but not always) available for adding masses: on top of the camera when in high mode. In low mode, the Antlers are typically added to the bottom of the sled.
The key to using additional masses like the Antlers is to use as little additional weight as possible for the maximum possible inertial effect. Because inertia increases as a weight gets farther and farther from the pivot by the square law, it's best to find a place as far as practically possible from the gimbal to position your weights.
In high mode, going up from the camera and then horizontally out (either side to side or fore and aft) is a good, efficient spot.

CIAO: Cheap inertial add-on
Make your own
Simple and inexpensive Antler-like devices can be made with a 3/4″ pipe about 36 inches long, a few clamps, a riser, and two dumbbell or diving weights. Attach the weights to the ends of the pipe. In high mode, use the riser and clamp the pipe about 4 to 12 inches above the camera. This position is generally out of the way of the operator, actors, and DP. Generally out of the way. Be cautious, it is easy to forget how wide your rig has become when the extra masses are mounted high, beyond your normal view.
The denser the weight, the smaller it can be, and the less effect the wind will have on it. Small balls of depleted uranium work great, but bronze is a cheaper and safer alternative.
Positioning the extra masses
If the masses are added sideways (weights extended beyond the right and left of the camera), the inertia is increased more in the roll axis than in the tilt axis by a factor of two or more. A sideways orientation tends to even out the inertial inequality between tilt and roll inherent in the design of the Steadicam, making it easier to operate and to correct the effects of wind hitting the rig.
Note: Adding masses ciose to the gimbal adds very little inertia for the additional weight.
Adding masses far from the gimbal adds lots of inertia relative to the weight, but all the issues of flexing and hitting things apply.
A normal rig, having more inertia in tilt than in roll, tends to be “squirrelly” when the wind hits it. A rig with masses oriented sideways is a lot less squirrelly and tends to move laterally rather than angularly when the wind hits it. The disturbance to the shot is minimized, especially if there aren't any objects in the near foreground.
Regardless of the orientation of the masses, the increase in pan inertia is the same. Some sample numbers: A normally configured Ultra sled (by itself) has about 420 lbs/in2 of pan inertia and a maximum of 1870 lbs/in2 with the monitor fully extended.

Using two 2 pound weights, you'll get another 1296 lbs/in2 of inertia in pan (4 lbs x 18 in x 18 in). Roll inertia — if the masses are oriented sideways — is increased by about 2900 lbs/in2! 4 lbs x [(18in x 18 in) + (20 in x 20 in.)]. We love the square law! More or less weight can be used, with greater or lesser effect.
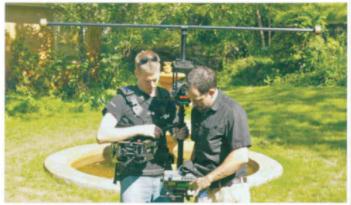
Sometimes it's better to orient the masses fore and aft, either to increase the tilt inertia or to avoid objects in the set. Many operators (like Amando Crespo, below) have added Antlers to the bottom of their rigs in high mode to add stiffness and to gain lens height.


For fun, I made a set of “Super Antlers” that were 6 feet long. The inertial increase with two 2 pound weights is 5184 lbs/in2 in pan and 6784lbs/in2 in roll! It's very resistant to angular change but hard to get through a doorway!
Sometimes even the regular Antlers get in the way of actors, lights, doorways, etc., and they cant be used in their best position. Everything is a compromise.


Pay attention when you are resting or walking back to “one.” It is easy to forget the Antlers are on your rig.