Negotiating tight spaces
First of all, what makes the space tight? If it's furniture, set dressing, or an actor, can it be moved? Moved a little? Moved while no one is watching? Sometimes the object that makes it hard for you to maneuver isn't going to show up on screen, and it can be removed or replaced by a grip. Other skills or personnel may be required to move an actor out of the way
What is it about you, the Steadicam, and the space that makes it tight? If you are shooting forward, usually the problem is where the arm meets the vest. If you are shooting to the side, usually the sled length is the limiting factor. You may have balanced the rig initially in a very expansive configuration, making it impractical for the small space. Understanding where the problem is makes solving the problem a whole lot easier.
Often the tightness lasts only for an instant, as, for instance, one goes through a doorway or a gap in a fence. An extreme extension of the rig, or pulling it very close to you, may work for just that moment. Combine this with a slight turn of the hips, and you are through the tight spot.
Critical to making this type of move work is to keep the focus on the subject very carefully, so the event of going through the space is minimized. Look at this moment in The Apostle as the camera slips through a gate in the baseball fence.
A big challenge of this shot was to get through the narrow gap in the fence without making a big deal of it and to keep Robert Duvall's drunk and agitated character in the frame — without ending up on his back. It's about the story, not the fence.
The Apostle 0:31:18
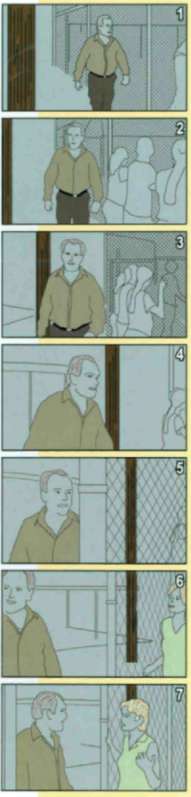
First three frames (well into the shot): As the camera tracks back to the gap in the fence, we isolate Robert Duvall from Farrah Fawcelt, then from the rest of the world. A careful pan left eliminates the fence, and he grows in one spot in the frame. What's he up to?
Frame four: I extended my arms and slipped backward through the narrow gap in the fence, giving the camera the most room to move and pan, as I was desperate to get Farrah back in the frame as soon as possible.
Frame five is the most awkward moment of the sequence: the camera passes through the fence and that big post jumps into frame. We kept Duvall in one area of the frame to lead the audience's eyes away from the fence post. At the same time, the space is set for Farrah to enter frame right as soon as possible.
Frame six. I'm watching the edges and looking off the monitor for Farrah. When is she going to enter the frame? Then Robert makes a surprise move to the left. We don't want to pan left and away from Farrah's entrance, so I pull back with my arms as much as possible, stretching the frame to the limit. But she's slowing down, delaying her entrance — yikes! — but we just hold them.
Frame seven: As the pair comes closer together, we creep in slightly, tentatively, leaving them some space around the edges, and leaving room for the entrance of a third character.
Obviously, we could have used different shots and cuts to get through the fence (perhaps even more cleanly), but Robert wanted this shot to be continuous for the sake of the acting. The shot starts earlier and actually continued on until the film ran out (4 minutes every time), but we used a few cut-ins to get the best performances and emphasize the knockout blow with the baseball bat.
It's fun to watch the rest of the sequence and note how the camera changes its voice. It starts as a knowing, sympathetic storyteller, but after the baseball bat hit it becomes a shocked and reactionary documentary camera caught in the action. At the end, the camera shifts again to a knowing but distant, detached observer as the Apostle realizes what he has done.
Micro-rehearse squeezing through the tight spot without disturbing the image. Commit the move to muscle memory.
Be very careful as the lens gets near foreground objects. If you are going through a door and you need to angle the gimbal to move the arm out of the way, do it as far as you can ahead of the door. This will minimize the disturbance to the image at the point where it is most noticeable on screen.
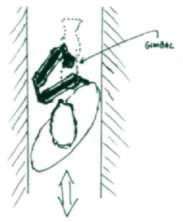
Where to look at the critical moment

Jerry watches the camera magazine clear the doorframe.
Maintain the flow of movement through tight spaces, both of the sled and of your body. If you are shooting to the side, and you've shrunk the rig down to fit through a door, don't look from the matte box to the battery and back and forth to see if you have clearance. Concentrate on placing the matte box at a specific, rehearsed distance from the door frame. Trust that if you place it correctly the ballery will also clear the door This technique will get you throush the door much more cleanly, with fewer bumps. scrapes, and blrtwn takes.
How can you and the rig get smaller?
It often helps to push the arm across your chest toward the sled. The sled stays in the same place, but the angle the gimbal takes to the arm is changed (perpendicular to your chest). The position is a bit uncomfortable, but the technique pulls the upper arm section out in front of you. This makes you and the Steadicam less wide as you walk forward or backward. Pushing the sled out in front of you has a similar effect. It also helps to place the rig off-center in the door frame if the shot permits this camera position.

Practice, practice, practice.
Play with the various possible camera positions and watch what happens to the arm as you move around. Do the line dances in some of these constrained conditions, or add a tight squeeze section to a line dance.
Tip: As soon as you are through the light space, return the rig and arm to norma operating positions.
If you are going sideways through the tight space, or operating in Don Juan, pushing the arm across your chest is exactly the wrong technique. Instead, you want to pull the arm in the other direction and flatten the angle of the gimbal to the arm. Everything then shinnies up fore and aft — perfect for side tracking through a narrow space, with your body flat toward the camera, traveling parallel to the lens.

Back mounted vests
The extra hardware on the back and sides of back mounted vests make negotiating many tight spaces a lot more difficult. Also, the way the arm attaches to the vest holds the arm in a slightly different relationship to the body than a standard vest.

If you have a back mounted vest, it helps to take a good look at what makes your vest both wide and deep, and then you can figure out how to make yourself as thin as possible in different circumstances.
Take a look at the operator wearing both front and back mounted vests.
Hard back, back mount vest

Traditional hard front vest

With a traditional back mounted vest, turning your hips has no real slimming effect. As one part disappears, another appears — and the width is the same.
The Garrett Brown version of the back mounted vest removes the armature and attaches the socket block to the front in the traditional position. Although the vest is a bit wider on the hips than a traditional front mounted vest, the classic slimming techniques still work.
Hard back, front mount vest
We know several operators who love the back mounted vest and who also carry a second. front mounted vest in their kits for working in very tight spaces. Otherwise, their old front mounted vests don't get used all that much.
Socket blocks
Overhead view of a dual mount version of a back mounted vest The socket block on a back mounted vest is in a very different position and orientation from the socket block on a traditional vest.
The second mount of the dual mount vest retums the arm and socket block close to their ideal position, and, by eliminating the extra armature, reduces the weight and size of the vest.
Limited space between lens ans actor

Sometimes the space itself is not overly tight, but the need to get the lens far from the actor as he passes or comes abreast of the camera makes things tight. For instance, if you need to back into a corner to let the actor pass by, remember to put the camera into the corner, not your body. This will maximize the distance between the lens and the actor, minimize focus shifts, and slow down the pan. The move will generally have a more pleasant and natural effect on the screen.
Another thing to remember, both on sets with moveable walls and on real locations, is that nobody can see what is behind the camera. What might be a close pass by in a narrow hallway can be made much more natural and appealing by backing into an open doorway behind the camera. Your friends the grips can open or close the door as necessary.
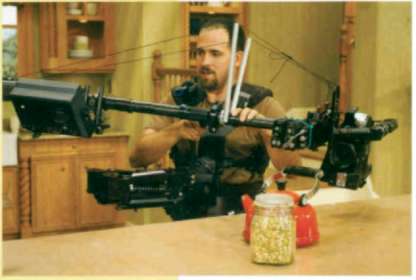
The smallest rig possible
More drastic measures are called for if you need to squeeze through a long narrow space. One technique is to fold the arm back on itself and operate with the rig in front of you. To avoid hitting the battery with your legs, the sled must be far from your body, and you must really lean back to stay in balance. There is very little room for error here, so it's a good thing to practice at home. I've used this technique several times on moving buses and trains with much success.
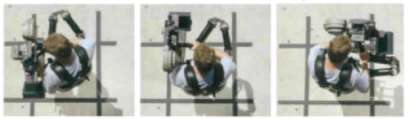
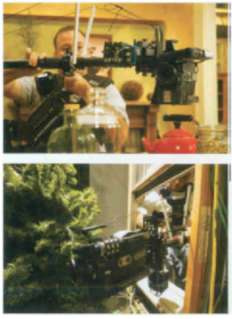
Another way to squeeze through
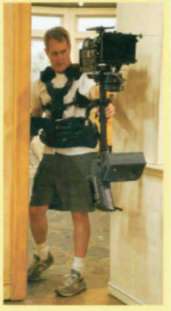
The two pictures show the operator getting pretty thin, and there's good control over the framing.

But you can squeeze even thinner!!
Once I was asked if I could go between the studs in a wall under construction — at a pretty fast pace! The space between the studs was the standard 14.5 inches (37cm). I was shooting forward, so the rig could easily get through the space, but what about the arm and then me?
The slip though the stud wall technique depends on the narrowest spot only being a wall and not a long corridor. It's son of like a high jumper going over the crossbar — not everything has to be thin at one instant, just each part must be thin as it passes though the wall. Operating one-handed, I pushed the sled through the opening, and then twisting, got the arm and then my body through the studs. The action, of course, had to be specifically arranged to be in front of the lens as I went through the studs. It wasn't the prettiest of shots, but it worked, and I was young.
Riding through narrow spaces
If there is a way to do this sort of shot off of a little dolly, go for it, and fold the arm back on itself (see drawing on the previous page). Using this technique, I survived an entire sequence on a nasty, tight, and very steep stairwell in the movie Sudden Death.
The Rickshaw was invented for the movie Two Bits. Robin Beurki was the operator, and the DP wanted him to precede an actor running at high speed through a very narrow alley. Robin concluded that if a grip could pull a two-wheeled contraption through the space, then the Steadicam — in low mode — could follow. What might have been a nightmare became an easy shot for the operator. More importantly, everyone could go a lot faster, and the sequence looked much better. With the Rickshaw, you can be pulled really fast through the tightest space, and all you have to worry about is the framing.

A word of caution:A narrow Rickshaw is easy to turn over in a high speed turn. If you are going to it goingaround corners, slow way, way down or widen the wheelbase.
Tilt head helps to place the camera
If you have a tilt head, you can angle your sled and the lens to make it easier to walk down a narrow aisle. If the director wants the lens along the floor in extreme low mode, this may be the only way to get the shot without a dolly. It's a great technique for working in buses, airplanes, and the like, where dollies can't fit.
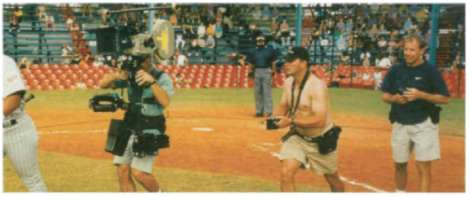
NFL Films promo
Here, the sled was configured as long as possible in low mode, with the tilt head aimed down. The bottom of the camera is parallel to the ground, and the central post leans back, so the lens can get between the legs of the center and see both the ball and the linebacker.
The next few seconds were fun. The ball is hiked to the quarterback and he drops back for a pass where he is tackled by the linebacker. The camera has to keep the ball, the quarterback, and the linebacker in frame the whole time, accelerating sharply backward and panning right — very tough to do with a long post held at an angle, and in the mud.


You can also the tilt head to get over and under things. If you tilt the camera up, and balance the sled so the camera hangs in front of you, you can get a great push in on someone sitting at a desk or table.
Vertically tight spaces
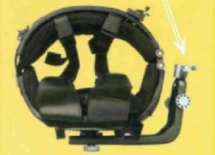
If it's your body and the arm that are hitting things in tight spaces, try using the Buddycam (see page 237). It works especially well if you are in high mode because the grip can duck under the lens if necessary.
Another good use of the Buddycam is negotiating vertically tight spaces. Sometimes you can shrink the rig vertically to fit through a tight space — such as through a low doorway or into the backseat of a car — but there's no way for the operator to bend or follow. Again, a couple of grips and the Buddycam may make an impossible shot easy. It's also possible for grips to pass off the Buddycam from one to another, making some really interesting moves.
Keep the focus so the story, not on your problem
Take a look at the loft shot in In Dreams, and think about how the camera move did not emphasize the low wooden beam as it passed underneath.

In Dreams 1:27:49
During the pan left (frame one), the camera booms lower, so the beam in frame two is higher and less blocking.
One key to the success of this shot is similar to the shot in The Apostle, keeping the viewer focused on the subject. The camera is driving toward Annette the whole time, her head in one spot in frame.
As I passed under the beam, I briefly took my eyes off the monitor and watched the top of the matte box clear the beam.
In addition to making the camera follow the right path, I had to do what I normally hate to do — walk with bent knees.
We've also seen some young operators go down on their knees and then walk on their knees to be low and stay low! Yikes, that is painful to think about. But it's also easy to squat down onto a little box with skateboard wheels on it, and get pushed around by a grip. Remember, of course, to shorten the vest so that it doesn't dig into your thighs as you sit on the box.
Horizontal rigs
Another interesting trick is to lay the rig horizontally. Garrett's original “Polecam” was a horizontal rig. Lots of operators have used a horizontal rig in an airplane to fly the camera over the heads of passengers and at a dinner table or similar situation. The trick, of course, is to rebalance the rig so that it hangs horizontal and pray that you don't have to go through a doorway later in the shot.
Some considerations: There may be a lot of stress on the camera mounting stage. It's best if you use a light camera and possibly add some spreaders and stays (as shown in the pictures). Get a machinist to make your L bracket so it can mount in multiple positions. Try to get the camera's e.g. close to the center post, and find a way to mount your monitor so that it is properly oriented to the camera.
A horizontal rig is tough to balance. The gimbal is still set just above the eg of the whole sled, but you can't move the gimbal up and down to set the proper drop time. You've got to move and extend the battery, monitor, or camera to get the right balance for the shot.
The sled's inertia is shifted radically. What used to be the pan inertia is now either the til or roll inertia (depending on how the camera is oriented), and without modification, if: likely to be too small. Extend the monitor and battery fully, and perhaps add AntlersTM to die base of the rig to increase the inertia. You'll also gain some additional distanc (reach) from the camera to the gimbal.
Fast starts and stops are very hard to control. The rig is still a pendulum and wants to tilt or roll as you change speed, but there's no good part of the structure to grab and prevent unwanted movement. (The e.g. of this rig is not in the post, but in free air.)
Pans are difficult because the inertia is quite large. Fast panning is impossible. Both the camera and the base of the Steadicam will swing in wide arcs. Switches are impossible. Unlike conventional (vertical post) operating, controlling and shifting the point of rotation is extremely difficult — impossible in many situations. Other than ballrooms and sports arenas, most interior locations are designed for vertical human beings to move about, and a long horizontal beast is going to have a difficult time moving and panning through most spaces we encounter.

However, once you overcome these obstacles, there are a lot of fun things you can do with a horizontal rig. You can magically fly over teapots on countertops, or with the camera aimed along the axis of the post, you can poke through windows or openings just larger than the camera. We strongly suggest you practice at home if youknow this kind of shot is coming your way.

You can use the on axis orientation for shooing straight up or down, great for spinning shots of cathedral ceilings or vertigo inducing shots over cliffs and balconies.
Keeping your AC moving along with you
Another aspect of shooting in tight spaces involves all those otherpeople that move with the Steadicam operator in a normal shot. Your assistant, the boom guy, grips to guide you, electricians holding lights, the director or DP,and the actors and extras — all these people have to find a way through the tight space as well.
Indispensable to you is your assistant, and you must help him find a way to get focus. If he can't get near you for that moment, sometimes the solution is to have him focus using a remote monitor. Although an assistant can't normally judge focus very well from the sharpness of the image, he can tell how far away the subject is by its size on the screen. Carefully match an actor's size on the screen to a distance, and a focus puller has a fair chance of keeping things sharp.
If the assistant can't get through the tight spot with everything else going on, try using two assistants, one for the part of the shot up to the tight spot, and another with a second wire-less transmitter for the rest of the shot. Both transmitters are set to control the lens, and the assistants work out when to switch one off and the other on. Start and stop the camera manually, as turning the transmitters off and on may turn the camera off and on. Again, test the whole scheme ahead of time, as the trick may not work with all focus systems.