Low mode
a new range of lens heights
There are many simple (and relatively inexpensive) ways to rearrange or extend the parts of your sled to help you get a specific shot.

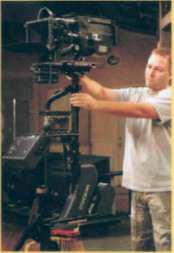
One of the first and most important rearrangements was done for Stanley Kubrick on The Shining, where Garrett placed the electronics and monitor above the camera to create a new range of low lens heights.
On the set, Danny Lloyd used to move his finger and taunted Garrett in his Redrum voice, “Low mode! Low mode!” That creepy voice haunts us to this day.
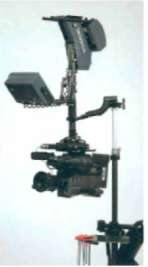
Building the rig in low mode
Reconfiguring your rig generally means you must add some widgets. For instance, for low mode, you need two accessories: a means to securely put your camera mounting dovetail on top of the camera and the indispensable F-bracket. Don't forget to flip your monitor over.

The F-brackee
The F-bracket is necessary to reverse the gimbal handle and put the arm back into a proper relationship with the sled. Without the F-bracket, the arm is next to the camera, and switches are impossible. However, not using the F-bracket makes for a quick high low mode and might be just the ticket to getting the lens over that high table.

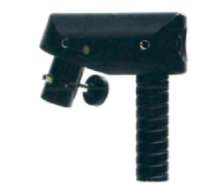
One key safety point for all F-brackets to gimbal handle arrangements: do not rely on any clamp to hold the gimbal. You must install the provided safety pin in what is called double shear,or sooneer later you will drop your camera on the floor.
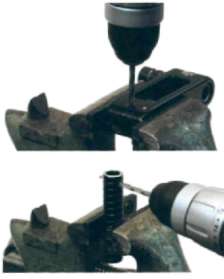
If your sled does not have a safety pin system, get out an eighth inch drill and get to work. Drill all the way through and insert a steel nail or a hardened (black) steel screw. Do not use soft “butterbolts”
You also need to examine the F-bracket itself to be sure the post going to the gimbal handle can't slip out. Amazingly, some F-brackets come without this safety pin and these pans also need to be drilled and pinned for safety.
For instance, the Master Series' J— and F-brackets relied on two small set screws to keep the post from falling out. Eventually, they failed. In workshops, we've seen them fail within minutes of being tightened.
Get used to the idea of getting out the drill and hacksaw to make things work right — especially with older gear.

Low mode brackets and cages
Most cameras do not come with a suitable rigid means to attach the camera mounting dovetail to the top. All sorts of custom cages, handle clamps, and camera-specific low mode brackets have been made in address this problem No sincle solution is best for all situations.
Seasoned operators generally have several low mode brackets in their kits for the specific cameras they are likely to encounter, as well as various handle-type clamp systems.

The best cameras for low mode have actual camera mounting threads built mto the camera body, like the workhorse Panavision Lightweight II. Do not confuse real camera mounting threads with a threaded hole intended for mounting a light or other small accessory on top of a camera. Cameras with an optional 100% videotap and integrated low mode mount, like the Moviecam Compact and the 435, also work very well.

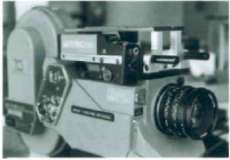
Many video cameras have enticing carrying handles on the top. Although it's easy to attach a clamping bracket to the han die. it may not be strong enough for low mode. Make sure the handle does not flex or vibrate the camera when rigged for low mode. Most handles are not designed for the kinds of stresses we put on them.
Some very small (and plastic) handles on the new DV-Cam type cameras are easily crushed by a typical handle clamp. These cameras should be carried in steel cages weighing a few pounds. When you design your cage, make sure you have access to change batteries and tape, and that the lens doesn't see the supports. Be sure you can flip open the camera's LCD screen, and you can put remove any Accessories like mane boxes, microphones, auxiliary lenses and the like.
The weight of the cage should be distributed so the gimbal is close to the top of the post. Separate the plates to raise the eg. up off the camera mounting platform. Also make the cage weights as thin (side to side) and as long (fore and aft) as possible, to create the most pan inertia. Really fancy cages have multiple plates to create different weights for different rigs (or practicing), quick release mechanisms for the camera, and plenty of mounting holes for the camera and the Steadteam dovetail plate.
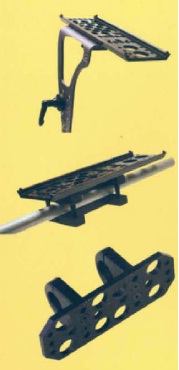

The dovetail can be attached diredty to this custom handle for the Panasonic Varicam.
The very solid VLS bracket is shown below.
Quick fix for video
Sometimes the easiest, strongest, and fastest way to work in low mode with a video camera is to shoot upside down. You simply move the gimbal until the rig hangs upside down, add your F-bracket, and turn the monitor. Most editing software has the ability to flip the video right side up, but check to be sure this solution is possible before you shoot.
Tip: If you find balancing in low mode confusing, just remember that moving any weight Uphill will level the sled, just like in high mode.
Balancing in low mode
Balance the sled just as you would in high mode, and for the same reasons — to facilitate getting the specific shot. Practice getting the rig into low mode and back to high mode by yourself and with your assistant.
So many times we've heard production worry that it's going to take 15 minutes to make the change to low mode, so they start calling for the dolly! They're astonished when we tell them we'll be ready in 2 minutes.
With almost any rig and a bit of practice, flipping to low mode can be done in under a minute, easily. And once you get it in low mode, you can start operating — rehearsing the shot, working out the hard parts, adding that special magic.
Because operating in low mode is a bit harder than operating in high mode, it's really important to balance the rig well, both statically and dynamically. On some rigs you can flip the monitor without moving the monitor's e.g., thus preserving dynamic balance when going from high to low mode.

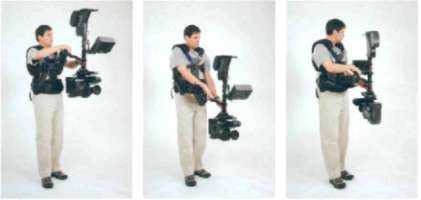
Step by step: switching to low mode
- Attach a dovetail plate to the top of the camera (directly, or with a low mode bracket).
- Flip the monitor upside down.
- Static balance the rig with the camera on top (yes, and upside down). Follow the same balancing procedures as in high mode.
- With the rig held horizontal, release the gimbal clamp and move the gimbal away from the camera (about 1/2 inch). Tighten the gimbal damp. The camera will now hang at the bottom, right side up
- Check your drop time.
- Attach the F-bracket to the gimbal handle before picking up the rig.
It's a good idea to balance in low mode dunng prep and make marks in order to expedite the conversion during production.
Operating concerns in low mode
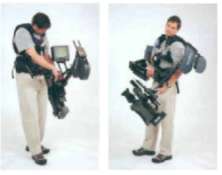
Operating in low mode is a bit harder than operating in high mode. Although the sled's weight is the same, you generally have to hold the camera a bit farther away to clear your legs, which requires more physical effort.


In low mode, the operating hand grabs the post under the gimbal, just like high mode
Also, you will find that your hands are not at the same height anymore. Your operating hand reaches down for the gimbal and your arm hand is perched higher on the arm.
This unevenness in hand height creates a strain across your shoulders. It gets worse as you try to push the lens really low (and you flipped everything to low mode to get the lens low, right?).
In low mode, you often tilt way up to hold a frame (especially on rigs without a tilt head), which puts a strain on the operating hand and makes panning a whole lot harder. Extreme tilting also puts the monitor out of a normal viewing position, so you end up arching and twisting your body to see the image. Add it's no better in Don Juan.
What can you do to make operating easier in low mode?
First and foremost, really good form and balance make operating a lot easier A tilt plate or integral tilt head can keep the post more upright and the monitor in a more viewable position.
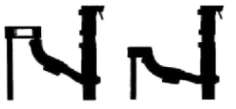
Use a slanted F-bracket to minimize the hand height differential. A motorized stage makes balancing and trimming possible without straining to reach the stage, now at thigh level.


Note:
The slanted F-bracket (right) creates more space and keeps the gimbal yoke at a better attitude for operating than the straight one (left).
The joys of low mode operating
In high mode, you are often told what the actor is going to do, and you are left to your own devices to figure out what they want you to do with the camera. With low mode operating, you are putting the lens out of the normal human (high mode) range, The director is trying to make some specific point or comment with this lens height, and this gives you a big clue about how to move and pan the camera.

If given a low mode shot, we try to emphasize why the lens height is low. If it's a dog or child's POV, then — in addition to being low — we try to move the sled like a dog or a child moves. If the camera is low off a motorcycle to emphasize speed, we try to get the lens close to the deck and barely fly over and by objects to increase the sensation of speed. If we are low so we will look up at our imposing subject, then we get in close and tilt up more. Go for it. Push the limits.
Low mode in The Shining
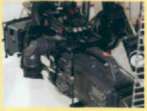
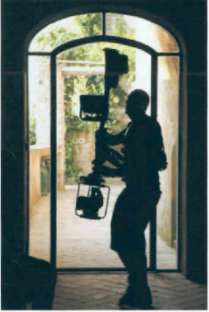
One of the most famous low mode shots of all time is the big wheel shot in The Shining.
Part of what makes the shot so compelling is Kubrick's relentless and emotionally cool center-punched framing, with the camera religiously held level fore and aft. The camera pans ahead of the subject, making it easier to understand the huge empty spaces of the Overlook Hotel, and at times the camera pushes ominously closer to Danny.
Because of the low lens height, the carpets are the graphic elements that change the most as the camera races along. This aspect of the image is surprisingly enhanced by the harsh sound of the wheels on the marble floors disappearing as Danny rides over the carpets.

The Shining 0:34:48