Navigation
keeping safe on your feet
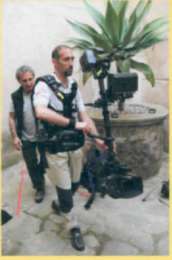
Most Steadicam operating involves walking backward with your eyes glued to the monitor and your brain occupied with balance, level, and framing.
Each shot consists of an established sequence of frames that tell a story. In order to achieve these frames, the camera must follow a specific path. If you drift off this path, the shot is compromised.
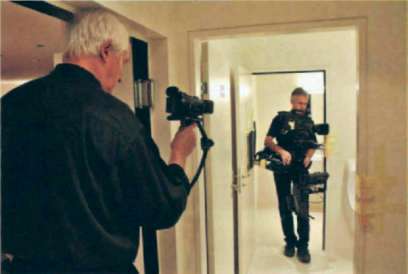
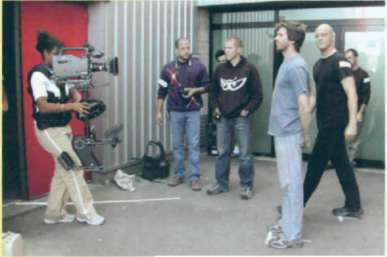
While it is smart to have a grip spotting you, it is not recommended that he physically lead you through the set or around obstacles. Depending on a grip to navigate throughout the shot is self-defeating. The force he puts on your body will likely disturb your critical sense of balance with the rig. You will end up fighting between the pull of the grip and the pull of the weight of the rig. Just imagine a grip following a couple on the dance floor. He reaches in and lifts one of the (lancers right in the middle of their tango. Not a pretty sight.
Scoutt,cout, scout
We cannot emphasize enough the importance of scouting the path you will take to do the shot. This is critical on location where the production has less control over the set, but it is equally important on a set considering the number of people working, moving, setting lights, spilling drinks, rearranging props or furniture.
Do not only check for obstacles, holes, or slippery areas that might trip you at foot level, but consider where the camera will be flying and where you will fit as the camera makes its journey through the set.
Horizontal Lens Angles 35mm 1.85:1
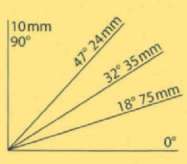

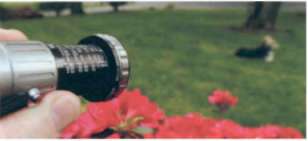
Make yourself a lens chart and determine how to configure your fingers to approximate the different lens angles.
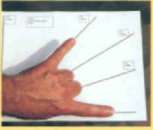
24 mm
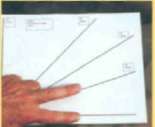
75 mm
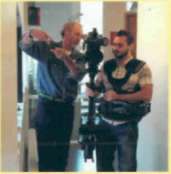
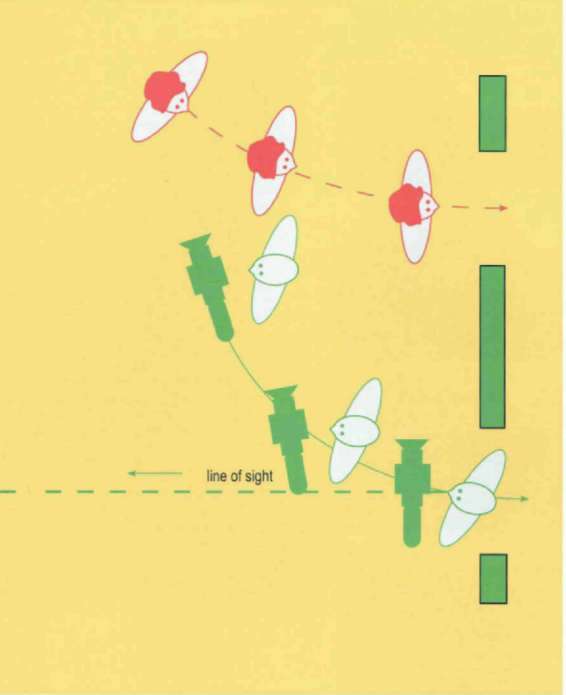
Steadicam operators often use their forearm and fingers to help scout a shot. We can estimate what's in and out and whether we and the Steadicam can fit in tight spaces. Our fingers can approximate horizontal lens angles, and the forearm is about the size of a sled. We use one arm for Missionary and the other arm to simulate Don Juan.
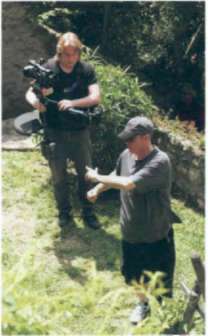
During the scout, it also helps to stand up straight and walk next to the “lens” — just as you would walk with the Steadicam. Boom up and down with your arms. Leam how you must move. Be sure, however, to break this “mime dance” and place your eyes exactly where you want the lens, in order to see any problems the lens might see.
To communicate with others on the set, it's probably better to use more traditional ways to describe the frames.
Director's finders are extremely useful, butkeep your eyes open,The Director can easilyplace the finder whereyou can't get the lens.
Learn the set, learn your path
If you watch an experienced Steadicam operator do a shot, he seemingly never takes his eyes off the monitor He has learned the path. But he will take his eyes off the monitor at critical moments. When he is holding a frame, or doing a simple walk and talk, he can safely look away without disturbing the image.
Walk through the set without the rig, following the path you will take with the Steadicam. Discover where you will need to make tums,do switches. Note what obstacles you need to avoid.
Next, pick up the rig and walk through the space, rehearsing the shot. Establish cues (mental marks) for yourself which will help to navigate you through the shot. For example, as the monitor clears the table edge, start the pan to the right. Find marks within your range of vision. Don't try to look behind you or around the camera.
Rehearse the move enough times to feel comfortable making your way through the set for the duration of the shot. You must memorize what's in the frame, how the Steadicam travels through the set, and where your body must go to get the camera where it needs to be.
A trick to avoid taking your eyes off the monitor
Tilt your head to change your field of view. A human's visual field is wide and ellipsoidal, almost 180°. With your neck bent down a bit, you can rotate your field of view to in clude both the ground in front of and behind the rig. The monitor is still centered in your view, and you can confidently move in any direction.
This happens naturally in Don Juan. Because the monitor is behind you, your head is at the perfect angle to see in front of and behind you. When in Missionary, simply turn your head toward the camera until you can see both the monitor and behind the rig. This orients your field of vision fore and aft, not side to side.
Your peripheral vision allows you to keep your eyes on the monitor and minimizes the chance of disturbing the frame while straining to find your path. Place marks, or establish visual cues within your peripheral vision. Consider using the edge of a table that you pass, or placing a line on the floor that directs you to your next frame.
Tip:
Glancing over your shoulder can easily upset your framing If, to be safe, you must look away from the monitor, do so. Make sure you are in perfect balance. Turn only your head, don't twist your upper body. Be careful not to pull the rig with your operatin hands — you will likely disturb the image,
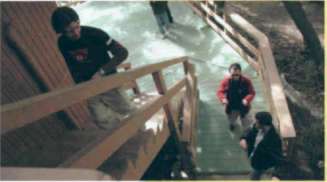
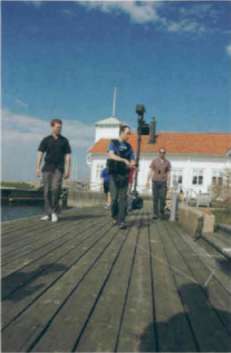
Here, the operator put a line on the ground. As he backs over the line, it naturally comes into his view. Other visual clues, like the end of the railing on the stairs and the change in the direction of the planks on the deck, also help to guide the operator.
Physical marks
Using marks keeps everyone sharp. The camera's path is clear, the actors' positions are set This helps with lighting, setting foreground objects, and timing stops and starts with the actors. Everyone is on the same page.
What should a mark look like?
Tape marks on the floor are most common. Always mark the position of the Steadicam post. There's no guarantee the operator will be in the same relative position to the rig every time he comes to the mark.
Little X's are hard to tmd when you are walking backward. The classic Steadicam solution to finding a mark is a big “V.”
Everyone has the ability to estimate where two nonparallel lines will intersect. As the operator moves through the set, he can easily find the vertex of a V. Using peripheral vision, the operator can determine exactiy when the mark is under the post.
Keep in mind that a wide V makes it easier to gauge the convergence, but it enters your field of view a lot later than a narrow V.
The V can be arranged so that one side is the actual path of the camera. In this case, the other line closing in will aid the operator in timing the stop perfectly.
One line of the V could be set up to point where the camera needs to point. As the operator comes to a stop on his mark, he can perfectly aim the camera down the line. Or a third line could be placed to indicate the direction to point the camera.
These large V marks can also be useful for actors, and they make it easy for you and an actor to hit your marks at the same time. By watching the actor approach his V, you can gauge your speed and his as you travel to the vertex of your own V. You simply adjust your speed to land on your mark at the same time the actor lands on his mark.
A large V can also help guide the operator precisely to a narrow doorway.
Sometimes it is not possible to put down tape marks because the floor is in the shot. You may be able to use the V during rehearsals as you learn the shot and then remove it for the take. Also consider making your V out of rope and have a grip pull it out of frame during the shot.
Marks are not exclusively on the floor. Try using a line on a wall or even the ceiling. The ceiling works quite well with the rig in long low mode: you are already looking up at the monitor.

See how Jerry is looking up past the monitor at the Von the ceiling?
Here, when the camera points down the line and the actors hit their marks, the frame lines up perfectly.
The line on the ground leads the operator to the doorway.
Here, the tape marks the camera's path from point A to B to C.
Do you really need marks?
At first glance it may seem odd to use a lot of marks with the Steadicam. What happens to the inspiration, the creativity, the going with the flow?
With marks, your real creativity is unleashed, because you don't have to spend all your time compensating for bad timing, people not hitting marks, bad backgrounds, or bogeys in the frame. With a plan, you can make the most creative stuff work, with your characters properly lit, and with the least amount of effort.
How many marks do you need? Enough to get the job done to your satisfaction.
The ability to move the camera freely is a gift, but it comes with a rsponsibility to use it wisely. Too often, everyone on the set is either lazy or sloppy with marks and timing (and anything else you can imagine) became they think the Steadicam operator can magically compensate or create miracles.
Don't believe in magic; don't rely on it to make your career.
When on a boat, it's hard to know exactly where you are. Over the centuries, many techniques have been developed to help sailors avoid rocks and shoals. One technique is called a range.
We can use a range to precisely place ourselves on a specific line on the set. This is useful when trying to slip through a doorway or other tight spot. Most marks are for the camera, but a range is lined up for the operator's position.
Here's how you do it: Place yourself add the rig in the doorway. (Be sure your position relative to the rig is consistent each time you pass through the door.) Look around for something that is in line with another thing even farther away. For example, you might see that the center mullion in the window along the back wall lines up with the telephone pole outside the window.
Now. as you move along your path toward the doorway, glance up to see the pole. When it lines up with the window, it is safe to back through the doorway. Choose objects that cannot be moved and that will be in clear view as you do the shot. Also be aware that a change in actor position or an unexpected cross by an extra could block your view at that critical moment.

definition
Range: n., navig. a line established by markers or lights on shore for the location of soundings.
Navigation safety
We encourage you not to use a grip to guide you through the shot. However, a grip should be used to protect you from injury. If there is an area you are trying to avoid, such as a drop off, uneven ground, industrial machinery, etc., do not simply count on your own ability to navigate. Always have a grip watching your back. If your own navigation fails, he is there to stop you from stepping outside of the safe area.
The vest's pressure on your back is pan of your feedback system for balancing the rig. When a grip pushes on your back, it feels as if gravity has somehow gotten weird, and
you are compelled to balance the rig despite this change. You can lean with well over 100 lbs of “free” force, and the grip will often lose the battle. Pyrrhic victory, though, ending with both of you bumping into something on the set — or falling into “the old crevasse.”
Alternatively, have the grip poke you sharply in the ribs to correct your path or if you are heading for danger. Or find another solution, something that works for you without interfering with your operating or your balance.
Two more aids to navigation
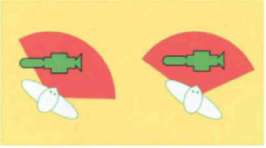
A variation on the range is called holding the gap, which is especially useful when going backward.
If there is a narrow gap between two fixed things, such as between two trees, two fence posts, two buildings, etc. or a doorway, window, or other architectural feature, you can use the gap as a guide to moving the camera on a line directly toward or away from the gap. As the camera moves toward or away from the subject, you can keep on the path by not allowing gap to widen or collapse. Everything gets smaller as you back away, but the eye is very sensitive to any changes in the gap.
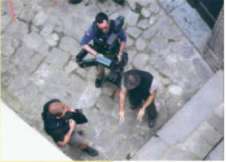
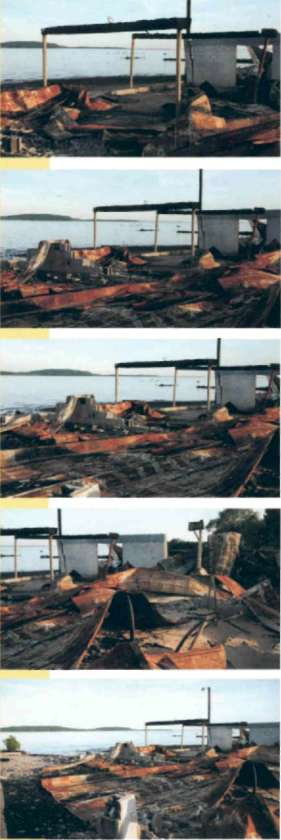
Although the range is typically viewed by taking one's eyes off the monitor, gaps are typically seen in the monitor as part of the image and the composition, and gaps can be anywhere in the frame. In the photos of the burned down building, the gap between the edge of the crumbling wall and the metal pipe directs the camera's path back through the rubble.
A gap changes radically if one doesn't travel directly toward or away from it.
Gaps works best when the line between the two objects forming the gap is not perpendicular to the line of travel, i e., when you are square to a doorway, you can deviate from the ideal line quite a lot before you notice the gap closing.
This technique is very similar to the one we use to hold a fixed relationship (i.e., the gap and the angle to the camera) between two characters in a raking walk and talk (see page 181).
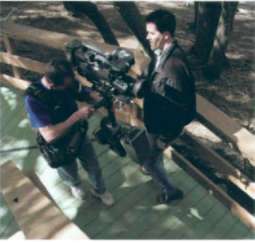
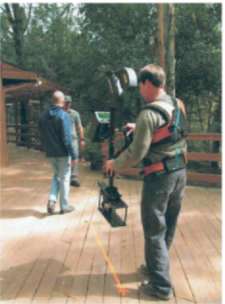
In these photos, there are several gaps. Which one is constant? Notice that it doesn't matter whether the camera is panned right or left the gap is costant as long as you are on the path.
A variation on holding the gap is “holding the plane.” We can hold a narrow, flat surface — such as a door or window — constant in the frame. This time, if the surface widens or collapses, we are no longer on the chosen path. It helps if the surface has some raised or contrasting elements so we can better judge the relative changes, especially as we get farther and farther from the surface.
Comfort level
You must be comfortable with your ability to navigate through the set to the end of the shot. If you are unsure about the location of a hazard, then your operating will suffer. Don't operate when you are not confident. Walk through the shot again. Memorize your path. Use your navigation techniques to give you confidence. Set up a safety grip either to walk with you, or strategically station him to protect you from a specific danger. Only do the shot if you feel safe.
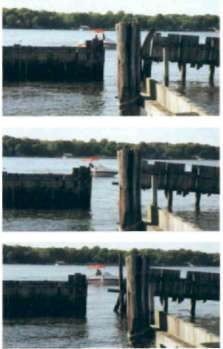
Note how the gap is opening in this series of shots. The camera is trackina left.