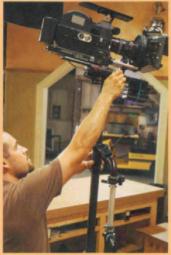
Configuring the rig
to get the lens where you need it
What can you do if the range of lens heights in high or low mode just doesn't work? How can you get the lens higher or lower? Fortunately, there are many, many tricks and techniques available.
The easiest and quickest methods are to change the arm post or 10 alter the height of the socket block.
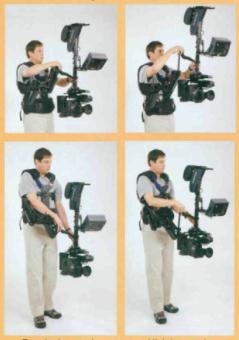
Increasing the range of lens heights in high mode
Simply use a longer arm post. Most arms have a tool free, quick-change system, so this is generally the fastest and easiest method. I keep a selection of arm posts (4, 6, 9,and 12 inches) in a bag on my docking stand.
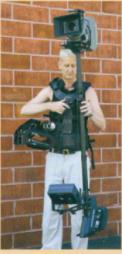
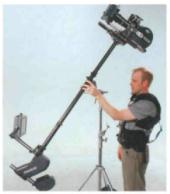
Using a longer post to extend the upper range of low mode, also called high low mode.
Regular low mode High low mode
You should not use (or need to use) an arm post longer than 12 inches The twisting stresses on the arm increase with a longer arm post — it's a big lever — and you can damage the arm. The heavier the camera, the shorter the maximum length arm post you should use.
There's also a limit to how high you can reach with your arms, and arm posts longer than about 12 inches are simply not necessary. As you boom higher and higher, your operating grip gets less and less useful, and the quality of your operating goes down. With normal length sleds, the battery also start hitting your arms.
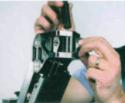
A tool-free mod for a IIIA arm.
Increasing the range of lens heights in low mode
In low mode, the operator often can't reach the gimbal at the bottom of the arm's normal boom range, so some of the range is wasted. You can use longer arm posts and/or you can raise the socket block on the vest to restore the boom range and increase the maximum lens height. If you are careful, raising the gimbal with these techniques can have no effect on how low you can go, but it gives you more boom height at the top. We call this arrangement high low mode,and it's great for flying over things!
We prefer the combination of raising the socket block and using a slightly shorter arm post (rather than just a longer arm post).
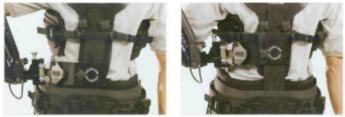
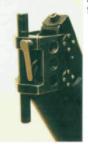
Depending on your vest and the length of your torso, the socket block can move as much as 3 inches.
Lowering the range of lens heights, usually in high mode
Use an upside down F-bracket (or an old J-bracket) in the arm to drop the range of lens heights 6 to 10 inches. Be sure to pin — in double shear — the F-bracket to the arm post!! With a long drop-down post, it,ometimes gets a little tricky to properly grab the gimbal handle.
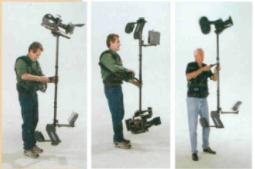
Long mode
To get the lens right down on the deck or much higher in the air, we need to extend the sled vertically, either by telescoping the central post or by swapping it out for a longer one. Posts longer than 5 reel or so are called superposts.The first ones were made by screwing two standard IIIA posts together. Now many Steadicams have multisection telescoping posts in stretch from regular to superpost length and everything in between.
Long mode operating concerns
The real downside of long mode is that we can go through a lot of effort (and expense!) for a very small return in lens height. With a heavy camera, extending the post 36 inches — with all the problems it entails — might result in only 5 or 6 inches difference in lens height. One upside of this equation is that we can argue for lighter and lighter cameras, so that the 36 inch extension results in a 15 to 18 inch change in lens height — and we sweat less
Tilt head
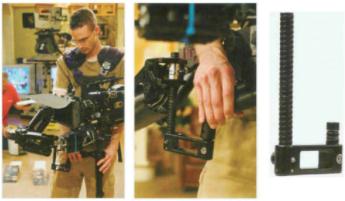
Long mode operating — high or low — is a lot more useful when combined with an integral tilt head. When you tilt a long mode Steadicam, it sticks out a lot. It tends to hit things in tight quarters, is nearly impossible to pan well, and worse, you lose lens height! All that effort to get a few more inches of lens height, and you give them away when you tilt.
With a tilt head, you can keep the post vertical in most situations and maintain that precious lens height. You can also pan as easily as in regular modes, not hit much with the battery, etc. The integral tilt plate keeps the camera e.g. close to its same position as you tilt, minimizing rebalancing and preserving dynamic balance.
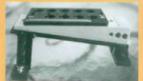
If your rig doesn't have an integral tilt head, you can add a tilt plate like this one.
Balancing in long mode
Balancing a long mode Steadicam requires a different drop time than normal. What you want is a rig you can tilt and control with the same touch you use on your normal length rig. A 4 second drop time on a long rig indicates a very bottom heavy rig. Stop counting and start feeling.
Tilt the rig. Move it around. How does it behave? Ultimately, how the rig behaves is the real test for all rigs — not some arbitrary drop time.
You will discover that you can't start or stop tilts easily in long mode, and if you go off level it's harder to get back to level. This is another way of saying the rig is more resistant to angular change in the tilt and roll axes. You'd better plan ahead for your tilting moves and carefully manage your horizon.
A long rig also feels more natural if the monitor and battery are extended from the post. Making the rig long makes the rig more inert in the tilt and roll axis, but has no effect on the pan axis. If you don't extend the monitor, the rig may feel excessively light or whippy in the pan axis Extending the monitor and battery increases the inertia in the pan axis to make the rig feel more normal — or at least more equally slow in all axes.
The joys of long mode operating
Getting the lens radically high or low is lots of fun. So get really high or low with a light camera, use the long posts in the arm, and raise the socket block. Don't go half way. There are new perspectives out there to exploit, if you place the camera well. A high lens in the middle of a city street is much less dramatic than one next to the awnings along the sidewalk. Be to pass by or include objects that imparts to the audience a feeling of being really high or low.
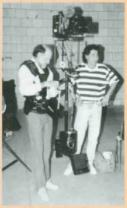
Balancing and trimming a long mode Steadicam can be a real pain — it's often impossible for the operator to reach the balancing knobs on the stage.
A motorized stage is more than convenient; it's crucial for precision long mode operating.
Jericho 0:18:06
Booming down over the horses gives a great sense of scale. For the last frame, the camera rises again to ensure that the bad guy's faces are not blocked by our hero's shoulders.
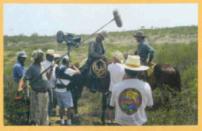
Horses hate tracks and dollies. The long mode Steadicam is the perfect tool for working near them. Just introduce yourself and the gear to them gently, and they will not get spooked

The Lost World 1:12:55
Here's another wonderful super low mode shot by Chris Haarhoff. He emphasizes the low lens height by passing close to the characters and holding a radical tilt up through most of the shot.

The stiffening system
Any long post Steadicam sled, whether single or multi-section, suffers from increased flexing. The longer a post, the more it flexes - unfortunately by the cube law. Doubling the post length makes the rig eight times more flexible. Although a carbon fiber post is very stiff, it will need extra rigidity under certain situations. The heavier the camera or the more violent the moves, the more help is required.
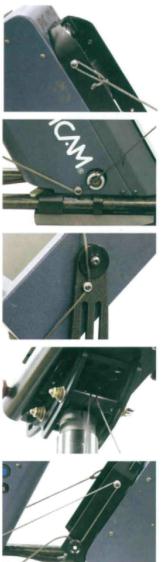
The stiffening system works like the spreaders and stays on a sailboat mast. A spreader attaches to the monitor arcs or brackets (without tools, of course), and there are attachment points on the battery mount, the bottom of the sled, and just underneath the tilt head. A length of lightweight Vectran™ (a polymer cable that is as strong as steel, onefifth the weight and much more flexible) is stretched between the points.
If a stiffening system is not standard on your rig, it's fairly easy to go to your machinist and make the necessary parts. Vectran™ line is easy to find, or you can use 180 pound test nylon fishing line. The system works better when the monitor is high.
To use the system, move the monitor (or the battery) inboard an inch or so from its final position. Lace the Vectran™ line from one side of the battery mount down around a pin at the base of the sled, up around the spreader on the monitor, further up to a hook just under the tilting head, down the other side via the spreader, around the pin at the bottom of the sled, and back up to the battery. Extend the monitor (or battery) out to its final position to tension the Vectran™ You also can tilt the sled horizontal with the monitor down and then retighten the line. When the sled is vertical, all is tight
The stiffening system is also very useful with normal length rigs whenever violent moves or stresses are anticipated, such as a vehicle shot on rough roads. It is also possible to attach the Vectran™ line to some solid part of the camera to further stiffen the rig. Often the camera to Steadicam mounting isn't perfect, and the stage exhibits some flexing as well. Once you have balanced your rig and tensioned the Vectran™, be careful that the camera doesn't move very far on the stage.