Gyros
for specific situations
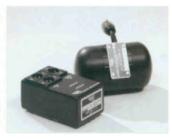
The real question about gyros, like any piece of hardware, is when and how to use them. Understanding a bit about them may inform that choice.
The gyros that we currently use are made by Ken Labs in Connecticut. They are called Kenyon stabilizers and they come in several sizes and have different weights of rotors, both of which determine the amount of inertia or stiffness they deliver.
The KS-4 is the smallest size that we use and has a heavy, tungsten rotor. The KS-6 is larger, but uses a lighter rotor, and the KS-8 has the same physical size as the KS-6 but uses a heavier tungsten rotor. KS-10's and 12's are beyond our practical ability to carry.
The gyro's “cans” are sealed and filled with helium, both to reduce corrosion and to transmit the internal heat from the rotating parts to the can. Inside the can, a pair of counter-rotating gyroscopes spin at about 20,000 rpm. They are powered by an inverter that takes the battery's 12 volt DC power and turns it into 120 volts AC at 400 Hz. It takes about 10 minutes for the gyros to fully come up to speed.
Any attempt to rotate the can (or anything attached to it) is resisted by the gyros. The gyro effect is most pronounced when the can is not rotating, and is reduced as the rotational speed increases, up to a point where the internal gyros hit a bumpered stop and stop working altogether.

An important consideration: the Kenyon stabilizers were designed to be used individually with binoculars. The arrangement of components, springs, etc. inside the can were designed with this task in mind As this is not our task at all, we have to modify, multiply, and reorient the gyros to take maximum advantage of their stiffness and to avoid or minimize annoying side effects. We often use gyros in pairs,andaset of three works even better.
Orienting the gyros
The long axis of the can is the common axis of the two internal gyros when undisturbed. The greatest resistance to rotation is 90° to the long axis of the can. Rotating the can around the long axis (essentially the axis of a flywheel) has the least resistance but alsoinduces very strange and strong motions. One of the two internal gyros is completely unaffected by this external rotation, and it offers no resistance whatsoever to the rotation, but the other gyro — the one spinning in the opposite direction to the external rotation — tries desperately to flip itself around in its mount 180° so it will be rotating in the same direction as the external rotation. The result? Lots of crazy bumps and wobbles are translated to the Steadicam.
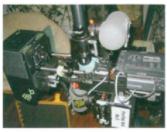
The intuitive way to orient two Kenyon units is with one axis vertical (resisting tilt and roll) and one at 90° horizontal (resisting roll and pan). This gives the most help with the roll axis (horizon), which needs it the most. But it also induces the most annoying effects to the rig when you pan or tilt, sending the rig in strange and unwanted directions. Because we pan and tilt quite often, this is probably the single worst arrangement for a pair of gyros.
“X” configuration for Steadicam
The best and easiest to achieve arrangement of a pair of gyros we have found so far is to clock the whole arrangement 45° around the roll axis, so that an “X” pattern is seen from the front or rear. Arranged this way, no axis of either can is on an axis on which we tend to route. If we also rotate this X an additional 45° from vertical (around the tilt axis) as seen from the side, the negative effects are minimized further.
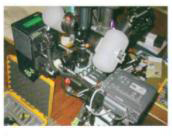
By adding a third gyro at right angles to the first two, even smoother results are obtained. This places one can in each of the three axes and they tend to balance each other out. The effect of three KS-4's is about the same as two KS-6's and weighs about the same also. The KS-4's also seem to have a slightly smoother response overall as well. Normally two gyros would be mounted below the sled and one above the camera to keep the e.g. of the sled closer to normal.
Splitting up the two X configured gyros in a two can setup leads to other undesirable consequences because they will not exactly balance out each other during any moves that affect them both. It is important that the angles that the cans are mounted in relationship to the camera are equal and opposite to each other or another kind of imbalance in their effect will result.
“V” formation with two cans
Rick Raphael developed another configuration which he liked very much — he orients two cans in a V formation (looking down from above) with the two cans at about 71° from each other. He found this angle experimentally, and the result is exceptionally smooth response in the pan axis, and of course, most of the inertial help is in that axis as well, with smaller assistance going to the tilt and roll axes.
Be flexible
Think about what axes you want to help, and in what proportion. It might be best summed up as three varying philosophies, which you may want to embrace for different situations, and your mounting scheme may want to be flexible enough to adjust for each or at least two of them.
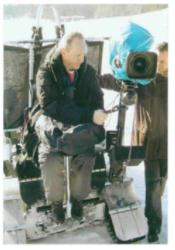
With three stabilizers the inertial augmentation is equal in all three axes, and this results in a feel most like what you normally are used to, just suffer.
With two stabilizers mounted in an X you get more augmentation in the roll axis than the other two, and since that is the weak est normally, you get a Steadicam that is more balanced than normal,but it does not feel like what you are used to. In addition, changing the angle of the X (being careful to keep each can the same angle relative to the camera) you can fine tune how much tilt versus pan stability you desire. When the X is made tall and narrow, tilt is enhanced at the expense of pan. and when the X is short and fat, pan is stiffer than tilt. If headroom is the hardest thing to control during a particular shot, you could go for a stiffer tilt axis.
With two gyros mounted in the V configuration, pan is both the strongest axis, and it is noticeably smoother. Since most of our moves are primarily in the pan axis, this may be the most desirable way to mount two gyros, but if you are having trouble with roll or tilt, think about one of the other configurations.
For most situations, Larry McConkey prefers three KS-4's and he removes his Steadicam battery and video recorder — mounting them in a separate backpack with the 120V converter connected by a 15 foot long umbilical cord. Normally an AC or grip will carry this pack, so the overall weight of the rig remains about the same. In tight spots, the backpack can be mounted on his vest — but this is a serious weight increase and not good for long takes. On a vehicle, of course, the backpack is tied down nearby.
Mounting the gyros
Another factor to be considered is the rigidity of the mounting used and the construction of the sled.
Many sleds have a lot of flex in the post itself and in all the wonderful adjustable x–y mounts for the camera platform and bottom sled. Any quick changes the operator makes tend to result in a kind of whiplash effect, with shuddering noticeable in the shot. In some cases the result can be worse than not using gyros. A subtle change in technique will help — no sudden changes in pan. tilt, or roll, i.e., gently starting and stopping all moves — but the real solution is a more solid construction overall. All adjustable parts should be carefully set up with the least possible slop.
Maintenance
Another issue with the gyros is cost of rebuilds. After a few hundred hours of use, they tend to get a little noisier and “grinchy” Kenyon will overhaul in short order, but the cost is several hundred dollars — an ongoing expense of the system to consider.
Current research into the inner workings of the gyros may produce a more user-friendly unit designed specifically for Steadicam use. Design options include the reorientation of individual gyros inside the can and employing a different number of gyros, differential rate springs, stops, etc. This single unit would provide the maximum gyro effect with the minimum of side effects. If one needs a larger gyro effect, multiple units could be bolted together.
So how and when should we use gyros?
- For shots where we don't want the Steadicam to rotate very fast, such as extremely still frames very long lens stuff, or title sequences
- For whip pans. Gyros hit their internal bumpers, “unlock” for the whip, and then lock back up when you stop. Be sure you have a stiff rig or carefully feather out the start and stop of each whip pan.
- Windy conditions
- Vehicle shots.

When are gyros less useful?
- When sound is important it careful adding sound barneys over gyros. The can has to dissipate a lot of heat, and the barney keeps the sound and the heat in.
- When quick, jerky moves are required — unless you are going for a “shuddering” effect.
- When a fine subtle touch is desired such as responding to an actor's changing facial expressions instead of large body movements.
- When time is an issue, or flexibility in the configuration of the Steadicam is important.
- When lots of charged batteries are not available.
- When you don't have lots of help first setting up and then “getting dressed” for each take.
