12. Working with Tables
In this chapter, you learn how to create new tables from scratch and import them from Microsoft Word and Excel documents. You also learn how to edit tables and stylize table attributes.
In the past, building complicated tables has been a difficult task in any page layout program. Thankfully, InDesign CS5 now makes building tables easier than ever.
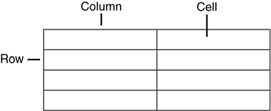
A table is nothing more than a grid made up of horizontal rows and vertical columns. Each area of grid intersection is called a cell. You can insert text or an inline graphic into a table cell.
Figure 12.1. An example of a basic InDesign table.
Creating a New Table
InDesign treats tables like a very large inline character that is placed inside a text frame (not a graphic frame). This means that you must use the Type tool (not the selection tools) to create a new table.
![]() LET ME TRY IT
LET ME TRY IT
Creating a Table
Follow these steps to create a table:
- Select the Type tool and click the cursor where you want to place the table.
- Choose Table, Insert Table.
- In the Insert Table dialog box, enter the numbers of rows and columns you want (see Figure 12.2).
Figure 12.2. Enter the preferred settings in the Insert Table dialog box.
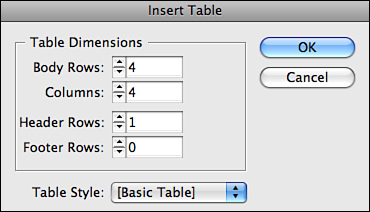
- If you want the table contents to be repeated, enter the number of header or footer rows you want it repeated on.
- Click OK.
When you click OK, InDesign displays the table inside the text frame. You can then click the Type tool cursor inside any table cell and add text by typing. As you type, the table column expands vertically to fit the added text.
You can also add text or inline graphics to a table cell by pasting from the Clipboard or importing with the File, Place command. Any text or inline graphics that do not fit in a table cell are stored as overset items. Also, when you add text or graphics to a cell that contains a fixed height, any items that exceed that height are automatically stored as overset. InDesign indicates when there are overset items by displaying a red dot in the bottom-right corner of the table cell.
Inline graphics become part of the text in which they are placed. If you edit the text, the graphic keeps its same position in the text.
Converting Text into Tables
InDesign allows you to convert a selected range of text into a table. To do so, highlight the text with the Type tool and choose Table, Convert Text to Table.
When the Convert Text to Table dialog box appears, indicate what delimiter characters (such as a tab, comma, or paragraph break) to use as column and row separators (see Figure 12.3). The delimiter character tells InDesign when to create a new column or row in the ensuing table. These characters should already exist in the text, but If they do not, you must place them before converting. You can choose delimiter characters from the Column Separator and Row Separator drop-down lists. The Number of Columns field becomes active only when you choose Paragraph as the delimiter character for both column and row separators.
Figure 12.3. Enter the preferred settings in the Convert Text to Table dialog box.
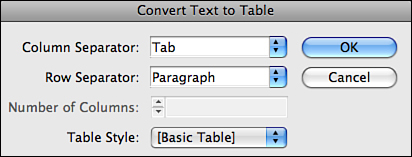
You can also apply an existing table style by choosing one from the Table Style drop-down list (see “Utilizing Table and Cell Styles,” later in this chapter). When you finish entering the preferred table conversion options, click OK to convert the text into a table.
Importing Tables from Microsoft Word or Excel Documents
When importing Microsoft Word or Excel documents that contain tables, you have the option to convert them into unformatted InDesign tables or into InDesign tables that will preserve Word or Excel styles and formatting.
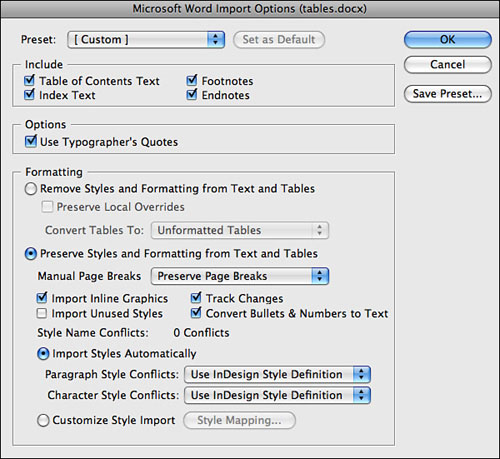
To import a table from a Word or Excel document, choose File, Place and browse to the document on your disk. To access the Import Options dialog box, enable the Show More Options feature located at the bottom of the Place dialog box, or hold down the Shift key as you click Open.
In the Formatting section of the Microsoft Word Import Options dialog box (see Figure 12.4), choose to either remove styles and formatting from the table or keep them. To remove styles and formatting, select Unformatted Tables from the Convert Tables To drop-down list. If you choose to keep the styles and formatting, there are several additional options to choose from, including Manual Page Breaks, Import Inline Graphics, Import Unused Styles, Track Changes, and Convert Bullets & Numbers to Text. You can also choose to import styles automatically or use a customized style import. The Customized Style Import option allows you to map InDesign styles to imported Word/RTF styles, and vice versa. For more on importing styles from Word and Excel documents, see Chapter 7, “Working with Text.”
Figure 12.4. Enter the preferred settings in the Microsoft Word Import Options dialog box.
Resizing Tables
InDesign enables you to resize tables by clicking and dragging with the Type tool, or by entering measurement values in the Row Height and Column Width fields of the Table panel or Control panel. You can also enter these values in the Rows and Columns panel of the Cell Options dialog box.
Resizing an Entire Table Interactively
To click and drag to resize an entire table, insert the Type tool cursor in any cell and position the cursor over the bottom-right corner of the table. When the Type tool cursor changes to display a diagonal, double-headed arrow, click and drag to scale (see Figure 12.5). To scale the table proportionally, hold down the Shift key as you drag.
Figure 12.5. To scale a table, position the Type tool cursor over the bottom-right corner of the table, and click and drag.
Resizing Columns Interactively
To resize a column, insert the Type tool cursor anywhere in the table and then position the cursor over the right or left edge of a cell (see Figure 12.6). When the cursor changes to display a horizontal, double-headed arrow, Shift+click and drag to change the column width.
Figure 12.6. To resize a column, position the Type tool cursor over the right or left edge of a cell and Shift+click and drag.
To change the width of all columns proportionally, hold down Shift as you drag the right edge of the table.
Resizing Rows Interactively
To resize a row, insert the Type tool cursor anywhere in the table and position the cursor over the top or bottom of a cell. When the cursor changes to display a vertical, double-headed arrow, click and drag to change the row height, as shown in Figure 12.7.
Figure 12.7. To resize a row, position the Type tool cursor over the top or bottom of a cell and Shift+click and drag.
To change the height of all rows proportionately, hold down Shift as you drag the bottom edge of the table.
Show Me: Media 12.1—Resizing Tables Interactively
![]()
Access this video file through your registered Web edition at my.safaribooksonline.com/9780132174541/media.
Resizing Columns and Rows Numerically
You can resize selected rows and columns numerically by entering measurement values in the Row Height and Column Width fields of the Table panel or Control panel. You can also enter these values in the Rows and Columns panel of the Cell Options dialog box.
To access the Rows and Columns panel of the Cell Options dialog box, choose Cell Options, Rows and Columns from the Table menu, or from the Table panel or Control panel menu. You can also right-click or Control-click (Mac) and choose the command from the contextual menu.
In the Cell Options dialog box, choose At Least or Exactly from the Row Height drop-down list and enter a measurement value in the field (see Figure 12.8). To apply a maximum row height, enter a value in the Maximum field. To resize selected column widths numerically, enter a measurement value in the Column Width field. You can also apply measurement values by clicking the up or down arrows located next to the Row Height and Column Width fields.
Figure 12.8. Enter the preferred settings in the Cell Options dialog box.
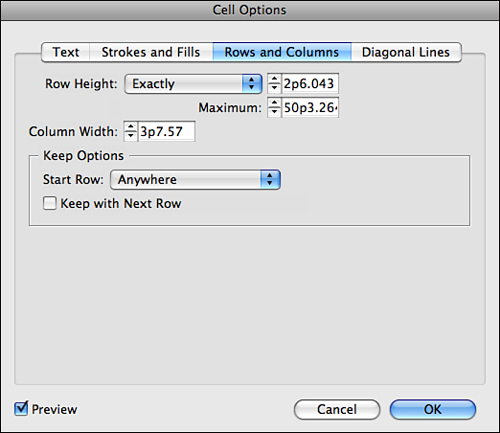
Check the Preview option at the bottom left of the dialog box to see the settings applied in the document as you adjust them. When you’re ready, click OK to apply.
Adding Rows and Columns
After you create (or import) a table, you can edit its appearance by adding and deleting rows and columns. InDesign offers several ways to do this.
Use any one of the methods in the sections that follow to add rows and columns to a table.
Using the Insert Command
Insert the Type tool cursor in any table cell and choose Table, Insert, Row/Column. You can also choose the command from the Table panel menu, or by Control-clicking (Mac) or right-clicking (Win) and selecting it from the contextual menu.
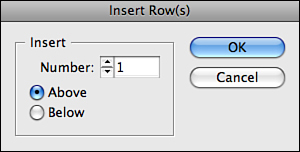
When the Insert Row/Column dialog box appears, enter the number of rows or columns you would like to add in the Number field (see Figure 12.9). At the bottom of the dialog box, choose whether to place the new rows above or below (or the new columns to the left or right of) the selected cell. Click OK to add the rows or columns.
Figure 12.9. Enter the preferred settings in the Insert Row/Column dialog box.
Using the Table Panel and Control Panel
You can also add rows and columns by entering settings in the Table panel or Control panel. The Number of Rows field and the Number of Columns field display the current number of rows and columns in the table.
To add rows or columns, insert the Type tool cursor in any table cell and enter the total number of rows or columns you would like the table to contain in the Number field of the Table panel or Control panel (see Figure 12.10). You can also add rows and columns by clicking the up or down arrows next to the number. When using this method, InDesign adds new rows at the bottom of the table, and new columns to the right.
Figure 12.10. To add rows or columns, enter the total number of rows or columns you would like the table to contain in the Table panel or Control panel.
![]()
Option-Dragging (Mac) or Alt+Dragging (Win)
Position the Type tool cursor over the top or bottom of a cell, click and hold the mouse button down, then Option-drag (Mac) or Alt+drag (Win) to create a new row or column.
Using the Table Options Dialog Box
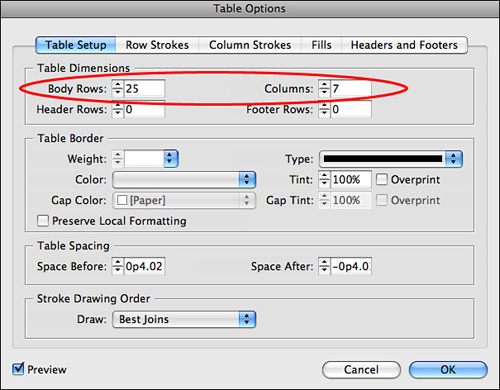
Insert the Type tool cursor in any cell and choose Table, Table Options, Table Setup. In the Table Setup panel of the Table Options dialog box that appears, enter the total number of rows and columns you would like the table to contain in the Body Rows and Columns fields (see Figure 12.11). You can also add rows or columns by clicking the up or down arrows next to the number fields. Enable the Preview option at the bottom left of the dialog box to see the settings applied in the document as you adjust them. When you’re ready, click OK to apply. When you do, InDesign adds new rows at the bottom of the table and new columns to the right.
Figure 12.11. To add rows or columns, enter the total number of rows or columns you would like the table to contain in the Table Setup panel of the Table Options dialog box.
Tell Me More: Media 12.2—Adding a Single Row at the Bottom of a Table
![]()
Access this video file through your registered Web edition at my.safaribooksonline.com/9780132174541/media.
Deleting Rows and Columns
Use any one of the following methods to delete rows or columns from a table:
Using the Delete Command
Insert the Type tool cursor in any table cell and choose Table, Delete, Row/Column. You can also choose the command from the Table panel menu, or by Control-clicking (Mac) or right-clicking (Win) and selecting it from the contextual menu. InDesign immediately deletes the row or column in which the cursor is positioned. You can also select multiple rows or columns with the Type tool and delete them using this method.
Using the Table Panel and Control Panel
You can also delete rows and columns by entering new settings in the Table panel or Control panel. The Number of Rows field and the Number of Columns field display the current number of rows and columns in the table.
To delete rows or columns, place the Type tool cursor in a cell and in the Number field enter the total number of rows or columns you would like the table to contain. You can also delete rows and columns by clicking the up or down arrows next to the number.
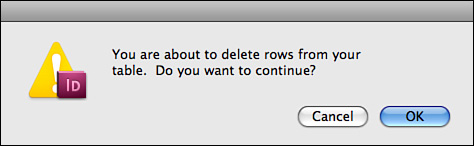
InDesign displays a warning dialog box whenever you enter lower values in the Number of Rows and Number of Columns fields (see Figure 12.12). If you are sure you want to delete, click OK. Note that when using this method, InDesign deletes rows from the bottom of the table and columns from the right, regardless of what rows or columns you have selected in the table.
Figure 12.12. InDesign displays a warning dialog box whenever you enter lower values in the Number of Rows and Number of Columns fields.
Using the Table Options Dialog Box
Insert the Type tool cursor in any table cell and choose Table, Table Options, Table Setup. In the Table Setup panel of the Table Options dialog box that appears, enter the total number of rows and columns you would like the table to contain in the Body Rows and Columns fields. You can also delete rows or columns by clicking the up or down arrows next to the number. Enable the Preview option at the bottom of the dialog box to see the changes applied as you make them. When you’re ready, click OK to apply. InDesign deletes rows from the bottom of the table and columns from the right.
Working with Header and Footer Rows
You have the option to include header and footer rows that can flow across multiple text frames, text columns, or pages. They can be added when creating a new table, or you can add them to an existing table. You can also convert selected table rows into repeating headers or footers.
Adding Header and Footer Rows
To include header or footer rows as you create a new table, enter the number of rows you’d like to have by entering values in the fields of the Insert Table dialog box (see the “Creating a Table,” Let Me Try It section, earlier in this chapter).
You can add header or footer rows to an existing table using the Table Options dialog box. Select a cell, row, column, or table with the Type tool and choose Table, Table Options, Headers and Footers. You can also choose the command from the Table panel menu, or by Control-clicking (Mac) or right-clicking (Win) and choosing it from the contextual menu. In the Headers and Footers panel of the dialog box, enter the number of rows you’d like to include by entering values in the respective fields (see Figure 12.13). You can also apply row numbers by clicking the up or down arrows located next to the Header Rows and Footer Rows fields.
Figure 12.13. Enter the preferred settings in the Headers and Footers panel of the Table Options dialog box.
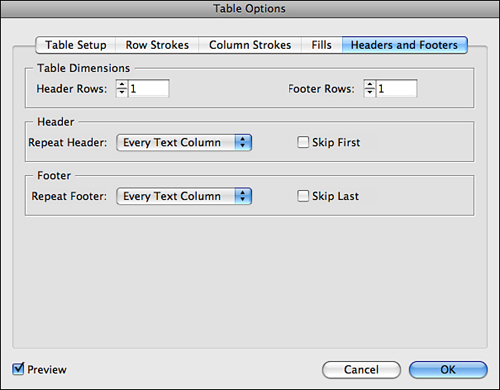
From the Repeat Header/Footer drop-down lists, you can choose to repeat the header or footer row on every text column, once per frame, or once per page. Select the Skip First option to prevent the header from appearing in the first row of the table. Select the Skip Last option to prevent the footer from appearing in the last row of the table. Select the Preview option at the bottom of the dialog box to see the settings applied in the document as you adjust them. When you’re ready, click OK to apply.
Converting Existing Rows into Headers and Footers
To convert an existing row into a header, select the first row of the table with the Type tool and choose Table, Convert Rows, To Header. You can also choose the command from the Table panel menu, or by Control-clicking (Mac) or right-clicking (Win) and choosing it from the contextual menu.
To convert an existing row into a footer, select the last row of the table with the Type tool and choose Convert Rows, To Footer from the Table menu, the Table panel menu, or the contextual menu.
It is also possible to convert multiple rows into headers or footers. To do so, select the first or last row of the table, then Shift+click to select additional rows and choose the appropriate command.
Editing Table Headers and Footers
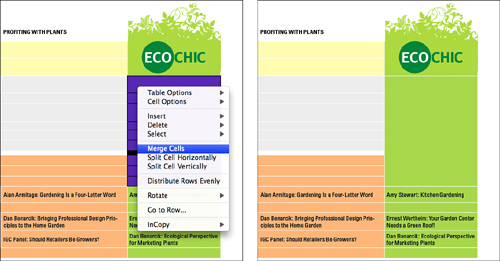
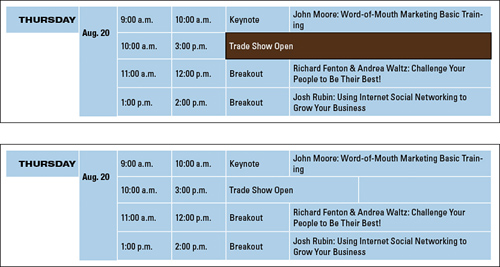
InDesign allows you to edit only the first instance of a header or footer row (see Figure 12.14). You can apply these edits just as you would with any other row; however, it is important to note that the edits are then applied to every instance of the header or footer throughout the table.
Figure 12.14. When you hover the Type tool cursor over subsequent headers and footers in a threaded table, InDesign displays a lock icon. This indicates that they cannot be edited.
You can edit Header and Footer options by changing the settings in the Headers and Footers panel of the Table Options dialog box. To access the dialog box, select a cell, row, column, or table with the Type tool and choose Table, Table Options, Headers and Footers. You can also choose the command from the Table panel menu, or by Control-clicking (Mac) or right-clicking (Win) and choosing it from the contextual menu.
To convert an existing header or footer into a body row, select the first instance of the header or footer with the Type tool (or Control-click (Mac) or right-click (Win) and choose Edit Header/Footer from the contextual menu) and choose Convert Rows, To Body from the Table menu or the Table panel menu.
Merging and Splitting Cells
When you adjust the height of a cell, you are also adjusting the height of the entire row. Likewise, adjusting the width of a cell also adjusts the width of the column. However, by merging and splitting cells, it is possible to create individual cells that are wider or taller than the rows or columns they are positioned in.
Merging and Unmerging Cells
To merge two or more cells in a table, select the cells with the Type tool and choose Table, Merge Cells. You can also choose the command from the Table panel menu, or by Control-clicking (Mac) or right-clicking (Win) and choosing it from the contextual menu. After you choose the Merge Cells command, InDesign places any text or graphics contained in the selected cells into one merged cell (see Figure 12.15).
Figure 12.15. Multiple empty selected cells (left) and the cells merged together (right).
To restore a merged cell back to its original state, select the cell and choose Table, Unmerge Cells. You can also choose the command from the Table panel menu, or by Control-clicking (Mac) or right-clicking (Win) and choosing it from the contextual menu.
You can also merge and unmerge selected cells by clicking either the Merge Cells or Unmerge Cells button located in the Control panel.
Splitting Cells
To divide a cell, select it with the Type tool and choose Table, Split Cell Horizontally or Table, Split Cell Vertically. You can also choose the commands from the Table panel menu, or by Control-clicking (Mac) or right-clicking (Win) and choosing it from the contextual menu. After you choose the command, InDesign positions any cell contents (text or graphics) in the left or top half of the cell (see Figure 12.16).
Figure 12.16. A single selected cell (top) and the same cell split vertically (bottom).
Show Me: Media 12.3—Merging and Splitting Cells
![]()
Access this video file through your registered Web edition at my.safaribooksonline.com/9780132174541/media.
Adjusting Cell Spacing and Alignment
Table cells are like little text frames in that they allow you to insert text and inline graphics. Because of this, you can also apply some of the same text frame settings, including inset spacing amounts, vertical justification, and horizontal text alignment.
Just as you would apply text frame settings using the Text Frame Options dialog box, you can apply table cell settings using the Cell Options dialog box.
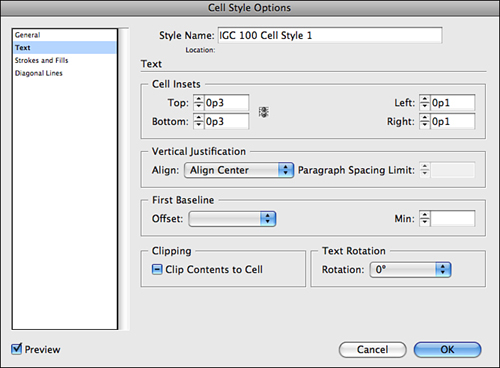
To access the dialog box, place the Type tool cursor in any table cell and choose Table, Cell Options, Text. You can also choose the command from the Table panel menu, or by Control-clicking (Mac) or right-clicking (Win) and choosing it from the contextual menu.
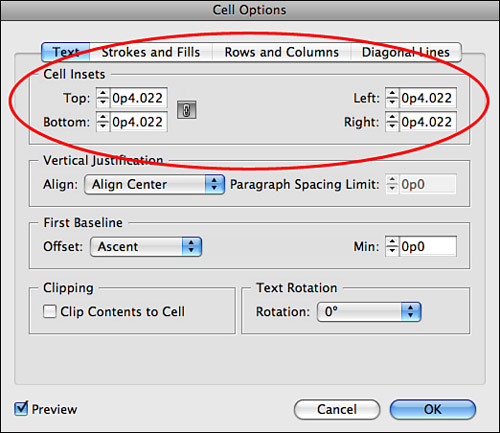
In the Text panel of the Cell Options dialog box, enter Top, Bottom, Left, and Right cell inset spacing amounts in the respective fields. You can also enter inset spacing amounts by clicking the up or down arrows located next to each field.
To apply vertical justification to the selected cell(s), choose Top, Center, Bottom, or Justify from the Align drop-down list (see Figure 12.17). To apply a limit for paragraph spacing when applying justified vertical alignment, enter a value or click the up or down arrows in the Paragraph Spacing Limit field. This value sets the maximum amount of space allowed between paragraphs in the cell when justified. InDesign adjusts the leading of each line up to the amount entered. Enter higher values to prevent a change in leading.
Figure 12.17. Enter the preferred inset settings in the Text panel of the Cell Options dialog box.
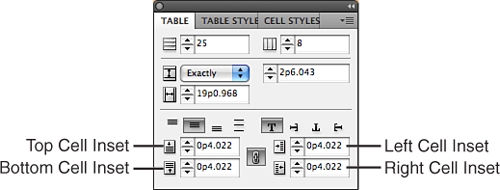
If you prefer working with panels rather than dialog boxes, you can also enter inset spacing amounts for a selected cell (or series of cells) in the Top, Bottom, Left, and Right cell inset fields of the Table panel or Control panel (see Figure 12.18).
Figure 12.18. You can also enter inset spacing amounts in the Top, Bottom, Left, and Right cell inset fields of the Table panel or Control panel. Inset spacing is the amount of space in between the cells.
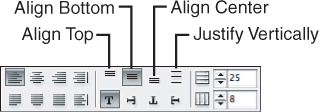
You can also apply vertical justification settings by clicking one of the vertical alignment buttons located in the Table panel or Control panel. Options include Align Top, Align Bottom, Align Center, or Justify Vertically (see Figure 12.19).
Figure 12.19. The Control panel also contains several vertical alignment buttons.
To adjust the horizontal alignment of text contained within a table cell, insert the Type tool cursor into the paragraph and click one of the alignment buttons located in the Paragraph panel or Control panel. See Chapter 8, “Formatting Text,” for more about applying paragraph alignment options.
To adjust a table’s horizontal alignment in relation to its text frame container, insert the Type tool cursor before or after the table in the frame, and click one of the horizontal alignment buttons located in the Paragraph panel or Control panel.
Setting Table Borders, Strokes, and Fills
InDesign allows you to apply stroke and fill attributes to an entire table (globally) and to its individual cells (locally). You can apply cell strokes and fills globally using the Table Options dialog box and locally using the Cell Options dialog box. You can also apply stroke and fill attributes, globally and locally, using the controls available in the Control panel.
Setting a Table Border
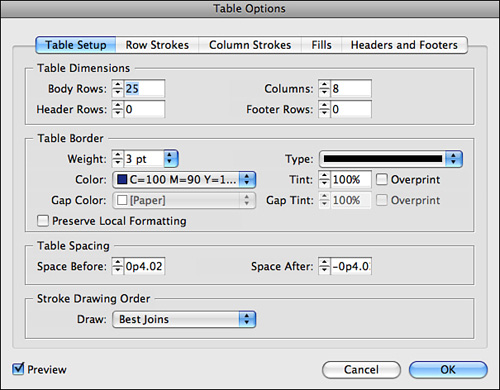
To set the table border (the stroke or line that surrounds the entire table), choose Table, Table Options, Table Setup. You can also choose the command from the Table panel menu, or by Control-clicking (Mac) or right-clicking (Win) and choosing it from the contextual menu.
In the Table Setup panel of the Table Options dialog box that appears, choose a stroke Weight, Type, Color, and Tint setting (see Figure 12.20). You can also choose a Gap Color and Tint value when applying an open stroke style. To overprint, enable the Overprint options. For more about these settings, see Applying Strokes in chapter 5, Working with Frames and Shapes.
Figure 12.20. Enter the preferred settings in the Table Setup panel of the Table Options dialog box.
If you already applied a cell border locally to one or more cells at the top, bottom, right, or left edges of the table using the Cell Options dialog box or Control panel, applying a table border using the Table Options dialog box will override it. To maintain local cell formatting, select the Preserve Local Formatting option.
To apply a table border locally using the Cell Options dialog box, select the entire table with the Type tool and choose Table, Cell Options, Strokes and Fills. You can also choose the command from the Table panel menu, or by Control-clicking (Mac) or right-clicking (Win) and choosing it from the contextual menu.
In the center of the cell diagram at the top of the Cell Options dialog box, click the intersecting horizontal and vertical lines. By clicking these lines, you are telling InDesign to apply a stroke to the surrounding edges of the table, and not to the interior cell edges (see Figure 12.21). Choose a stroke Weight, Type, Color, and Tint setting (see Figure 12.22). You can also choose a Gap Color and Tint value when applying an open stroke style. To overprint, enable the Overprint options.
Figure 12.21. Click the intersecting horizontal and vertical lines to apply a stroke to the surrounding edges of the table, and not to the interior cell edges.
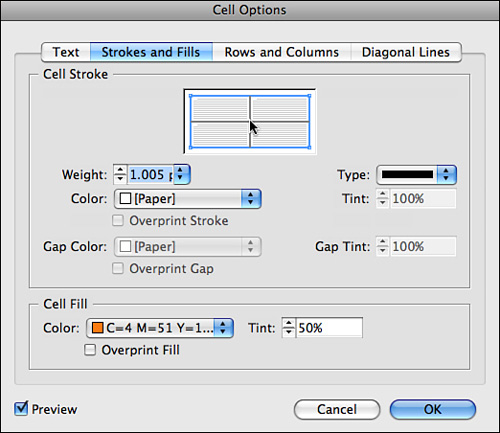
Figure 12.22. The Control panel also contains cell stroke type and weight controls, including a cell diagram.
![]()
You can also apply a table border locally using the cell diagram and stroke type and weight controls located in the Control panel.
Setting Table Strokes and Fills
To set cell strokes and fills globally using the Table Options dialog box, insert the Type tool cursor anywhere in the table and choose Table, Table Options, Alternating Row Strokes, Alternating Column Strokes, or Alternating Fills (see Figure 12.23). You can also choose the commands from the Table panel menu, or by Control-clicking (Mac) or right-clicking (Win) and choosing them from the contextual menu. From the Alternating Pattern menu at the top of the Table Options dialog box, choose to apply a stroke or fill to Every Other, Every Second, Every Third, or Custom Row/Column.
Figure 12.23. Enter the alternating fills, row strokes, or column strokes settings in the respective panel of the Table Options dialog box.

Choose a fill color and tint or a stroke weight, type, color, and tint for the first and next rows or columns. You can also choose a Gap Color and Tint value when applying an open stroke style. To overprint, enable the Overprint options. For more about these settings, see “Applying Strokes” in Chapter 5, “Working with Frames and Shapes.”
You can also choose to skip rows or columns in the alternating stroke or fill pattern by entering a value in the Skip First or Skip Last field.
To maintain local cell formatting already applied using the Cell Options dialog box or Control panel, select the Preserve Local Formatting option.
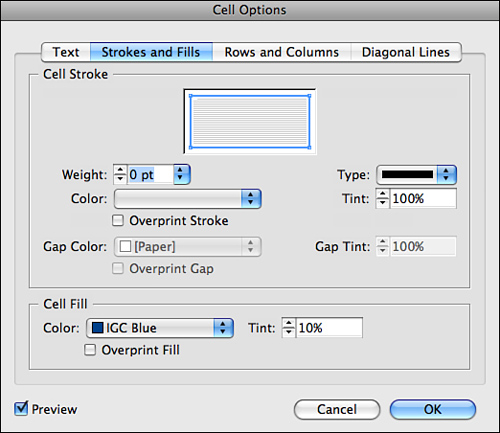
Setting Strokes and Fills in Individual Cells
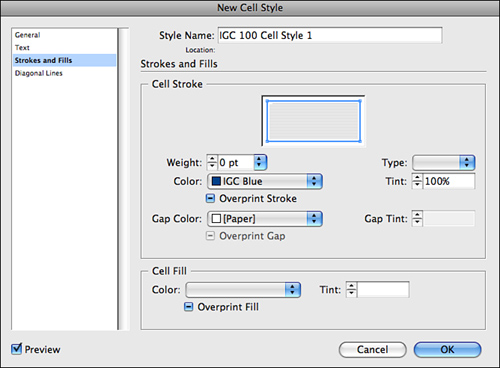
To set cell strokes and fills locally using the Cell Options dialog box, select the cells you would like to format and choose Table, Cell Options, Strokes and Fills. You can also choose the command from the Table panel menu, or by Control-clicking (Mac) or right-clicking and choosing it from the contextual menu.
From the cell diagram at the top of the Cell Options dialog box, click to highlight the edges you would like to apply a stroke to. Proceed to choose a stroke weight, type, color, and tint. You can also choose a Gap Color and Tint value when applying a stroke style. At the bottom of the dialog box, choose a fill color and tint to apply to the selected cells. To overprint cell strokes and fills, enable the Overprint options.
Enable the Preview option at the bottom of the dialog box to see the settings applied to the table as you adjust them (see Figure 12.24). When you’re ready, click OK to apply.
Figure 12.24. Enter the preferred settings in the Strokes and Fills panel of the Cell Options dialog box.
You can also apply strokes locally to selected cells using the cell diagram and stroke type and weight controls located in the Control panel. In addition, you can set cell strokes and fills locally using the Stroke panel and Swatches panel—just as you would with any text frame.
Working with Table Contents
InDesign enables you to insert text, graphics, diagonal lines, tabs, and other special characters into a table cell.
Placing a Graphic in a Table Cell
You can place a graphic in a table cell the same way you would insert a graphic into a line of text. Because table cells behave like miniature text frames, placed graphics are treated as nested inline objects.
To place a graphic in a table cell, click to place an insertion point with the Type tool and import using the Place command or by copying and pasting. For more on placing inline graphics, see Chapter 11, “Combining Graphics with Text.”
Fixing Overset Table Cell Contents
Table cells automatically expand when you insert text or graphics inside them. However, when you add text or graphics to a cell that contains a fixed height amount, any items that exceed that height are automatically stored as overset. InDesign indicates when a cell contains overset items by displaying a red dot in the bottom-right corner of the cell (see Figure 12.25).
Figure 12.25. A red dot appears in the bottom-right corner of the cell when it contains overset items.
To display overset text and graphics in an overset cell, expand the cell or reduce the size of the text or graphics. You can also select the cell and adjust the fixed height amount, the inset spacing, or the first baseline offset.
You can also thread text frames containing overset tables and repeat any existing header and footer rows.
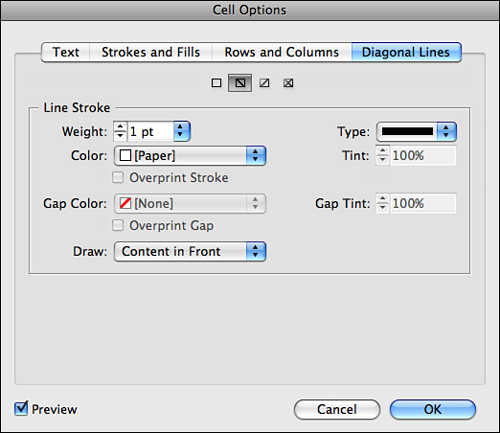
Applying Diagonal Lines to Cells
You can apply a diagonal line to a selected table cell (or series of cells) using the Diagonal Lines panel of the Cell Options dialog box. Choose Table, Cell Options, Diagonal Lines to open the Diagonal Lines panel (see Figure 12.26). You can also choose the command from the Table panel menu, or by Control-clicking (Mac) or right-clicking (Win) and choosing it from the contextual menu. Click one of the option buttons located at the top of the Cell Options dialog box and then choose stroke weight, type, color, and tint. To overprint, enable the Overprint options. From the Draw drop-down list, choose Content in Front or Diagonal in Front.
Figure 12.26. Enter the preferred settings in the Diagonal Lines panel of the Cell Options dialog box.
Setting Tabs in Table Cells
When you press the Tab key with the Type tool cursor inserted in a table cell, it moves the cursor to the next cell. So does this mean that you can’t enter tab characters into a table cell? Thankfully, no—you can enter tab characters by inserting your cursor into a table cell and choosing Type, Insert Special Character, Tab. You can also Control-click (Mac) or right-click (Win) and choose the command from the contextual menu. If you’re on the Mac platform, you can press Option-Tab to insert a tab in the current cell.
Utilizing Table and Cell Styles
Table and cell styles are similar to paragraph and character styles in that they enable you to apply multiple formatting attributes with one click of the mouse button. With table styles, you can save and apply multiple table formatting attributes, such as table borders and row/column strokes. With cell styles, you can save and apply multiple cell formatting attributes, such as cell insets, paragraph styles, and strokes and fills.
As with paragraph and character styles, you can create table and cell styles that are based on another style. When you change or edit a parent style, any shared attributes will also change throughout the document. You can also import your favorite table/cell styles and style groups from other InDesign documents via the Load Styles feature. For more on using these style features, see Chapter 9, “Working with Text Styles.”
Creating a Table/Cell Style
You can set up a table or cell style in three ways: from scratch, by basing the new style on a preformatted table, or by basing it on an existing table/cell style.
• To create a table or cell style from scratch (with no attributes already set), you must first make sure that you do not have the Type tool cursor inserted in a table, and that you do not have a table/cell style selected in the Table/Cell Styles panel. Then Option-click (Mac) or Alt+click (Win) the Create New Style button located at the bottom of the Table/Cell Styles panel or choose New Table/Cell Style from the Table/Cell Styles panel menu.
• To create a table or cell style that starts out by inheriting all the attributes of a table or cell that has already been formatted locally, insert the Type tool cursor in the table or cell, then Option-click (Mac) or Alt+click (Win) the Create New Style button at the bottom of the Table/Cell Styles panel. This is probably the easiest way to create a new table/cell style.
• To create a table or cell style that starts out by inheriting all the attributes of another style, make sure the Type tool cursor is not inserted in a table. Then highlight the existing style in the Table/Cell Styles panel and click the Create New Style button or choose New Table/Cell Style from the Table/Cell Styles panel menu or Control panel drop-down list.
When you use one of these methods to create a table/cell style, InDesign displays the New Table/Cell Style dialog box (see Figure 12.27). Each of the panels in this dialog box mirrors the formatting controls located in the Table/Cell options dialog boxes. You can access a panel by clicking its name in the menu to the left.
Figure 12.27. The New Table/Cell Style dialog box enables you to specify which attributes you’d like to save as a table/cell style.
Including Cell Styles in Table Styles
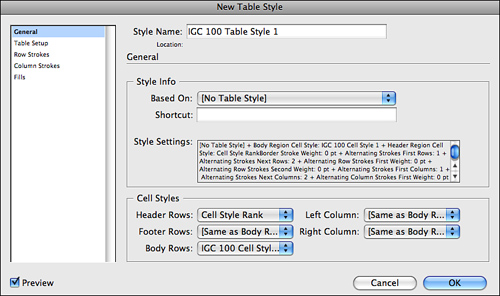
There is only one way to include cell style attributes as part of a table style. Choose a cell style (or multiple cell styles) from the General panel drop-down lists available in the New Table Style dialog box. When editing a table style, choose the cell styles from the General panel of Table Style Options dialog box. The options you choose allow you to specify where the cell styles are applied in the table (Header Rows, Footer, Rows, Body Rows, Left Column, and Right Column) (see Figure 12.28).
Figure 12.28. Choose the cell styles to include from the drop-down lists available in the General panel of the New Table Style dialog box.
Show Me: Media 12.4—Including Cell Styles in Table Styles
![]()
Access this video file through your registered Web edition at my.safaribooksonline.com/9780132174541/media.
Applying Table/Cell Styles
To apply a table or cell style, place the cursor anywhere in the table or highlight the cells you would like to stylize. Proceed to click the style name in the Table/Cell Styles panel, or choose the style name from the Table/Cell Styles drop-down list in the Control panel (see Figure 12.29).
Figure 12.29. You can apply table/cell styles to a selected table or cells by choosing one from the table/cell style drop-down lists located in the Control panel.

Remember that unlike paragraph and character styles, table and cell styles do not share attributes. Therefore, when you apply a table style, InDesign does not override any cell formatting; when you apply a cell style, InDesign does not override any table formatting.
By default, when you apply a cell style, InDesign removes any formatting from a cell style that was previously applied, but does not remove any local cell formatting. Similarly, when you apply a table style, InDesign removes formatting from a table style that was previously applied, but does not remove any overrides made by entering settings in the Table Options dialog box.
Editing Table/Cell Styles
To edit a table/cell style by changing attribute settings in the Table/Cell Style Options dialog box (see Figure 12.30), do one of the following:
• Press Shift-Opt-Cmd (Mac) or Shift+Alt+Ctrl (Win) and double-click the style name in the Table/Cell Styles panel.
• Control-click (Mac) or right-click (Win) the style name in the Table/Cell Styles panel and choose Table/Cell Style Options from the contextual menu.
Figure 12.30. The Table/Cell Style Options dialog box enables you to edit stylized table/cell attributes.
Adjust the attribute settings located in the different panels of the Table/Cell Style Options dialog box. After you click OK, the changes affect all the tables/cells wherever the style is applied in the document.
Applying Table/Cell Overrides
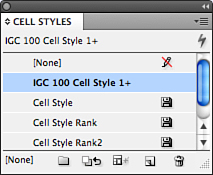
You may be wondering why a plus sign (+) occasionally appears next to a style name in the Table/Cell Styles panel. When the plus sign appears, it means that the applied style for the current table/cell selection has been overridden (see Figure 12.31). A style appears as overridden in the panel only when you apply local edits to stylized table/cell attributes.
Figure 12.31. The plus sign appears next to the style name only when you edit the stylized table/cell attributes locally.
To remove all table/cell style overrides for a selection, Option-click (Mac) or Alt+click (Win) the style name in the Table/Cell Styles panel. You can also remove table/cell style overrides by clicking the Clear Overrides in Selection button in the Table/Cell Styles panel or its equivalent in the Control panel (see Figure 12.32). You can also choose the Clear Overrides command from the Table/Cell Styles panel menu.
Figure 12.32. Click the Clear Overrides button to remove any table/cell style overrides that are currently applied to the selected table/cells.
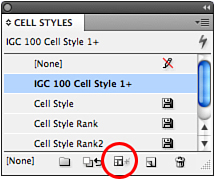
Clearing Undefined Cell Attributes
To remove all local cell attributes not changed by an applied style, click the Clear Attributes Not Defined by Style button at the bottom of the Cell Styles panel, or choose the command equivalent from the Cell Styles panel menu (see Figure 12.33).
Figure 12.33. Click the Clear Attributes Not Defined by Style button to remove all local cell attributes ignored by an applied style.
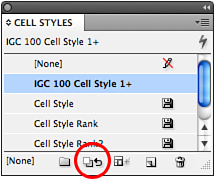
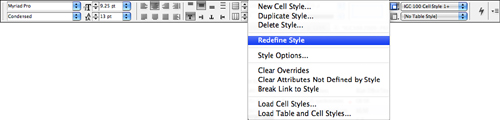
Redefining Table/Cell Styles
You can redefine table/cell styles after applying local edits to stylized table/cell attributes. To do so, insert the Type tool cursor in the stylized table/cell and proceed to edit the stylized attributes locally. Then choose Redefine Style from the Table/Cell Styles panel menu (see Figure 12.34). InDesign adjusts the style to match.
Figure 12.34. You can also access the Redefine Style command from the Control panel drop-down list.