
11. Dealing with Problems
This chapter covers how you can use Project 2010 to resolve common problems with your project.
While managing projects, you will, no doubt, run into any number of problems. This book has provided you with many of the processes for dealing with basic problems, such as splitting tasks and reassigning work to other resources. This chapter covers a few of the more common problem scenarios that we haven’t yet dealt with in this book, and how you can use Project 2010 to resolve the issues.
Tell Me More: Media 11.1—Avoiding Future Problems by Using Project 2010 Now

Access this audio file through your registered Web Edition at my.safaribooksonline.com/9780132182461/media.
Problem: One of My Resources Is Overallocated
Overallocation occurs when a resource in your project is assigned to work that exceeds their available time (the value entered in the resource’s Max Units field). For example, a resource has a Max Units value of 100% for a project. That resource is assigned 75% to one task and 50% to another task at the same time. Because the assignment total is 125%, and the resource’s availability is 100%, the resource is overallocated by 25%.
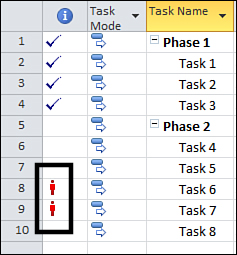
Project 2010 provides a visual indicator when a resource assigned to a task is overallocated. In the Gantt Chart view, look for a red icon in the Indicators column, as shown in Figure 11.1.
Figure 11.1. Look for the highlighted red icons in the Indicators column to identify overallocated resources.
So what do you do if you find that you have overallocated resources in your project? Resource leveling is the process of looking at how resources are allocated in your project and moving the assignments around so that tasks are done according to constraints (as soon as possible, for example), but without forcing resources to work beyond 100% of their availability.
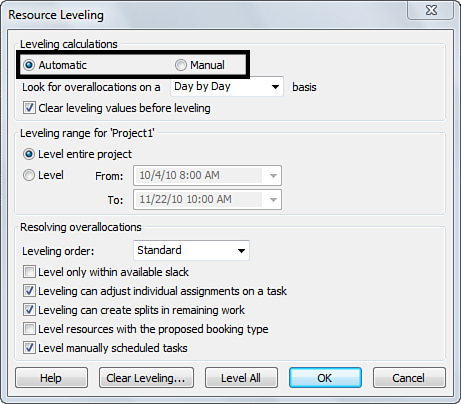
Project 2010 enables you to control how leveling occurs in your project. First, make sure that manual leveling is selected for the project. On the Resource tab, in the Level group, click Leveling Options. On the Resource Leveling dialog box, under Leveling Calculations, ensure that Manual is selected, as shown in Figure 11.2.
Figure 11.2. Under Leveling Calculations, click Manual.
Show Me: Media 11.2—Manually Leveling Resources

Access this video file through your registered Web Edition at my.safaribooksonline.com/9780132182461/media.
You have a few different ways to manually level resources in your project.
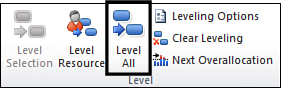
To level all resources across all tasks in your project, on the Resource tab, in the Level group, click Level All, as shown in Figure 11.3.
Figure 11.3. Click Level All to level all resources in your project.
To level all resources assigned to specific tasks in your project, follow these steps:
- Press Ctrl and click the row header for each task you want to level. This selects the tasks.
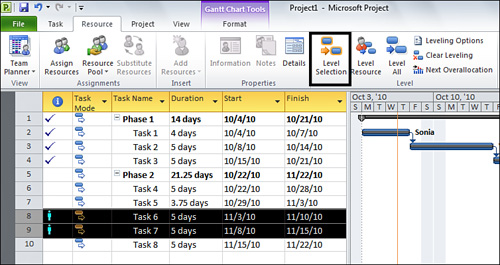
- On the Resource tab, in the Level group, click Level Selection, as shown in Figure 11.4.
Figure 11.4. Select the appropriate tasks and then click Level Selection.
To level specific resource across all tasks in your project, follow these steps:
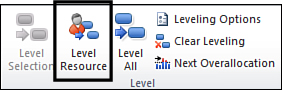
- On the Resource tab, in the Level group, click Level Resource, as shown in Figure 11.5.
Figure 11.5. Select the appropriate tasks and then click Level Selection.
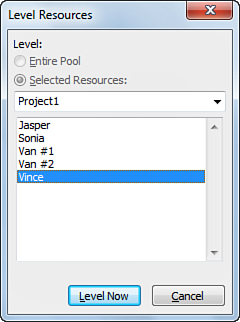
- On the Level Resource dialog box, shown in Figure 11.6, click the name of the resource you want to level, and then click Level Now.
Figure 11.6. Click the name of a resource, and then click Level Now.
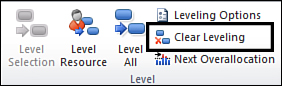
If, at any point, you no longer want resources leveled on your project, on the Resource tab, in the Level group, click Clear Leveling, as shown in Figure 11.7.
Figure 11.7. Click Clear Leveling to remove leveling from your project.
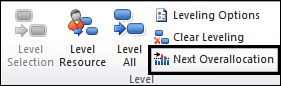
If you have several overallocations that you want to deal with one at a time in a project with many tasks, you can go through the overallocations one at a time by clicking Next Overallocation (on the Resource tab, in the Level group), as shown in Figure 11.8.
Figure 11.8. Click Next Overallocation to move to the next issue.
Problem: My Schedule Goes Longer Than My Deadline
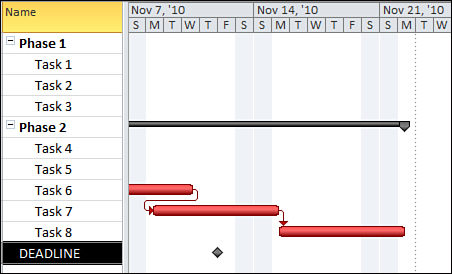
It’s not uncommon. Resources provided updates to tasks in your project, you just finished adding those updates to your project, and you find that those updates have pushed out the schedule because the work is being completed slower than scheduled. The last task is now scheduled to finish in November, and you have a deadline of the end of October. Or maybe you included a milestone in your project to represent the deadline, and you see that tasks are going beyond that milestone (as shown in Figure 11.9). Any number of expletives may be running through your head, and you’re not sure what you should do to pull things back on track.
Figure 11.9. An example of a deadline (indicated by a diamond on the Gantt chart) with tasks in the critical path extending beyond it in the Detail Gantt view
First things first: You need to figure out what factors are tying your schedule down. You can use the Task Inspector (on the Task tab, in the Tasks group, click Inspect) to help identify which of these factors may be contributing to the lengthy schedule:
• Constraints— If tasks in your project have constraints applied, review those constraints and make sure you really need them in place. Does that task really need to start no earlier than that date? Can you make that date a little earlier? Look closely at what you can do to the constraints to save some time in your overall project schedule. For more information on constraints, see Chapter 4, “Working with Tasks.”
• Dependencies— Look closely at the dependencies you have set up between tasks in your project. Does one task really need to wait for the next task to finish completely, or can it start when the previous task is 50% done? Do those two tasks really need to finish at the same time, or can one finish a bit earlier so that its successor can get started earlier? Make sure that dependencies accurately reflect what needs to happen in your project. See Chapter 4 for more information on overlapping tasks in your project.
• Durations— Are the durations of your tasks accurate, or have you added some padding to the durations to give your resources wiggle room? If you padded your durations, now’s the time to take that padding out and be realistic about what you need to get done to finish this project on time. This is a very common issue, especially when adding updates from resources to a project. The updates you enter may increase durations, or the actions you take during leveling may push out a finish date. For more information on adjusting task durations, see Chapter 4.
• Calendars— This is a tricky one. Remember that you have project, task, and resource calendars to account for. Look at each of these calendars and see how it’s affecting the remaining tasks in your project. Is a resource that’s assigned to one of the remaining tasks taking a week of vacation in the middle of the task? Can you assign someone else to do the work so that the task can be done sooner? Or can you move the task earlier in the project, before the resource goes on vacation? Evaluate nonworking time in each calendar used by the remaining tasks and see what you can move around to bring in the schedule. For more information on calendars, see the section titled, “Setting Up Your Project’s Calendars,” in Chapter 3, “Starting a Project.”
If adjusting constraints, overlapping tasks, shortening durations, and moving tasks around based on calendar availability doesn’t bring your schedule in enough to meet your deadline, you might consider assigning additional resources to your tasks. With more people working on tasks, or more machinery available to do the work, your team may be able to get tasks done more quickly, enabling you to meet your deadline. In thinking about this option, however, it’s critical to balance the importance of meeting the deadline with the costs incurred by adding resources to your project. It may make more sense to push the deadline out to a later date. You still incur resource costs because of the additional hours that the existing resources put in past the original deadline, but those costs may be less than the costs incurred by adding more staff or equipment to get the work done on time.
Problem: My Costs Are Exceeding My Budget
You’ve set a budget for your project, and you’ve been checking spending against budget regularly, using the processes you learned in Chapter 6, “Accounting for Project Costs.” While reviewing costs, you realize that you have now crossed from spending on target to overspending. First, you’ll want to figure out where these overages are coming from.
 LET ME TRY IT
To identify the source of cost overages in the Resource Usage view, follow these steps:
- On the View tab, in the Resource Views group, click Resource Usage.
- On the View tab, in the Data group, click Budget Assignment in the Group by list.
- On the View tab, in the Data group, click Outline and then click Outline Level 1. Each of the groupings collapses so that you can easily look at the numbers for each of the budget assignments.
- Compare the Budget Cost column with the Actual Cost column, and the Budget Work column with the Actual Work column. If the actual values are higher than the budget values, that budget assignment contains overages.
- Click the plus sign next to the name of the budget assignment that contains the overage. This expands the budget assignment, enabling you to review each resource that has that budget assignment.
- Look through the actual data for each resource, expanding resource names to see task-specific data. Look across the right pane in the view to see timephased actual cost and work data.
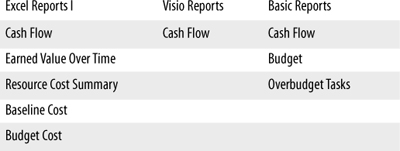
Also, several visual and basic reports can help you narrow down cost issues, listed in Table 11.1.
Table 11.1. Cost Reports in Project 2010
For more information on generating reports, see the “Reporting on Your Project” section of Chapter 8, “Sharing Your Project with Others.”
After you’ve identified where the cost issues are occurring, the next step is deciding what you want to do to get your costs back to budget. Baselining may be a good idea here, so that you capture what your data looks like before making modifications. For more information on baselining, see “Baselining Your Project” in Chapter 7, “Capturing Project Progress.”
You can take a few approaches to cut back on costs.
Assigning Work to Fewer People
If you’ve got any extra resources working on your project, perhaps they can be better used on another project. By removing excess resource assignments from your project, you reduce the costs that those resource assignments incur.
For more information on working with resource assignments, see “Assigning Resources to Tasks” in Chapter 5, “Working with Resources.”
Cutting Back on What Needs to Get Done
Are there remaining tasks that aren’t 100% necessary for completion of your project? By removing tasks, you also remove resource assignments, thereby reducing the associated costs.
For more information on working with tasks, see Chapter 4.
Trimming Budget Amounts
Are you sure that your budget amounts are accurate? If you’ve padded your budget a bit for flexibility, now’s the time to cinch up the belt and be realistic. Sometimes, all that’s needed is a more realistic set of budget data, and your project will be back on track.
For more information on adjusting budget data, see “Adding Values to Budget Resources” in Chapter 6.