It came as a surprise to nearly everyone that DSLRs might be used for serious work. It wasn’t supposed to happen like this—not by a long shot. The DSLR only came about because the news wire services no longer wanted to send both still and video camera people to the same event.
Today the pro shooter must look at the DSLR in a different light, for as much as it doesn’t feel or act like a true video camera, the ersatz camcorder has nonetheless emerged as a serious tool in the shooter’s burgeoning bag of tricks.

FIGURE 5.1
The DSLR plays a serious role for shooters of every stripe. I used a Canon 5D to shoot the web demos for Moonrise Kingdom (2012). 1
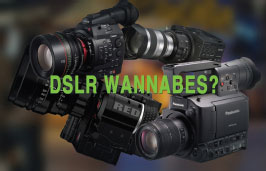
FIGURE 5.2
The DSLR has profoundly influenced the shape and capabilities of video cameras. The large sensor Panasonic AF, RED Epic, and Canon EOS are effectively souped-up DSLRs.
We all know that a DSLR can produce very compelling video images. We also know that the DSLR is capable of producing the most hideous amateur-looking video images. The fact is if you stay within a DSLR’s narrow dynamic range, and limited color gamut, you should do fine, or even better than fine. But venture too far into the darkest night or the brightest day, and you better watch out. A bevy of ugly artifacts is never far away.
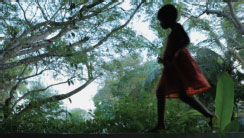
FIGURE 5.3
In the right hands, the DSLR can produce remarkable and compelling images, such as this one from The Girl Who Could Not Fly by Chris Morgan, Tanzania, 2012.
The DSLR’s reduced sampling does not in itself produce inferior images, but it does increase the risk of pictures that are soft or clipped, that lack contrast, or exhibit noisy shadows. If you can handle the risk, are cognizant of it, and can work with the camera’s operational and performance compromises, then proceed. Embrace the DSLR for the economy and filmmaking prowess it offers. Embrace it with all the gusto in your being.
The DSLR is designed to yield the best possible still images. It was never intended to capture superior audio and video; indeed, the price difference between the two types of cameras underlies many DSLR compromises and limitations.
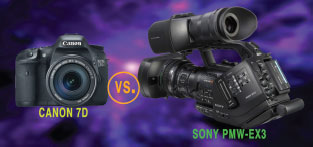
FIGURE 5.4
Which camera makes sense for you? The DSLR is inexpensive and features a large sensor with a wide range of available lenses. It is also subject to overheating, the zoom is not a true zoom and lacks servo control, the CF card connector pins are prone to bending or breaking, the camera has no proper audio capability and connectors, and usually lacks timecode support and full-raster HDMI monitoring.
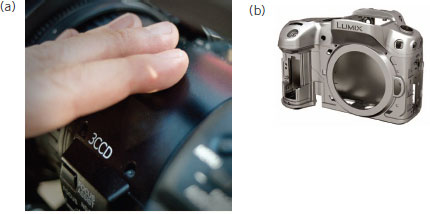
FIGURE 5.5
The heat sinks in a true video camera (a) direct excessive heat away from the sensor. To achieve low noise, DSLRs without the proper heat sinks or heat dissipation must necessarily limit the processing load. The size and shape of a still camera (b) works against efficient heat management, which in turn limits a camera’s continuous runtime.
The large pixels in a DSLR are light sensitive in the way large-grain bromide crystals are triggered more readily in high-speed film emulsion. The Canon 5D’s double-frame sensor is twice the size of a 4-perf 35mm cine sensor, and this greater size has its benefits—and drawbacks.
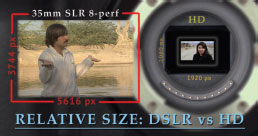
FIGURE 5.6
The DSLR center-crops HD video to 1920 × 1080, reducing the significance of a sensor’s total pixel count.
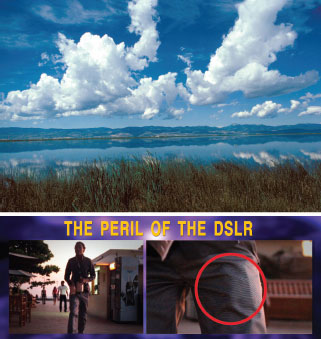
FIGURE 5.7
DSLRs designed to produce the sharpest still images do not utilize an optical low pass filter (OLPF) and so are susceptible to severe moving video defects like moiré.

FIGURE 5.8
The Nikon D800 was one of the first DSLRs to be fitted with an OLPF. The filter placed in front of the sensor reduces moiré by absorbing ultraviolet and infrared light. The use of a low pass filter is controversial due to the trade-off in resolution. Unlike an ordinary camera diffusion filter, the OLPF affects fine detail only.
If you’re shooting video with a still camera you need to understand the implications. The DSLR’s low data load spread over a huge raster places enormous stress on an image. Omitting huge numbers of samples, skipping every other sensor line, or utilizing ham-fisted long-GOP compression, do not great pictures make!
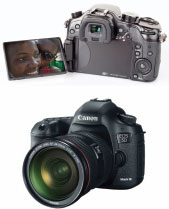
FIGURE 5.9
To minimize the heat that contributes to noise, the still camera uses line skipping and other questionable practices to reduce the processing load. More sophisticated models rely on improved algorithms to reduce the data burden.
It is vital to recognize a DSLR’s narrow dynamic range. This means avoiding blown-out overly bright windows in a dark interior set, and deep impenetrable shadows in high-contrast daylight exteriors or at night.
DSLR shooters must employ adequate fill to lift weak shadow areas to avoid blockiness and noise. Besides the routine use of a mirror or passive fill card, I also may use a TIffen Soft/FX or Schneider Digicon to tighten the shadows at the bottom of the camera’s characteristic response curve.
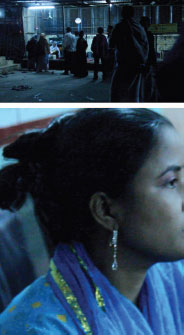
FIGURE 5.10
Blotchy shadows may appear in highly compressed DSLR images especially in low light.

FIGURE 5.11
Act of Valor (2012). A sizable portion of the movie’s $12 million budget went to ameliorating the shortcomings in the DSLR images and workflow.
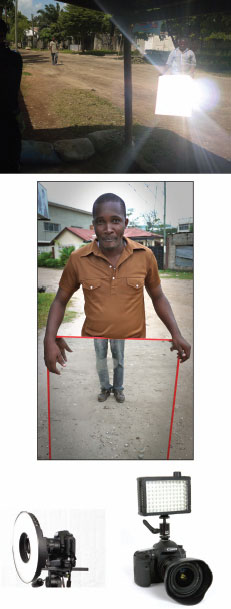
FIGURE 5.12
The DSLR shooter constantly seeks ways to fill weak shadows and reduce noise. Mirrors or bounce cards can be effective. So can an on-camera LED or ring light to fill the facial shadows of actors’ close ups.
Owing to many DSLRs’ notorious line skipping, these cameras may exhibit noticeably reduced vertical resolution. The tilting of the camera therefore in high-detail scenes should be performed with care to minimize aliasing artifacts, which may be especially apparent on a big screen.
Keep in mind that the load shedding in a DSLR is really a form of cost shifting, because the shortcomings of the camera along with its low price are frequently offset by the additional costs incurred in post-production. The 2012 feature Act of Valor, shot largely with the Canon 5D, attests to the large sums that can be expended in post-production to address high-compression artifacts, noise, frame rate, focus, and other issues.
FIGURE 5.13
DSLRs do not possess sufficient on-board processing to shoot 24 FPS RAW, even to an external device. To capture 1080p HD RAW, a 36-megapixel sensor is needed, about 18 times what is currently allocated to produce HD video in a typical DSLR.
Proper setup of the DSLR is critical to gain control of a camera’s capabilities and potential drawbacks. MANUAL operation is imperative, and indeed, most DSLRs link the Movie Mode to the “M” setting. A slow shutter of 1/50th or 1/60th second is vital to infuse motion blur into the frame. Remember in progressive mode, we don’t have the benefit (or liability) of field blurring that is intrinsic to interlaced capture.
A default ISO value of 160 has been typical for most DSLRs. With the advent of updated models from Canon, Nikon, and others, the shooter has gained two stops more exposure, so ISO 640 may be considered normal. Shooting at less than a camera’s “normal” ISO may unnecessarily deepen shadows and lower black levels, so proper awareness and perhaps an external neutral-density filter may be in order.
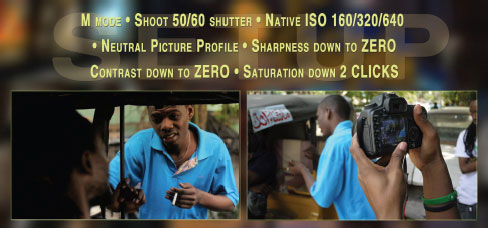
FIGURE 5.14
These settings represent a typical configuration for shooting Canon 5D video. Later models, including the Canon 6D, feature greater manual control over audio levels, exposure, and other key parameters.
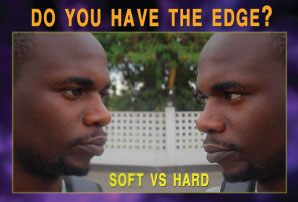
FIGURE 5.15
It takes a lot of processing to wrap a plastic edge around in-focus objects. Turning sharpness down to zero takes a load off the DSLR and may help address noise and heat issues. On the left, the look is much more organic. Note that small-screen presentations on a mobile device may require a harder edge.
Use NEUTRAL PICTURE PROFILE. Some manufacturers may call it something else. The idea is to capture as flat an image as possible in order to preserve maximum shadow detail and gradations in the original image. The Neutral Picture Profile in Canon cameras is analogous to the CINELIKE-V setting in Panasonic models; this allowing maximum flexibility in postproduction by producing what is in effect a low-contrast camera original.
Turning SHARPNESS down to zero (but not off) produces more tasteful, organic-looking images and substantially reduces the processing load in a DSLR. Sharpening in-camera puts great stress on the codec to maintain strong edges, which effectively expends bits preserving false detail rather than actual detail. The sharpening algorithms in-camera also tend to be less sophisticated than what is commonly available in Adobe After Effects, Boris FX, and other postproduction software.
Speaking of which, the sharpening and tweaking of contrast in postproduction must be considered in light of the anticipated delivery vehicle. DVD, Bluray, mobile devices, and the Web have different sharpening requirements, especially if scaling after sharpening is also required.
Shoot dialed down; recover in post. It’s a good mantra for DSLR shooters.
A major downside of the DSLR is the jello effect from the rolling shutter. I discussed this phenomenon in Chapter 4 as the digital sensor in most DSLRs scans pixel by pixel, line by line from the top down, and so introduces a time differential, which when panning or tracking can lead to an unnatural sloping of vertical lines. 2
It isn’t just a matter of limiting quick pans. Buildings and walls may appear warped or grotesque with a rapidly moving camera. The effect may not be noticeable in a forest, say, given the trees and foliage and the viewer having no fixed sense of sizes or shapes. But follow an actor through a narrow urban street or capture his point of view down an office hallway, and suddenly the walls and columns weave and lean like a drunken sailor. More disturbing are the faces of actors, especially women, who appear distorted. The sickening effect is hardly conducive to one’s future career prospects!
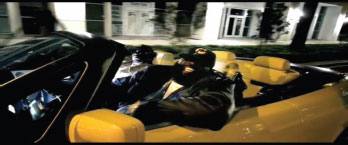
FIGURE 5.16
Once you become sensitized to the rolling shutter, there is no turning back. You are doomed. The sloping lines will drive you nuts.
NARROW DEPTH OF FIELD: BLESSING OR CURSE?
For decades, shooters have used selective focus to appropriately direct viewer’s attention inside the frame. However, a whisker-thin depth of field can be disturbing as in the case of an actor whose nose tip appears sharp but whose eyes are slightly soft.

FIGURE 5.17
Can’t afford a proper set or background? The DSLR’s narrow focus can make quick work of in-frame distractions.

FIGURE 5.18
Concerts and sports and wildlife programs usually benefit from a smaller camera sensor and increased depth of field.
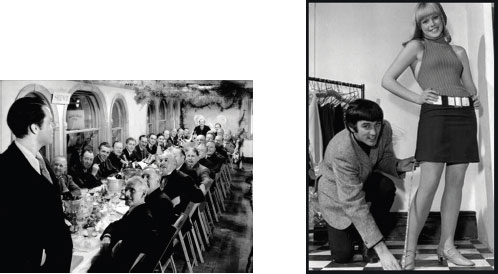
FIGURE 5.19
Orson Welles famously used deep focus in Citizen Kane (1941). DSLR shooters should bear in mind that the current shallow depth of field fad is just the fashion!
FIGURE 5.20
Despite the large assortment available, most lenses designed for still cameras are poorly suited for video applications. See Chapter 6.
The sensor of a full-frame DSLR extends over the equivalent of eight perforations (in film parlance), which may produce a very narrow focus with a normal lens. 3 The DSLRer shooting wide open may struggle to find and keep critical focus in a scene, or else he or she might stop down to increase the depth of field and gain additional operating margin that way.
Of course, the smaller stop is achieved by adding light. Do you see what’s happening? The large sensor deemed so desirable by shooters entails substantial compromise simply to achieve sufficient depth of field for routine operation.
Aesthetically, the full-frame shallow focus look can also seem unnatural, since audiences conditioned over the decades are accustomed to the look and feel of cinema’s 4-perf 35mm; the 8-perf DSLR look may induce discomfort or can even alienate the traditional large-screen movie viewer. For that reason, the Super 35 or Micro 4/3-size sensors may be better suited for feature film projects, offering the perspective of a larger imager while still allowing a practical and reasonable DOF. On the other hand, if you’re doing a show about eyelashes, you may very well want the whisker-thin depth of field offered by a full-frame DSLR.
Every camera has its share of operational compromises, and the DSLR, owing to the fact that it isn’t a video camera in the first place, has more than most with respect to ergonomics, focus, audio connectivity, and workflow.
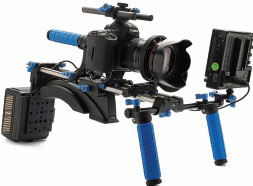
FIGURE 5.21
Special rigs are available to accommodate the DSLR’s unwieldy profile. This setup was used to shoot the 2010 season finale of the popular U.S. television show House.
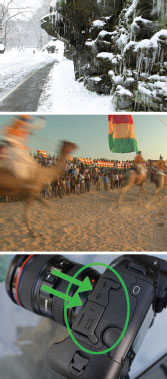
FIGURE 5.22
As shooters we often face challenging environmental conditions. The best DSLRs have seals to protect against rain, snow, and grit.
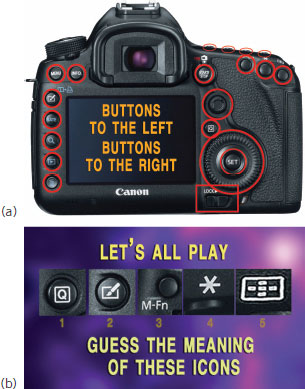
FIGURE 5.23
Oh man. Tiny buttons everywhere with cryptic graphics! The DSLR’s layout of controls leaves a lot to be desired.
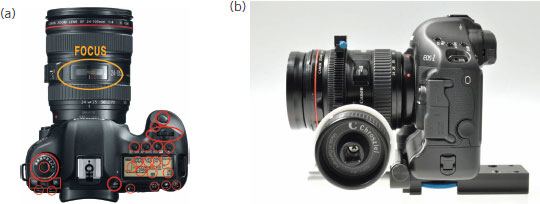
FIGURE 5.24
Oh, more buttons. And soft buttons too. Following focus? The range of focus covers barely a one-eighth turn of the lens barrel. A precision follow focus (b) can help.
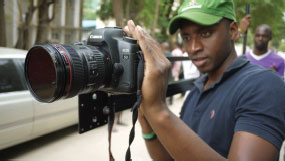
FIGURE 5.25
Zooming in or out to frame a scene? The DSLR’s vari-focal lens is not a true zoom. It requires critical refocusing when changing focal lengths.
In bright daylight, the DSLR’s LCD screen may be obscured and difficult to see. For this reason, the shooter usually opts for an external monitor connected via HDMI. This output is sadly hobbled in some cameras and does not reproduce a full-size monitored image.
Fortunately, this is changing with the latest DSLRs that output a 1920 × 1080 raster. Although there exist multiple versions of HDMI, 4 the camera should allow HD monitoring in virtually all cases.
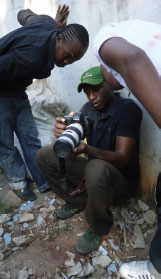
FIGURE 5.26
Reviewing takes on a DSLR’s tiny screen can be futile, especially in daylight. A dedicated high-resolution monitor is required.

FIGURE 5.27
The latest DSLRs output full-raster HD to an external monitor.
Audio is the underbelly of a DSLR. Most models do not allow manual control of levels, the preamps and limiters are primitive, and the feeble 1/8-inch mic input is prone to failure. For most folks, capturing production audio to a DSLR is a nonstarter, which means in nearly every case, shooting double system, that is, recording to an external device like a Zoom or Tascam. The audio separated from the picture is synchronized later using a tool like PluralEyes that compares the waveforms of the production audio with a reference track captured in-camera.
THE UNLOCKED AUDIO MESS
In professional camcorders, the audio is locked to picture via time code. In the DSLR, for reasons of economy and load management, the audio and the video are allowed to drift, the amount varying from camera to camera. The drift is not consistent, and usually not more than one or two frames, depending on the length of the scene. Some DSLRers shoot a reference at the beginning of each day to ascertain that day’s drift. Because the audio recorded to camera is used to align the production sound, the synchronization in-camera is critical. PluralEyes, for all its elegance, is useless if it is syncing to the out-of-sync camera audio.
If shooting double system it is advantageous to roll and cut the camera and recorder at about the same time. Although this is not always possible especially in documentaries, it is worthwhile to capture a roughly equal amount of audio and video. It makes handling of a show’s footage much more efficient and facilitates archiving down the road.
Speaking of organization the sound recordist should be sure to press STOP rather than the PAUSE button when capturing to the external recorder. Pressing STOP forces the recorder to create a new file, which can be a big time saver when working with PluralEyes or other automated syncing software.
Although most shooters are loath to do it, the prenaming of clips in the recorder can help with organization as well. Appending the date to each file ensures that a unique file name is captured for each scene. This is to avoid each day’s files having the same names, which can be annoying.
Shooters should take particular care when shooting double system at 24 FPS. Different cameras require audio recorded at different speeds. Newer DSLRs usually specify 23.976 FPS—or 29.976 FPS. It is critical to conduct sync tests prior to the first day of shooting. In this particular minefield, no one likes surprises, and there tend to be plenty when shooting double system with a DSLR.
As a practical matter, be sure to record proper head and tail slates and feed a guide track into the camera for reference inside the NLE or for use as a possible backup. I will revisit the subject of shooting double system in Chapter 12.
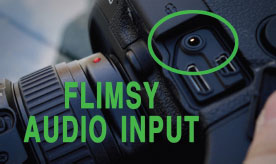
FIGURE 5.28
Good sound makes our pictures look better! Recording to an external machine circumvents the camera’s weak onboard audio. The flimsy 1/8-inch mini-jack is ongoing menace.
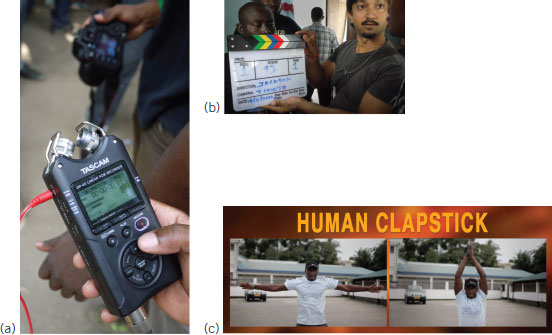
FIGURE 5.29
Capturing audio (a) to a separate recorder? Be sure to capture 48-kHz .wav or .aif files and record a guide track into the camera. You’ll need a clapperboard (b) or other reference to facilitate the lineup of picture and sound inside the NLE. Some lowbrow shooters use a handclap or series of jumping jacks to assist the postsynchronization efforts.

FIGURE 5.30
When shooting double system we may encounter a sync discrepancy of one or two frames depending on the length of a scene. Over 30 minutes, the audio may be three frames out of sync!

FIGURE 5.31
To forestall synchronization problems we can run the output from the recorder into the camera mic input. Although this ensures a precise line up of picture and sound, the mismatched levels will blow out the camera audio unless we use a 25dB attenuating cable. This cable conveniently accommodates a second set of headphones!

FIGURE 5.32
If the performers in a long shot appear out of sync consider this: Audio lags at a rate of one frame for every 14 meters (45 ft) from the camera. This discrepancy is in addition to the inherent drift of a DSLR’s internal audio.
With each new generation, the DSLR is becoming more sophisticated and video capable, with increased manual control over audio levels, exposure, shutter, and key imaging parameters. At the same time, the cameras are increasingly reflecting the IT world, integrating camera setup, operation, and streaming into a slew of wired and wireless devices. This trend appears to be driving the industry as more professional WiFi-enabled video cameras enter the market.
This DSLR has already impacted the world media scene in profound ways. The camera’s inconspicuousness, low cost, and ability to capture compelling images and immediately disseminate those images around the world, has once again placed enormous power in the hands of the video shooter. Our challenge then, more than ever, is to use this power wisely.
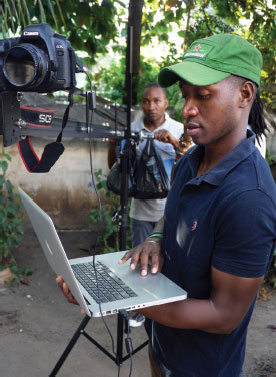
FIGURE 5.33
The DSLR is easily integrated into the file-based system we use every day.
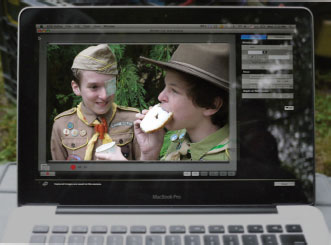
FIGURE 5.34
Convenient software for the laptop or iPad controls camera setup and operation, helps organize files and folders, and manages proxies and script notes.
FIGURE 5.35
The integration of timecode into DSLRs still requires the use of synchronizing tools such as PluralEyes.
FIGURE 5.36
This Micro Four-Thirds DSLM (Digital Single Lens Mirrorless) camera records 1080p50 or 60 FPS at 72 Mbps with intraframe compression. That sounds a lot like a video camera to me!
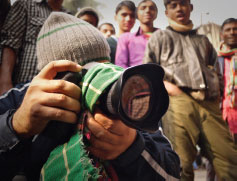
FIGURE 5.37
The DSLR accesses places where pro video cameras are loath to tread. In Dhaka, UN Development officer Mahtab Haider uses a colorful gamcha to reduce the camera’s visibility in crowds. From Tahrir Square to Times Square, keeping a low profile is often critical to one’s success.
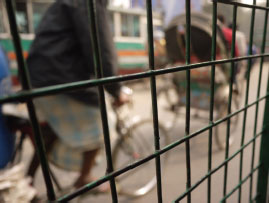
FIGURE 5.38
The DSLR camera has transformed how stories are told and by whom. This new world order embracing potentially tens of millions of viewers is only now starting to come into focus.
EDUCATOR’S CORNER: REVIEW TOPICS
1. Identify three (3) ways how the DSLR has influenced the design of proper video cameras. Consider workflow in addition to performance and operational aspects.
2. Many DSLR shooters prefer a shallow depth of field. How does narrow focus help or hinder a shooter’s effectiveness as a camera operator and storyteller?
3. Is the DSLR “good enough” for the kinds of stories you intend to tell? List five (5) factors that may influence your decision to use a DSLR for your next production.
4. Discuss three (3) areas of concern when using a DSLR on a feature film. Do the same caveats apply to a documentary?
5. What are the advantages of finalizing image sharpness, detail, and contrast, in post?
6. Describe the procedure for recording DSLR double system.
7. The optical viewfinder is a major advantage for DSLR shooters, who use it to light and compose their scenes. Other than cost, are there any benefits to an electronic viewfinder?
8. Finally do you know the significance of the cryptic icon buttons in 5.23b?
1 Anderson, W. (Producer & Director), Bush, E. (Producer), Cooper, M. (Producer), Dawson, J. (Producer), Hoffman, S. (Producer), Peissel, O. (Producer), … Yacoub, L. (Producer). (2012). Moonrise Kingdom [Motion picture]. USA: Indian Paintbrush.
2 The Sony PMW-F55 introduced in 2013 utilizes a global shutter in conjunction with a Super 35 CMOS sensor. Could this be the end of jello-cam? Is this the harbinger of things to come? One can only hope.
3 A full-frame SLR normal perspective lens is 50mm. A 1/3-inch camcorder’s normal lens is 7mm. The shorter focal length lens has more depth of field. Simple. See Chapter 6.
4 As of 2013, there were six different versions of HDMI: HDMI Ethernet Channel, Audio Return Channel, 3D Over HDMI, 4K × 2K Resolution Support, and a new Automotive HDMI. Stay tuned. That is only Version 1.4. Next up is Version 2.0 supporting 4K resolution at 60 FPS.