
Now that our schemas are defined and our models are ready, we need to start actually using them throughout our application by updating our controllers with various CRUD methods where necessary.
Up until this point, our controllers have consisted of only fixture, or fake, data so we can prove that our controllers are working, and our view models were wired up to our templates. The next logical step in our development is to populate our view models with data directly from MongoDB. It would be even better if we could just pass our Mongoose models right to our templates as the viewModel itself!
If you recall from the Updating the Home controller section of Chapter 6, Controllers and View Models, we originally created viewModel in our home controller that consisted of an array of JavaScript objects that were just placeholder fixture data:
var viewModel = {
    images: [
        {
            uniqueId:       1,
            title:          'Sample Image 1',
            description:    '',
            filename:       'sample1.jpg',
            views:          0,
            likes:          0,
            timestamp:      Date.now
        }, {
            uniqueId:       2,
            title:          'Sample Image 2',
            description:    '',
            filename:       'sample2.jpg',
            views:          0,
            likes:          0,
            timestamp:      Date.now
        }, {
            uniqueId:       3,
            title:          'Sample Image 3',
            description:    '',
            filename:       'sample3.jpg',
            views:          0,
            likes:          0,
            timestamp:      Date.now
        }, {
            uniqueId:       4,
            title:          'Sample Image 4',
            description:    '',
            filename:       'sample4.jpg',
            views:          0,
            likes:          0,
            timestamp:      Date.now
        }
    ]
};
We are going to replace that
viewModel with a very stripped down version that we will then populate with real data from our mongoose models:
var viewModel = {
    images: []
};
Before we can populate that viewModel with real data, we need to first make sure our home controller can use our models. To do so, we must require the models module. Include this at the very top of the controllers/home.js file:
var sidebar = require('../helpers/sidebar'),
    ImageModel = require('../models').Image;
We could have required the full models module and have had access to both the Comment model as well as the Image model; however, for the homepage, we really only need to use the Image model. Now that our mongoose model for Image is available to our home controller, we can perform a find operation to retrieve a list of the newest images to display on the homepage. Replace the existing sidebar() call in your home controller with this updated version of the code:
ImageModel.find({}, {}, { sort: { timestamp: -1 }},
    function(err, images) {
        if (err) { throw err; }

        viewModel.images = images;
        sidebar(viewModel, function(viewModel) {
            res.render('index', viewModel);
        });
    });
Using ImageModel, we execute a MongoDB find query, but we provide no specifics for the actual query (a blank JavaScript object), which means it will return every document. The second parameter is also a blank JavaScript object, which means we aren't specifying how to map the results, so the full schema will be returned. The third parameter is an options object where we can specify things such as the sort field and order. In this particular query, we are retrieving every single image in the images collection sorted by timestamp in descending order (ascending order would have had a value of 1 instead of -1).
The callback function that executes after a successful find to the MongoDB database server will return both an error object as well as an images array of matching models; in our case, every image in the database. Using the array that's returned from the query, we simply attach it to our viewModel via its images property. Then, we call our sidebar function exactly as we did previously.
At this point, we are no longer populating our viewModel with fixture data but instead populating it with exactly what is returned from the database when we perform a basic find query using our mongoose Image model. The homepage for the application is officially data driven! Here is a recap of the entire controllers/home.js file:
var sidebar = require('../helpers/sidebar'),
    ImageModel = require('../models').Image;

module.exports = {
    index: function(req, res) {
        var viewModel = {
            images: {}
        };

        ImageModel.find({}, {}, { sort: { timestamp: -1 }},
            function(err, images) {
                if (err) { throw err; }

                viewModel.images = images;
                sidebar(viewModel, function(viewModel) {
                    res.render('index', viewModel);
                });
            });
    }
};
If you were to run the app and open it in a browser, you wouldn't actually see anything on the homepage. That's because we haven't actually inserted any data yet! That's coming up next. However, note that the page itself still works and you didn't get any errors. This is because MongoDB is simply returning an empty array from the find on ImageModel, which the Handlebars homepage template is handling fine because it's performing an each operation against an empty array so it's displaying zero images on the homepage.
The image controller is by far the biggest component of our application. It contains most, if not all, of the logic that's powering our app. This includes displaying all of the details for an image, handling the uploading of images, and handling likes and comments. There's a lot to cover in this controller, so let's break it down by each section.
The primary responsibility of the index function in our image controller is to retrieve the details for a single specific image and display that via its viewModel. In addition to the details for the actual image, the comments for an image are also displayed on the page in the form of a list. Whenever an image is viewed, we need to also update the views count for the image and increment it by one.
Begin by editing the controllers/image.js file and updating the list of required modules at the top to include our models module:
var fs = require('fs'),
    path = require('path'),
    sidebar = require('../helpers/sidebar'),
    Models = require('../models'),
We also want to strip our viewModel down to its most basic form exactly as we did in the home controller. Replace the existing viewModel object variable with this new, lighter version:
var viewModel = {
    image: {},
    comments: []
};
After defining our blank viewModel, let's include a find call on the Image model so that we can look up an image specifically by its filename:
Models.Image.findOne({ filename: { $regex: req.params.image_id } },
    function(err, image) {
        if (err) { throw err; }
        if (image) {
            // to do...
        } else {
            res.redirect('/'),
        }
    });
In the preceding code, we are using the Models module's Image model and performing findOne, which is identical to find, except it will only ever return a single document (matching or not) instead of an array as find returns. By convention, we use a singular variable name in our callback's second parameter versus a plural, just so we as developers can easily tell we are working with a single object or an array/collection of objects.
The query object we provide as the first parameter matches the filename field of an image document using MongoDB's regex filter and comparing to req.params.image_id, which is the value of the parameter in the URL as defined in our routes file. The URL for an image page will always be http://localhost:3300/images/abcdefg, where abcdefg will be the value of req.params.image_id. If you recall, we are randomly generating this value in the create function when an image is uploaded.
After checking to make sure our err object isn't null, we then check to make sure our image object is also not null. If it's not null, that means a model was returned from MongoDB; so, we found our image and we're good to go. If an image model wasn't returned because we tried searching for an image by a filename that doesn't exist, we simply redirect the user back to the homepage.
Let's now populate our viewModel by inserting the following lines in the area where we have the // to do... placeholder comment:
image.views = image.views + 1;
viewModel.image = image;
image.save();
We attach the image model that was returned from findOne to our viewModel.image property, but not before incrementing the views property of that model by 1 (so that we represent our actual plus one view as we load the page). Since we modified the model (by incrementing its views count), we need to ensure that it's saved back to MongoDB so we call the model's save function.
Now that viewModel has been updated with the image model and the views count has been incremented and saved, we next need to retrieve a list of comments associated with the image. Let's include a little bit more code to query the Comment model and find any comments that belong to the image. Insert the following block of code immediately after image.save(); from earlier:
Models.Comment.find({ image_id: image._id}, {}, { sort: { 'timestamp': 1 }},
    function(err, comments){
        if (err) { throw err; }

        viewModel.comments = comments;

        sidebar(viewModel, function(viewModel) {
            res.render('image', viewModel);
        });
    }
);
Using find on our Comment model, we can pass in an object that contains our query as the first parameter; in this case, we are specifying that we want all comments where the image_id field is equal to the _id property of the main image model we attached to our viewModel earlier.
That code might look a little odd so let's elaborate. Remember that the image object that is returned from the original Models.Image.findOne() call is available throughout the entire scope of that callback function. No matter how deep we get nesting callback functions, we will always have access to that original image model. Therefore, we can access it and its properties inside the callback function that fires when our Model.Comment.find() has executed.
Once inside the find callback of Comment, we attach the comments array that was returned to our viewModel and then call our sidebar function exactly as we did previously when we first opened the controller and started editing this index function.
As a review, here is the entire index function inside the controllers/image.js file after it's been completely updated:
index: function(req, res) {
    // declare our empty viewModel variable object:
    var viewModel = {
        image: {},
        comments: []
    };

    // find the image by searching the filename matching the url parameter:
    Models.Image.findOne({ filename: { $regex: req.params.image_id } },
        function(err, image) {
            if (err) { throw err; }
            if (image) {
                // if the image was found, increment its views counter
                image.views = image.views + 1;
                // save the image object to the viewModel:
                viewModel.image = image;
                // save the model (since it has been updated):
                image.save();

                // find any comments with the same image_id as the image:
                Models.Comment.find({ image_id: image._id},{},{ sort: { 'timestamp': 1 }},
                    function(err, comments){
                        // save the comments collection to the viewModel:
                        viewModel.comments = comments;
                        // build the sidebar sending along the viewModel:
                        sidebar(viewModel, function(viewModel) {
                            // render the page view with its viewModel:
                            res.render('image', viewModel);
                        });
                    }
                );
            } else {
                // if no image was found, simply go back to the homepage:
                res.redirect('/'),
            }
        });
},
Let's quickly recall all of the
index controller's responsibilities and tasks:
- Create a new empty
viewModelobject. - The
findOneimagemodel where the filename is a regex match to the URLimage_idparameter. - Increment the found views of
imageby one. - Attach the found
imagemodel toviewModel. - Save the
imagemodel since itsviewshas been updated. - Find all comments with the
image_idproperty equal to the_idof the originalimagemodel. - Attach the array of found
commentstoviewModel. - Render the page using
sidebarpassing in theviewModeland callback function.
We already have the functionality in place in our create function to handle randomly naming and uploading an image file. Now we need to save that information to MongoDB for the uploaded image.
Let's update the original saveImage function inside controllers/images.js:create and include the functionality to tie it into the database.
Our goal with the saveImage function is two-fold. First, we want to make sure that we never save an image to the database with the same randomly generated filename as an already existing image. Second, we want to ensure that we only insert the image into the database after it has been successfully uploaded, renamed, and saved to the filesystem. We are going to make two modifications to the existing code to achieve this.
The first modification is to wrap the bulk of the logic with find against the randomly generated file name, and if any documents are returned from MongoDB as a match, we need to start the process over to repeat this as many times as necessary until we achieve a truly unique filename. The code to perform the search is as follows:
Models.Image.find({ filename: imgUrl }, function(err, images) {
    if (images.length > 0) {
        saveImage();
    } else {
        // do all the existing work...
    }
});
If an images array that is returned from find has a length greater than zero, it means at least one image was found to have the same filename as was generated with our random for loop. If that's the case, we want to call saveImage again which will repeat the whole process (randomly generate a new name, and perform a find on the database for that new name). We do this by previously defining the saveImage function as a variable so that within the saveImage function itself, we can execute it again by calling the original variable as the function.
Assuming no images were returned from find, it means we have generated a truly unique filename for our image and are safe to rename the file and upload it to the server as well as save a record to the database.
Originally, the last step of the create function was to redirect the visitor to the image's page within the callback that fired when the file system rename was finished. This is where we're going to want to create a new mongoose image model. We should redirect only when the database server is finished saving the image (again relying on a callback function). Consider the following line in the original function:
res.redirect('/images/' + imgUrl);Replace this with this new block of code:
var newImg = new Models.Image({
    title: req.body.title,
    description: req.body.description,
    filename: imgUrl + ext
});
newImg.save(function(err, image) {
    console.log('Successfully inserted image: ' + image.filename);
    res.redirect('/images/' + image.uniqueId);
});
Here we create a brand new Image model and pass in the default values via its constructor. The title and description fields get set right from the values passed in via the HTML form using req.body and the form field names (.title and .description). The filename is what we build the same way we did originally when we set its destination for renaming it, except we don't include the path and directory names, just the randomly generated filename and the image's original extension.
We call the model's .save() function (just as we did earlier when we updated the image's views property in the index controller function). The save function accepts a second parameter in its callback, which will be the updated version of itself. Once the save is completed, and the image has been inserted into the MongoDB database, we then redirect to the image's page. The reason the callback returns the updated version of itself is because MongoDB will automatically include additional information such as _id.
As a review and sanity check, here is the complete code for the saveImage function in controllers/image.js:create with the new lines of code clearly highlighted:
var saveImage = function() {
    var possible = 'abcdefghijklmnopqrstuvwxyz0123456789',
        imgUrl = '';
    for(var i=0; i < 6; i+=1) {
        imgUrl += possible.charAt(Math.floor(Math.random() * possible.length));
    }
    /* Start new code: */
    // search for an image with the same filename by performing a find:
    Models.Image.find({ filename: imgUrl }, function(err, images) {
        if (images.length > 0) {
            // if a matching image was found, try again (start over):
            saveImage();
        } else {
    /* end new code:   */
            var tempPath = req.files.file.path,
                ext = path.extname(req.files.file.name).toLowerCase(),
                targetPath = path.resolve('./public/upload/' + imgUrl + ext);

            if (ext === '.png' || ext === '.jpg' || ext === '.jpeg' || ext === '.gif') {
                fs.rename(tempPath, targetPath, function(err) {
                    if (err) { throw err; }

                    /* Start new c
ode: */
                  // create a new Image model, populate its details:
                    var newImg = new Models.Image({
                       title: req.body.title,
                       filename: imgUrl + ext,
                       description: req.body.description
                   });
                   // and save the new Image
                   newImg.save(function(err, image) {
                       res.redirect('/images/' + image.uniqueId);
                   });
                   /* End new code:   */
                });
            } else {
                fs.unlink(tempPath, function () {
                    if (err) { throw err; }

                    res.json(500, {error: 'Only image files are allowed.'});
                });
            }
/* Start new code: */
        }
    });
/* End new code:   */
};

saveImage();
Don't forget to initially execute saveImage() right after the function is defined; otherwise, nothing will happen!
At this point, we have most of the key functionalities wrapped with MongoDB integration, and our app should really feel like it's coming together. Let's give it a test run and make sure all of our end points are working so far. Launch the app and open it in a browser:
$ node server.js
Server up: http://localhost:3300
Mongoose connected.
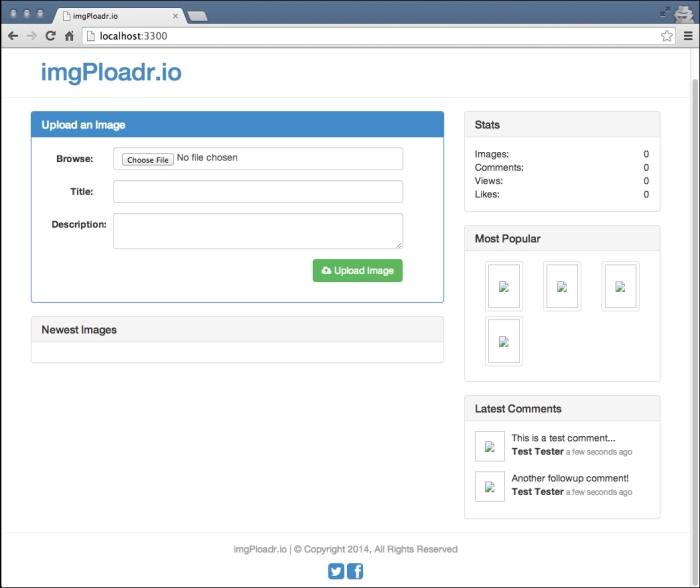
Open up a browser and point it to http://localhost:3300, and you should see your application up and running as in the following screenshot:
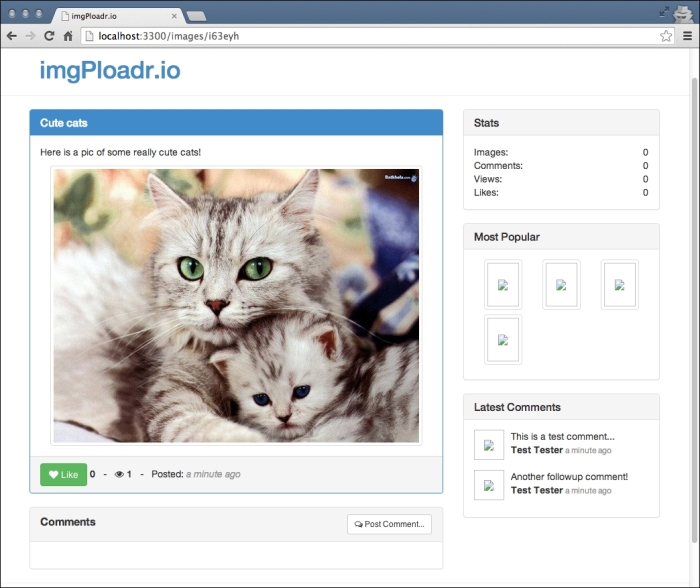
Go ahead and use the form on the homepage to browse for an image file on your computer and select it. Provide a title and description and click on the Upload button. You should be taken directly to the image page with the details for your uploaded image displayed:
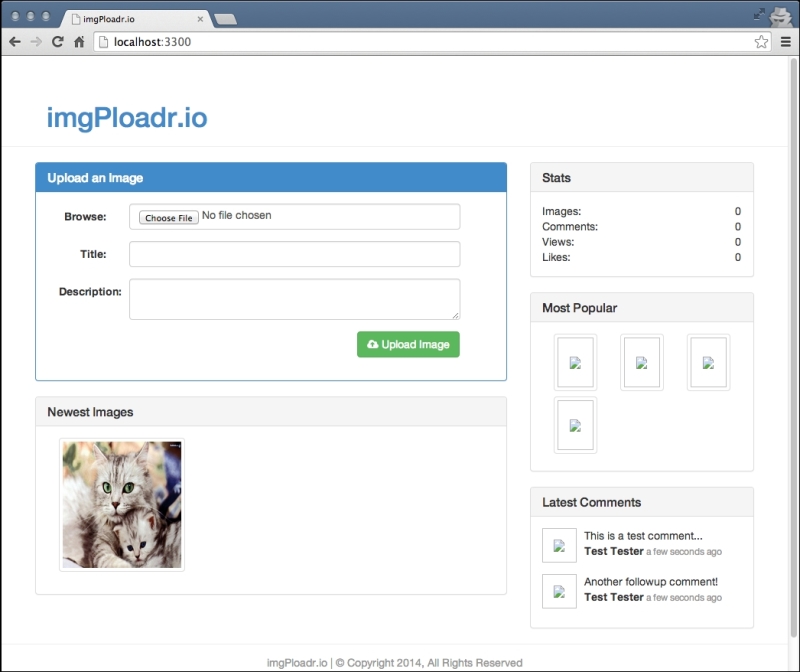
Go back to the homepage, and you should now see your new image displayed under the Newest Images section:
Next, let's add support for the Like button. Remember that our Like button works a little differently. It uses AJAX with jQuery so that data can be sent and received in real time without reloading the entire page. The experience for the user is seamless and enjoyable, as they don't lose their scroll place on the page or any other jarring UI-related issues.
The endpoint that the Like button hits is /images/:image_id/like, so we are going to use the value in the URL for image_id to find and retrieve the image in MongoDB, increment its likes value by 1, and then return the new total number of likes for the image (so that the UI can update with the new value).
Currently, the like function in controllers/image.js only does a simple JSON response with a hardcoded value of 1:
res.json({likes: 1});Let's replace that original code with new code that will use the mongoose Image model to find an image with a filename that matches image_id passed in via the URL:
Models.Image.findOne({ filename: { $regex: req.params.image_id } },
    function(err, image) {
        if (!err && image) {
            image.likes = image.likes + 1;
            image.save(function(err) {
                if (err) {
                    res.json(err);
                } else {
                    res.json({ likes: image.likes });
                }
            });
        }
    });
Assuming the callback function receives a valid image model response from the query, we'll then increment its likes property, and since the model is then modified, we need to execute its save function. Inside the save function's callback, we send a JSON response back to the browser with the real current value of the image's likes.
Tip
Sometimes we will use shorthand in JavaScript and perform the following:
if (!err && image)
What this is actually doing is checking for falsey and truthy conditions, meaning the absence of err (or when its value is null) is treated as false. Any value that's not null, not '' (empty string), not 0, or negative will be considered True. In the if statement in the preceding example, we are saying "if the err object is false (that is null) and the image object is true (that is not null), then we're good to go!"
With this code in place, you can run the app again and test out the Like button by viewing the image that you uploaded earlier and simply clicking on Like. If it worked, the counter next to the button should increase by one. Refresh the page, and the likes count should remain as the new value.
Inserting comments will work almost exactly the same way as the likes for an image. The only difference is that we are creating a new comment model instead of updating an image model. The original code we had in our comment function was:
res.send('The image:comment POST controller'),Let's replace this with some code that will find the image by the image_id in the URL again, but this time instead of updating its likes, we are going to create a new comment and assign the comment's image_id value with the _id of the image we are currently viewing (this is to attach a relationship to the comment so that it actually belongs to an image). Replace the entire comment function in controllers/image.js with the following block of code:
Models.Image.findOne({ filename: { $regex: req.params.image_id } },
    function(err, image) {
        if (!err && image) {
            var newComment = new Models.Comment(req.body);
            newComment.gravatar = md5(newComment.email);
            newComment.image_id = image._id;
            newComment.save(function(err, comment) {
                if (err) { throw err; }

                res.redirect('/images/' + image.uniqueId + '#' + comment._id);
            });
        } else {
            res.redirect('/'),
        }
    });
Here you can see that we are using the same code from the like function to query MongoDB and find the image with the matching filename from the URL.
Assuming a valid image is returned as a match, we create a new comment object called newComment and actually pass in the entire HTML form body into the constructor. This is a bit of a cheat as it's a coincidence (not accidental) that our HTML form uses form fields that have the same name and structure as that of a comment model. If you were to perform the console.log operation on the req.body object, you would see something like the following:
{
    name: 'Jason Krol',
    email: '[email protected]',
    comment: 'This is what a comment looks like?!'
}
That's identical to what we would have just built manually anyway, so we just take a shortcut and pass the whole thing in as is! After that, we update a few more properties on the newComment model. First, we manually set a property called gravatar, which is where we will store the MD5 hash value of the commenter's email address so we can retrieve their Gravatar profile picture. Gravatar is a universal avatar service that stores profile pictures based on a user's e-mail address. However, the unique ID they use for each profile is an MD5 hash value, which is why we have to store that value.
As we are relying on the third-party MD5 module, we need to ensure that it's installed in our project and saved to our package.json file as a dependency. From your project's root folder, execute the following command:
$ npm install MD5 --save
In addition, we need to require the module in the controllers/image.js file at the very top along with the other modules we are requiring:
var fs = require('fs'),
    path = require('path'),
    sidebar = require('../helpers/sidebar'),
    Models = require('../models'),
    MD5 = require('MD5'),
Finally, we set the image_id property of the newComment to the _id property of the image we found at the beginning of the function. Then, we call the comment model's .save() function and redirect the user back to the image page. For convenience, we append a bookmark to the new comment's _id to the URL so that when the page loads it will automatically scroll down to the users' comments that have just been posted.
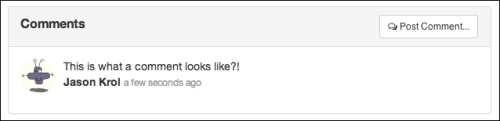
With that functionality in place, go ahead and fire up the app and open it in your browser. Visit the image page for any images you've uploaded and post a comment. Once the comment posts and the page reloads, you should see something like the following screenshot under an image:
Note
We could have chosen to handle comments using jQuery and AJAX the same way we handled the Like button. However, this introduces a bit more complexity because if we were to do that, we would have needed a slightly more sophisticated way to display that inserted comment to the screen. This would have involved relying heavily on jQuery to do some advanced DOM manipulation to display the comment after it was posted using AJAX.
In a later chapter, when we review Single Page Applications, we will take a brief look at some JavaScript frameworks that perform this kind of functionality and a lot of other advanced features!
That concludes the code and functionality for the image controller.
Let's do a quick recap of all of the changes we've made to this controller:
- Updated the
indexfunction to retrieve an image from MongoDB and populateviewModelwith the details of theimagemodel. We also found all comments related to that image and attached an array of those toviewModelas well. - We tweaked the
createfunction to insert a new image model into the database once it has been successfully renamed and saved to the filesystem. - The
likefunction was updated to actually increment the value of an image'slikesproperty and save that value to the database as well as return the new value via a JSON response. - Comments are now inserted for a particular image via the
commentfunction. Not only is acommentmodel inserted into the database, but also its corresponding image is found and theimagemodel's_idvalue is attached to the comment to solidify a relationship.
The last piece of the puzzle and last area we need to tie into MongoDB is the sidebar. To do this, we are going to need to update each of the helpers we previously created. Most of the helpers that we write code for are going to be using concepts and functionality that we've already covered in this chapter. However, there is the addition of one new concept that I want to focus on before we take a look at the code.
As JavaScript by its very nature is asynchronous, there undoubtedly comes a time when we need a way to handle executing a number of different asynchronous functions at the same time. The big issue here is that if we tried to perform three different queries to a MongoDB server for example, how will we know when all three are finished before we move on and do work with the results? Up until this point, we've simply been relying on a single callback function, which works great for a single call. How can we assign a single callback function to multiple asynchronous calls? The answer is we can't—not directly anyway. You can use a lot of nested callbacks to achieve this, but that is generally considered bad practice and will significantly reduce the readability of your code. We can use a third-party module, however, that was designed very specifically for this exact need.
async is a powerful node module that can be downloaded and installed via npm, which provides a number of extremely useful utility functions all designed to help when working with a series of asynchronous functions. Two functions that we are going to work with in this chapter are series and parallel. The series function allows us to execute asynchronous functions sequentially, each waiting until the previous function finishes before executing a single callback function at the end. The parallel function allows us to do the opposite—execute a number of asynchronous functions simultaneously, waiting until they all complete before executing a single callback function when the last function is finished. How does a single callback function handle the responses of a number of different asynchronous functions, you ask? By accepting an array of the responses of each function as a parameter!
Since we are going to be using async for our project, let's install it via npm and make sure our package.json file is updated as well. Within the root of your project folder, execute the following from the command line:
$ npm install --save async
Let's take a look at the first use of async in one of our helpers, the comments helper. Originally, helpers/comments.js was a module that had a newest function that returned an array of fixture data with some sample comments. We are going to completely remove this code and instead query MongoDB for the newest comments and return those as an array. Start by clearing the comment helper module and start from scratch (note that we included a new callback parameter to the newest function):
var models = require('../models'),
    async = require('async'),
module.exports = {
    newest: function(callback) {
        // to do...
    }
};
Notice that we added the additional require statements at the top of the file for our models and async. Within the newest function, let's replace the // to do... comment with code to query MongoDB and find the five most recent comments:
models.Comment.find({}, {}, { limit: 5, sort: { 'timestamp': -1 } },
    function(err, comments){
        // to do – attach an image to each comment...
    });
Notice that the first parameter in the find query is an empty JavaScript object, meaning we will retrieve every comment in the database. For the third parameter, however, we're using limit and sort so that we limit the number of records returned to five, and we sort the query by timestamp in descending order.
Now that we have an array of comments, ideally, we'd like the image that each comment belongs to returned as well. Typically, this would be accomplished with an aggregate query in MongoDB to join different collections together (such as a JOIN in SQL). For the purposes of our code, we're going to instead query MongoDB separately for each comment and retrieve the image associated with the comment's image_id value.
First, let's define a function that will query MongoDB and retrieve and attach an image model to a comment model:
var attachImage = function(comment, next) {
    models.Image.findOne({ _id : comment.image_id},
        function(err, image) {
            if (err) throw err;
            comment.image = image;
            next(err);
        });
};
This function will accept a comment model as the first parameter, and a callback function as the second parameter (named next). The next callback as the second parameter is important because it's the key to how async is able to function. Imagine that the next callback acts as a chain link. Since the same function is going to be called for every item in a collection, there needs to be a way to daisy chain the calls together. This is performed via the callback.
Basically, every time the callback is called for an item in the array, it performs its work and then executes the same callback with the next item in the array, and so on and so forth, which is why we named the callback function parameter next.
Another important element to point out with this function is that when we attach the image model to the comments image property, we are using the virtual property we set up earlier in the main comment's schema. If you recall, when we set the image property, we are actually setting the private _image property. Likewise, when we get the image property, we are actually retrieving the private _image property.
After we have defined the attachImage function, we need to use the each function of async to apply that function to every item in the comments collection:
async.each(comments, attachImage,
    function(err) {
        if (err) throw err;
        callback(err, comments);
    });
The each function of async will loop through every item in the collection in the first parameter, and send each item as a parameter to a callback function in the second parameter. The third parameter is the final callback function that is executed once the entire series is finished with the collection. In this case, every comment in the comments array will be passed individually to the attachImage function. When the entire collection has been iterated through, the final callback will execute, which basically fires the very first callback function that was passed into the newest function as its only parameter. Boy that was a mouthful! Let's try to break this down a little further so it makes a bit more sense:
- The
newestfunction of the comment helper module accepts a single parameter namedcallback—this is the function that will get called once all of the work is finished in this entire function. - The first thing the
newestfunction does is find the latest five comments and returns them as an array to an anonymously defined inline function. - First, we define a function and store it in a variable named
attachImage. - The
attachImagefunction accepts two parameters, an individual comment model, and a callback function that we namednext. - The
attachImagefunction will query MongoDB to find an image with an_idvalue that is the same as theimage_idproperty of thecommentthat was passed into it as the first parameter. - Once that image is found, it is attached to the comment via its
imageproperty and then thenextcallback function is executed. - We use
async.eachto loop through every comment in thecommentsarray that was passed as the first parameter toeach. - Pass the
attachImagefunction as the second parameter, which is the function that will be called for every comment in the comments array. - Finally, define an inline anonymous function that will be executed once the last item in the comments collection has been iterated on. This inline function itself only accepts an error object as its parameter. Assuming every iteration of the
commentscollection was successful, this function will be executed with no error. Inside this function, we execute the original function namedcallbackthat was the only parameter to thenewestfunction, andcallbackis called with the newly updated comments array as its second parameter.
OK, the hardest part is over! You survived a crash course on the async module and came out, hopefully, unscathed! Just to be safe, here is the code for the helpers/comments.js module file in its entirety:
var models = require('../models'),
    async = require('async'),

module.exports = {
    newest: function(callback) {
        models.Comment.find({}, {}, { limit: 5, sort: { 'timestamp': -1 } },
            function(err, comments){
                var attachImage = function(comment, next) {
                    models.Image.findOne({ _id : comment.image_id},
                        function(err, image) {
                            if (err) throw err;

                            comment.image = image;
                            next(err);
                        });
                };

                async.each(comments, attachImage,
                    function(err) {
                        if (err) throw err;
                        callback(err, comments);
                    });
            });
    }
};
Note
Callback, callback, callbacks everywhere!
At this point, it's probably getting a little confusing with the number of callbacks we've been dealing with. A part of the problem is the terminology we've been using. Any function that is passed as a parameter and only executed after certain conditions are met, typically as the end result of the original function, is referred to as a callback. The popular convention with JavaScript is to label a callback function in a parameter literally with the variable name callback so that it's obvious. This works great when you are reading code, but not so much when you are explaining code and referring to a function named callback that's also known as the callback!
OK! So, of course, there's a catch right!? Well, kind of. Since we introduced async in our comments helper module, we now need to introduce it in our sidebar helper. This is because of the simple fact that our comments helper is now really asynchronous, so anything that uses our comments module needs to deal with that. As our sidebar module currently stands, it's just expecting the comments helper module to return an array and do it instantly; so, it's not expecting to have to wait around for the actual data. Because of this, if we ran our code as is, our comments sidebar would remain blank (because the sidebar would have rendered the page before the MongoDB calls were even finished thinking within the comments module). Let's fix this by updating our sidebar helper module to use async as well.
First, let's edit the helpers/sidebar.js file and replace its entire contents with this slightly modified version that uses async.parallel:
var Stats = require('./stats'),
    Images = require('./images'),
    Comments = require('./comments'),
    async = require('async'),

module.exports = function(viewModel, callback){
    async.parallel([
        function(next) {
            next(null, Stats());
        },
        function(next) {
            next(null, Images.popular());
        },
        function(next) {
            Comments.newest(next);
        }
    ], function(err, results){
        viewModel.sidebar = {
            stats: results[0],
            popular: results[1],
            comments: results[2]
        };

        callback(viewModel);
    });
};
The first thing we did was make sure async was included as a required module at the top of the file. Inside the primary exports function, we basically wrapped our existing code and integrated it into async.parallel so that we can easily tweak it a little later as we update each section of the sidebar helpers. Since we've so far only completed the comments helper module, that's the only one that's actually been changed. The other Stats and Images.popular calls are being forcibly used with async.parallel even though it doesn't quite make sense to do that right now. It will once those two sections become more asynchronous in the next sections.
The parallel function of async works in a similar way to its each function that we used earlier. The main difference is that parallel isn't performing the same function in a loop through a collection, but is instead performing a series of unique functions all at the same time. If you look closely, you can see that the first parameter to parallel is actually an array, and each item in the array is a unique function. Every function in the array accepts a next callback parameter function, which is executed at the conclusion of each of the functions. The second parameter in the next callback is the result of the work that was performed within the function itself. In the case of Stats and Images.popular, those two functions simply return values instantly with no asynchronous calls to anything else, so we just expect the results to be returned by executing them directly.
However, as you can see with the Comments.newest section, we are passing in the next callback function as a parameter because we want its execution to be deferred until the last second (that is, until Comments.newest is completely done all of its work). Once that next callback function is called, it is passed the results of all of its work.
The last parameter to the parallel function is an inline function that accepts a results array as its second parameter. This array is a collection of each of the results that were returned from each of the functions in the array in the first parameter. You can see that when we build viewModel now, we are referring to indexes in the results array. The index order is the order that the functions were defined in the original array. We know that the first function was to retrieve Stats, the second function to retrieve Images.popular, and the third function to retrieve Comments.newest. So, we can reliably assign results[0] to viewModel.Stats, and so on. As a reference, here is what the viewModel definition originally looked like in the sidebar module:
viewModel.sidebar = {
    stats: Stats(),
    popular: Images.popular(),
    comments: Comments.newest()
};
You can compare this with the updated version that uses async:
viewModel.sidebar = {
    stats: results[0],
    popular: results[1],
    comments: results[2]
};
Now that the sidebar is set up to properly handle the helper modules that are (and eventually will be) asynchronous, we can run the application and test to ensure our sidebar is properly displaying the top five most recent comments to the website. Run the application and launch it in a browser. If you haven't already posted any comments to an image, do so now so that you can see those comments appearing in the sidebar along with a thumbnail of the image they belong to.
At this point, we've covered and implemented a large number of changes to our application. It's understandable that something might be broken for you, so let's run through a quick checklist to make sure we haven't missed any trouble spots that might be preventing your app from running properly:
- Make sure you've npm installed all of the required modules for this chapter and that they are saved to your
package.jsonfile. This includes mongoose, async, and MD5. - Make sure the appropriate dependency modules are being
requiredat the top of each of the module files they are used in. - Make sure you remember to launch
mongodin another terminal instance whenever you run the application. - When it doubt, pay attention to the stack trace output that node is giving you in your terminal when it fails, as it is typically pretty obvious what's wrong. It will also give you the filename and line number of the offending module.
- When all else fails,
console.logeverywhere!
Next up, let's update the helper stats module to use parallel as well so we can get some real stats for the application.
The primary responsibility of the stats helper module is to gather up some totals for our application. These stats are for things such as total number of images uploaded, total number of comments, total views for all images combined, and total likes for all images combined. Your first inclination might be to assume that we are going to query MongoDB for all images and loop through every image to track all of the views and totals. That's one way to do it, but it's pretty inefficient. Fortunately, MongoDB has some built-in functionalities that makes generating these kinds of values a snap.
As we are going to be making a number of calls to MongoDB, we are going to rely on the async.parallel function again much like we did in the sidebar module. The original helpers/stats.js file was very bare bones, so let's completely replace that file with this new version that uses parallel:
var models = require('../models'),
    async = require('async'),

module.exports = function(callback) {
    async.parallel([
        function(next) {
             next(null, 0);
        },
        function(next) {
             next(null, 0);
        },
        function(next) {
             next(null, 0);
        },
        function(next) {
             next(null, 0);
        }
    ], function(err, results){
        callback(null, {
            images:   results[0],
            comments: results[1],
            views:    results[2],
            likes:    results[3]
        });
    });
};
This code does exactly what the module originally did; only it's a little more verbose! I'm pretty sure we don't want to just return 0 for all of our stats forever though as that'd be pretty useless and unimpressive to say the least! Let's update each function to properly query MongoDB and get some stats. Looking at the object returned in the callback in the last function, we could see that we already defined the order of the functions that are executing in parallel. Let's start with images. Replace the next(null, 0); line in the first function with the following code snippet:
models.Image.count({}, next);Easy! Just use MongoDB's count method to find the total number of documents in the images collection matching any criteria (the first parameter). Then, we just pass the next function as the callback because coincidentally enough the parameter signatures match. If we didn't want to use shorthand here, we could have written this the long way as:
models.Image.count({}, function(err, total){
    next(err, total);
});
However, who feels like typing all that when you don't have to! Let's do the same thing for the second function in the parallel array for total comments. Replace the next(null, 0); line in the second function with the following line of code:
models.Comment.count({}, next);Again, piece of cake!
Now the next two functions are going to be a little different, but they are almost identical to each other. What we want to do with next is get the total views and likes for every image. We can't use MongoDB's count because that only counts individual documents in a collection. We need to use MongoDB's aggregate functionality instead.
Using aggregates, we can perform a mathematical operation such as $sum to tally up results for us. Replace the next(null, 0); line in the third function with the following code snippet:
models.Image.aggregate({ $group : {
    _id : '1',
    viewsTotal : { $sum : '$views' }
}}, function(err, result) {
    var viewsTotal = 0;
    if (result.length > 0) {
        viewsTotal += result[0].viewsTotal;
    }
    next(null, viewsTotal);
});
Using MongoDB's aggregate function, we are telling MongoDB to group every document together and sum up all of their views into a single new field called viewsTotal. The resulting collection that is returned to the callback function is an array of documents with the _id and viewsTotal fields. In this case, the results array will only contain a single document with the grand total because we weren't that tricky with our aggregate functionality. If there aren't any images in the collection at all, we need to handle that and check accordingly. Finally, the next callback function is called with the actual value for viewsTotal.
Let's use the same exact functionality to total up the likes for all images. Replace the next(null, 0); line of code in the fourth and final function in parallel with the following code snippet:
models.Image.aggregate({ $group : {
    _id : '1',
    likesTotal : { $sum : '$likes' }
}}, function (err, result) {
    var likesTotal = 0;
    if (result.length > 0) {
        likesTotal += result[0].likesTotal;
    }
    next(null, likesTotal);
});
Now that the sidebar helper module has been updated and is complete with the async.parallel functionality, let's make a minor tweak back in our sidebar module to ensure we are calling the Stats module correctly so that it's properly asynchronous. The original line in helpers/sidebar.js was:
next(null, Stats());
Replace that line of code with this slightly different version:
Stats(next);
Last but not least, let's take care of the most popular helper module of the images sidebar.
Again, the original helpers/images.js file was mostly filled with fixture data and placeholder code that's fairly useless. Let's replace the entire file with this new version that's actually pretty tame in comparison to all of the other helper modules:
var models = require('../models'),

module.exports = {
    popular: function(callback) {
        models.Image.find({}, {}, { limit: 9, sort: { likes: -1 }},
            function(err, images) {
                if (err) throw err;

                callback(null, images);
            });
    }
};
At this point, that code should be pretty familiar to you by now. We just query MongoDB and find the top nine most liked images by sorting the images by total like count in descending order and limiting the results to nine documents.
Let's edit the helpers/sidebar.js file again to include the updated call to the Images.popular function. Consider the original code:
next(null, Images.popular());
Replace this with the following slightly newer version:
Images.popular(callback);
And now the sidebar is completely finished and completely dynamic. No more fixture data or placeholder variables anywhere. Running the application should yield a fully functional website with all of the features we set out to implement working perfectly! Give it a spin and make sure it's working correctly.