
Xamarin Studio is an IDE from Xamarin. We can download it from http://xamarin.com/download .
Xamarin offers different options in its store. To check the version and the plan we need, we can visit http://store.xamarin.com .
The following screenshot shows Xamarin Studio on Mac OS:
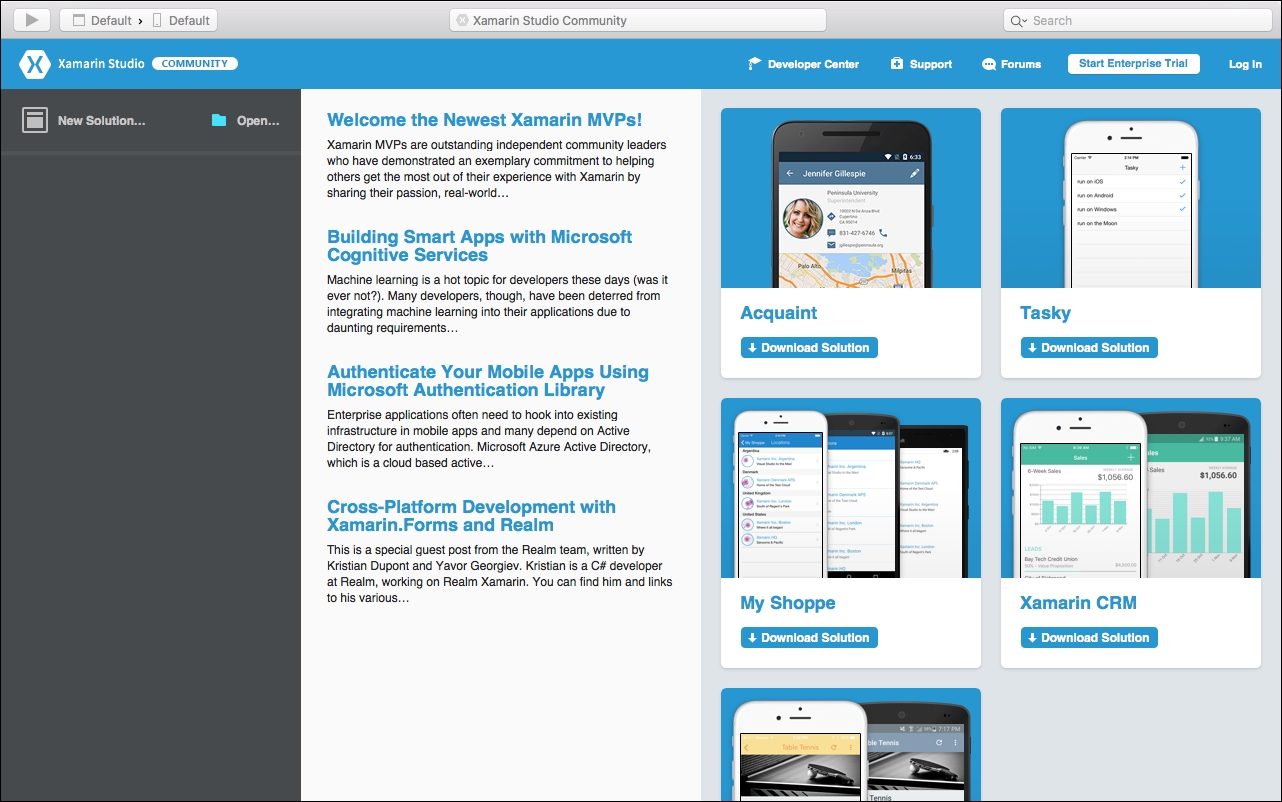
Xamarin Studio could change design in the future, but currently, when we start Xamarin for the first time, we are presented with three areas. Our most recent projects opened are presented on the left. The news from the Xamarin blog is presented in the central area. A list of examples is presented on the right side and we can download, explore, and run them on our devices.
At the top of the left panel are presented the buttons to create a new solution or open an existing one.
A solution is a container for the collection of projects we need to write in order to develop our apps. We will explore in the next chapter all the details of the available project types we can create with Xamarin.
Our focus is now on what Xamarin Studio offers and how we can use this editor in order to work more quickly and more efficiently, taking advantage of all its features.
We can now start developing our first solution:
- Click on the File | New | Solution.
- On the left side list, select Android | App.
- Click on Next.

- Write
XamarinByExamplein the empty field called App Name. - Click on Next:

- Check summary page and click on Create:

The Xamarin Studio template automatically adds the following to the project:
- References to the libraries
Mono.Android,System,System.Core, andSystem.Xml. - The
Resourcesfolder with all the base resources the simple app needs - A file named
MainActivity.csthat is the main point of access to the app - The
Assetsfolder - The
Propertiesfolder
More libraries can be referenced manually by double clicking the References folder on the Solution pad.
Adding an iOS project allows us to see one initial difference:
- Right-click on the Solution.
- Select Add | New Project.
- In the left side list, select iOS | App. In the central list, select Single View App.
- Write
XamarinByExample.iOSin the empty field called App Name.
The Xamarin Studio template creates for us a new iOS project with a simple Hello world app.
It automatically adds the following to the project:
- The references to the libraries
Xamarin.iOS,System,System.Core, andSystem.Xml - The
Resourcesfolder AppDelegate.cs: The class responsible for launching the UI of application, as well as listening (and optionally responding) to application events from iOSEntitlements.plist: The file that configures the permissions on iOSInfo.plist: The file that configures the entire appMain.cs: The entry point of the applicationMainStoryboard.storyboard: The file with the UI storyboardXamarinByExample.iOSViewController.cs: This is the ViewController that manages the page designed in the storyboard
Right now we are going to focus on the editor:

The first button in the top bar is the Run button. When we click it, our app runs with the Configuration (Debug, Release) selected in the combo named Configuration selector.
We can select where to run our app using the target selector. The target selector is a combo that contains the list of available devices. They may be either real devices plugged to our machine or virtual devices configured to run in a simulator.
On the top in the center we have the Notification Area. Here we can be notified about the numbers of warnings or errors in our app, or the results in a search.
When we click on the Notification Area, Xamarin opens up the associated details pad to show us more details of the selected notification.
In the top right section, we find the Global Search field.
This is a very useful feature of Xamarin, and we are going to explore it in more detail.
The left-hand section is called the Solution pad, and it contains all the files in our solution.
The central section contains the Document. When we open a file from the Solution pad, it gets displayed, if possible, in this section.
The right-hand section contains the properties and hidden pads that we can customize.
We can customize most of what we've seen so far.
The global search is one of the most powerful features of the editor.
It allows us to easily jump to the point of the code we need to retrieve.
Go to is the main feature of the global search, and this allows us to find a type, a file, or a declaration.
All we need to write is type:NameOfTheTypeWeAreLookingFor and we will be directed to the type.
Tip
Using the global search, we can write in the filter just the uppercase letter of the object in camel case we are looking for. So for example, if we are looking for the file MainActivity.cs, we can just write file:MA and the file will appear on the list eventually with all the others compliant with our filter.
When we are in a file, we can jump to a known line by typing in the global search :NumberOfLine:NumberOfColumn.
For example, :10:10 jumps to the 10th line and 10th column of the document.
The key bindings is a feature that allows us to use short key combinations for actions.
In the following table, we can have a look at some of them:
|
Short key |
Description |
|
⌘+ D |
This generates the constructor of the class. |
|
cw |
|
|
switch |
Template for the |
|
exception |
Template for an entire class exception. |
|
prop |
Template for a short property. If we need a private set, we can use |
|
try |
Template for |
In the menu Tools | Options (Windows) or Xamarin Studio | Preferences (Mac), in the section Environment | Key Bindings we can look at all the default short keys and we can also define ours.
Xamarin Studio allows us to customize how the code will be automatically formatted.
We will find this feature very useful when we want to be consistent with the coding standard of our company or the coding standards of our customer.
To customize it, we go to Tools | Options (Windows) or Xamarin Studio | Preferences (Mac) and select in the left menu Source Code | Code Formatting | C#. A drop-down list appears, where we can select the coding style we prefer, or we can also define our own coding standard by going in to the tab C# Format. We will now see an example of code with the current coding standard. Clicking on the Edit button, we can choose from different layout options for Indentation, Braces, Blank Lines, Wrapping, White Spaces, and New Lines.
The Code Formatting settings are not saved in the solution but in the local settings of Xamarin Studio. If we share our code with another person with different policies, when they open the solution with their customized Xamarin Studio, they will have the option to apply their own policies for the solution or use the project specific user settings.
A code template is a block of reusable code that we can insert where we need it in our code. Code templates can be simple or very complex. For example, blocks such as try…finally and if…else are commonly used, but we could also use code templates to insert entire classes or methods.
To try one of them, we can go to the Program.cs, writing in the global search file:Program.cs and pressing
Enter.
After the Console.Writeline("Hello World"); we can write for and press double
Tab.
There the following code would automatically appear:
for (int i = 0; i < max; i++)
{

}
Using the Tab button, we can navigate between two fields, i and max. We can change them with the values we need. By replacing the field i with myIndex, all the i in the template will be updated with the new value. When we arrive at the last editable value, we can press enter and at this point the template will be transformed in to regular code.
The code templates are written with a simple meta-language.
Here is a small list of the code templates we can find useful:
|
Keyword |
Code template |
|
ctor |
It generates the constructor of the class. |
|
cw |
|
|
switch |
Template for the |
|
exception |
Template for an entire class |
|
prop |
Template for a short property. If we need a private set we can use |
|
try |
Template for |
As an exercise, we can try all of them in our code. To use them in our code, we need to write the keyword and press double Tab.
There are about 40 templates currently available for C# in Xamarin.
Going to Tools | Options (Windows) or Xamarin Studio | Preferences (Mac), under the Text Editor section we can find Code Templates, with all of them, and details of how they are implemented.
We can also write our own code template.
If we try to add a property by writing in the code prop + double
Tab, it generates a short property as follows:
public object MyProperty {
            get;
            set;
        }
This has object and MyProperty as editable.
The implementation of this template in the meta-language is relatively easy.
public $type$ $name$ {
    get;
    set;
}
The words between the symbol $ are the ones that are editable. We can put them in the code more than once, and when they have different names they can be navigated with the tab button. When they have the same name, the engine repeats for us, in realtime, what we write in the first field with that name.
It would be great and always useful to have a template that writes an extended property like this:
private object _myProperty;
public object MyProperty{
  get
  {
    return _myProperty;
  }
  set
  {
    _myProperty = value;
  }
}
Unfortunately, there is not a code template like this. The bright side is that we can create it.
Go to Tools | Options (Windows) or Xamarin Studio | Preferences (Mac), select Code Templates from the Text Editor section, and press Add.
As a shortcut, we can write propex. We need to select C# from the drop-down list called group and text/x-csharp from the drop-down list called mime. As a description, we can write Template for extended properties.
private $type$ $name$;
public $type$ $Name${
    get
    {
        return $name$;
    }
    set
    {
        $name$ = value;
    }
}
Now in the drop-down list, on the right, we can select three new fields that are all the fields we inserted between the $ symbols.
We can define the default values for type, name, and Name.
After defining the default values for each field, we just need to press OK to save the snippet.
This is a very useful feature of Xamarin, disabled by default. When we enable it we have a powerful tool to raise the level of quality of our code.
The source analysis checks code on the fly and warns of potential errors and style violation, suggesting automatic fixes. To enable it, we need to go to Tools | Options (Windows) or Xamarin Studio | Preferences (Mac) and turn it on from the Text Analysis in the Text Editor section.
When enabled, we can see markers in the scroll bar. By moving the mouse over them we can see the problems colored by severity. The scroll bar gives us a high level view of the quality of our code. Some of the suggestions are just recommendations, and this doesn't mean that they have to be addressed.
If we click on the marker and press Alt + Enter, a list of suggested actions will be shown and we can decide whether or not to automatically fix the issue with the suggested action.
Regions let us specify a block of code that we can retrieve in the navigation bar at the top left side of our document. In longer code files, it is convenient to separate the code into regions so that we can focus on the part of the file that we are currently working on. The following example shows how to define a region:
#region MyClass definition public class
MyClass
{
 static void Main()
 {
 }
}
#endregion
A #region block must be terminated with a #endregion directive.
In general, we can comment a line in C# by using // before the part to comment or /* before the first char to comment and */ after the last one. In Xamarin Studio, we can also use a particular comment in our code by using // TODO: our comment. This will add the line commented on a task list that we will retrieve any time by clicking on the button Tasks positioned at the bottom right of Xamarin Studio.
To comment our classes and fields we use the documentation tags.
The documentation tags are comments in XML that can be useful if we want to automate the technical documentation of our app. The documentation tags are defined using /// and XML markup.
Xamarin generates the documentation tags for us. The quality of the auto-generated documentation tags is related to the quality of the coding standards we use.
Let's add, for example, a method to Program.cs called TransformTextInLowercase that transforms a string in its lowercase:
string TransformTextInLowercase(string textToTransform)
{
     return textToTransform.ToLower();
}
Adding the /// in the row before the first one and pressing enter allows Xamarin Studio to generate the following comment for us:
/// <summary>
/// Transforms the text in lowercase.
/// </summary>
/// <returns>The text in lowercase.</returns>
/// <param name="textToTransform">Text to transform.</param>
string TransformTextInLowercase ( string textToTransform)
{
      return textToTransform.ToLower();
}
Xamarin and the Microsoft C# compiler provide us with a way to extract the documentation from the comments.
It looks for XML documentation comments within the source code (comments that start with three slashes, ///), and puts them all into a single XML file.
To auto generate this XML file, we have to:
- Double-click on the name of the project in the solution pad. This opens the properties of the project.
- Click on Compiler under the Build section on the left side list.
- Flag Generate xml documentation.
- Choose a folder and a filename.
- Press the OK button.
Next time we compile, a new XML file that contains all the documentation tags will be automatically generated in the deployment folder.
The xml file can be used as the starting point to generate automatic documentation. We can write an xsl to present the data in html, or use tools such as NDoc, Monodoc, or Sandcastle to build a help file.