
Chapter 2: Getting and Installing Xcode
In This Chapter
Selecting a Mac for Xcode
Signing up for development
Getting started with Xcode
Xcode is free and runs on any Intel Mac. However, hobby developers and professionals have different hardware and software requirements. A system tuned for maximum productivity may be very different from one used for experimentation or hobby coding.
Selecting a Mac for Xcode
If you own an Intel Mac, you can run Xcode on it. But understanding the differences between a streamlined and productive working environment and a slow and informal one is useful.
Choosing a processor
Surprisingly, processors have less influence on productivity than other factors. A faster processor can speed up compilation times, but unless you're working on industrial projects with hundreds or thousands of source files, you'll find little obvious benefit to running Xcode on a high-speed multi-core Mac Pro.
Xcode compiles incrementally, which means that only updated files and their dependencies are recompiled after an edit. Compared to Xcode 3, Xcode 4's improved compiler technology cuts compile times even further. iPhone projects compile relatively quickly, even on a Mac mini, shown in Figure 2.1
However, other Xcode features such as code completion and source control can be noticeably faster on a faster Mac. Xcode 4 does more behind the scenes while you edit. It checks code for errors as you type it, and it can also display live help. The faster your Mac, and especially the faster your Mac's disk system, the more speedily these features work for you. On a slow Mac it can take a few seconds to check a file for errors, so there are obvious benefits to working on a faster Mac.
Figure 2.1
You do not need the latest, fastest, and largest Mac to use Xcode. You can create professional iPhone apps on a MacBook or Mac mini.

Selecting memory
Xcode 4 uses memory more efficiently than Xcode 3. Even on larger builds, it's unlikely that 2GB will feel restrictive on a Mac that's used exclusively for development. If you create artwork as well as code, you're likely to have some of the applications in Adobe's Creative Suite running at the same time as you use Xcode. Previewing graphics in Bridge, editing them in Photoshop and Illustrator, and importing them into an Xcode project is a standard workflow. Creative Suite and Xcode can work together in 2GB, but 4GB is a more realistic minimum to prevent disk thrashing and delays.
Choosing a monitor
A monitor, or monitor bank, can be the biggest influence on overall productivity. The less time you spend rearranging screen content, the more quickly you can create code. Although you can develop projects successfully on a monitor with a resolution of 1024x768, a minimum resolution of 1680x1050 is very much more productive. At this resolution, you can see the entire Xcode 4 workspace at once and use it as it was designed to be used. Larger monitors are even easier to work with, and a dual monitor system provides a significant speed boost because you can work on multiple projects or multiple files simultaneously.
After you've mastered the essentials of iOS, Xcode, and OS X, you'll spend significant time reviewing class references in the various frameworks and exploring message boards looking for code samples and developer tips. The most efficient way to view the references is to create a set of bookmarks with the most useful class references and view simultaneously in tabs in a web browser. You can then switch between them instantly as needed.
![]() TIP
TIP
You can use Spaces to create a separate developer Space that's dedicated to Xcode and its supporting windows. Day-to-day apps such as Mail can be kept in a different Space, minimizing clutter.
Exposé can be another timesaver. When you have many Xcode windows open at once, Exposé is by far the easiest way to switch between them. You can set up Exposé and Spaces in the System Preferences.
The most luxurious and productive development environment has at least two monitors for code and at least one further monitor for online browsing. The extra monitor may be on another machine, but it's more efficient to use a three- or four-monitor Mac; it's often useful to copy and paste code directly into your project from the documentation or other online sources.
Working with disk storage
Disk space and disk features can make a big difference to Xcode performance. Ideally, you should install Xcode on your main Mac hard drive, allowing at least 20GB for a full install of two separate versions (active and beta) with all documentation and your own project code.
Although it's not immediately obvious from the install options, Xcode can be installed and run on an external drive. However, OS X support for external USB drives is temperamental, and external drives are likely to be slower than internal disks. You should use a tool called SpindownHD in a tool collection called CHUD (Computer Hardware Understanding Developer Tools) to control disk idle and sleep modes. SpindownHD isn't a complete solution, but you can use it to extend spin-down times. Without it, Xcode sometimes crashes when it accesses a disk that is sleeping or when a Mac wakes up after hibernating. CHUD and Spindown are installed with Xcode. You can find Spindown in <Macintosh Hard Disk>/Developer/Applications/CHUD/Hardware Tools.
![]() CAUTION
CAUTION
The spin-down problem makes it difficult to keep folder and application shortcuts in the Finder window, where they're most useful to you. For example, if you drag Xcode to Places so you can run it quickly and the disk it is installed on hibernates or sleeps, the link may disappear. If you have enough free space, installing on your Mac's boot drive avoids this problem.
A Mac with an SSD (Solid State Drive) for OS X and Xcode can be a significant timesaver. Xcode 4 loads projects quickly but takes much longer to boot than Xcode 3. You can speed up the initial boot by running Xcode from a faster-than-average conventional disk, a RAID 0 system (Redundant Array of Independent Disks), or an SSD. This is a luxury option but is well worth considering for professional development.
Choosing peripherals
Peripherals can make a significant difference to your productivity. It's good practice to choose extras that feel comfortable to work with and don't have quirks, design features, or extras that distract you.
Selecting a printer
A printer isn't essential and is discouraged for environmental reasons, but may be useful for occasional debugging. It can be easier to trace execution through a paper listing than to view it in sections on a monitor. There are no special requirements for printing from Xcode. Any standard inkjet or laser printer works.
Choosing a pointing device
There's no lack of choice in the mouse market, and if you intend to develop professionally, getting a professional mouse with extra features can be well worth the extra money. You'll use it every day, and it's important that you're comfortable with it, that its shape doesn't leave you with RSI (Repetitive Strain Injury), and that it doesn't have extra or missing features that break your concentration. Extremely expensive mice with extra buttons may not be more productive than cheaper models. A good cordless mouse with a smooth scroll wheel can save significant time, particularly if it includes inertia for faster scrolling.
Opinions are mixed on Apple's own Magic Trackpad and mouse models. Some developers feel very comfortable with them, but others don't like them at all. Because pointing devices are a matter of taste, be sure to spend time trying out the various alternatives as thoroughly as you can. You can literally save hours or even days over a year with a cheap upgrade to a pointing device that you feel comfortable with.
Choosing your Mac keyboard
Keyboard action is a matter of personal taste. Some developers love the Apple wireless keyboards, but others find them impossible to work with. Be sure to visit a computer store to try some alternatives. Logitech PC keyboards offer a much wider range of actions and feels, and can easily be customized to create Mac mappings. Although some Apple enthusiasts may be horrified by the idea of using non-Apple peripherals, keyboard feel has a measurable influence on typing accuracy and comfort, so you must pick a feel that works for you.
Depending on your location, your Mac keyboard may have unhelpful character mappings. For example, in the UK, the critical # (hash) character isn't available, and you can type #import only by copying and pasting it from an existing import directive. It's a good idea to consider a free character mapping tool such as Ukelele (scripts.sil.org/cms/scripts/page.php?site_id=nrsi&id=ukelele), which sacrifices nonessential characters to create a custom layout that includes all the essential characters used in C-family programming.
![]() TIP
TIP
You may want to consider using a U.S. keyboard for development. This can be a practical choice if you have a Mac dedicated to development, but is less practical if you also use for Mac for browsing and e-mail. You can buy a U.S. keyboard from the United States using a site such as amazon.com or newegg.com. Beware of import duties and VAT—the final cost may up to 25 percent higher than the order price.
Choosing supporting software
Although Xcode seems self-contained, in practice you're likely to use it with other software. For example, if you choose to view documentation online, your choice of web browser becomes a significant limiting factor. Safari and Google Chrome are reasonably well behaved, but Firefox 3.x is notorious for memory leaks and lock-ups, and for running Flash and Java plug-ins with 100 percent processor utilization. Both can slow Xcode to a crawl. In extreme cases, it's impossible to edit code without a noticeable delay. This may change in future versions of Firefox, but currently Firefox 3.x can't be recommended. Debatably, Chrome provides the best overall browsing experience. It supports Flash and ad blocking, loads pages quickly, and can handle many open tabs—a useful feature when you may have many class references open simultaneously.
Xcode typically requires the most recent version of OS X. If you are a member of the Mac Developer Program, this is included in the program cost. Minor upgrades are free, but iPhone developers may need to buy a major update when it becomes available.
Other tools can be added as needed. Unless you outsource graphic design, you need an editing suite to create start-up graphics, icons, buttons, and other images, as shown in Figure 2.2. This is an essential requirement for the iOS projects, where graphic design is extremely important, and a very useful extra for OS X development. Adobe's Creative Suite is the de facto standard, but it's expensive. Free or cheap alternatives include Gimp for OS X (www.gimp.org/macintosh) and Pixelmator (www.pixelmator.com).
A small number of helper apps are available for developers. Xcode 3 supported various plug-ins, but these are no longer compatible with Xcode 4. The Mac App Store includes a selection of other apps that have been updated. For example, Accessorizer (www.kevincallahan.org) adds boilerplate setter and getter code. More apps are likely to appear in the App Store as Xcode 4 matures.
Figure 2.2
Although it isn't integrated directly into Xcode, Adobe Photoshop works well as an external editor for graphics.
![]() CROSS-REFERENCE
CROSS-REFERENCE
For more information about selecting editors and helper applications for various file types, see Chapter 8.
Signing Up for Development
Xcode 3 was free. It was supplied on every Mac's OS X installation disk in the Optional Installs folder. You can also download the latest version by registering as a developer for free.
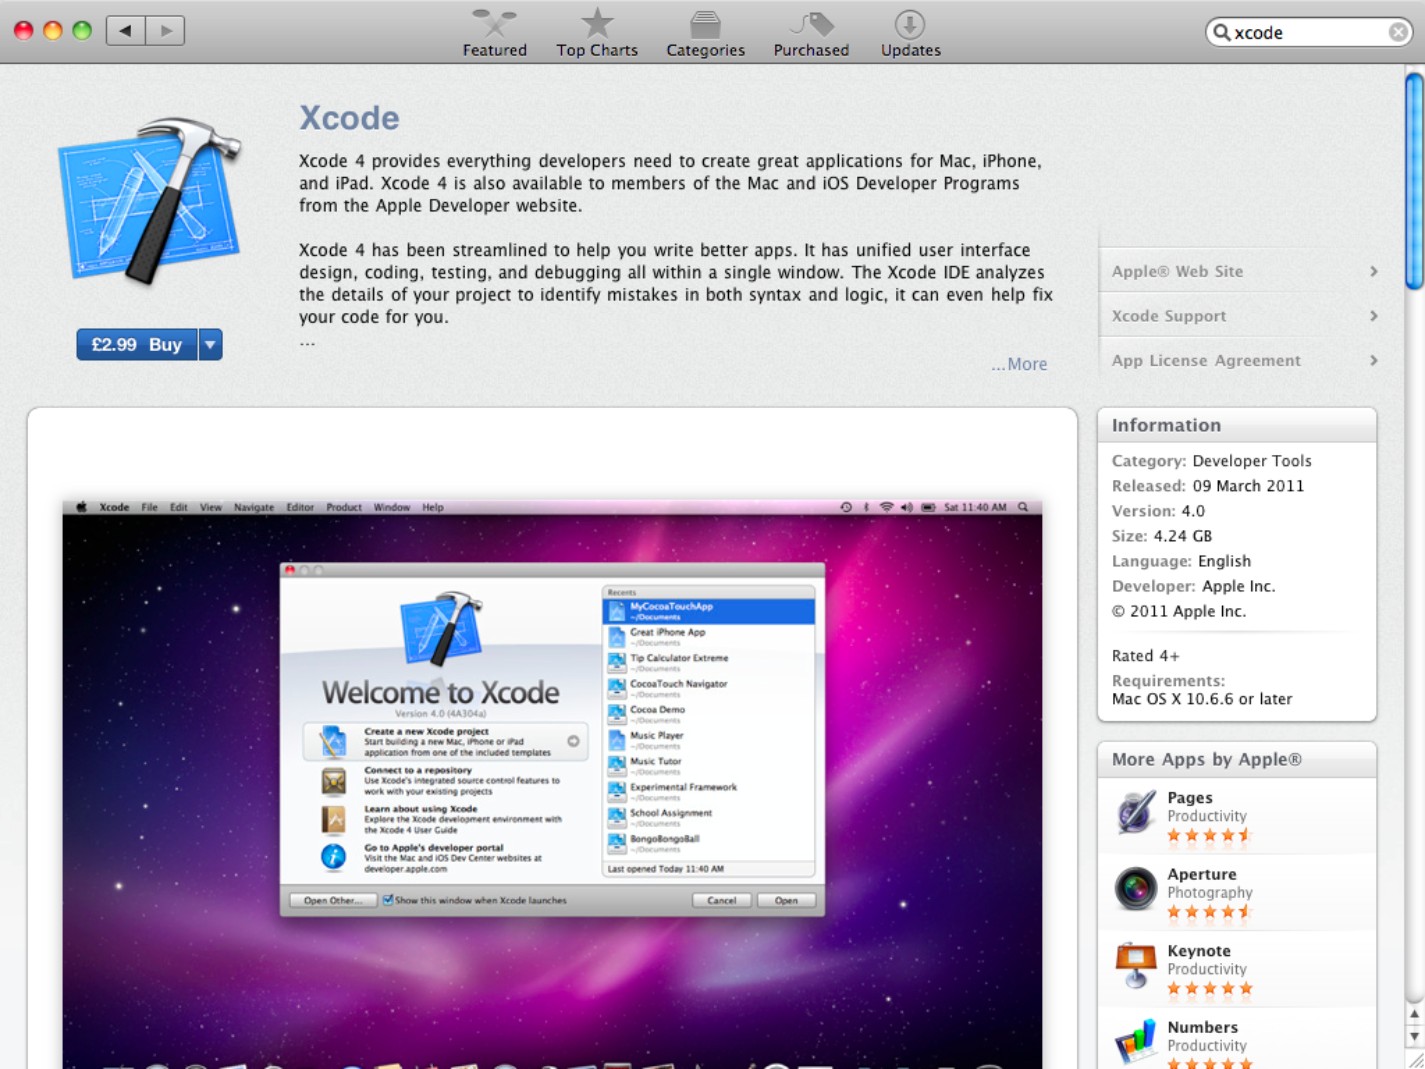
Apple has changed this policy for Xcode 4. You can buy Xcode 4 from the Mac App Store for $4.99 without registering as a developer, as shown in Figure 2.3. This allows you to experiment with Xcode 4. It doesn't allow you to create apps you can sell through the store, but currently you can use this option to create Mac apps you can sell from your own website.
You can also register as a developer. This gives you a “free” copy of Xcode 4 and also gives you access to the extra features you need to create apps you can sell, and upload them to the stores.
Figure 2.3
You can buy Xcode 4 from the Mac App Store.
Registering as a developer
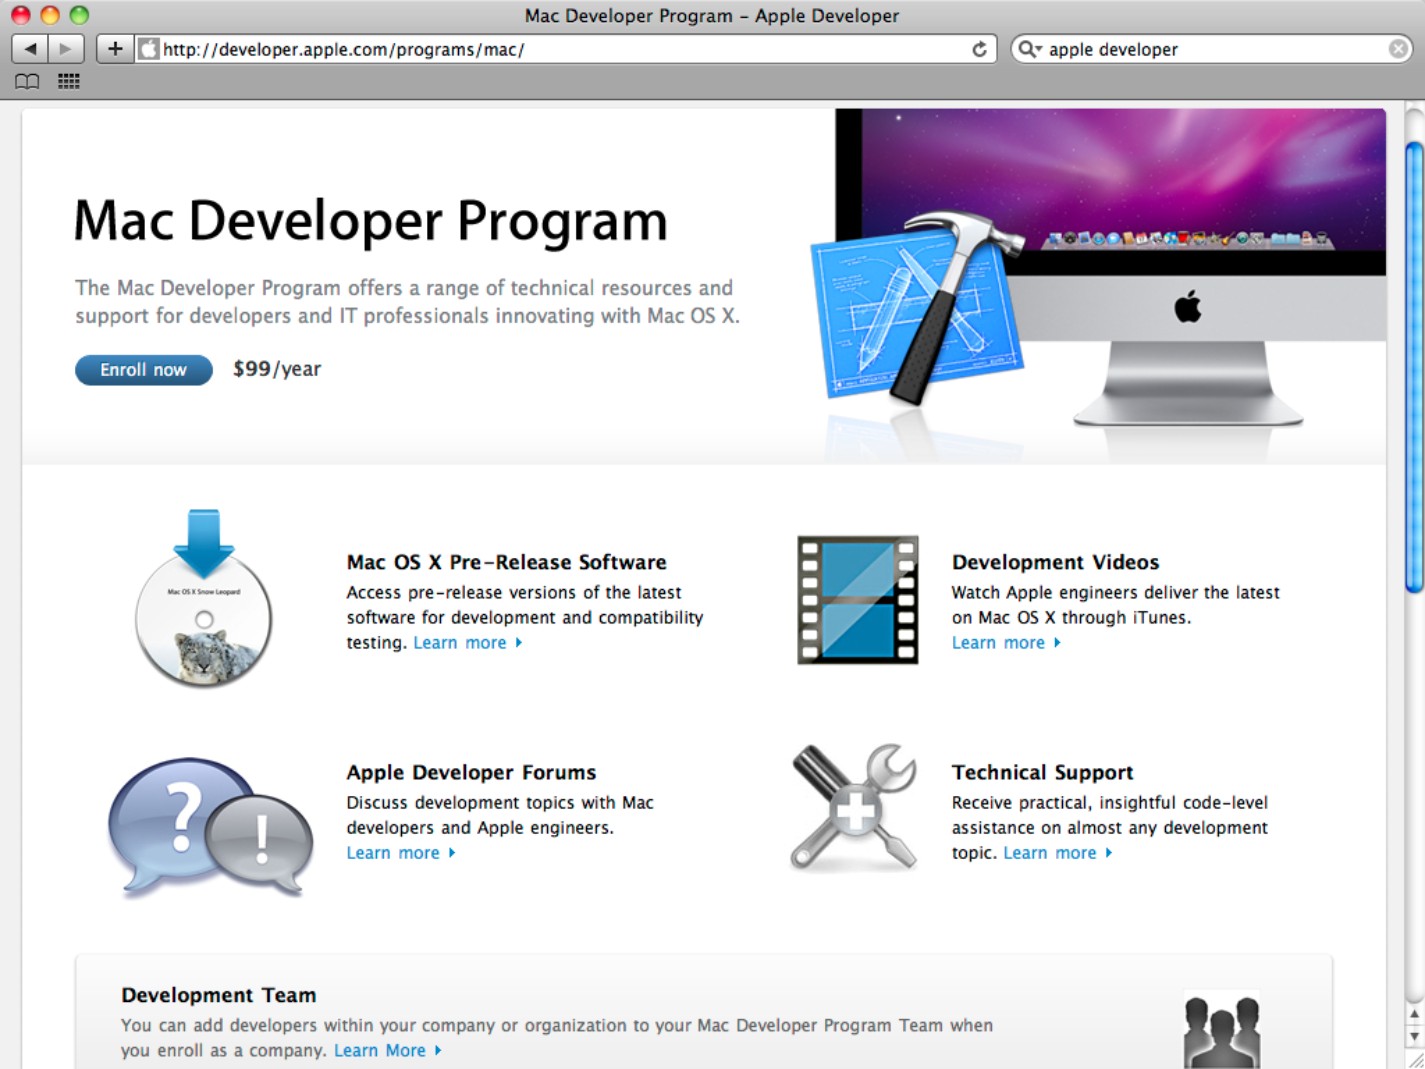
To register as a developer, visit the Apple developer home page, which is currently at developer.apple.com, shown in Figure 2.4. The design of this page changes regularly, but recent designs have included a selection of sign-up links for the various developer programs.
Figure 2.4
Begin the sign-up process at Apple's developer portal. This image shows the bottom of the page, with a list of programs. Selecting a link takes you to the sign-up page for each program.

Choosing a program
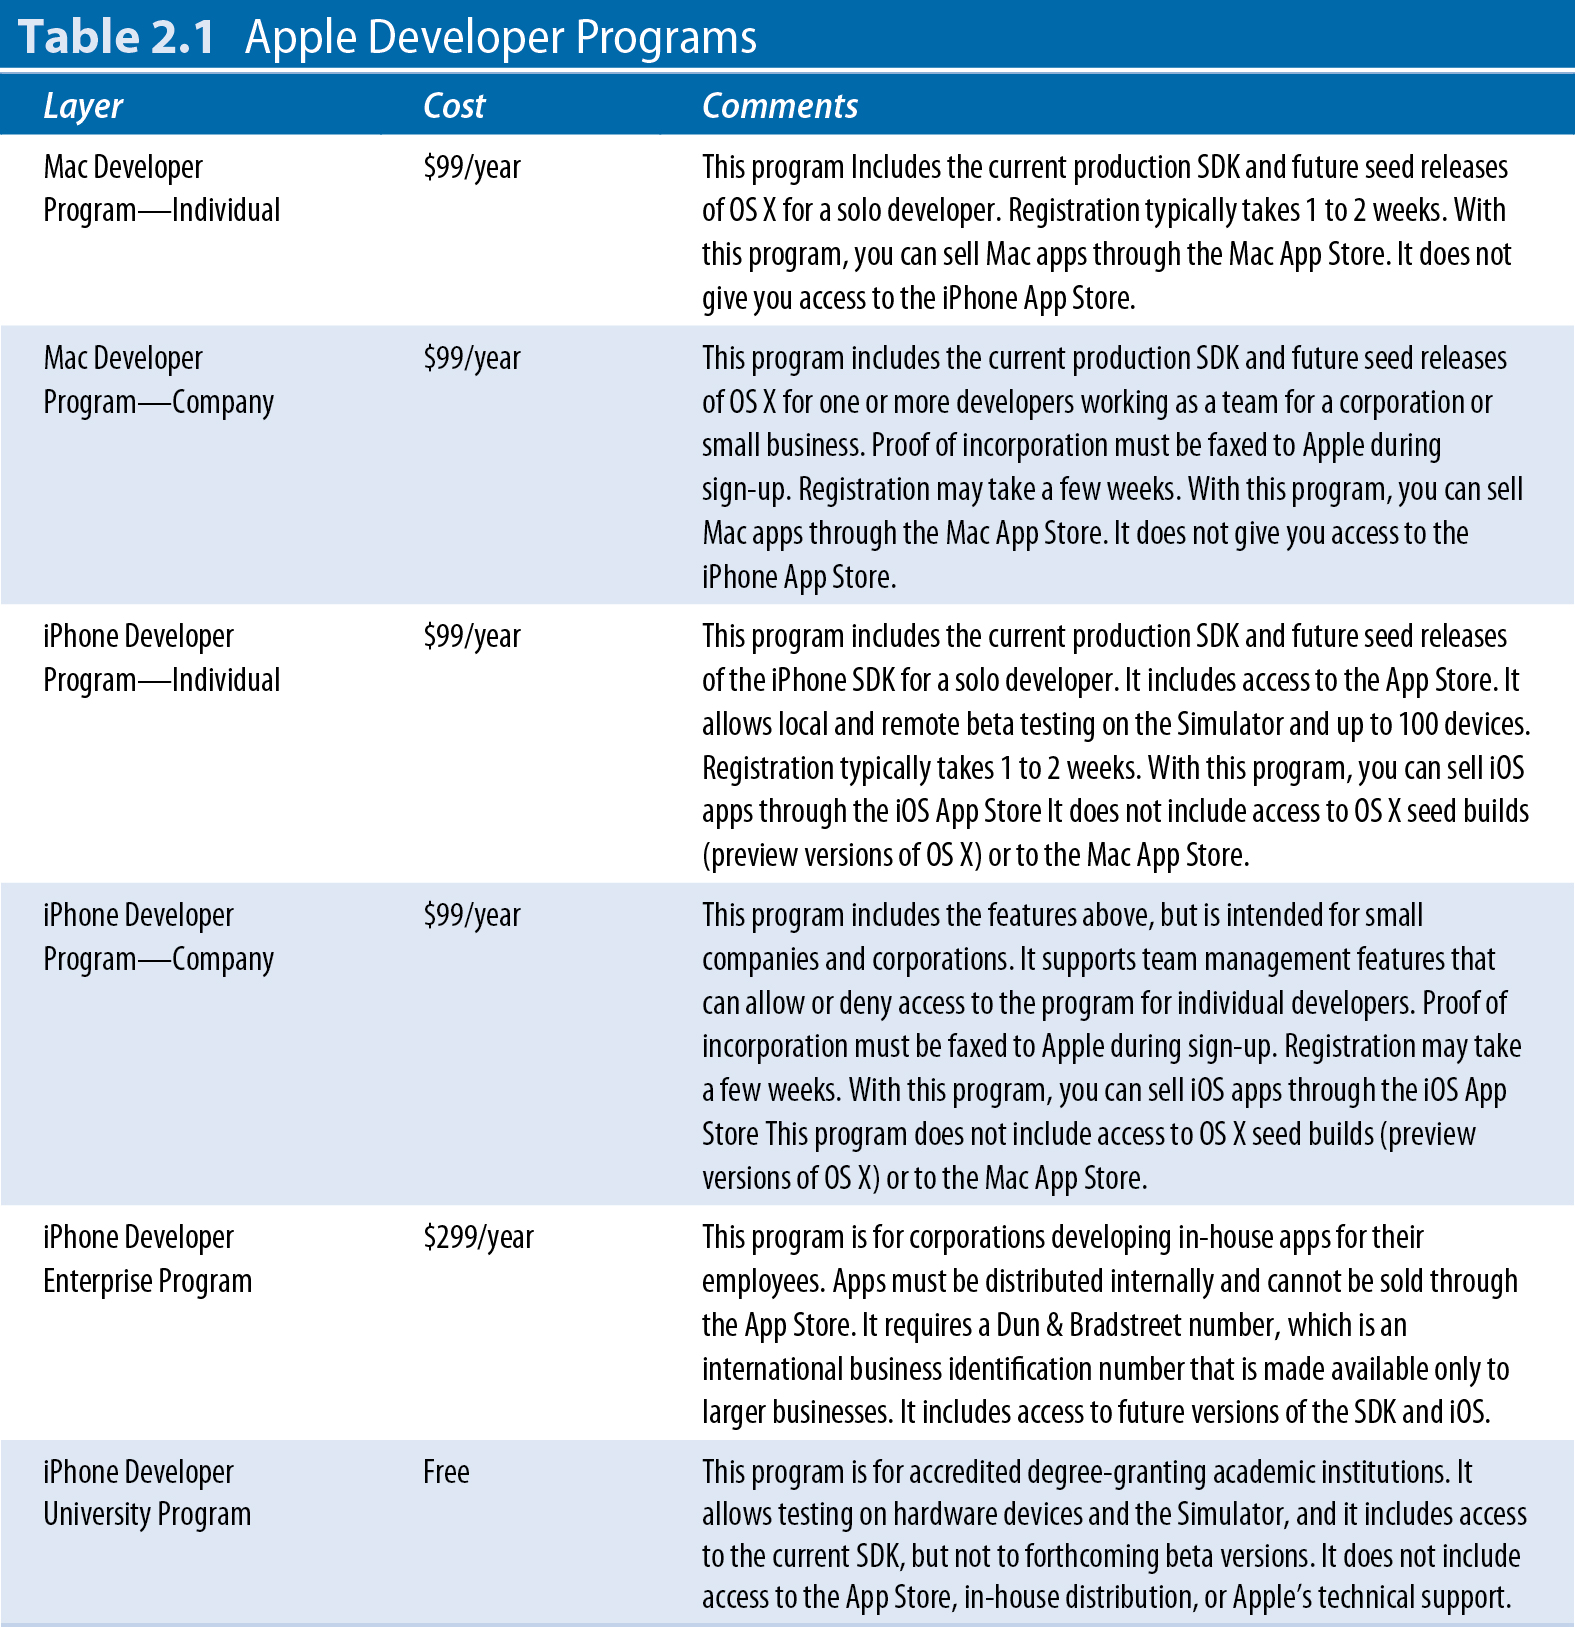
Table 2.1 lists the current developer programs.
Sign-up is straightforward. You must supply an e-mail address for the free program, and you must provide personal details including an address and contact phone number for the paid programs. If you do not already have an Apple ID, you need to create one. If you already have an Apple ID for personal use, creating a separate company ID is useful if you are incorporated; this can simplify taxes and accounting.
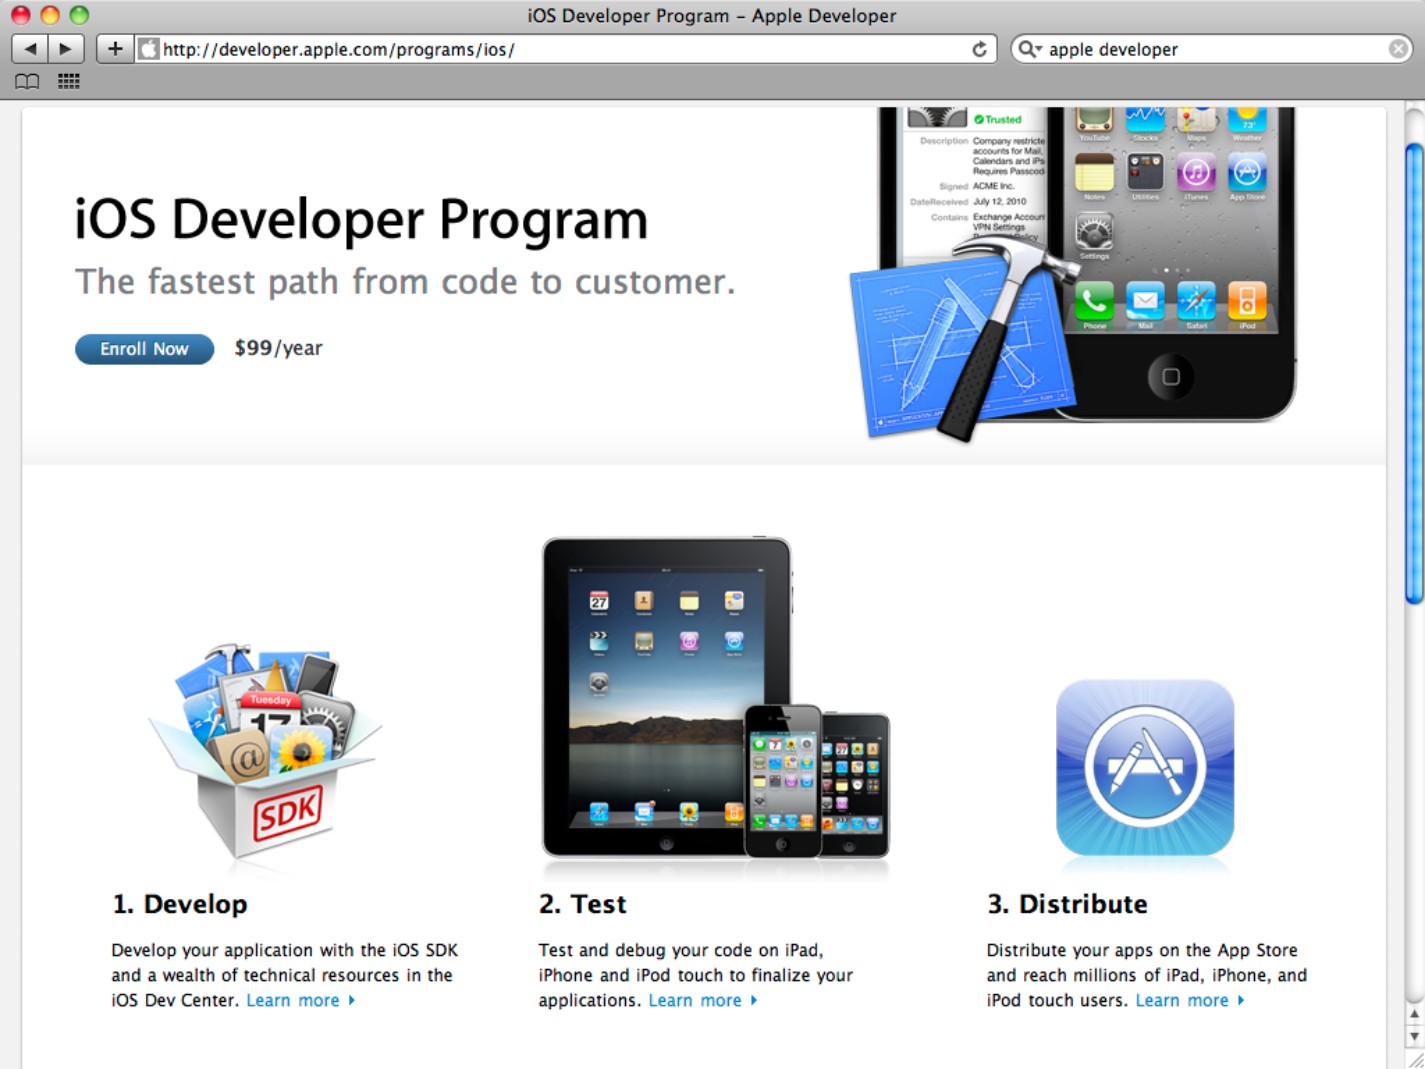
The iOS developer programs
The chief benefits of the iOS developer program, whose portal is shown in Figure 2.5, are access to the App Store retail program and the ability to test apps on real hardware. Testing requires the generation and installation of certificates and profiles—files that allow you to develop and test apps but don't allow you to copy them freely—on a special area of the developer site. This is a complex process and is described in Chapter 11.
![]() CAUTION
CAUTION
Keep in mind that although the iOS program seems cheap, you need at least an iPod touch to test apps, and an iPhone is strongly preferred. Adding an iPad to your hardware collection can push the total initial cost of app development during the first year to over $1,000. Many developers do not earn this back from sales.
Business sign-up requires proof of incorporation. Documents must be faxed, not sent, to Apple's HQ in Cupertino. If you are a solo developer with an incorporated business, signing up as a company can take an extra week or so, but it simplifies foreign tax accounting for App Store sales. Without a company, a portion of foreign earnings can be withheld for tax reasons until local tax authorities receive paperwork that proves country of residence. With multiple territories (sales regions) in the App Store, this can create a small mountain of paperwork for individual developers and may also hold up payments.
Figure 2.5
Beginning enrollment in the iOS Developer Program can take up to three weeks for companies. Enrollment for individuals is sometimes processed within 24 hours, but may take a couple of weeks.
Enrolling for the iOS Developer Program also provides potential access to the Apple's add-on services for iOS, including the iAD network, the GameCenter network, the in-app purchase scheme, and the push notification service. To use these services, you must enable them individually after enrollment. You also may need to authorize or sign further legal contracts.
The Mac developer programs
The Mac developer programs shown in Figure 2.6 give developers access to the App Store and the opportunity to install and develop for versions of OS X before they're made available to the public. OS X develops more slowly than iOS, but beta updates are made available regularly. These updates may not be completely stable, so it's a good idea—although an expensive one—to install them on a separate development machine.
Because it's possible to sell Mac applications independently from a website without using the App Store, and because anyone can buy and install Xcode for a nominal fee, the incentive to sign up as a full Mac developer may not be completely compelling. It can be worth buying Xcode 4 first to experiment with it, and then signing up as a full developer when you have developed a commercial app.
Figure 2.6
The supplied tools and developer resources for those enrolling in the Mac Developer Program are almost identical to those available to iOS developers, with the difference that Mac developers get access to beta versions of OS X.
![]() NOTE
NOTE
Having a combined program for both OS X and iOS development would be useful. Unfortunately, Apple doesn't offer one. In practice, either program gives you access to a full version of Xcode with both iOS and OS X development tools and supporting documentation. The programs differ in access to beta versions for their respective platforms, and to the two App Stores.
Accessing developer resources
Developer resources include the online reference libraries, a selection of developer videos, and the developer message boards.
Using the online documentation and references
The iOS and OS X reference libraries, which include documentation described in Chapter 6, are freely available and do not require registration. The URLs change regularly, but currently you can find the iOS library at http://developer.apple.com/library/ios/navigation/ and the OS X library at http://developer.apple.com/library/mac/navigation/. If these URLs no longer work, search for “OS X Reference Library” and “iOS Reference Library.”
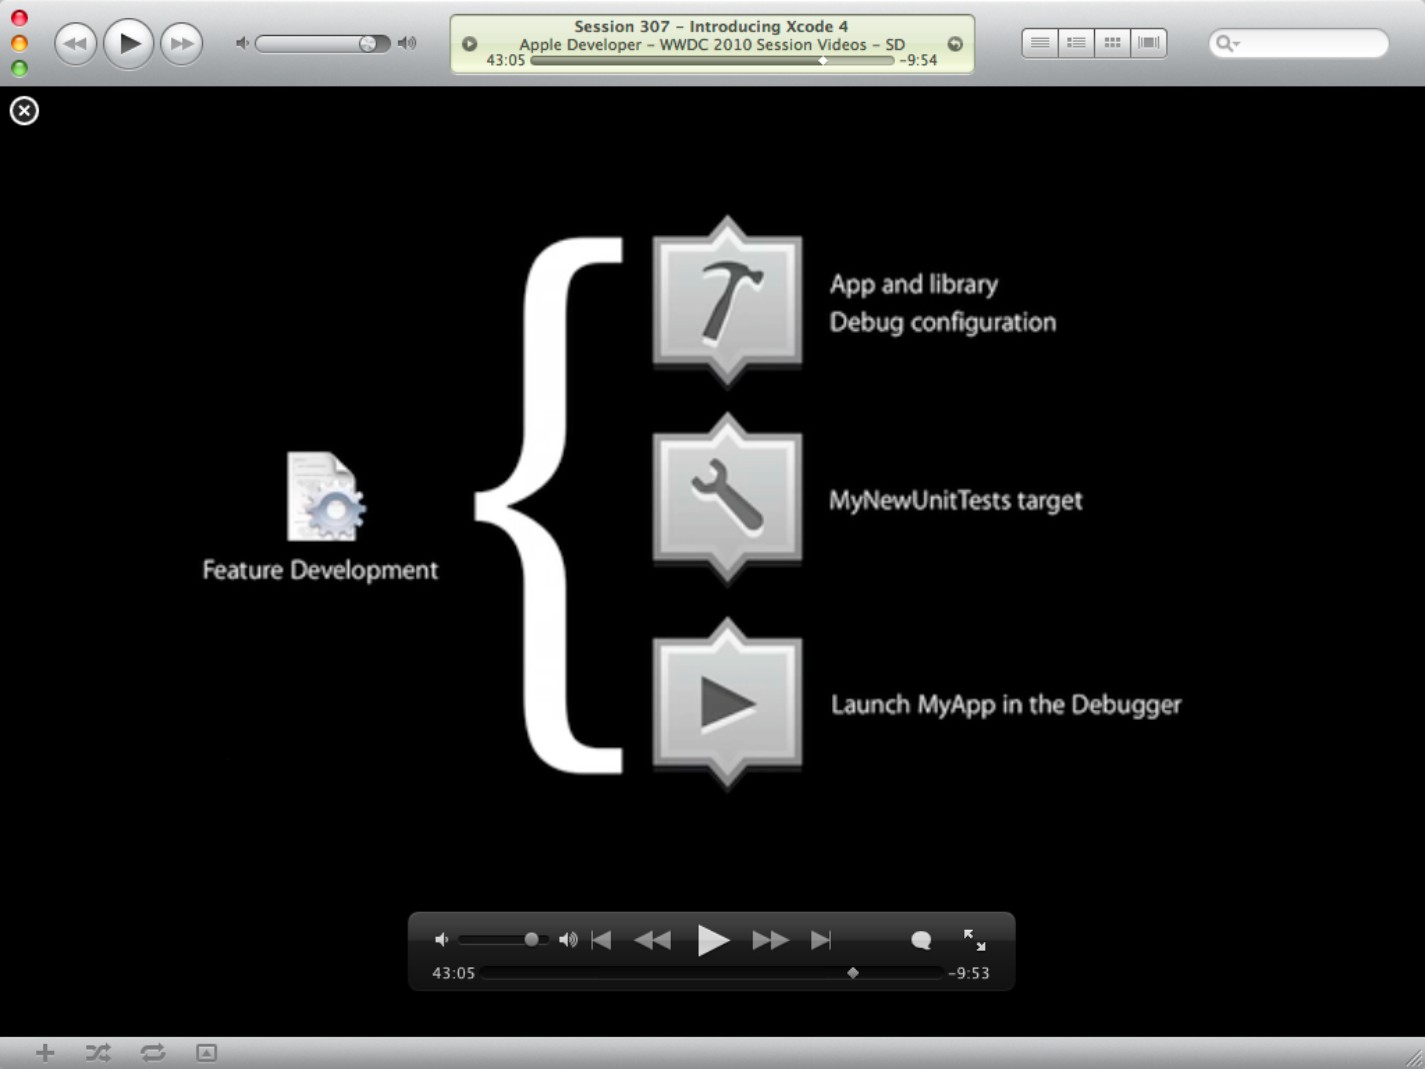
Viewing developer videos
The developer videos, an example of which is shown in Figure 2.7, include keynotes and background talks, often taken from Apple's WWDC (World Wide Developer Conference) series. In the past, Apple charged $500 for access to these videos. Now they are available via iTunes to anyone who registers for a paid program. The keynote speeches from each year's WWDC remain free and can be downloaded by anyone.
Some developers find that the hands-on examples in the videos offer a more successful introduction to key technologies and essential development techniques than the slightly chaotic explanations in the documentation.
The Mac and iOS Developer Programs allow access to different video collections. Only Mac developers are given access to the Mac Development Foundation Videos. Similarly, only iOS developers are allowed to download the iOS Development Videos.
![]() Caution
Caution
Video sizes can up to 400MB, and the complete video collection is around 10GB. You can watch them online, but if you have slow- or medium-speed broadband, downloading them may be your best choice. As of version 10.1 of iTunes, batch downloading isn't available. You can mark any number of videos for download, but iTunes unmarks them after it completes two downloads. The remaining videos must be reselected manually.
Figure 2.7
If you download developer videos from iTunes, you can back them up to an alternative location and play them in alternative players, which may be on other machines.
Using the Apple developer discussion boards
The Apple Developer boards are perhaps the least useful developer resource. Alternative developer boards such as stackoverflow (www.stackoverflow.com) have built up a larger collection of questions and answers, discussed in more depth. They're also indexed by Google, which simplifies topic and keyword searches.
The chief advantage of the official developer boards is that Apple employees sometimes read and comment. Otherwise, you can typically get more detailed and more helpful comments from elsewhere, from developers who may have worked through a problem and posted the code for a full solution.
Asking for technical support
Both the iOS and OS X Developer Programs offer developers up to two code-level support incidents per year. You can use these to discuss your code with an Apple technical support engineer. The engineers won't be able to understand a huge project instantly, so technical support incidents are best used for mysterious but localized issues that resist conventional debugging and are beyond the insight of other developers.
Many of the internal features of iOS and OS X are undocumented, and code doesn't always work as you expect it to. For example, UI code may create extra ancillary views while managing transitions, or UI objects may have complex features that can't be accessed externally. Apple engineers are more likely to be aware of these quirks than external developers. But Apple doesn't guarantee that engineers will solve a problem, only that they will look at it. Developers who find the service useful can buy two extra incidents for $99 or five for $249.
![]() CAUTION
CAUTION
Only public non-beta versions of iOS and OS X are supported. You won't be able to ask questions about bugs or features in beta releases.
Getting Started with Xcode
When you enroll in a program, you are allowed to access a page like the one shown in Figure 2.8. The design may differ, but the page includes a download link to the latest SDK (Software Development Kit).
Xcode is packaged as a standard Mac .dmg file, which is typically around 2 to 3GB. You must download the complete SDK with each new update; there's no incremental install or upgrade option.
A complete upgrade cycle may require extra downloads. A new version of iTunes is often released around the same time as Xcode is updated. OS X also may go through an incremental update.
iOS developers need to update the firmware in all their devices—or at least, in all the devices that need to run the current version of iOS. Documentation may need to be downloaded separately.
![]() TIP
TIP
If you have a spare older device, it can be useful to keep an older version of iOS on it and use it for compatibility testing. Conversely, if you have a single device such as an iPhone, you may be reluctant to upgrade it to beta firmware for testing. Older apps typically work on newer firmware. However, apps developed for new beta firmware don't work on devices with older versions of iOS, unless you deliberately make them compatible.
A full update can easily require 5 to 8GB of files, including Xcode, firmware, documentation, iTunes, and OS X. This is impractical over dial-up and can be difficult with slow broadband. If you don't have 10MB/s or faster broadband, it's useful to plan updates so you can leave the download running overnight.
Mac developers have a more straightforward experience. OS X is updated less frequently and doesn't usually require extra downloads. Individual OS X beta releases are released approximately monthly, but are much smaller downloads than a full iOS beta. The differences between minor versions—for example, OS X 10.7.1 and 10.7.2—are often so small that you can develop apps without keeping up to date with them.
Figure 2.8
In this example, the download link appears at the bottom left. This location often changes.

![]() CAUTION
CAUTION
If you're limited to dial-up, Xcode may not be a practical solution for you. At best, you can try to find someone with faster broadband willing to download updates and burn them to a DVD or copy them to a memory stick. Unfortunately, the Xcode documentation is tightly integrated within the SDK, so this is only a partial solution.
Installing Xcode
After downloading, double-clicking the .dmg file mounts it in the usual way. The opened mounted image is shown in Figure 2.9. Double-clicking the .mpkg file starts the installer. If a PDF file is included, it lists the latest release notes.
After displaying the legal agreements, the installer tries to force you to install Xcode on your main system disk, as shown in Figure 2.10.
Figure 2.9
The Xcode dmg package is completely conventional. You can mount it and run the installer in the usual way.
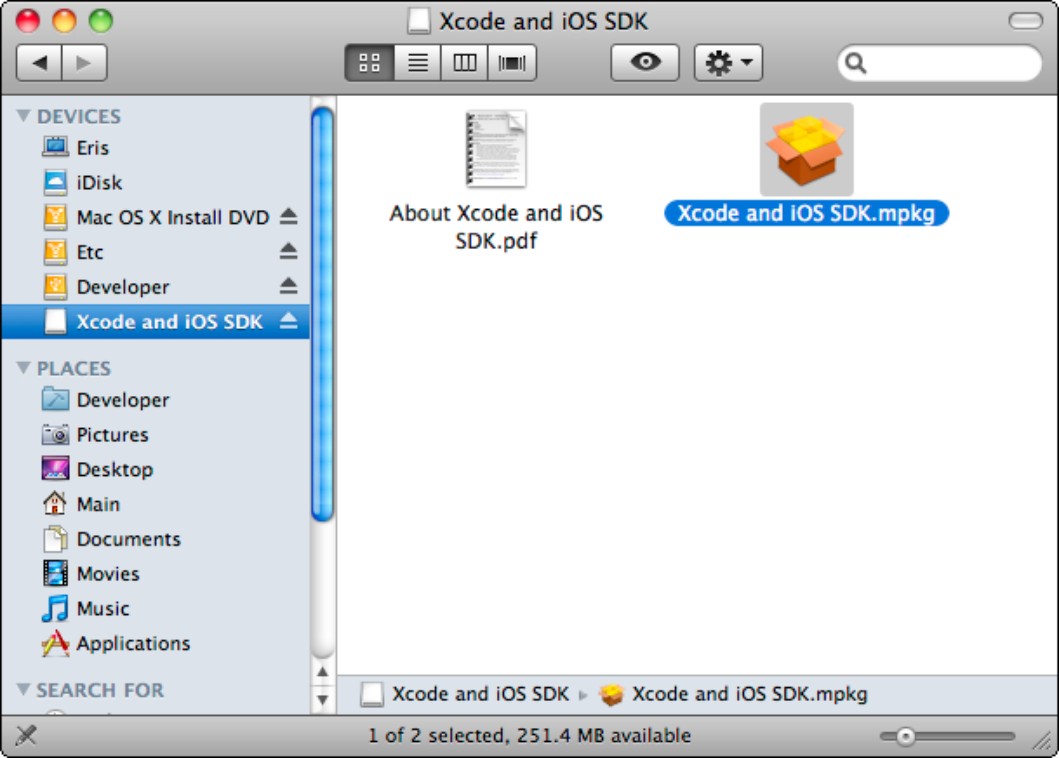
Figure 2.10
The installer doesn't appear to give you a choice of destination. What if you want to install to a different drive?
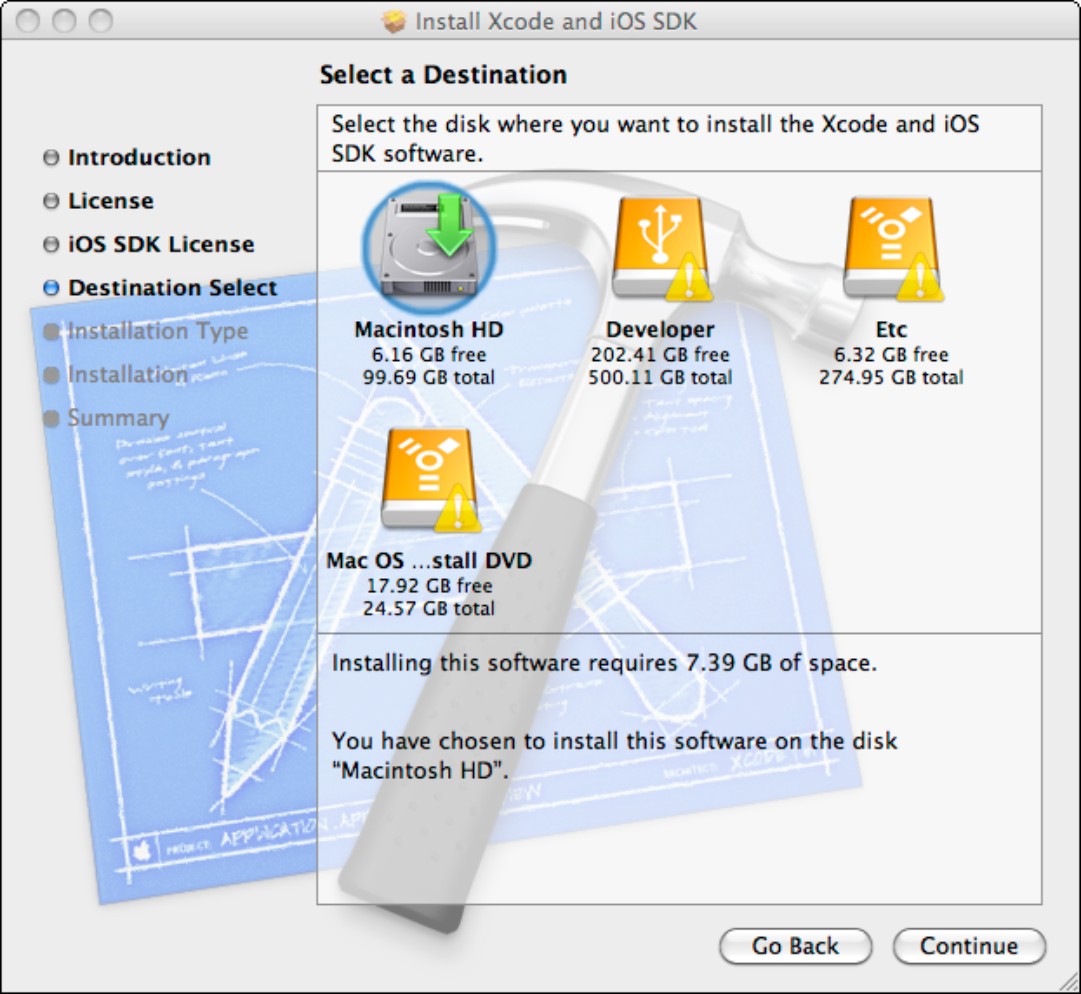
If you click Continue and then click the folder under the Location tab, you can select Other as the location. This opens a drop-down dialog box that allows you to select a drive and folder anywhere in your Mac, as shown in Figure 2.11. You also can create a new folder, if you choose to. Traditionally, Xcode is installed in a root-level folder named /Developer.
Figure 2.11
A hidden option makes it possible to choose Other and then select or create your own destination folder.

Installing to a different folder or disk creates a split installation. Around 900MB of key features, including some of the system tools, are always installed to the /Developer directory on the main system disk. The rest of Xcode can be installed in any folder you specify.
Typically, you see a list of optional features in the main install dialog box. The UNIX Development tools are of interest only to developers who want a separate set of compiler tools that can be accessed from Terminal using the command line. If you're not interested in UNIX development, you can leave this option uninstalled.
In the past, the documentation was downloaded and installed with Xcode. Now it's downloaded separately after you run Xcode. You can ignore the internal documentation and use Apple's web documentation exclusively, but there are good reasons to use both if you can. For more details about installing and using the documentation, see Chapter 6.
Depending on the current version of iOS or OS X, you may see more than one SDK listed here. In Xcode, an SDK is a collection of code libraries that build code for a specific version of either OS X or iOS. For example, Xcode uses different two iOS SDK libraries to build apps for the Simulator and for hardware devices.
In Xcode 4, Apple typically bundles all legacy versions into a single combined SDK for a given platform. You're no longer given a choice about which versions are installed, and all supported legacy versions are made available. This may change with future updates.
![]() CROSS-REFERENCE
CROSS-REFERENCE
For information about creating applications that can run on legacy versions of iOS and OS X, see Chapter 10.
After you have selected a destination folder, the rest of the installation process is automatic. It can take from half an hour to two hours to install Xcode, depending on the speed of your Mac and its hard disks. You can leave your Mac unattended or continue working on something else. If you have to install Xcode, update iTunes, and change the firmware in one or more devices, the complete process can take up to half a day. If you also need to update OS X, it takes even longer.
![]() CAUTION
CAUTION
Close Xcode and iTunes before you install a new version. The installer pauses if Xcode or iTunes are running.
Creating and organizing project folders
After installing Xcode, you can create supporting folders for your projects. Do not save your projects inside a /Developer folder. This is critically important. When you update Xcode, the contents of /Developer can be overwritten without notice. For similar reasons, don't install extra helper applications inside /Developer.
If you have installed Xcode into a separate partition, you can keep a project folder elsewhere on the partition. The exact location or name of your projects folder is arbitrary, but it's useful to choose a location that is only a few navigation clicks away from /Developer.
Figure 2.12 shows one possible folder workspace for Xcode and associated project folders. It's useful to have a scratch folder for quick trials and experiments, and a production folder for commercial projects. You may also want to have further separate folders for Apple sample code, template examples, downloaded code, shared or collaborative projects, and so on. Try to keep the main production folder dedicated solely to production code, which includes your own applications and any spin-off frameworks you create. The /Provisioning folder shown here stores certificates and downloaded provisioning profiles used in iOS development. It's good practice to store these in a separate folder to make them easy to find and to avoid misplacing them.
![]() TIP
TIP
Prefixing project folders with a plus sign (+) lists them alphabetically in a separate order from the tool and support folders.
Figure 2.12
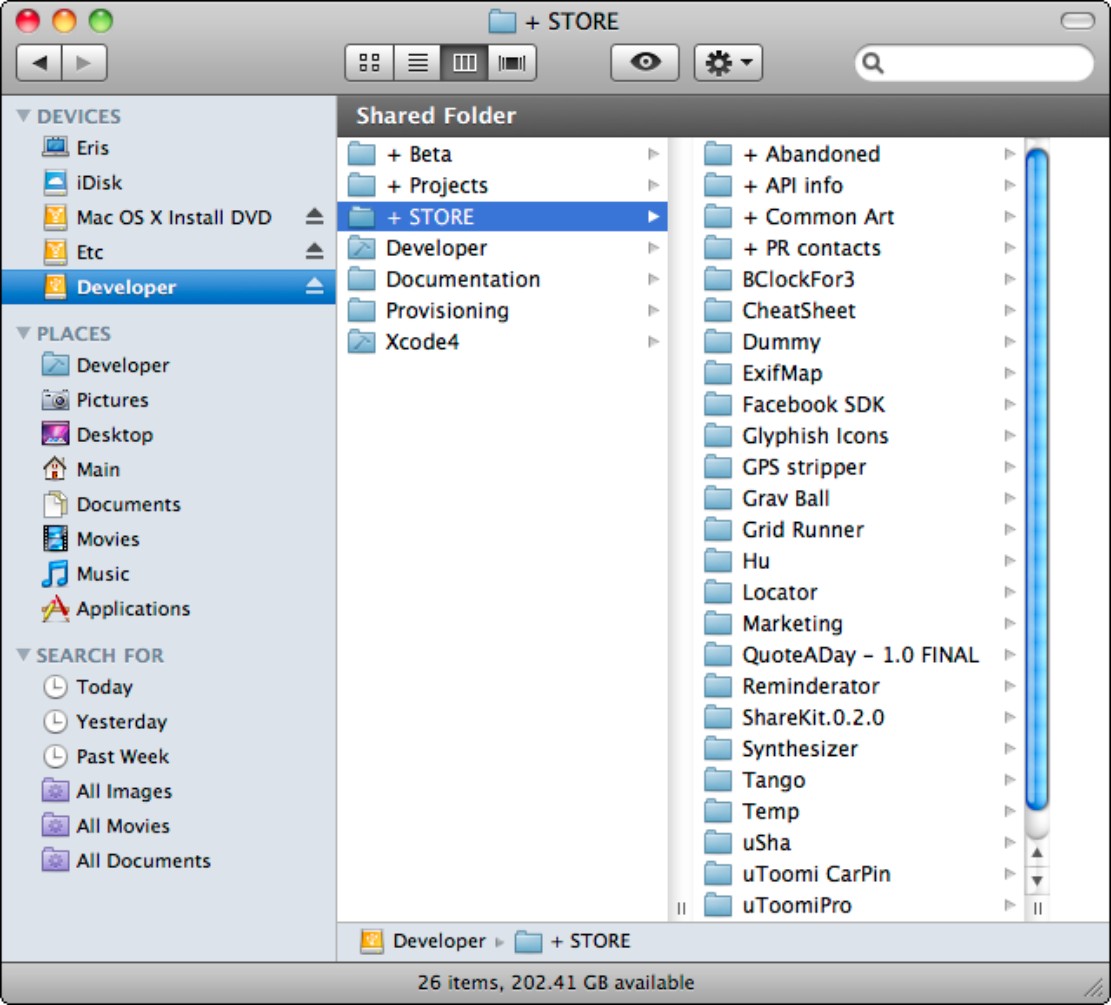
One possible /Developer folder layout is shown here. +Projects hold test and experiments and +Store hold code used in App Store projects.

Figure 2.13 shows one possible project folder structure. You often reuse graphics and fonts between projects, and it's helpful to keep them in a single shared folder. Similarly, even if some projects are abandoned, it's useful to keep them out of the way in a graveyard folder in case you need to refer to them again.
Figure 2.13
This is one possible projects folder layout. You may want to spend some time organizing your project workspaces before you begin coding. Your ideal layout may look very different, but it's important that it works smoothly for you.
Working with multiple versions of Xcode
SDKs are updated regularly, and you often need to have more than one version installed and available simultaneously. For example, you may have:
![]() A production version of Xcode for production code
A production version of Xcode for production code
![]() A newer beta version, used to explore the features in a forthcoming OS update
A newer beta version, used to explore the features in a forthcoming OS update
![]() An optional alternative or preview SDK with broader changes
An optional alternative or preview SDK with broader changes
Apple doesn't force you to install beta SDKs, but it's commercially useful to offer updated or new apps with new features as soon as the latest version of iOS is released to the public. Apple typically asks for new apps up to two weeks ahead of the release, to allow for review time.
Xcode is modular, and it isn't difficult to work with multiple versions. The core tools change very slowly. The biggest changes happen in the SDK folders and their supporting headers and binaries.
In practice, this means you can install multiple versions in separate folders. Use the /Developer folder for your production version. Other folder names are arbitrary. In theory, you should reinstall your production version of Xcode after installing a beta, but in practice, the order of installation rarely matters.
One caveat is that Xcode projects always run the most recently installed version of Xcode when you double-click them. It's often easier to start the production version of Xcode manually and select a project for editing than to load projects with a double-click in Finder. Xcode maintains a recent files list, so this isn't usually a hardship—and it may be more convenient.
Uninstalling Xcode
In theory, you should uninstall Xcode using an Apple-specified script. Open Terminal, and type the following:
$ sudo /Developer/Library/uninstall-devtools --mode=all
This removes most Xcode files and the /Developer folder. If you have Xcode installed in a different folder, you can find the script in the corresponding /Library folder.
![]() CAUTION
CAUTION
There's no undo for this operation, and the files aren't moved to the Trash. Once Xcode is removed, it is gone, and everything in /Developer goes with it.
In practice, you can often drag the /Developer/Applications folder to the trash, and then install a new version of Xcode on top of the remains of the current one. This method isn't foolproof; it can sometimes lead to duplicated or misplaced frameworks, but it is lazy, quick, and simple. If you haven't customized the other contents of /Developer, you can drag the entire folder to the trash.
Summary
This chapter explored the hardware options you should consider to use Xcode productively, and it introduced the various Apple Developer Programs for iOS and OS X. It explained how to register as a developer, how to download Xcode, and how to create both a default install in the standard locations and a custom install in a selected folder or disk partition.
It also examined multi-version installations with simultaneous production and beta development systems, and it explained how you can remove Xcode from your system if you no longer need it.