Chapter 10. Get Productive with iWork
Word processing, spreadsheets, and presentations probably aren’t the first things that come to mind when you think of the iPad—unless they’re the first things that come to your mind on any topic. After you’ve used the iPad for longer than two hours, you realize that it’s a great little device for consuming stuff (videos, eBooks, web pages), but not so much for creating stuff, like, well, word-processing documents, spreadsheets, and presentations.
Apple’s iWork suite for the iPad attempts to change that impression. For many years, iWork—consisting of Pages (word-processing), Numbers (spreadsheet), and Keynote (presentations) programs—lived on some Macs in the giant, looming shadow of Microsoft Office. After all, from corporate offices to college campuses, Microsoft Word, Excel, and PowerPoint are the de facto industry standards for documents, spreadsheets, and presentations.
If you’re considering buying iWork (or you have it already and don’t know where to start with it), this chapter is for you. iWork isn’t a do-all, be-all desktop suite, but neither does it take up gigabytes of hard drive space for files and features you’ll never use. It can, however, keep you productive—even if you’d rather use your iPad to watch The Office instead of working on a spreadsheet for the office.
Meet iWork
If you’ve never heard of iWork, you’re not alone. It’s oldest component, the Keynote presentation program, has only been around since 2003, with Pages and Numbers debuting a few years later. All iWork programs are Mac-only, which means that more than 90 percent of the computing population has never used iWork or doesn’t care because darn it, there’s new antivirus software to install!
Apple created iWork to cover much of the same ground as Microsoft Office, Corel WordPerfect Office, OpenOffice.org, StarOffice, Google Docs, and any other software suite that contains the holy trinity of business productivity applications: a word-processing program, a spreadsheet program, and a presentation/slideshow program.
With the tablet version of iWork, Apple transformed the point-and-click desktop version of the suite into tap-and-drag iPad software. It isn’t just a half-baked copy of an overstuffed office suite, either. Who wants a screen clogged full of toolbars, menus, and floating palettes when your screen is your workspace? Apple’s iWork re-engineering takes this into account, tucking your formatting, function, and design controls neatly into tappable buttons that deliver toolbars only when you need them—leaving most of the screen free and clear. And those iPad finger moves—where you zoom in on and pinch onscreen elements—work in iWork, too.
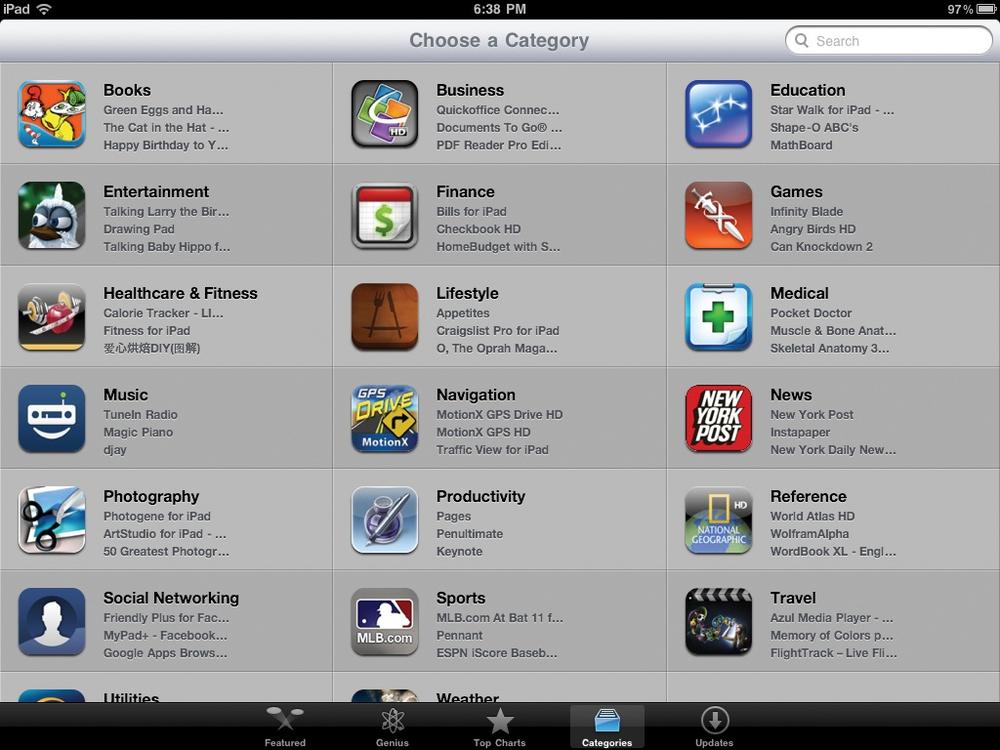
You can buy the iWork programs in the App Store—just tap the Categories button and look in the Productivity area (circled). Apple sells each program separately for $10 apiece. This is convenient if, say, you just need to compose memos and wouldn’t know a GPA calculator if it bit you—you don’t have to buy the whole suite. And if you do buy the whole suite, it’ll set you back just 30 bucks—a bargain compared to desktop suites that cost $80 or more.
Note
The App Store doesn’t sell the whole iWork suite as one big app—you have to buy each $9.99 program separately. But all three apps show up if you search for “iWork” in the App Store.
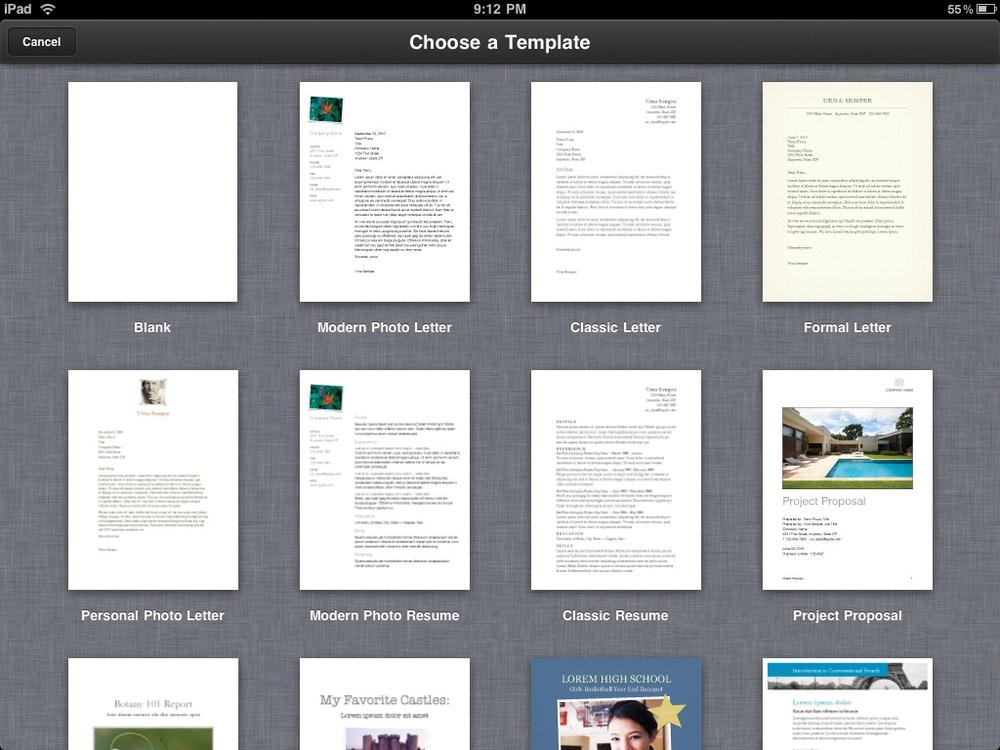
Pages. Pre-stocked with 16 templates for all kinds of documents (résumés, letters, flyers—even a blank page!), the iPad version of Pages aims to make word-processing as efficient as possible. Granted, it’s no Microsoft Word in the features department, but it’s versatile enough to let you do more than just type words. You can add photos, charts, and tables to documents, and format text with features like bullets and numbered lists. And here’s one way Pages trumps Word: As with all iWork apps, Pages automatically saves your file at least twice a minute.
Numbers. A spreadsheet-making alternative to Microsoft Excel, Numbers also has its own collection of templates so you can create things like budgets and travel planners. It lets you convert a table into a form for speedy data input and create formulas with more than 250 functions (for those who really like to rock a spreadsheet). Numbers isn’t all about numbers, though; it can tap into the iPad’s Photos app so you can jazz up your spreadsheets with pictures, too.
Keynote. With 20 slideshow transitions and 12 themes to choose from, Keynote was made for crafting slick presentations for audiences of any size. Although it’s not as powerful as Microsoft PowerPoint, Keynote is a nimble app, designed for creating shows on the go. And once you design your presentation on the iPad, you can run it there, too—by hooking it up to a projector with one of Apple’s Dock Connector video adapters (see Play iPad Videos on Your TV).


At this point, you may be thinking, “It’s all well and good that iWork can do all this stuff, but does it really matter if nobody besides iPad and Mac owners can open these files?” Here’s the answer: iWork can export files in PDF format, the lingua franca of the computer world, whose files everyone with the free Adobe Reader can open. Makes iWork all that more appealing, eh?
Get Started with iWork
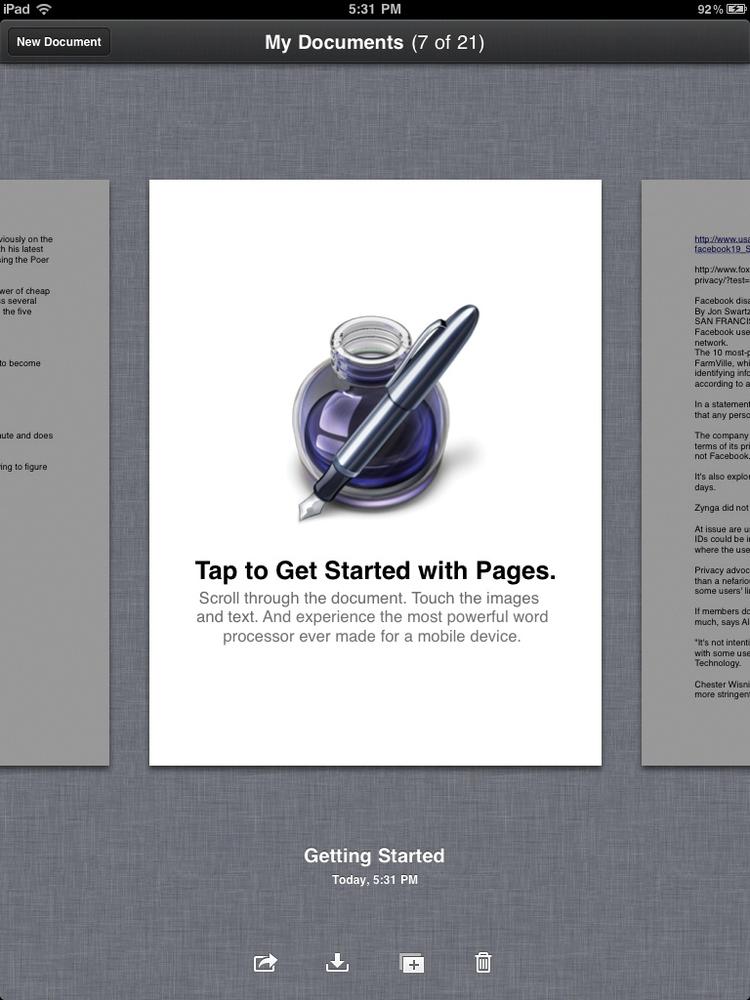
As with any word-processing, spreadsheet, or presentation program, the first step in using one of iWork’s apps is to create or open a document so you have a place to process your words, numbers, or slides. Start by tapping open an app, say Pages, on the iPad’s Home screen. If this is your first time with the program, you land on the app’s main screen, where all the documents, spreadsheets, or presentations you create will live. (Apple organizes all the iWork apps the same way; Pages is used here as an example.)
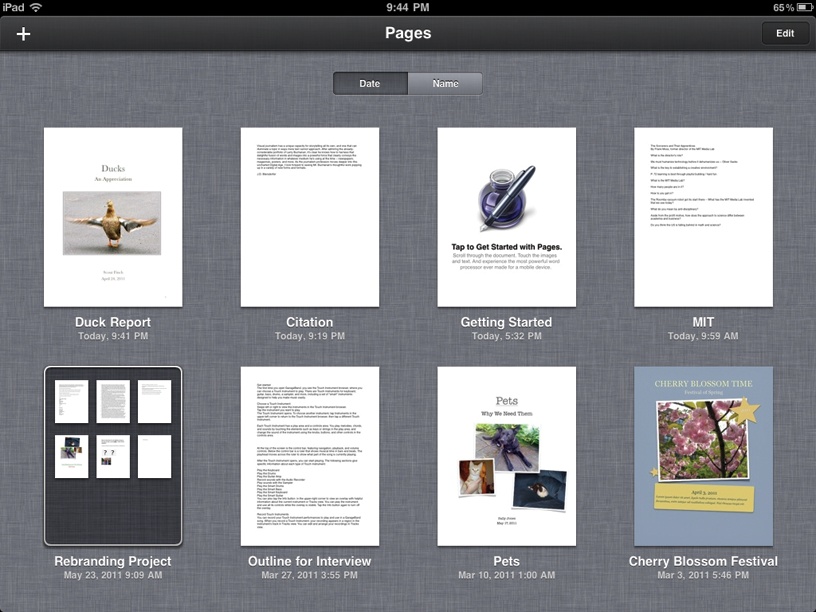
The Pages main screen starts out fairly sparse, except for the introductory Getting Started guide (circled below). But as you create new documents, the screen fills up with pint-sized versions of your files, as shown below. Here’s how you create and manage documents to fill up your own app screen:
Create a Document. Tap the
 icon (right) to create a file from a blank page or iWork
template.
icon (right) to create a file from a blank page or iWork
template.Import a Document. Tap the
icon and then, under “Copy from,” tap the relevant source button
(right). To copy a file to your iPad via iTunes, follow the import/export instructions
on page 173. You can also copy files from an iDisk (soon to be renamed iCloud) or a
WebDAV (collaboration) server. Duplicate a Document. On the main Pages/Numbers/ Keynote screen, tap the Edit button or press and hold the document you want to duplicate until the thumbnail wiggles and a yellow border appears around your selection. Then tap the icon in the upper-left corner.
Delete a Document. Don’t need the selected file anymore? Press and hold its icon (or tap Edit) on the main Pages screen until it wiggles and the yellow border appears. Tap the
 icon to delete it.
Send a document. Ready to pass a file along by email, iTunes sync, or to an online server? Open the file, tap the wrench icon to reveal the Share and Print menu (shown on page 172), and choose an option.
When you’re ready to create a fresh file in any of the apps, tap the ![]() icon in the
top-left corner and choose Create Document. To start from scratch, choose the blankpage
option. To create a specific type of document, like a résumé or that flyer for the school
bake sale, flick through the template catalog and tap the page style you like.
icon in the
top-left corner and choose Create Document. To start from scratch, choose the blankpage
option. To create a specific type of document, like a résumé or that flyer for the school
bake sale, flick through the template catalog and tap the page style you like.
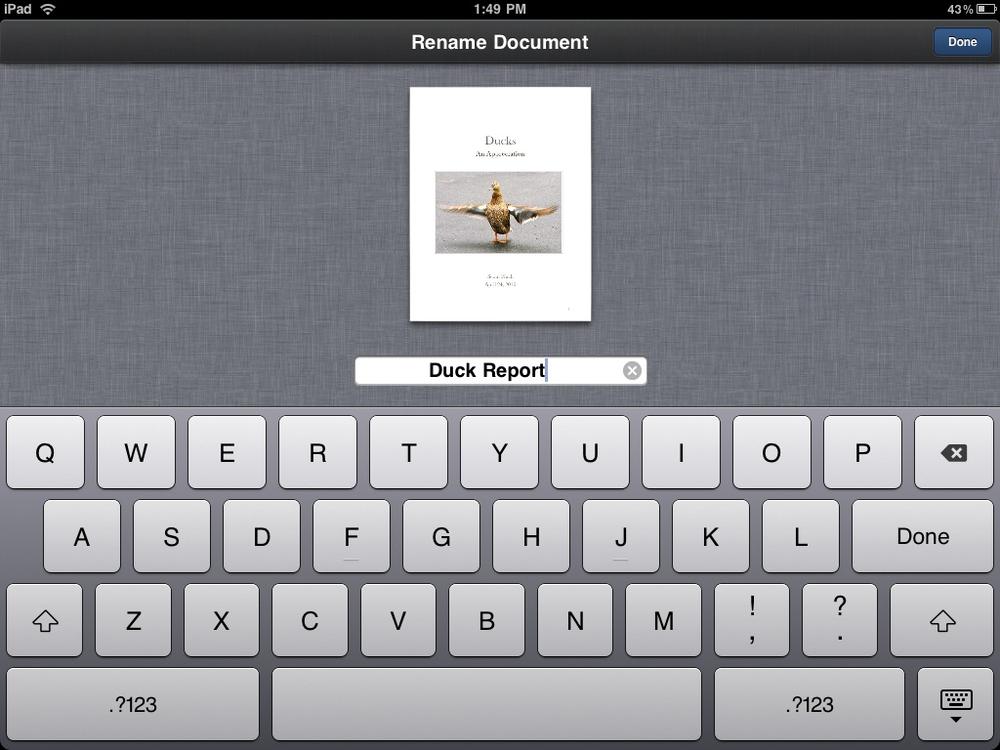
Want to rename a file? Tap Documents to go to the main Pages screen, tap the document’s thumbnail, and then press the generic name underneath the preview until the Rename Document screen pops up (right). Now you can change the document name to a more personalized or appropriate one (“Duck Report”). Tap the document to go back to the main Pages screen.
Want to switch to another file or start a brand-new one while you’re working on a document? Tap the Documents button in the upper-left corner of the open file. iWork saves the file and returns you to the main Pages, Numbers, or Keynote screen, which has your previously created files. To open one, locate its thumbnail and then tap it.
You can also store files in “folders,” just as you can with apps on the iPad Home screen (page 8). Press and hold a thumbnail on the main screen and drag it onto another to create the folder (circled above), then drag in more files.
Create Documents in Pages
Unless you started with the Zen of a blank page, you’ll notice that the Pages templates all use dummy type and stock photos as placeholders for your own text and pictures. In its simplest form, Pages lets you craft your documents by just tapping the fake text and typing in your own words; the program adds new pages as you need them. Tap the corner of the template’s placeholder picture and replace it with one of your own from the Photos box that pops up.
When you tap into a text field (as opposed to a picture box), Pages displays a
formatting toolbar at the top of the screen. It includes a ruler for tab stops and margins,
plus buttons for things like formatting headlines, making characters boldface, and changing
text alignment. (Tap the ![]() on the end if you want to slide the toolbar out of the way.)
on the end if you want to slide the toolbar out of the way.)

A simple set of four icons in the top-right corner of the screen contains all the program’s other formatting tools. With these, you can:
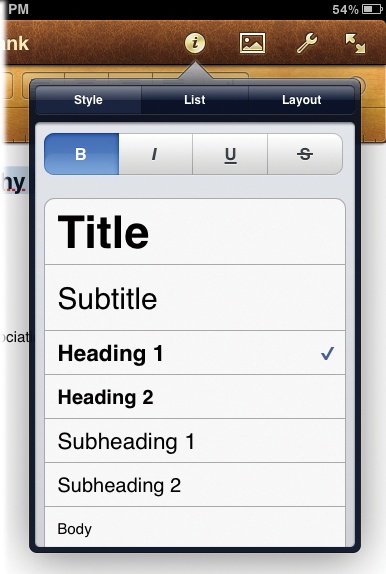
Style text. Select some text on-screen and tap here to open a three-tabbed box with the labels Style, List, and Layout. The Style menu has pre-configured type styles for titles, subtitles, and so on, along with bold, italic, underline, and strikethrough buttons. Tap the List tab to turn the selected text into a bulleted or numbered list. Tap the Layout tab to change the text alignment (centered, flush right, and so on), the number of columns on the page, or the space between lines.
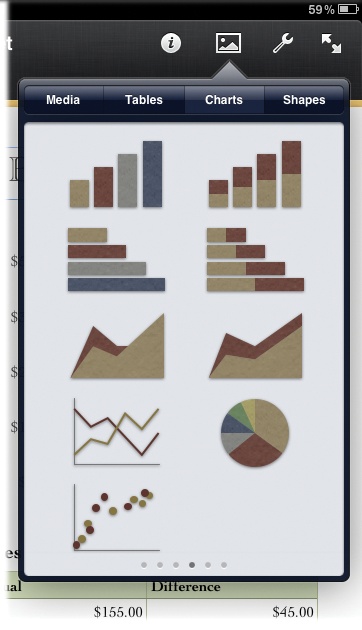
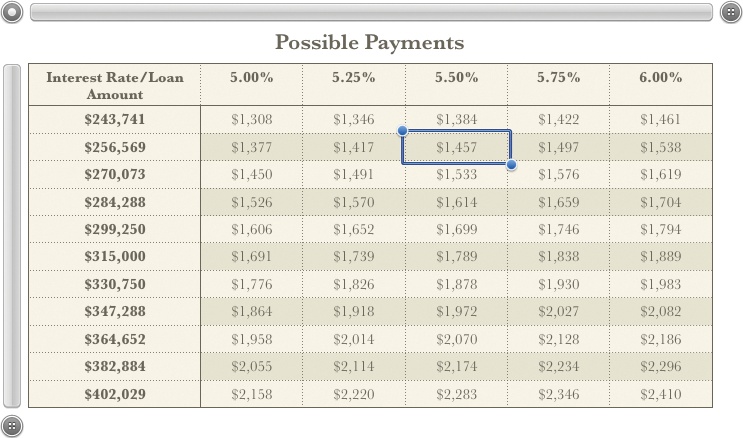
Add images and graphics. Use this four-tabbed box to add visual elements to your documents. The Media tab lets you insert photos from the iPad’s Photos app. Tap the Tables tab to stick in an adjustable table, and tap the Charts tab to insert bar charts, pie charts, and other infographics. Tap the Shapes tab to add pre-packaged geometric forms and arrows to your document. Hate the colors in a chart? Replace it; swipe the box with your finger—there are six mini-pages of each type of chart to choose from, as indicated by the dots at the bottom.
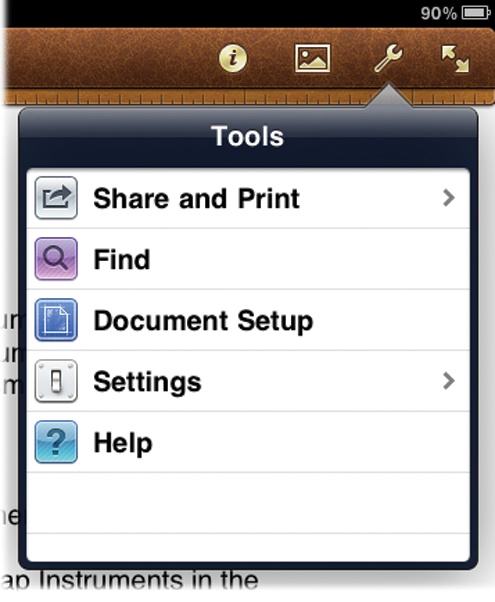
Tools. Tap the Wrench icon to get to the Find option, which helps you search documents; the Print command (Print With Your iPad); and the blueprint-y Document Setup screen, where you change a file’s headers, footers, and margins. The “Go to Help” shortcut takes you to the full Pages manual online. The Settings menu lets you turn on guides for aligning text and photos, and launch the spell-checker and word-counter.
Go to full-screen view. Tap these arrows to lose the toolbar and expand your document full-screen.
You can use Pages in either portrait or landscape view, but you’ll only see the toolbar and other controls in portrait mode. Want to jump to a different page in a document? Press your finger down on the right side of the screen to see the Page Navigator preview tool, then move it up or down until you find the page you want.
Tips for Working with Text and Photos
Pages may have a ton of templates, but you’re not locked into cookie-cutter documents.
If you want, you can use text-formatting tools to change a document’s type size, style,
and even color (tap ![]() →Style→Text Options→Color) to make it look the way
you want it to look.
→Style→Text Options→Color) to make it look the way
you want it to look.
And you’re not locked into rigid photo sizes or placement, either. After you import your own pictures or choose stock graphics, tap the element to get a slider bar so you can resize the image in the frame, or use the blue handles to resize the image itself. Drag a selected photo around the page to reposition it. You can even delete photo boxes you don’t want.

Miss those Ctrl-Z (Undo) and Ctrl-S (Save) lifesavers? If you mess something up, don’t worry. Pages, like all the iWork programs, has a handy Undo button on the top-left corner of every screen. And it automatically saves your document every 30 seconds as you work along.
Create Spreadsheets in Numbers
When you think of the iPad, you tend to think of shredding a game or cruising the Web, not wading deep into a spreadsheet. But if you need to get a little work done on your trusty tablet, the Numbers app can graph your data, crunch your digits, and handle other nerdy tasks.
As with Pages, Numbers offers a collection of 16 pre-fabricated templates for the most
popular types of spreadsheets: a mortgage calculator, personal budget tracker, travel
planner, weight-loss log, expense report, and more. There’s also a blank template with an
empty grid of cells awaiting you. Tap a template to select it. Tap the fake text and numbers
in the cells to overwrite them with your own facts and figures. To add new sheets or forms
to a spreadsheet, tap the ![]() button on the tab at the top of the screen.
button on the tab at the top of the screen.

As with Pages, the four icons hanging out in the top-right corner of the screen hold the formatting tools for table text and graphics. With a tap, you can:
Style text, rows, and cells. You get different options here depending on whether you highlight text or tables. For text, you get a box with Style, Text, and Arrange tabs. Here, you can choose typefaces, type colors, and effects (like opacity and shadows), as well as flip objects. When you have a table selected, the
 menu becomes a four-tabbed box for changing the color and style of
the table. Tabs for Headers and Cells hold the controls for tweaking those elements, and
the Format tab lets you dictate how Numbers represents numbers, like currency and
percentages. With a chart selected, the menu gives you color and style options for the chart’s text and
type (pie chart, area chart, and so on). In short, if you need to format anything on
this sheet, the has it.
menu becomes a four-tabbed box for changing the color and style of
the table. Tabs for Headers and Cells hold the controls for tweaking those elements, and
the Format tab lets you dictate how Numbers represents numbers, like currency and
percentages. With a chart selected, the menu gives you color and style options for the chart’s text and
type (pie chart, area chart, and so on). In short, if you need to format anything on
this sheet, the has it.Add images and graphics. Just as in Pages, this menu holds the tabs (Media, Tables, Charts, and Shapes) to all the photos, tables, charts, and geometric shapes you may want to add to your spreadsheet. For example, you can press and hold a pie chart on the page until the Delete button appears, zap the pie chart off the screen, and drag a bar chart out of the menu and onto the sheet to replace it. Then tap or drag a table to add its data to the chart.
Change settings. Tap here to open the Tools menu. The Find option at the top of the menu lets you search for keywords within a file, but it’s the last menu item that should answer your Numbers questions. That’s the link to the online Help guide, where Apple’s detailed manual for Numbers (and all its formulas and functions) hangs out. The other two items on the Tools menu are the Print command and Settings—off/on switches for guides that help you align elements as you finger-drag them around the screen, as well as the program’s spell-checker to help catch typos in your charts.
Go to fullscreen view. Tap here to dismiss the toolbar for an uncluttered full-screen look at your sheet. Tap the top of the screen to get it back.
You can pull and push pretty much every element in a Numbers template to accommodate your data set. Need to expand the standard chart by a few rows or columns? Tap the chart and, when the gray bar appears, tap the circular handle on either the horizontal or vertical bar and drag it in the direction you need to add (or delete) rows and columns. If you don’t like the position of a table or chart in a template, tap it so the same gray adjustment bars appear. Then press the dotted circle in the top-left corner and drag the table to a new location on the page.
Need to edit the data the chart references? Give it the old double-tap and when the
![]() icon appears at the top of the screen, tap it and choose “Plot Rows as
Series or Plot Columns as Series.”
icon appears at the top of the screen, tap it and choose “Plot Rows as
Series or Plot Columns as Series.”

Numbers wouldn’t be a spreadsheet program if it didn’t do sums and calculations. Double-tap any cell where you want to execute an automatic calculation, and the Numbers keypad for punching in math and logic arguments appears. It offers more than 250 formulas and functions in several mathematical specialties, including engineering and statistics, for a value-calculating good time.
Create Presentations in Keynote
If there’s an app in the iWork trio that shows off the iPad’s looks best, it’s Keynote—it shines when your slides and snazzy animated transitions play on its high-resolution screen. Made to let you show off photos, graphics, and short bits of bullet-pointed text, Keynote is the most intuitive of iWork’s three apps.
It comes with 12 templates, some of them extremely plain for your more serious talks about how the company missed its financial goals for Q4, and some fancier for middle-school book reports and vacation essays. Once you pick a template, fill it up with your own pictures and text. (You have to ‘Pad horizontally—Keynote doesn’t do portrait mode.)
During your presentation, you don’t have to progress statically from slide to slide. Keynote comes with several animated transitions. You can spin, twirl, pop, flip, dissolve, or zoom to get you from one slide to the next—and you can apply a different transition for any slide in the presentation.
Keynote gives you control over the text on your slides, building in animated effects where your titles disappear in a hail of flash bulbs, for instance. Here’s a tour of the Keynote toolbar:
Style text. Tap a text block to select it, and then tap the
icon to get to the Style, Text, and Arrange tabs. The Style tab
holds the color and border options, while the Text tab lets you format a typeface’s
style, color, and more. With a picture selected, you can use the Arrange option to flip
objects and edit the image frame.Add images and graphics. Tap here to get to the controls to add (and format) any photo or graphical element (table, chart, or shape) in your presentation.
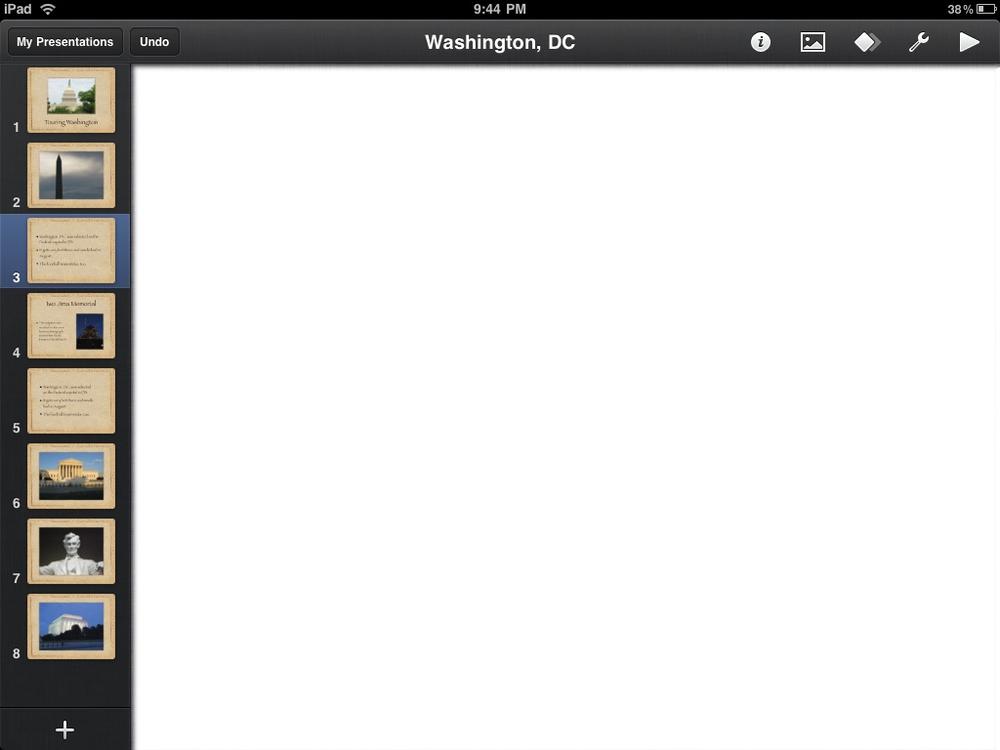
Add animated transitions. Tap the dual-diamond icon to go to the animation screen. Touch any slide thumbnail (shown at left), and then tap the None button to open up the Transitions box. Flick through the effects and pick a dramatic (or sober) animation to go from one slide to the next. Tap the Options button to time the transition—or to trigger a slide change when you tap the iPad’s screen.
Change settings. Tap here to see the Tools menu. As in Pages and Numbers, visit this menu to use the Find feature to search for certain words in your presentation or to print out the presentation. Tap the “Go to Help” option for Apple’s online Keynote manual. The rest of the tools consist of Presenter Notes (little iPad crib sheets you can refer to while projecting your presentation on the big screen), and settings for the built-in edge guides (used to align the elements on a slide), the display of each slide’s number, and the embarrassment-saving spell-checker to catch giant typos in slide titles and text.
Play. Tap the familiar
 icon to start your presentation. If you set your slides to advance automatically, sit back and enjoy the show. If you opted
to manually advance each slide (if your presentation is part of a live talk and you need
to time the slides with your narration), tap or swipe the iPad’s screen to march through
the show.
icon to start your presentation. If you set your slides to advance automatically, sit back and enjoy the show. If you opted
to manually advance each slide (if your presentation is part of a live talk and you need
to time the slides with your narration), tap or swipe the iPad’s screen to march through
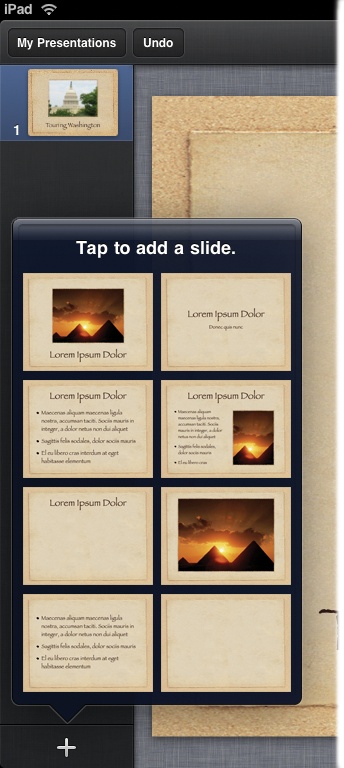
the show.Add Slide. Tap the
button at the bottom of the vertical column of slides to call up a
box full of slide styles (shown at right) so you can add new ones to the show. Some
slide templates are just text blocks, some are photo-only, and some have both text and
photos. If you don’t see quite what you want, pick the one closest to your vision and
use the text and object formatting controls to rework the slide.
To animate text or images so they move on or off a slide, tap the relevant element and then tap the toolbar’s dual-diamond icon. Tap Build In (to move the item in) or Build Out (to move it off the slide), and then select an effect from the menu (shown at right). It’s good fun.
For an even cooler way to grab your audience’s attention, press and hold your finger on
a slide for a second or two. A red laser pointer dot appears on-screen and follows your
fingertip around as you drag it to point out something…important. 

Import, Export, and Share iWork Files
So what good is all this work (and iWork) if you can’t share your files with the people who need them? And what can you, as an industrious iPad owner, do with your fancy iWork suite if you can’t view, open, and edit files that people send you—especially if your correspondents cling to Microsoft Office and don’t even have iWork? No problem. Here’s why:
All the programs in the iWork suite let you import, open, and edit files created in Microsoft Word, Excel, and PowerPoint.
All the programs in the iWork suite let you export files in just about any format you need. You can, for example, export files in their native iWork formats so you can edit them in the desktop version of the program on your MacBook or iMac. You can also export iWork files in the format of the corresponding Microsoft Office program: Pages exports files in Word’s .doc format, Numbers spits out Excel .xls files, and Keynote exports presentations as PowerPoint .ppt files. And finally, you can export files as Adobe Acrobat-ready PDF documents.
You can move files on and off your iPad multiple ways—by email, using iTunes, or via Apple’s document-sharing site, iWork.com. You can also copy your iWork files to your iCloud/MobileMe account or to a WebDAV server (the latter so you can work collaboratively).
iWork by Email
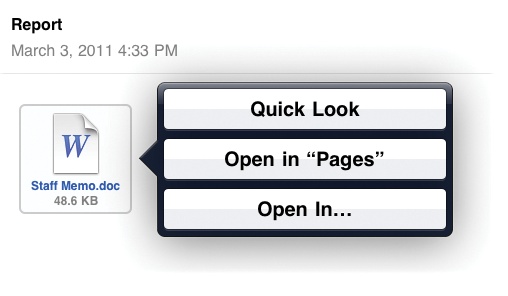
How do you normally get most of the files people send you? If the answer is email, you’re in luck. If you get an attached Word, Excel, PowerPoint, or .csv (comma-separated values) file, or a Numbers, Pages, or Keynote file, you can save it in the corresponding iWork for iPad program. Just press and hold the file attachment icon until the “Open in Pages” (or whatever) option pops up; if you have another app that can open the file, choose “Open In...” and select the app. Just tapping the file once opens the attachment as a Quick Look preview for reading, but not editing (though Quick Look does give you a button, in the top-right corner, to open the file in the appropriate app).
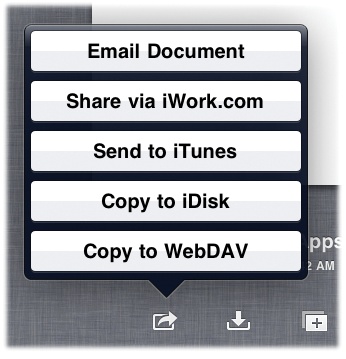
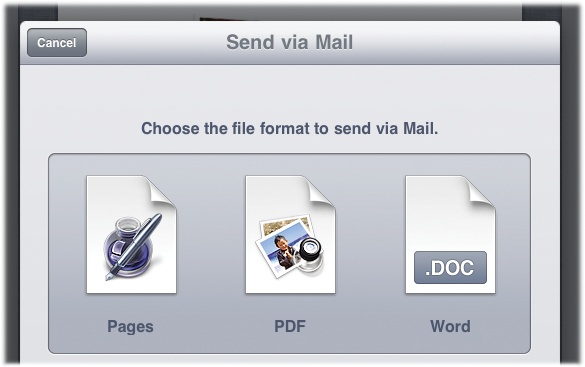
Likewise, you can export iWork files by email. Select the file and tap the toolbar’s wrench icon, tap Share and Print, and then tap Email Document (right). For Pages, Numbers, and Keynote, you can export iWork files in their native formats for the desktop editions of the program. You can also send documents as Office-ready .doc, .xls, or .ppt files. And finally, you can export any iWork file as a PDF document. (See the export options for Pages at right.) Tap your choice to convert (if necessary) and attach the iWork file to an outgoing message.
iWork by iTunes Sync
File too big to email? You can use iTunes’ file-sharing option to sync files back and forth between your computer and iPad. To import a file to the tablet, connect your iPad, click its icon in the iTunes window, and then click the Apps tab. Scroll to the file transfer settings area at the bottom of the screen.
In the Apps column, click the icon for the program whose file you want to copy to your
iPad (Pages and so on), click Add, and then navigate to and highlight the file. Sync your
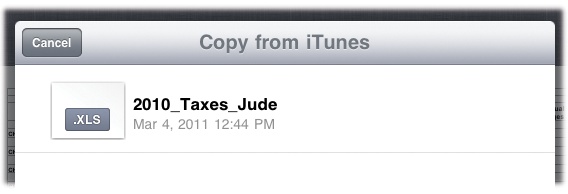
iPad to copy the file over to it. On the iPad, tap the ![]() icon on the Pages/Numbers/ Keynote main screen, and then tap Copy
from iTunes. In the box that appears (above), tap open the transferred file to import it
into your chosen iWork app.
icon on the Pages/Numbers/ Keynote main screen, and then tap Copy
from iTunes. In the box that appears (above), tap open the transferred file to import it
into your chosen iWork app.
To export an open file from your iPad to iTunes (and then to your computer), tap the wrench icon in the toolbar, choose Share and Print, tap Send to iTunes, and then tap your preferred format for the exported file (like .doc or .pdf ). Connect the iPad to your computer, select it in iTunes, and then click the Apps tab. Once you sync up the iPad and iTunes, the file appears in the shared files list. Select it and click the “Save to” button (circled above) to copy it to a folder on your computer, where you can open it in Word or whatnot.

iWork by Online Server
To share a file with others on the www.iwork.com site, you need an Apple ID (like a MobileMe or iTunes account). iCloud/MobileMe iDisk, or a WebDAV server, open the file, tap the wrench icon in the toolbar, and choose Share and Print. From the menu (shown on the opposite page), tap your preferred online destination, choose an export format, and then type any user name and password needed to transfer the file.
Troubleshooting iWork Files
The dynamic trio of Pages, Numbers, and Keynote lets you create fairly sophisticated documents, spreadsheets, and presentations right there on your iPad. But let’s face it—until iPads rule the galaxy, most of the world is still crouched in a Microsoft Office cubicle.
While many files can go back and forth between iWork and Office perfectly fine, intricately formatted files or those that use some of Microsoft’s more complex features may have some trouble in iWork. If the apps have problems with an imported file, you see a warning box like the one below, detailing the iComplaints. Here are some of the issues to look out for:
Fonts. The iWork for iPad trio has a selection of at least 40 fonts (and the family members within those fonts, like Plain and its cousins Bold and Italic), but it comes nowhere near the bulging font library found on most computers. When a file uses fonts the iPad doesn’t itself possess, the tablet substitutes a font it thinks looks close to the original. Your results may vary. To be on the safe side when moving an Office file to iWork, you may want to stick with those standard desktop typeface classics like Arial, Baskerville, Cochin, Copperplate, Courier, Georgia, Gill Sans, Helvetica, Palatino, Times New Roman, and good old Verdana.
Tracking changes. Two of Office’s most-used tools are its Track Changes and Comments modes. These let several people collaborating on one file see each other’s changes and embed notes to each other within the text. Unfortunately, these features don’t work in iWork: It automatically accepts all the proposed changes when you pull the file into iWork—and it strips out comments entirely.
Linked files. Unless it’s a regular old Web URL, other elements that were linked in the original Office file will probably get zapped, especially clip art and other graphics in file formats iWork doesn’t work with.

Getting Help with iWork
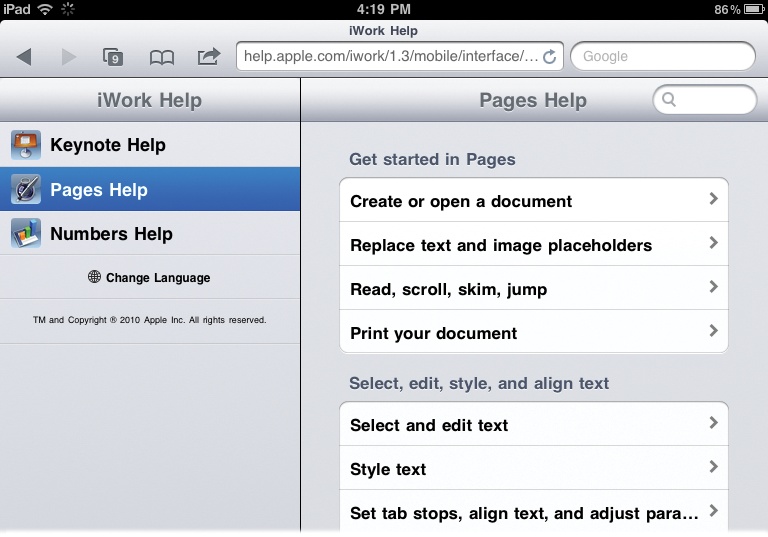
Even if you’re not flinging files back and forth to and from Microsoft Office (or even the Mac desktop version of iWork), you may still have questions about how to do things, like, say, setting tab stops or rotating objects. Thankfully, iWork’s creators anticipated your needs and wrote a tappable online user manual for each program in the suite.
When you seek answers (to iWork questions, anyway), tap the wrench icon in the upper-right corner of Pages, Numbers, or Keynote, and slide your digit down to the “Help” link. From there, the iPad whisks you into Safari, where you can browse through your selected iWork app’s user guide (like the one below).
Tip
Although it’s obviously Apple’s favorite solution, iWork isn’t the only game in town for iPad users who use Microsoft Office. Other options include DataViz Documents To Go ($10) and Quickoffice Connect Mobile Suite for iPad ($15). Both are available in the App Store and claim to have good compatibility with editing those inevitable Microsoft Office files that turn up on your tablet.