Chapter 14. Watch and Edit Videos
Apple added video playback powers to its handheld gadgets in 2005, when it introduced the first video iPod. Over the past six years, Apple’s device screens have gradually increased in size from 2.5 inches on that ground-breaking ‘Pod to 9.7 inches on the iPad’s majestic, high-resolution, backlit display. The tablet is perfect for immersing yourself in a movie—or for watching it inflight with your spouse while crammed into a couple of knee-knocking coach seats.
You find video for your iPad in all sorts of places. You can buy, rent, or stream movies, TV shows, music videos, and video podcasts from iTunes; download video-streaming apps from the App Store; watch website streams via Safari; launch the iPad’s built-in YouTube app; or even shoot a clip or two yourself with the iPad 2’s Camera app (the latter two video-friendly apps are discussed back in Chapter 6).
And if the whole family wants to watch a video, you can connect your iPad to your TV and see it on an even bigger screen.
From getting video onto your tablet to sharing it once it’s there, this chapter guides you through one of the most fun parts of the iPad experience.
Get Video Onto Your iPad
Depending on what you want to watch and where you want to watch it, you can get movies moving on your iPad in a variety of ways. Here are the common methods of video acquisition (aside from shooting your own, which is explained back on Shooting Videos):
The iTunes Store, desktop edition. You can shop the iTunes Store from your desktop computer, browsing through the hundreds of movies, TV shows, video podcasts, music videos, and iTunes U lectures offered for sale or rent (see Shop iTunes and the App Store for an overview of shopping the Store). When you buy or rent a video, iTunes downloads the file to your computer. Plug in your iPad and transfer the video with a quick sync (Sync Video).
The iTunes Store, iPad edition. You can also buy Store videos right from your iPad. Tap the purple iTunes icon on the iPad’s Home screen, browse until you find what you want, and click to buy or rent the video. (Video podcasts and iTunes U content are free.) iTunes downloads the file to your iPad, where you can find it by tapping the Videos icon on the Home screen. Videos you buy on the iPad get synced back to the iTunes library the next time you plug in your ‘Pad; videos you rent, don’t.
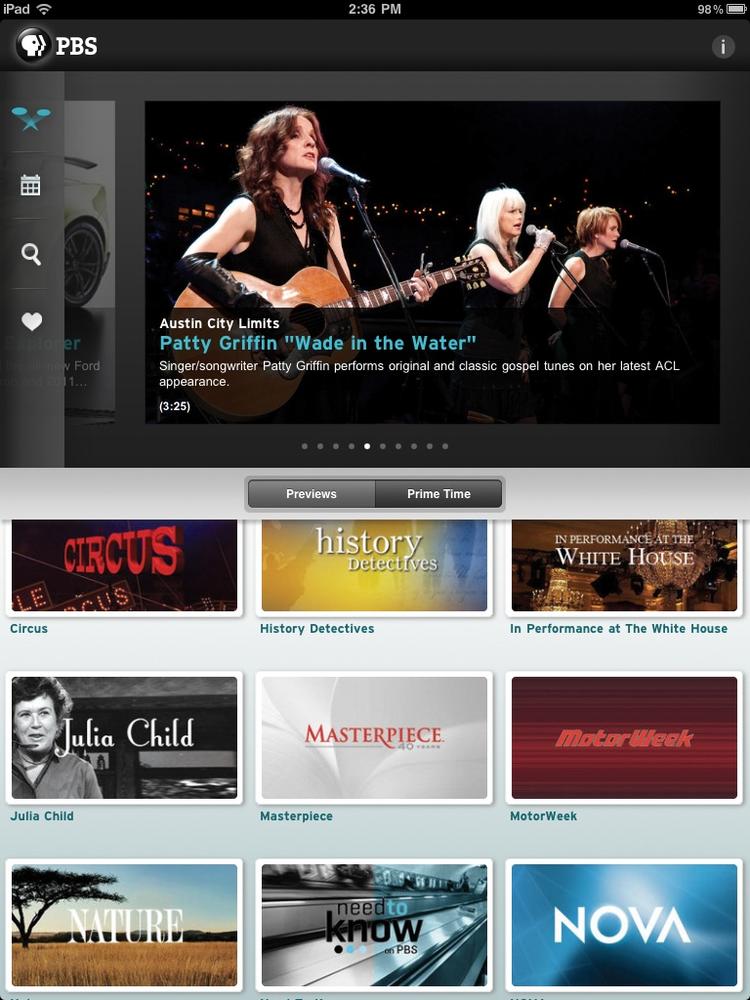
Video-streaming apps. With a speedy and steady Internet connection, you can skip bloating up your iPad with space-hogging videos and stream them with programs like the Hulu Plus app (TV shows for $8 a month) or the free PBS app (shown at right). ABC has its own app, where you can watch recent episodes of the network’s prime-time shows—with commercials, alas. The App Store also hosts a streaming app from Time Warner cable, plus the iPad version of Netflix. The ubiquitous movie-rental company streams full-length theatrical films to the iPad with a paid monthly membership, which starts at $8 (go to www.netflix.com).
Video-streaming websites. While many websites use Flash to play videos and therefore won’t work on the iPad, other sites use Apple’s QuickTime (Stream Web Audio and Video) and play back just fine. In addition, sites are slowly switching to a new, more versatile web-page technology called HTML5, which supports video playback out of the gate, so, in time, you’ll be able to play virtually all website streams on your ‘Pad, too.
Transfer Video from iTunes to iPad
Chapter 11 gives you the lowdown on moving all kinds of files between iTunes and your trusty iPad, but here’s a quick summary:
Synchronization. Connect your iPad to your computer and click its icon under Devices in iTunes’ Source list. Click the Movies tab and turn on the “Sync movies” checkbox; you can also sync individual movies to your tablet. If you have TV programs in your iTunes library, click the TV Shows tab and adjust your syncing preferences there. Ditto for video podcasts on the Podcasts tab and iTunes U media on the iTunes U tab.
Manual management. Click the appropriate library in iTunes’ Source list (Movies, TV Shows, Podcasts, and so on), and then drag the files you want from the main iTunes window onto your connected iPad’s icon.
The iTunes Store is chock-full of video choices, but sometimes you want to add your own flicks to your iTunes library. No problem, just drag the file from your desktop and drop it anywhere in iTunes’ main window, or choose File→“Add to Library” to locate and import your files. Once you get videos into iTunes, you can play them there or copy them to your iPad.
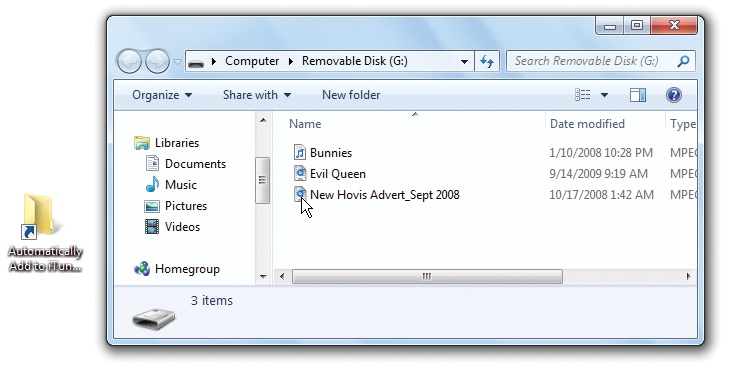
Another way to add videos to iTunes is to drag them into the “Automatically Add to iTunes” folder. This clever folder analyzes the file and—based on the file‘s extension—shelves it in the right spot. You find the auto-folder not through iTunes, but by navigating your system files. In Windows, it’s usually at C:/Music→iTunes→iTunes Media→Automatically Add to iTunes (Home→Music→iTunes→iTunes Media→Automatically Add to iTunes). If iTunes can’t categorize a file, it dumps it into a Not Added subfolder.
Tip
The iPad can play video in high-definition formats, but as members of the AV Club know, the video industry applies the HD label to a few different resolutions. Here’s the scoop: The iPad plays back hi-def video at the lowest HD resolution there is, 720p. If you need to convert your clips into different resolutions to get them to play on your hardware, see Video Formats That Work on the iPad for a list of video-conversion programs. If you find all these numbers confusing, see http://www.geek.com/hdtv-buyers-guide/resolution/ for more on HDTV screen resolutions.
Find and Play Videos on the iPad
To play a video on the iPad, tap open the Home screen’s Videos icon. On the next screen, tap the type of video you want to watch: Movies, TV Shows, Podcasts, or Music Videos. Then find the item you want to watch and tap the title or the Play button to start the show.
But how do you run the show when your gadget has no physical controls? Easy; the playback buttons are on the screen.
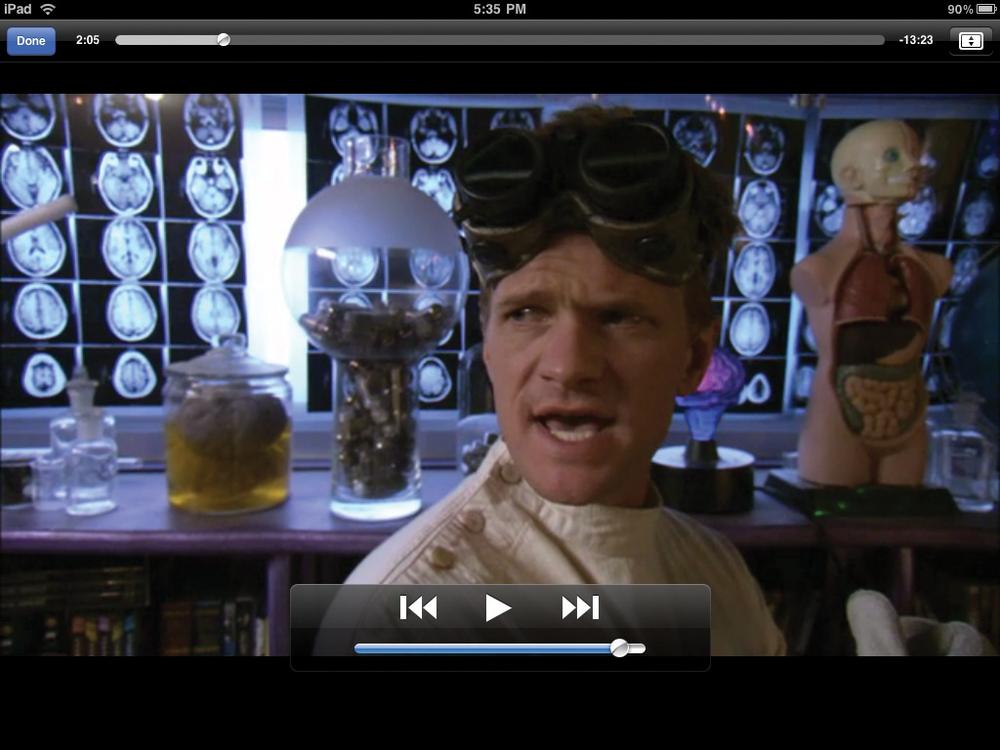
When you watch video, anything else on the screen distracts you, so Apple hides these controls. Tap the screen once to make them appear and again to make them disappear. Here’s what they do:
Done. When the video is over (or when you’re over the video), tap the blue Done button in the top-left corner to stop the show and jump back to your video library.
Scroll slider. The bar at the top of the screen shows the time elapsed, as well as the time remaining, in a clip. To jump around during playback, drag the little white dot to the desired point in the video.
Widescreen/Full Screen. See the little
 or
or  button in the top-right corner of the screen? Tap it to adjust the zoom level of the video, as described in Zoom/Unzoom a Video below.
Play/Pause (
 /
/ ). Just as they do with music files, these buttons start playback and
temporarily pause it when you need a break.
). Just as they do with music files, these buttons start playback and
temporarily pause it when you need a break.Previous, Next (
 ,
,  ). If you want to relive the glory days of VHS tapes, hold your finger down
on either of these buttons to see the video speed by in reverse or whip ahead in
fast-forward motion.
). If you want to relive the glory days of VHS tapes, hold your finger down
on either of these buttons to see the video speed by in reverse or whip ahead in
fast-forward motion.Many movies from the iTunes Store now contain chapter markers that identify a film’s scenes, just like physical DVDs do. (Some video-conversion software also adds chapter markers.) Tap the
 or
or  buttons to skip to the previous or next chapter in a video.
Volume. To raise or lower a video’s playback volume, drag the white knob on the slider below the playback buttons. If you like physical volume controls, you can use the volume rocker on the side of the tablet.
If you’re watching a video that has multiple audio tracks, subtitles, or closed captioning, tap the playback control icon shown at the left to get to the settings for those features.
Zoom/Unzoom a Video
The iPad’s beautiful screen is one of its major selling points. At a resolution of 1024 x 768 pixels, it’s just this side of HD resolution (1280 x 720). That’s okay for old-fashioned TV shows with their squarish 4:3 aspect ratios, but the screen isn’t the right dimensions for today’s widescreen movies and HDTV shows. To compensate for this proportion contortion, the iPad puts black bars above and below widescreen pictures to make them rectangular; for square-shaped TV shows, it adds bars to the sides.
The appearance of the black bars (called letterboxing) sends some people around the
bend. They paid good money to see the whole screen filled up. The
iPad acknowledges these feelings and has a solution. Simply double-tap the video as it
plays. The iPad enlarges the image to fill the entire screen. (If the playback controls
are visible, you can also tap ![]() or
or ![]() .)
.)
Truth is, part of the image is now off the screen; you lose the top and bottom of TV scenes, and the left and right edges of movie scenes. If this effect winds up chopping off something important—say on-screen credits—restoring the original letterbox view is just a quick two-tap away.
Play iPad Videos on Your TV
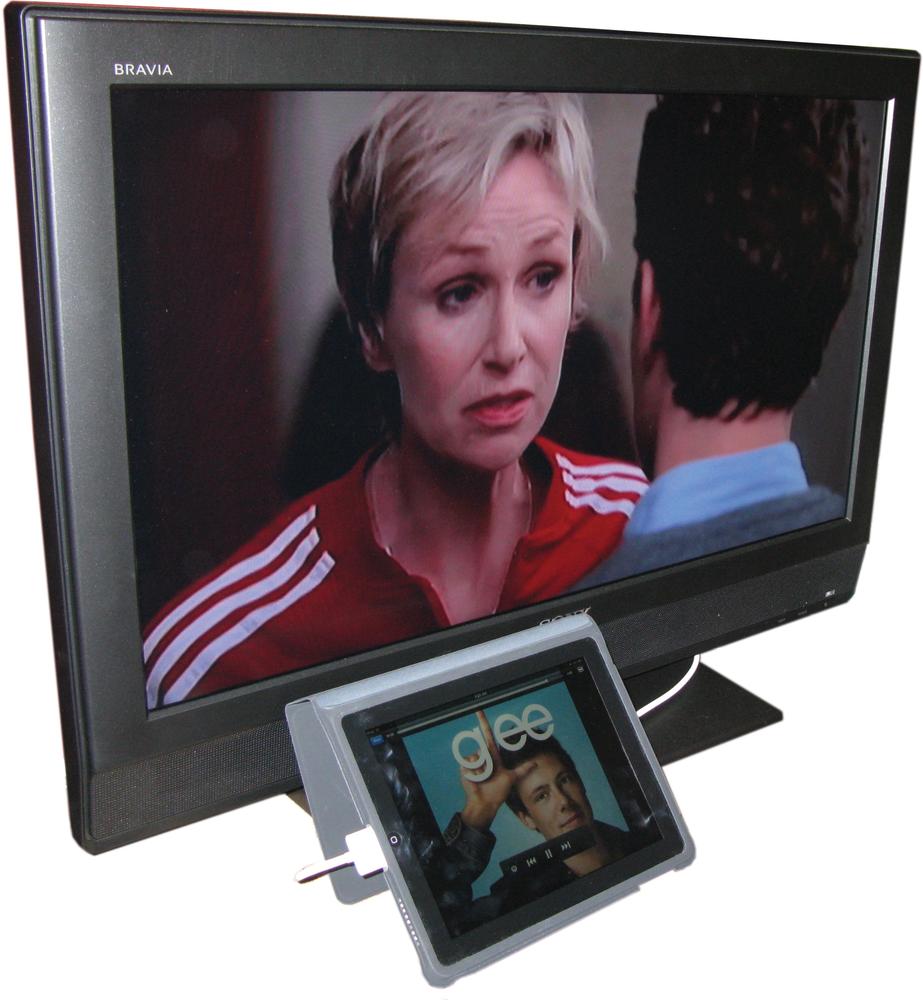
Movies on the iPad are great, but watching them on a bigger screen is often even more gratifying—especially if everyone in the house wants to watch. You can put all those movies and videos up on your TV screen—you just need to connect your iPad to your television set. What you connect them with depends on the hardware involved.
First of all, if you have a second-generation Apple TV (that’s the little black square one), you can use its built-in AirPlay wireless capability to beam your video stream onto the big screen over your WiFi network. Stream iPad Files With AirPlay has the details on getting set up with AirPlay.
But if you don’t have an Apple TV, you can use good old-fashioned cables to connect your iPad. Today’s TV sets (and those fancy AV receivers that connect all the components in your entertainment center) usually offer a few types of video port for connecting new gear. You can use component, composite, or VGA cables to tether your iPad to a TV or a projector. And you can watch high-definition videos over an HDMI connection with a special adapter.
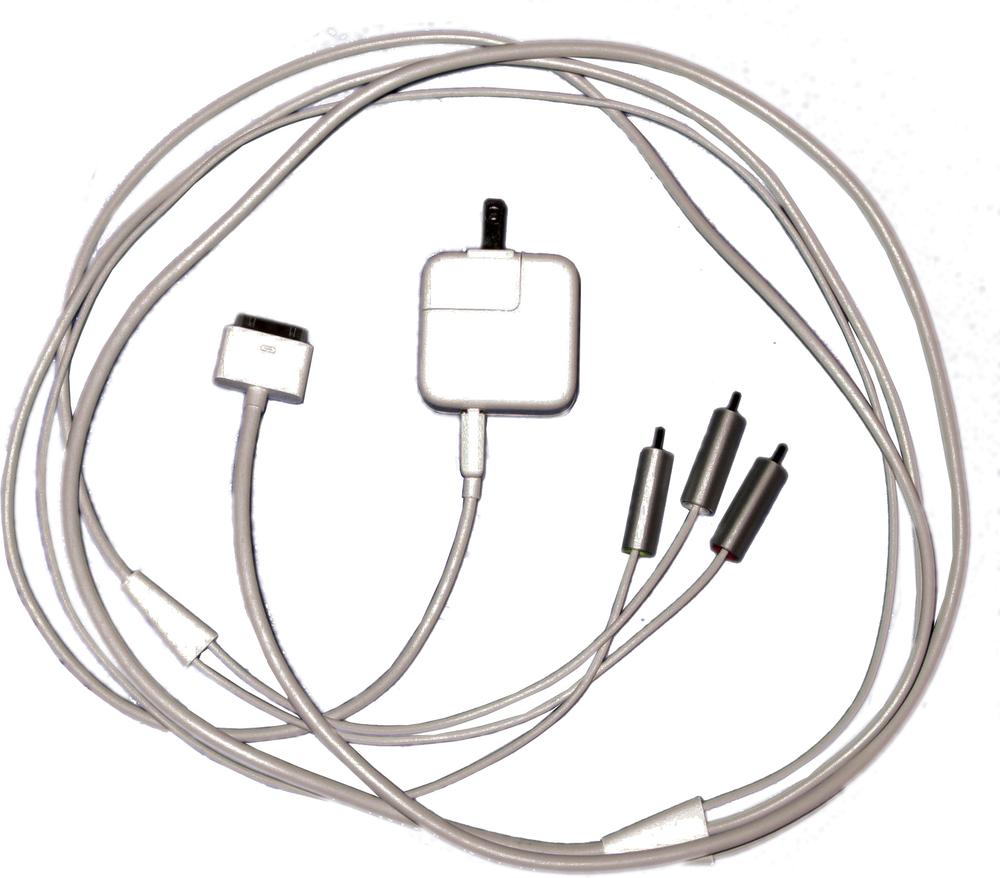
The easiest place to find any of these iPad cables is the Apple Store (store.apple.com). Here, you’ll see the Apple Composite AV Cable (shown right) for TVs that have older video inputs. You can also find the Apple Component AV Cable, made for high-end TVs and widescreen sets that handle higher-quality video and audio connections. Each type of cable costs $40, but that includes an integrated AC adapter to power your iPad for a whole-weekend movie marathon.
Apple’s Dock Connector-to-VGA adapter sells for $29. And if you want to perch your ‘Pad on a stand, the iPad Dock includes a port for these AV cables for $29 as well. Third-party docks and cables are also out there.
Tip
Want your video to remember where you paused or stopped it? Easy. On the iPad, tap the Home screen, and then the Settings icon. On the Settings screen, tap Video and next to Start Playing, select Where Left Off.
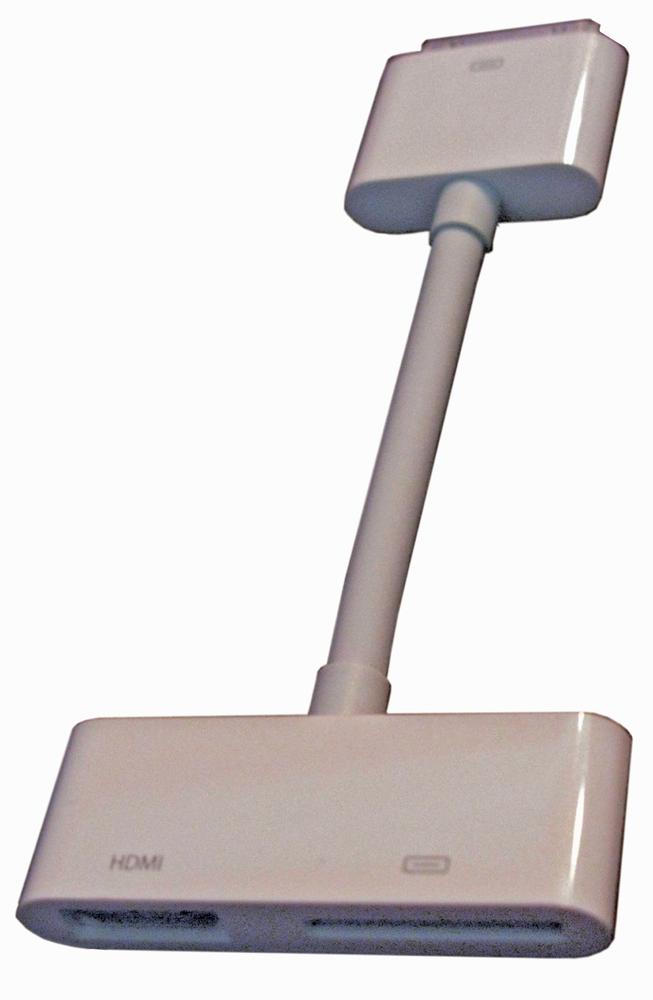
If you use HDMI cables to connect high-definition components to your nice, big widescreen HDTV, you can use an HDMI cable to connect your iPad, too, and get HD playback from your tablet—as long as you have Apple’s $40 Digital AV Adapter (shown at right). It plugs into the iPad’s dock connector on one end and has an HDMI jack, plus a second dock connector, on the other end (in case you need to charge the iPad with its AC adapter while you watch). You don’t, however, get another white AC cube, so keep track of the power plug that came with your iPad. And you don’t get the HDMI cable that links the adapter to your TV, either.
The AV adapter gives second-generation iPad owners a special bonus, too: screen output at the 1080p resolution (the best there is). You can use the adapter to mirror the tablet’s own screen, letting you see whatever’s on the iPad displayed on your TV. You can use the AV Adapter with a first-generation iPad to show photos and videos, but you don’t get the screen-mirror effect—and both iPad generations get video output at the lower-resolution (but still technically high-definition) 720p.
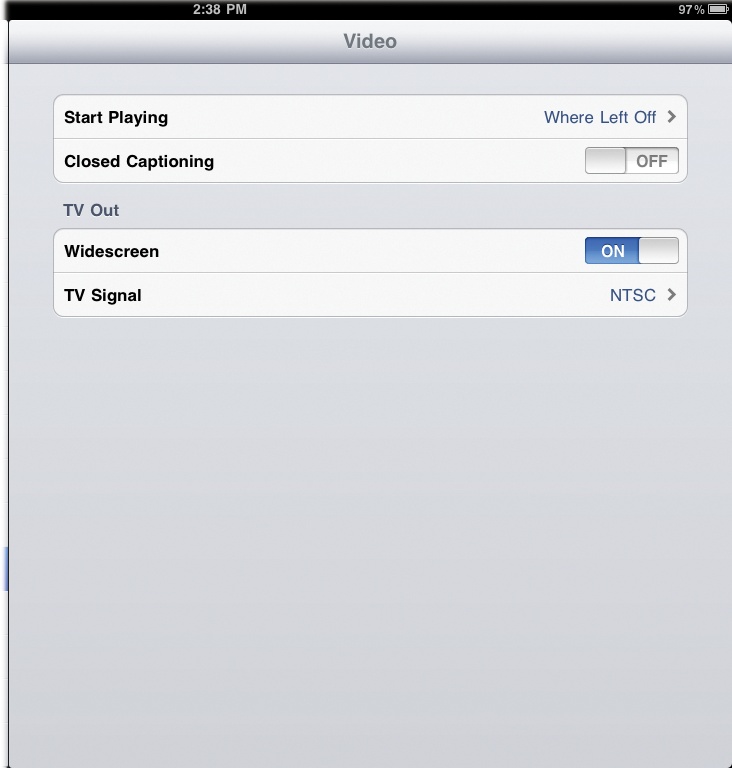
Whatever cable you use, the iPad senses when you connect it to a TV set and automatically pipes its video feed to the big screen, but there are some settings you can adjust at Home→Settings→Video. You can turn on closed captioning for videos that include subtitles. You can also flip the On button next to Widescreen if you don’t want your widescreen movies squashed into the 4:3 aspect ratio of older TV sets. And if you travel internationally, pick a TV Signal. Choose NTSC if you live in the U.S. or Japan, and PAL if you’re connecting to a European or Australian TV set.
Once you get the iPad hooked up to play movies, be sure to select the alternate video source on your television set, just as you would to play a DVD or game. Then call up the video from the iPad’s library, press the Play button, pop up the corn, and enjoy the show from big screen to bigger screen.
Edit Videos on the iPad
All iPads can play video, and with the right apps, all iPads can edit video clips, too. If, however, you want to shoot video—or use Apple’s own iMovie app to edit videos—you need to have the second-generation iPad, with its camera and zippy A5 processor inside.
Shooting Videos explains how to operate the iPad’s video camera, so flip back if you need a refresher course in principal photography (or at least to see a still shot of the cat smacking the dog in the head). And remember, whatever you shoot lands in Photos→Camera Roll and not where you’d logically look, namely the Videos menu.
Editing Video on the iPad 2
Once you get the hang of capturing video with the iPad (which, quite frankly, feels like shooting a movie with a ceiling tile until you get comfortable with gripping the 10-inch slab and aiming it at your subject), your clips will begin to pile up in the Camera Roll.
Look through them—do you have a video where all the good action is in the middle? You know, the one where the first 5 minutes consists of absolutely nothing but you coaxing an under-performing baby into demonstrating her agility with Cheerios. Or all those clips where the last 2 minutes show the inside of your tote bag because you forgot to turn off the camera? That stuff is easy to fix on the iPad.
Here’s how to trim off the unnecessary parts on either end of a clip (keep in mind you can’t edit within a clip):
Open the video you want to edit.
Tap the screen to call up the editing controls. The frame-viewer bar at the top of the screen displays scenes from the clip.
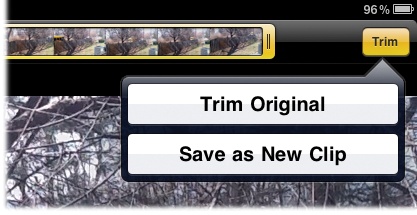
Use the frame-viewer to find the frames you want to cut off. Press the outer edge of the bar so it turns yellow (as shown below), and then drag either end of the bar to isolate just the frames you want. Tap the Trim button in the top-right corner of the screen to cut away the detritus and leave the delicious center of your video.
After you tap the Trim button, the iPad offers to trim the original clip (which makes this edit permanent) or save the edited video as a new clip—while leaving the original intact.
Video-Editing Apps for the iPad
While the iPad 2’s basic video-editing tool lets you trim bad bits from either end of a clip, you may find that’s not enough. If you want to stitch different clips together, score background music, put in titles, and add Hollywood-style scene transitions, you need an app for that. And fortunately for you, there are video-editing apps that let you do all these things. When you get to the App Store, search for video editing.
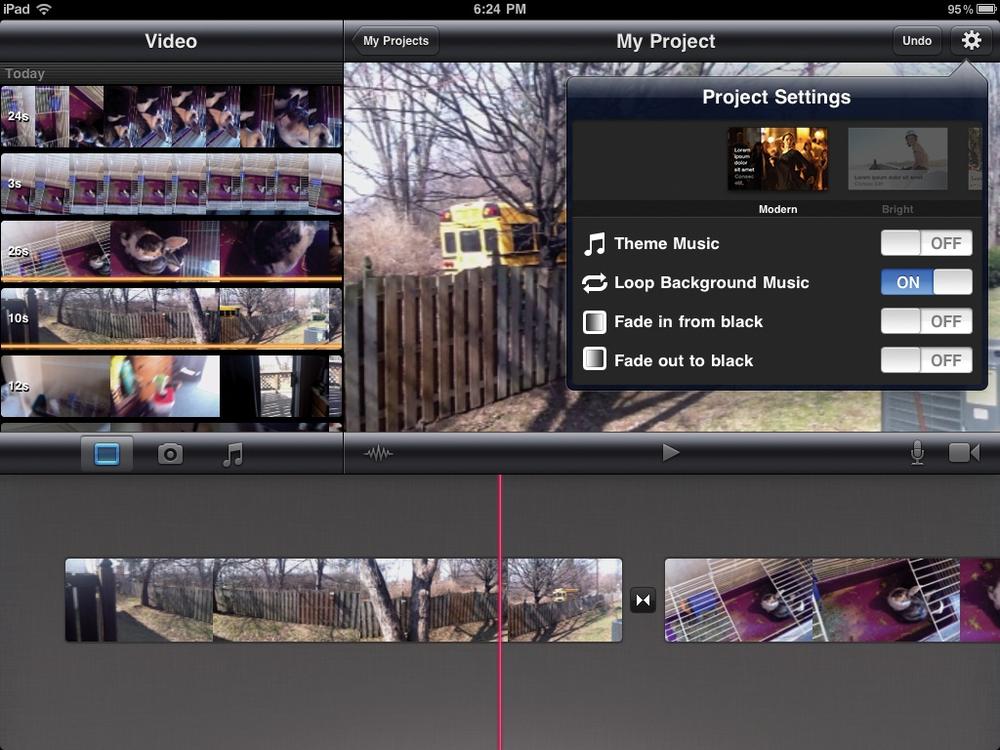
Two apps pop up immediately. One is the previously mentioned iMovie for iPad by Apple (shown below), which costs $5 and requires an iPad 2. The other is ReelDirector, a $2 app from Nexvio that works on both-gen iPads.
“Hey,” you say, “How do I get video clips on my original iPad if it doesn’t have a camera?” Just shoot the clips on whatever camera you use to shoot video, and convert them to iPad-approved video formats (Video Formats That Work on the iPad). Then import them into your iTunes-compatible desktop photo program of choice and sync them over to the iPad; just make sure you check the “Include videos” box (Sync Photos describes the syncing process in detail). Then craft your opus and export it to your favorite video-sharing site so the world can see your hilarious short of the hamster mingling with Star Wars action figures.
Video Formats That Work on the iPad
As discussed in Chapter 11, the iTunes Store now sells movies, TV shows, and music videos. You can also import your own home movies, downloaded movie trailers, and other videos into the iPad via iTunes, as long as the files have one of these file extensions at the end of their name: .mov, .m4v, or .mp4.
Other common video formats, like .avi or Windows Media Video (.wmv), won’t play in iTunes, but you can convert them with Apple’s $30 QuickTime Pro software or any of the dozens of video-conversion programs floating around the Web. (If you’re unsure whether a file’s compatible, it’s always worth trying to drag it into iTunes’ main window and then choosing Advanced→“Create iPad or Apple TV Version.”)
Here are a few popular video-conversion tools:
Aneesoft iPad Video Converter. Aneesoft offers several DVD and video conversion programs for both Windows and Mac OS X systems. Free trial editions are available to download from the site, and full versions cost $35 or less. (www.aneesoft.com)
Wondershare iPad Video Converter. Based in China, Wondershare offers two $30 conversion programs for Windows: one for DVDs and one for other types of video files. (www.wondershare.com)
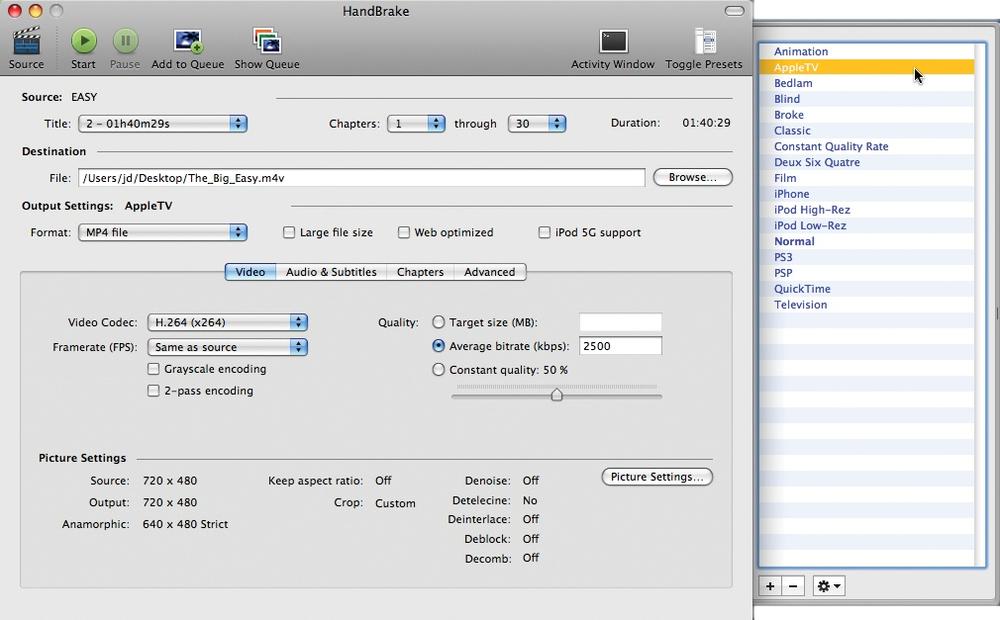
HandBrake. Available in versions for Windows and Mac OS X, this easy-to-use bit of freeware converts DVD movies and other files for everything from iPods to the Apple TV. (When converting for the iPad, go for the higher-quality settings for bigger screens—using the iPod setting may lead to a fuzzy picture when blown up to iPad size.) You can get HandBrake at http://handbrake.fr.
Tip
Movies and TV shows get their own libraries in the iTunes Source list. If you import a video yourself and it’s in the wrong place in the list, you may need to tweak the file’s labeling info. Open the file’s Get Info box (Ctrl+I [⌘-I]), click the Options tab, and then assign it a video format from the Video Kind drop-down menu: Music Video, Movie, TV Show, Podcast, or iTunes U file.
Delete Videos
Having a personal movie library with you at all times is great, but if there’s one thing about high-quality videos, it’s that they’re huge. Sure, TV show and movie rentals from iTunes delete themselves when they expire, but what about your regular collection? A long movie can take almost up to 2 gigabytes of your limited iPad drive space. And if you’re traveling with a full iPad and want to download a fresh flick for the plane, what do you do?
Fortunately, you can delete videos directly off the tablet—without having to link your iPad to the computer and turn off checkboxes to “unsync” files by way of iTunes. (However, removing the files the iTunes way is another way to regain drive space, with the added advantage that the videos stay safely in your computer’s iTunes library, ready for you to sync to your iPad again should you want to watch it again.)
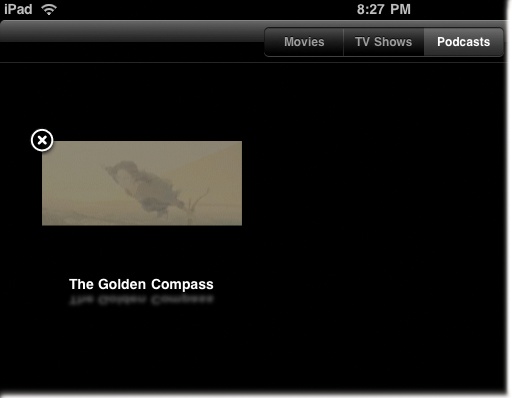
When you’re ready to lose a movie or two, go to the iPad’s Videos area and tap open the
category for the relevant file. Press your finger down on the icon until the
![]() appears on the corner (circled). Tap the
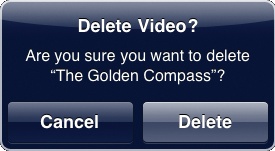
appears on the corner (circled). Tap the ![]() and in the box that pops up, tap Delete (or Cancel, if you have second
thoughts). The selected video goes poof! off the iPad. If you synced it
from your computer through iTunes, a copy is still there and you can sync it back to your
‘Pad later if you miss it.
and in the box that pops up, tap Delete (or Cancel, if you have second
thoughts). The selected video goes poof! off the iPad. If you synced it
from your computer through iTunes, a copy is still there and you can sync it back to your
‘Pad later if you miss it.
Note
Pay attention to what you’re deleting. If you accidentally delete an unwatched or unfinished movie-rental download on the iPad, it’s gone for good. You have to rent the whole thing all over again to see it. And remember, you can rent movies in iTunes on your computer and transfer them to the iPad, but you can’t sync a movie you rented on the iPad back to iTunes.
