Without doubt, applications need to send notifications to their users. The iPhone applications are not an exception, and the Safari Mobile browser implements a native JavaScript function to do that. Actually, this function is the same as the one used by other web browsers. Surely, you all know this function; it is the famous alert. However, if you call directly to this function in your code, the browser will launch a notification box with a title at the top. By default, this title displays the URL of the page, as shown in the following screenshot:
Many developers find this title unprofessional so it's better to build a custom notification box for setting our own title. As part of this title, we can change/add other options as we'll see in this recipe.
For this recipe, we will need a Mac computer as we're going to use the Xcode tool and the PhoneGap framework together. To refresh your memory about how to install both programming tools, take a look at the Installing the PhoneGap framework recipe in Chapter 1 , Frameworks Make Life Easier of this book.
Before continuing, you should launch Xcode, which is accessible through Macintosh HD | Developer | Applications | Xcode.
The second step will be to create a new project using the predefined template called PhoneGap-based Application. In order to do that, click on the menu option File | New Project..., of predefined files, including a main HTML file with the minimum JavaScript code required
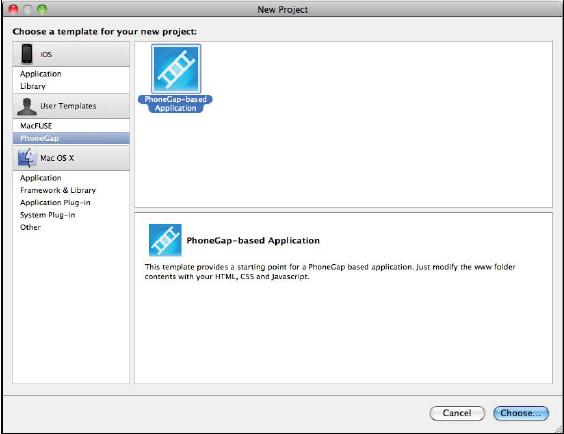
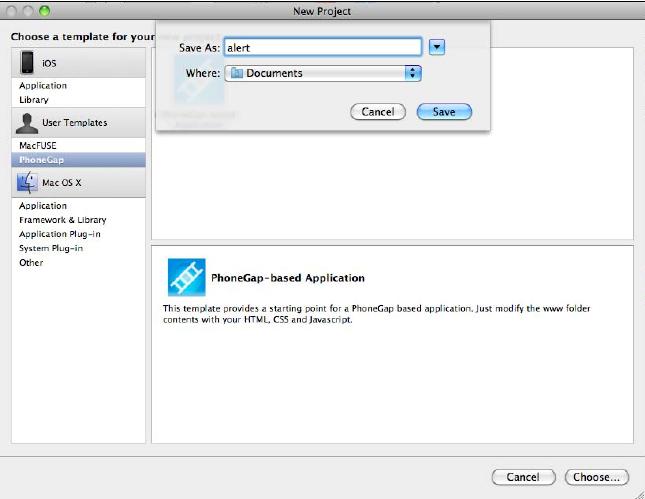
When you're ready, select the Choose... button to select a folder for creating your new PhoneGap project. You can do that through a simple dialog box:
In the Save As field, name the project as alert, and click the Save button to create the project. Xcode will create the required files for your new PhoneGap application. It uses a set of predefined files, including a main HTML file with the minimum JavaScript code required.
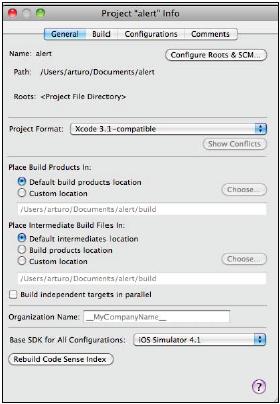
Now we're going to configure our project to use the iPhone Simulator to test and debug our application. In order to do this action, click on the menu option Project | Edit Project Settings. At the bottom of the new dialog box for the settings of your project, you can see an option called Base SDK for All Configurations. Be sure the option iOS Simulator 4.1 is selected, as shown in the following screenshot:
Making our life easier, we'll take the CSS file defined and used by the UiUIKit for this recipe. Copy this file to the www folder of your PhoneGapXcode project. This CSS file is called iphone.css and is located on the stylesheets folder of your UiUIKit main installation folder.
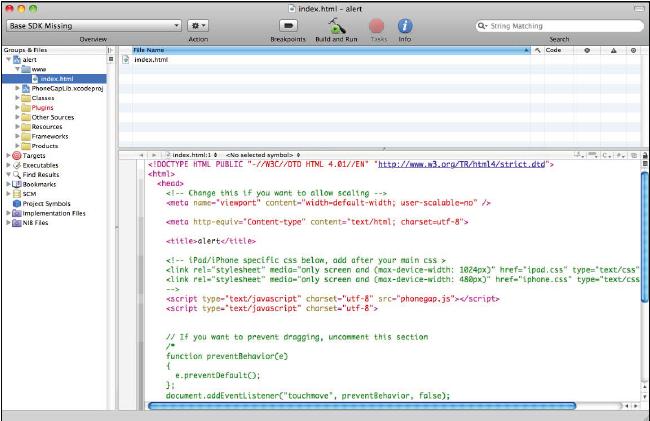
Let's see the JavaScript and HTML required code for building our notification box. After creating your PhoneGap project, Xcode opens the main HTML file called index.html on the text editor. As you can see, this file has a skeleton and should be modified to build our application. Replace the onDeviceReady() JavaScript function with the following code:
functiononDeviceReady(){
showAlert();
}
Now it's time to write the code for creating our notification box. Add the following lines after the previous onDeviceReady() function:
functionshowAlert() {
navigator.notification.alert(
'This is the alert box',
'Your new title',
'Done'
);
}
At the top of the index.html file, you can see two references to the CSS files. Uncomment the line referring to the iphone.css file. The code line should be as the next one:
<linkrel="stylesheet" media="only screen and (max-device-width: 480px)" href="iphone.css" type="text/css" />
Be sure the following line appears on the head section of index.html file:
<script type="text/javascript" charset="utf-8" src="phonegap.js"></script>
The last step is to build a simple toolbar through the following code:
<div id="header">
<h1>Notification box</h1>
</div>
In order to test your application and verify that everything is right, click on the Build and Run button from the Xcode main toolbar.
The complete Xcode project containing all the code for this recipe can be found at the code/ch02/alert/ folder in the code bundle provided on the Packtpub site.
The PhoneGap framework contains a custom JavaScript class called Notification. It requires different parameters to build a custom notification box for your applications. These parameters are a string used as a message for the user, a title for the box, a string for creating one or two buttons, and a JavaScript callback function to handle the user's input. Formally, only the first parameter is mandatory, the others being optional. Our recipe is using a button with the label Done. After clicking on it, the notification box will be closed. This is the behavior by default.
Obviously, it's possible to add a callback function to execute some code when the user clicks on the button of the notification box. In order to do that, you need to write the code for this function and use its name as the second parameter of the constructor of the notification box. For instance, the following code illustrates this technique:
functionmyCallback() {
// code for response after clicking on the notification box main button
}
functionshowAlert() {
navigator.notification.alert(
'This is the alert box',
myCallback,
'Your new title',
'Done'
);
}
We're using the standard onload attribute for the body element for calling to a predefined JavaScript function when the application is loaded by the web browser. This function call to others is designed to initialize the PhoneGap framework. When it happens, the onDeviceReady() function is executed. It will be the main entry point for our application. Our recipe is calling to a function called showAlert(), which is building the notification box after the application is launched and the framework is loaded.
We have decided to use the iphone.css file of the UiUIKit for the main layout of our application, which is launching the notification box. The reason to do that is because using this simple file we can create an initial layout with a native look and feel through a few lines of HTML code. Obviously, you can use your own CSS file or other stylesheet provided by other framework. This recipe is a simple example combining two different JavaScript/HTML/CSS frameworks for iPhone applications.
One of the advantages of using the PhoneGap framework is that it allows you to build a native application for the iPhone using only HTML, CSS, and JavaScript code. In fact, you can use Xcode to create it in the same way as building your native application using the Objective-C programming language. Remember, to distribute your native application to the Apple Store, you'll need to become a registered iPhone Developer as we explained in the Installing the PhoneGap framework recipe in Chapter 1 , Frameworks Make Life Easier of this book.
As a part of the notification.alert object used for this recipe, PhoneGap contains another kind of notification box called notification.confirm. This one allows you to build a box similar to the notification built by the confirm JavaScript function. In practice, the constructor for it uses the same parameters as the notification.alert object. We'll need two different buttons for allowing the user to choose between two options. In order to do it, you'll pass the label for these buttons separated by commas as the last parameter. In this case, the callback function will receive a parameter, which indentifies the index of the clicked button by the user. The next skeleton code shows how to do it:
functionafterChoosing(btnIndex) {
// 'btnIndex' is an integer
}
function confirm() {
navigator.notificatin.confirm(
'Are you sure?',
afterChoosing,
'Choose',
'Yes, No'
);
}