
Some actions take a long time and it's very useful to indicate to our users that an action or activity is in progress. Therefore, users will stay patient while they wait as they are being informed that the application is working properly. Usually, an application displays a special widget on the screen, which uses a simple animation to indicate that the application is still working. We can even use a simple text such as Loading, Working, or Waiting.
In this recipe, you'll learn how to use the activity indicator widget provided by Dashcode. The complete project can be reached at: code/ch04/activity.
This recipe requires Apple Dashcode, so we need a computer with the Mac OS X operating system. It's highly recommendable to have installed the iOS SDK, which includes the iPhone Simulator. Apple Dashcode will allow us to test and debug our web application for the iPhone.
- Launch the Dashcode application from the folder
Developer/Applications/on your system. Now, you can see a dialog box for choosing a template for a new project. - Select Safari and Custom and only mark the value SafariMobile in the Develop for checkbox.
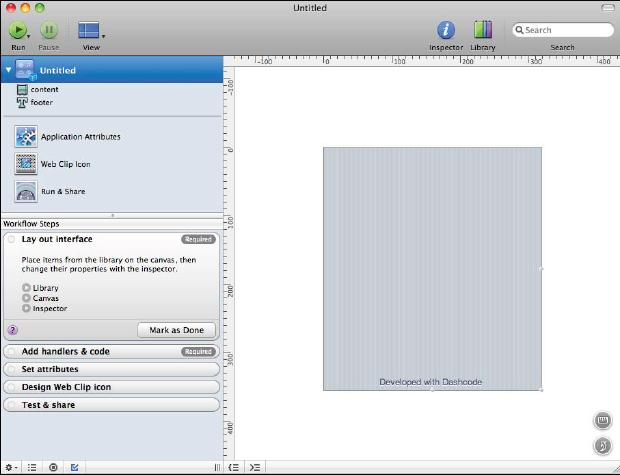
- Dashcode will show you a new window with two main areas: One on the left for handling all the options about our new project and another area on the right showing a workspace widget for constructing our application from prebuilt parts.
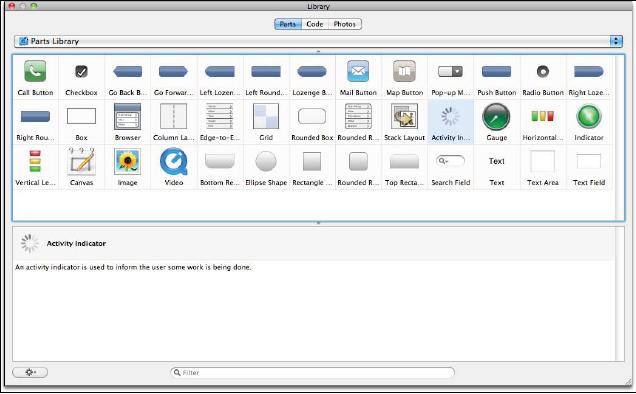
- Click on the Library button, located at the top of the window, to see the parts that are available to choose from. Select the Activity Indicator icon, as shown in the following screenshot:
- The next step will be to drag-and-drop the mentioned icon to our workspace located on the right area of the main window.
- Now, we're going to delete the label developed with Dashcode by selecting it and pressing the Delete key on your keyboard. We'll use a simple button for loading our indicator, so you should look for the Push button, which also can be found on the Library panel.
- Drag this new Button to our workspace and drop it above our widget indicator. Your workspace will look as shown in the following screenshot:
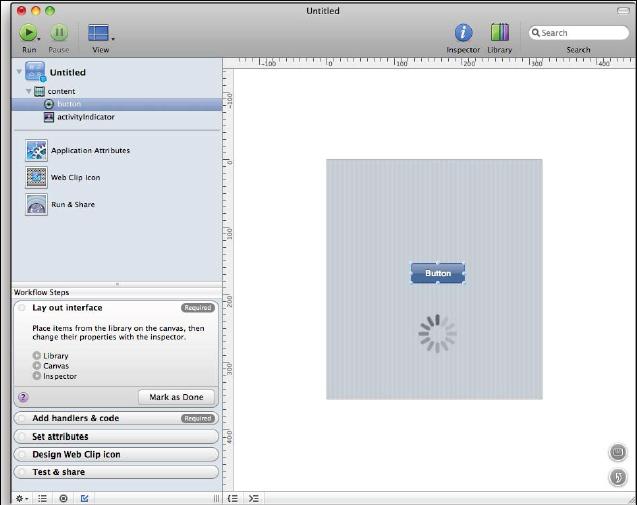
- Our new Button has a default label, so it's a good idea to change it for something more appropriate. Click on the Inspector button and a new window will appear. Change the Button label to Click me!. Close the Inspector window and the label for our button will be modified.
- The user interface for our small application is ready. Now, it's time for adding some code to render the activity indicator when the user clicks on the button.
- At the bottom left of the main window of Dashcode, you can find some icons. Click on the window that looks like a bullet list, titled Show or hide this project's files.
- The Workflow Steps area will be replaced by a tree with all the files that were created automatically along with our project. Click on
index.htmland its source code will appear in our workspace.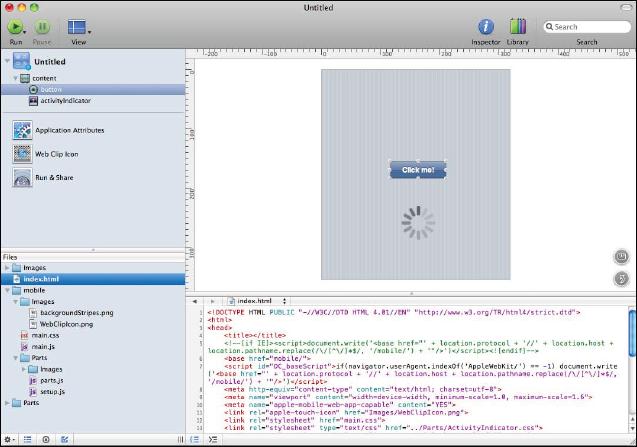
- The next step will be to look for the
imgtag withid="activityIndicator" and add this new value inside the style attribute:display: none; - Now, you should add the following
onclickevent handler to thedivelement that has the attributeid="button": onclick="showIndicator()" - Finally, we need a JavaScript function for showing our indicator when the button is clicked. Add the following JavaScript code inside the
headsection of theindex.htmlfile:<script type="text/javascript" charset="utf-8"> function showIndicator() { var indicator = document.getElementById("activityIndicator"); indicator.style.display = "inline"; } </script> - We have now finished our simple application and we can execute it by clicking on the Run button located at the top of the main window of Dashcode. The iPhone Simulator will start automatically.
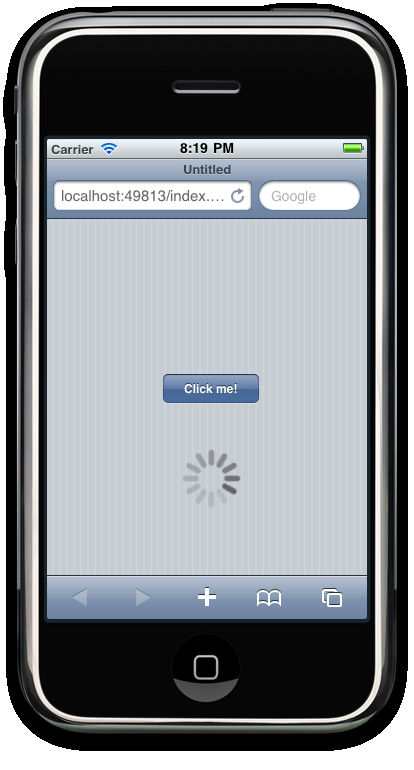
- If the user clicks on the button, the activity indicator will be seen in action:
Dashcode provides a library of ready-to-use parts, including an indicator for activities in progress. Thanks to the user interface of Dashcode, we can drag-and-drop the activity indicator and the button directly to the main workspace.
For this recipe, we inserted a button that triggers and displays our activity indicator. Obviously, you should use this widget for those activities or actions that may need some time to complete. For instance, loading files from a server over the Internet could result in a delayed response in the user interface, especially over a mobile data connection.
In order to show and hide our activity indicator, we used CSS styles. Specifically, the display property was widget set to none in order to initially hide the activity indicator. After clicking on the button, the showIndicator JavaScript function selects our activity indicator using the getElementById method and makes the indicator visible by using the setting of CSS value inline for the display property. The onclick event handler of the button invokes the JavaScript function. We don't need to do anything more for displaying widget; the activity indicator Dashcode will do the rest automatically.
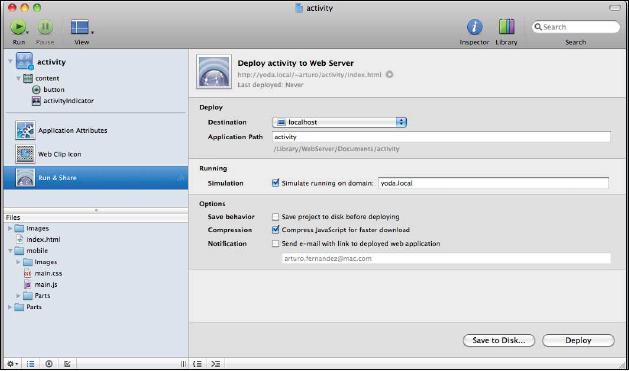
Dashcode allows us to deploy our web application for iPhone to a specific server or location. In order to do that, you can click on the Run & Share button located on the left area of the main window of Dashcode. There you'll find a set of properties on the right side of the main window for choosing where to deploy your web application. For example, if we're going to deploy to a folder on our web server, the first step will be to select localhost as Destination. By default, the application will be deployed to a new folder with the same name of the project inside our DocumentRoot folder. Also note that Dashcode compresses all JavaScript files by default, but if you don't want this to happen unselect the checkbox Compress JavaScript for faster download. When you're ready, click on the button Deploy and the application will be deployed to your chosen destination.
Once your application is deployed, you can access it from a real iPhone device using the proper path. For our recipe, the URL is: http://localhost/activity/.
- Installing the Apple Dashcode framework recipe in Chapter 1 , Frameworks Make Life Easier.