
You'll surely find it useful to use the camera of your iPhone. By default, a basic application is included with the phone that allows you to take pictures and save them automatically to the internal memory. You can then access your pictures through the Photo Library application.
However, it could be interesting to develop our own applications that can take and display pictures inside a container or other kind of element. For example, we can implement a feature for our application which allows taking and displaying pictures in a specific area of the screen delimited by a container element.
Most of the recipes in this book are focused on web applications instead of native applications. It is possible to build native applications using CSS, HTML, JavaScript, and the PhoneGap framework. Some features of the iOS operating system are inaccessible from a pure web application, such as taking and displaying pictures. The process we'll use to interact with the iPhone's camera and gallery will be explained in this recipe.
Remember, the use of PhoneGap for iPhone requires the Mac OS X operating system. You must have a computer with a recent version of this operating system. Additionally, we need to install the iPhone SDK and Xcode, as you've seen in the recipe Installing PhoneGap in Chapter 1 .
On the other hand, we'll need a real iPhone device for testing this recipe because the iPhone simulator doesn't offer a way to test the camera. Also, for installing your final native application on the device, you'll need to belong to the iOS developer program. Bare in mind that this process isn't free; you must pay an annual fee.
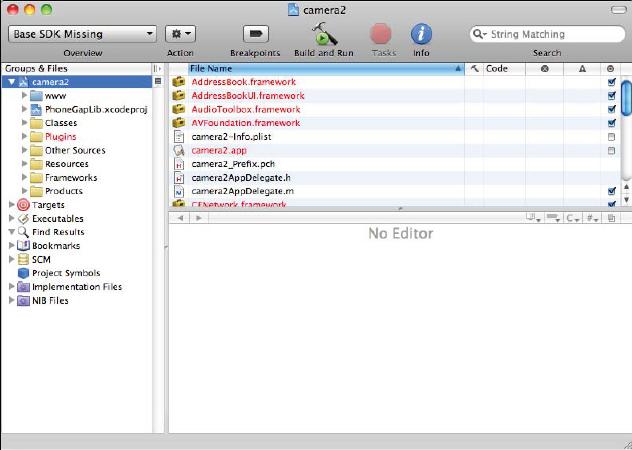
- Launch your Xcode application and create a new project using the File | New Project... menu option. Immediately, you'll see a new dialog box on your screen. Select PhoneGap-based Application in User Templates and click on the Choose... button.
- The next step will be to choose a folder and name for your new project. After clicking on the Save button, Xcode will create a new project for you.
- Select your
index.htmlfile located inside thewwwfolder. By default, Xcode will open the file in the editor.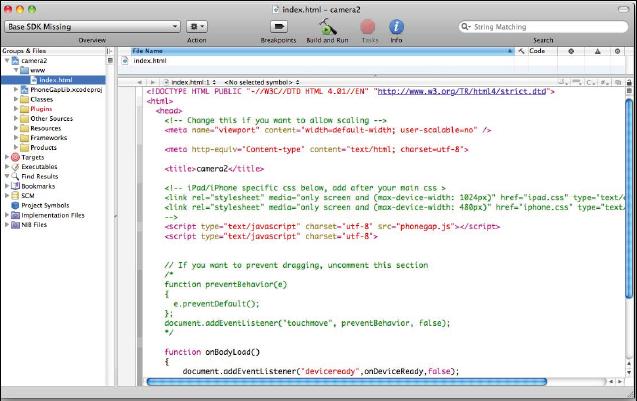
- Now it's time for adding our JavaScript code for taking and displaying pictures. Add the following line of Javascript to your
index.htmlfile:function isOK(data) { var strData = "data:image/jpeg;base64,"; var img = document.getElementById("img"); img.src = strData + data; } function isError(error) { navigator.notification.alert("Error: " + error, "Ooops!", "OK"); } function takePicture() { navigator.camera.getPicture(isOK, isError, {quality: 30}); } function onDeviceReady( takePicture(); } - Additionally, we're going to add some HTML code for displaying our picture on the screen. Copy the following code inside the body section of the
index.htmlfile:<img src="" id="img" />
- Finally, we'll add CSS code for hiding our tag
imgafter the picture is taken. The following lines will be inside yourheadsection of theindex.htmlfile:<style type="text/css" media="screen"> #img { display: none; } </style> - Now, we're ready for building and deploying our application on the device. Click on the Build and Run button in Xcode.
PhoneGap offers direct access to the camera through a specific object called navigator.camera. The method getPicture allows us to directly take a picture and manage its data. In other words, after taking a picture we can display it on the screen. Regarding the default camera application, it will be open and once photo is taken it will be closed and the control will be returned to our application.
The code for this recipe implements a simple application for calling to the internal photo application when our application is launched from the device. After taking the picture, automatically it will be displayed through the img tag inside the body section of the index.html file, which identifies our main screen. If some error happens, the isError function will be invoked and it will display a simple alert indicating the current error. Surely, you have discovered that isn't the standard alert JavaScript method. You're right. We're using a customized box for it, as we explained in the recipe Creating and customizing an alert box in Chapter 2 ,Building Interfaces.
The takePicture() function is launched when the application and the framework are ready. This JavaScript function is a wrapper to our functionality. Actually, takePicture() directly invokes navigator.camera.getPicture method. This method uses three different parameters, one callback function to indicate what will happen after taking a picture, an other callback for managing errors, and a third parameter, which is an array with different options. Our recipe is only using the quality option for indicating the quality of the taken picture. This parameter is an integer between 0 and 100, where a bigger number means more quality. In order to avoid memory problems and for compatibility with older models of iPhone, we are setting 30 as the value for this parameter.
By default, the isOK callback function will pass a parameter, which contains the raw data of the picture. Actually, it is a string for the Base64 encoded image. We're concatenating this kind of data with an other string (strData), which indicates the format of the image. Finally, we take our img tag and modify its src attribute by assigning our new string representing the picture. The picture is displayed on the screen after this action.
Instead of using the Base64 encoded string for our pictures, it's a good idea to use the file URI (Uniform Resource Identifier). PhoneGap allows us to do it through one specific option (destinationType) for the array passed as a third parameter of the getPicture method. If you're interested in this approach, you can replace the call to getPicture method of the recipe for this one:
navigator.camera.getPicture(isOK, isError, {quality: 30, destinationType: navigator.camera.DestinationType.FILE_URI});
Also, you should modify our isOK JavaScript callback function. Simply, replace it with this new code:
function isOK(imgU) {
var img = document.getElementById("img");
img.src = imgU;
}
Complete information about how to enroll in the iOS Developer Program can be found at: http://developer.apple.com/programs/ios/.
If you're interested in distributing a native application, it would be worthwhile to take a look at: http://developer.apple.com/library/ios/documentation/Xcode/Conceptual/iphone_development/145-Distributing_Applications/distributing_applications.html#//apple_ref/doc/uid/TP40007959-CH10-SW2.