
Remember that our applications are run in Safari, which is a web browser and events are handled in a different way than in native applications. In order to implement interfaces for our web applications that are similar to native ones, we'll need to disable the default behavior for these kind of events. This recipe explains how to prevent such behaviors.
- First, we need to write one JavaScript function as follows:
function avoid_behavior(evt) { evt.preventDefault(); } - The second step will be to write some code for invoking the previous JavaScript function. Actually, this function will be called for different events. Use the following
<body>tag for the HTML pages of your application:<body ontouchmove="avoid_behavior(event);" ontouchstart="avoid_behavior(event);" ongesturestart="avoid_behavior(event);" ongesturechange="avoid_behavior(event);">
Safari Mobile offers a simple method for disabling the default behavior for events. We only need to handle each event calling to a function, which will invoke to this default method. Using the<body> tag, we get to avoid this behavior when the page is loaded.
In practice, using the function of this recipe, we avoid effects such as the elastic scrolling. By default, Safari allows you to flick the content of the viewport. The problem is that native applications do not use this behavior and we need to avoid it to achieve a native look and feel similar to these ones.
The approach of this recipe is framework agnostic, so you can use it for your applications with independence of it. This means that it is possible to combine it with any frameworks described in the Chapter 1 , Frameworks Make Life Easier. For instance, you can use the iWebKit framework as used in the previous recipe.
Thanks to the hardware accelerometer incorporated in the iPhone, it is possible to rotate the content of the viewport. When the user rotates the physical device, by default, the layout of the application rotates as well. Let's see how to detect this kind of movement in our applications.
This recipe doesn't require any framework; despite this, we're going to continue using the iWebKit so we may reutilize our code.
- One more time, take your base XHTML file for iWebKit and modify the
<body>tag to include theonorientationchangeattribute. The line should be changed to the following:<body onorientationchange="detect_orientation()">
- For detecting and responding to the event rotation, we'll use a simple and useful JavaScript function as follows:
function detect_orientation() { alert("Orientation has been changed"); } - Be sure to close your XHTML file properly with the convenient standard tags. Take a look at the complete code for this recipe at
code/ch03/orientation.htmlin the code bundle provided on the Packtpub site.
The code for this simple recipe captures the event, which is launched when the user rotates the device. For this purpose, the onorientationchange handler is used inside the body tag. The detect_orientation() callback function will be executed as a response to the event. It will display a simple alert box with a message indicating that the event was launched.
In order to test this recipe, you can load your new page directly on the iPhone. As shown in the following screenshots, each time you rotate the device, a new alert box will be displayed. The following screenshots show different messages responding to these rotations:

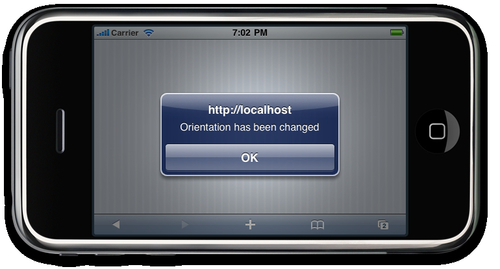
We can use a more sophisticated mechanism for displaying this information; despite this, we chose a common and native alert box provided by the web browser.
Maybe you're wondering why it can be useful to detect the rotation event. By default, the device autorotates the content, so for some applications you'll need to adjust the elements of the user interface. In some cases, the automatic adjustment made by the device will be sufficient and the content displayed will be indented properly. On the other hand, detecting the rotation could be required by those applications, which use the features and capabilities of the accelerometer. For instance, many games are making intensive use of this component and it is becoming very important to properly detect the rotation for responding to this action differently and then respond accordingly.
We can implement a graphic interface with drag-and-drop components from scratch, simply by detecting the different events over the screen and writing the code and responding to them. Fortunately, frameworks were designed to make our life easier, so we're going to use one of them for implementing this behavior in our web applications. Let's see how to write a small example with two rectangles. One of them will serve as an area for dropping and the other one will be the draggable component. Each will have a unique color and colors being the draggable component a smaller will be smaller. Obviously, the draggable rectangle can only be dropped inside the bigger one. This recipe explains the required code to implement this effect using the capabilities of the Sencha Touch framework.
Be sure you've installed Sencha Touch framework under the control of your web and can access it in your browser.
- The first step for this recipe will be to create a new folder inside the
DocumentRootof your web server. This new directory will contain three different files. Let's start writing the first one calledindex.html. It is a XHTML file defining the two main rectangles. - The following lines load the required files for the Sencha Touch framework, including the standard headers:
<!DOCTYPE html PUBLIC "-//W3C//DTD XHTML 1.0 Strict//EN" "http://www.w3.org/TR/xhtml1/DTD/xhtml1-strict.dtd">
<htmlxmlns="http://www.w3.org/1999/xhtml">
<head>
<meta http-equiv="Content-Type" content="text/html; charset=utf-8">
<title>Drag and Drop</title>
<linkrel="stylesheet" href="../sencha-touch/resources/css/ext -touch.css" type="text/css" />
<script type="text/javascript" src="../sencha-touch/ext-touch -debug.js"></script>
<linkrel="stylesheet" href="main.css" type="text/css" />
<script type="text/javascript" src="main.js"></script>
</head>
- Now, we need to define the main rectangles inside the
<body>tag:<body> <div id="droppable">Drop area</div> <div id="draggable">Drag me!</div> </body> </html>
- The second file is a CSS stylesheet defining the properties of the rectangles. Actually, we need to choose the position, dimensions, and colors. This is the code for
main.css, which was referred in the XHTML file:#draggable { width: 100px; color: white; height: 100px; background-color: blue; top: 170px; left: 5px; position: absolute; padding-top: 40px; text-align: center; border-bottom: 1px solid; } #draggable.x-dragging { background-color: black; } #droppable { text-align: center; color: white; border-top: 1px solid; padding-top: 60px; height: 150px; width: 210px; background-color: red; position: absolute; left: 5px; top: 5px; } - The third file is the
main.jsJavaScript main file required by Sencha Touch, which defines the Sencha Touch interface. Remember that applications using this framework must define a main custom JavaScript file for initializing it and defining the initial behavior of the components. The code inside our file, namedmain.js, is as follows:Ext.setup({ onReady: function(){ newExt.util.Draggable('draggable', { revert: true }); newExt.util.Droppable('droppable', { validDropMode: 'contains', listeners: { drop: function(droppable, draggable, e) { draggable.el.setHTML('Dropped!'), } } }); } }); - Now we're ready to test our new web application with drag-and-drop implemented.
- The required code files for this recipe are located at
code/ch03/drag_drop/in the code bundle provided on the Packtpub site.
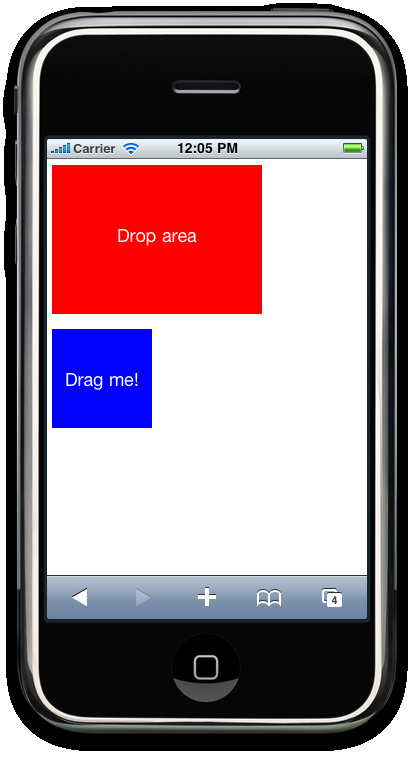
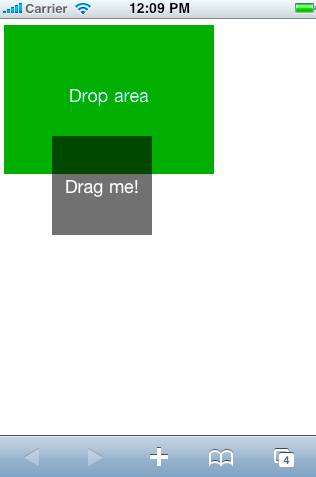
The HTML interface for this recipe is pretty simple: two rectangles with different colors and with absolute positioning. The bigger rectangle represents the droppable area where the other rectangle can be dropped. The smaller rectangle is blue and located at the bottom of the page. Both of them are simple div standard HTML elements with some CSS styles applied. We defined colors, width, and positioning in the main .CSS file for our recipe. Apart from this, the CSS file also defines different colors to be used when the user interacts with the rectangles. For instance, if the user clicks-and-drags the smaller blue rectangle, its color changes to grey and when this element is successfully dropped inside the larger rectangle area, the larger rectangle changes its color from red to blue.
Regarding the main.js file, it is using the Ext.setup method to initialize the framework and for defining the behavior of our rectangles. We need to indicate which rectangle is draggable and which is droppable. It's simple, thanks to two predefined classes implemented in Sencha Touch. These are Ext.util.Draggable and Ext.util.Droppable. In our code, we're using the id of each div element as the first parameter of the constructor of each class. This means that the div with id equal to droppable - the bigger rectangle - will be an object of the Ext.util.Droppable. On the other hand, the draggable element will be an instance of the Ext.util.Draggable class and the value for the id will be draggable.
The constructor of the class Ext.util.Draggable is using the property revert to indicate that the rectangle will come back to its original position, if it isn't properly dropped inside the specific boundaries. You can change this behavior by setting the value to false for this property. By default, the action will start when the user holds the element, but we can indicate a delay in milliseconds using the delay property.
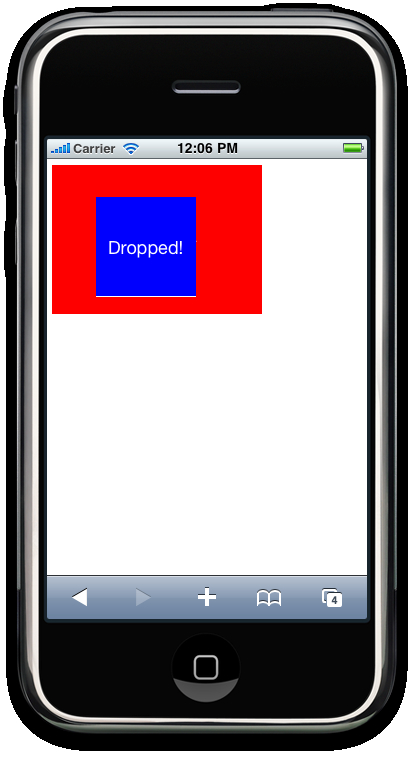
With respect to the constructor method for the Ext.util.Droppable, we're using a property called validDropMode for considering how the drop is used to confirm the placement of the dropped item. With the contains value for this property, we're indicating that the drop action will be valid only if the user places the smaller rectangle inside the bigger one. The other value for this property is intersect, which is used when we only want to intersect both elements to execute the action. In addition to this property, we used the listener object, which contains the event handlers to be added to the object during the initialization of the action. Our recipe simply changes the text of the draggable element to dropped! For executing this action, we're accessing the content of the div element through the setHTML() method provided by Sencha Touch.
The following screenshot shows the starting point:
When the users holds the small rectangle for dropping it, its color changes to grey as shown in the next screenshot:
The final result of the drag-and-drop action is shown the following screenshot:
Despite the fact that we only use two simple rectangles for implementing drag-and-drop with basic behavior, the classes provided by Sencha Touch offers a set of methods and properties for building more sophisticated interfaces.
- Installing the Sencha Touch framework recipe in Chapter 1 , Frameworks Make Life Easier.
- API reference for
Ext.util.Draggableclass at http://dev.sencha.com/deploy/touch/docs/?class=Ext.util.Draggable - API reference for
Ext.util.Droppableclass at http://dev.sencha.com/deploy/touch/docs/?class=Ext.util.Droppable
Sometimes it can be awesome to add visual effects to our applications. Usually, these kind of effects are implemented using animations. Basically, an animation is a set of movements made by a widget on the screen. Combining these movements with color changes, we can apply visual effects to the user interface of our web applications. The most popular of these animations or effects are fade and slide. Both of them display different elements on the screen showing one element and hiding another one that is applying a transition.
In this recipe, you'll learn how to apply simple visual effects in your web applications to improve the user experience.
We're continuing with Sencha Touch because this toolkit implements some visual effects, which are ready-to-use for some elements of the user interface.
- Let's start creating a new directory called
effectsinside theDocumentRootof our web server. Then you'll create a new XHTML file calledindex.htmlinside this new directory. - The content for this new file is simple and contains the following lines:
<!DOCTYPE html PUBLIC "-//W3C//DTD XHTML 1.0 Strict//EN" "http://www.w3.org/TR/xhtml1/DTD/xhtml1-strict.dtd">
<htmlxmlns="http://www.w3.org/1999/xhtml">
<head>
<meta http-equiv="Content-Type" content="text/html; charset=utf-8">
<title>Slide Effect</title>
<linkrel="stylesheet" href="../sencha-touch/resources/css/ext-touch.css" type="text/css" />
<script type="text/javascript" src="../sencha-touch/ext-touch-debug.js"></script>
<linkrel="stylesheet" href="main.css" type="text/css" />
<script type="text/javascript" src="main.js"></script>
</head>
<body></body>
</html>
- The next step will be to create a new CSS file -
main.css- Just for simplicity, our icon was called with the following lines:body { background: rgb(197,204,211); } .tab { background-color: #78bcf0; text-align: center; color: #204167; font-size: 1.5em; padding-top: 100px; } - Finally, we need to add a new main JavaScript file required by Sencha Touch. For this recipe, the file will define a graphic interface based on tabs. The required code is the next one:
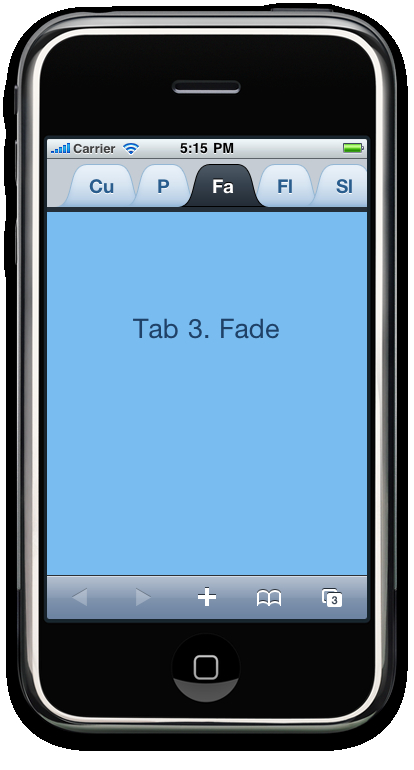
Ext.setup({ onReady: function(){ newExt.TabPanel({ fullscreen: true, sortable: true, items: [ {title: 'Cu', html: '<p>Tab 1. Cube</p>', cls: 'tab', animation: { type: 'cube', duration: 400} }, {title: 'P', html: '<p>Tab 2. Pop</p>', cls: 'tab', animation: { type: 'pop', duration: 400} }, {title: 'Fa', html: '<p>Tab 3. Fade</p>', cls: 'tab', animation: { type: 'fade', duration: 600} }, {title: 'Fl', html: '<p>Tab 4. Flip</p>', cls: 'tab', animation: { type: 'flip', duration: 400} }, {title: 'Sl', html: '<p>Tab 5. Slide</p>', cls: 'tab', animation: { type: 'slide', duration: 400} } ] }); } }); - Load this new XHTML page on your iPhone and click on different tabs for displaying different visual effects applied when each tab is loaded.
- All files for this recipe can be found at:
code/ch03/effects/in the code bundle provided on the Packtpub site.
Sencha Touch uses a main JavaScript file for defining the user interface and its behavior. This is the reason for using an empty HTML file for this recipe. However, this file needs to load the main JavaScript and CSS files, including our application-specific JavaScript file with the required code for defining our user interface.
The CSS file for our application is very simple. It only contains a specific background color for the page and some properties for the tabs as the color, size, and alignment of the text and the background color.
Regarding the main JavaScript file for our application, it defines a widget based on five different tabs. A different visual effect is applied to change to the active tab each time the user clicks on one of them. Specifically, we're using the effects cube, pop, fade, flip, and slide predefined by Sencha Touch. Each of these effects is defined by the object animation, which uses two parameters. The first one indicates the predefined effect and the second one is the duration of the transition expressed in milliseconds. We chose 400 milliseconds except for the fade value. For this one, we're using 600, but these are arbitrary values. You can choose the ones you consider the best for your purposes. Inside each tab, we're displaying a simple text indicating the number of the tabs and the effect applied during the transition. On the other hand, the cls property of each tab is used to indicate which style should be applied. In this recipe, we used the same value for all tabs.
We must keep in mind that these effects defined and implemented by Sencha Touch can only be applied to container objects using a CardLayout for the layout. This is the reason for using an object of the class TabPanel as our main container, which uses this layout by default. The advanced user can design a customized object using a layout such as this one. Also, it's possible to use whichever class defined by Sencha Touch that uses this specific kind of layout. For instance, NestedList is another container using CardLayout.
Apart from the effects shown in this recipe, the Sencha Touch framework implements others as a different kind of slide or the wipe effect. If you're interested, you can take a look at the complete documentation offered by this framework.
- Installing the Sencha Touch framework recipe in Chapter 1 , Frameworks Make Life Easier.
- Using different tabs recipe in Chapter 2 ,Building Interfaces.
- Reference about CardLayout class at http://dev.sencha.com/deploy/touch/docs/?class=Ext.layout.CardLayout
- Reference about animations defined by Sencha Touch at: http://dev.sencha.com/deploy/touch/docs/?class=Ext.anims
We're building web applications with a native look and feel, we have to keep in mind that they are running over the Internet. This means our potential clients will need an Internet connection to access our applications. However, this is an important difference between web applications and native applications. Here is where cache comes to the rescue. The new HTML5 standard defines a new mechanism for running web applications without Internet access. Using this technique our web iPhone application will behave closer to a native application.
Let's explore the mechanism for running your web application offline.
Be sure you've installed the iWebKit framework because we're going to use it to illustrate how to cache the files of our application. Also, we need to use a web server as Apache or lighttpd.
For this recipe, we'll start from scratch instead of reusing a file previously created.
- Open your favorite text editor and add the following lines:
<!DOCTYPE html PUBLIC "-//W3C//DTD XHTML 1.0 Strict//EN" "http://www.w3.org/TR/xhtml1/DTD/xhtml1-strict.dtd">
<html manifest="cache-mf" xmlns="http://www.w3.org/1999/xhtml">
<head>
<meta content="text/html; charset=utf-8" http -equiv="Content-Type" />
<meta name="apple-mobile-web-app-capable" content="yes" />
<meta name="viewport" content="width=device-width, user -scalable=no" />
<linkhref="../iwebkit/css/style.css" rel="stylesheet" media="screen" type="text/css" />
<scriptsrc="../iwebkit/javascript/functions.js" type="text/javascript"></script>
<title>Offline</title>
</head>
<body>
<div id="topbar">
<div id="title">Offline</div>
</div>
</body>
- After adding the code, save the file as
offline.htmlinside yourDocumentRootdirectory of the web server. We suppose the required files for the iWebKit framework are inside a directory callediwebkit, which is inside theDocumentRootdirectory. For instance, using Ubuntu Linux and Apache, we'll have the following path structure:/var/www/iwebkit/:It is the directory containing the required files for the iWebKit framework./var/www/offline.html:It is the main XHTML file for this recipe.
- Now, create a new text file with the following lines and save it as
cache-mfinside the sameDocumentRoot:CACHE-MANIFEST offline.html ../iwebkit/css/style.css ../iwebkit/javascript/functions.js
- Great! Now your application is ready to work offline.
We used the manifest attribute of the<html> tag with the cache-mf value. It indicates to the web browser that there exits a file called cache-mf in the same directory that the HTML file is located. You can observe we're using a standard XHTML file, but it will work with an HTML file as well.
The cache-mf is a plain text file containing information about the file, which should be cached for the web browser. Actually, it will contain one line per file, which will be cached. Each text line is a path to the specified file. By default, the path is relative to the directory where the application is running. Also, it is possible to use absolute path using the complete URL for each file. Don't forget to include the CACHE-MANIFEST header at the top of the file.
In this recipe, we used the iWebKit framework with a simple HTML file for the main user interface. As we don't need anything more, only style.css and functions.js are required and they will be cached with offline.html. Obviously, in the real world, your application will use and require more files such as images and other CSS and JavaScript files. Caching additional files is pretty easy; just add a new line per file to cache-mf. Maybe you want to use another name for the file, no problem. Just use a filename you prefer and set it as value in the manifest attribute of the<html> tag.
It is important to keep in mind what happens when the application files are upgraded. If the application is cached, users may still be running an older version. The browser will detect new files, but it will keep running the old ones, even though the browser detects the new files. To run the new version of the application, users must relaunch it. In fact, the browser downloads the new files in the background, but it is using the old files until the user decides to relaunch the application. You can understand this behavior easily by thinking about desktop applications and updates. When you launch a desktop application, it checks if updates are available and proceeds to download them. In this scenario, your application is still running an older version. Although the updates are downloaded and installed, you need to relaunch your application to use it. The cache mechanism and behavior explained earlier for our web applications will work in a similar way.
One of the main advantages of using cache for web applications is that the mechanism is transparent for the users. They don't need to configure anything; the browser does that automatically by handling the caching for them.
The mechanism used for this recipe is not designed specifically for iPhone or for iWebKit browser; it should work on every web browser able to understand and process HTML5 content. In fact, some desktop browsers such as Firefox will ask you for confirmation before storing some files in your local drive in order to enable caching.
In addition to CACHE-MANIFEST header, you can use another header defined by the HTML5 standard. For instance, using NETWORK and a new list of files after it, you could indicate that these files won't be cached. This means that the browser will always ask for a new version of them to the Web when the user visits the page.
- Installing the iWebKit framework recipe in Chapter 1 , Frameworks Make Life Easier.
- Complete information about the cache mechanism defined by HTML5 can be found at http://www.w3.org/TR/offline-webapps/