
![]()
DOM Traversing
This chapter covers jQuery methods for DOM traversing. Chapter 3 explained how to use jQuery selectors to get (or select) HTML elements based on their ID, tag name, class name, types, attributes, attribute values, and other criteria. Chapters 3 and 4 covered how a set of selected elements can be further fine-tuned using selector extensions, filtering methods, and expansion methods. DOM traversing methods can be used to select ancestors, descendants, and siblings of selected elements. Once you have the desired set of elements, you can access and manipulate their attributes (including values), properties, and styles.
This chapter’s recipes show how jQuery methods can be used to select HTML elements by traversing through the node tree at runtime in order to:
- Access their styles, properties, and attributes
- Manipulate their styles, properties, and attributes
Refer to Chapter 2 for a review of the DOM tree structure, nodes, ancestors, siblings, and descendants.
5-1. Getting the Child Nodes of Each Selected Element
Problem
You want to get the children of each element from the set of selected elements.
Solution
The following jQuery syntax selects the child nodes of each selected HTML element.
$(selector).children(childSelector)
childSelector is optional. If it is specified, only the children that match childSelector are selected. Listing 5-1 demonstrates the use of the children() method to get child elements of each element from the set of selected elements.
Listing 5-1. Using the children() method to select children elements
<!DOCTYPE html>
<html lang="en">
<head>
   <meta charset="utf-8">
   <script src="scripts/jquery-2.1.0.min.js"></script>
   <style>
      .list {
         border:3px double green;
         width:350px;
      }
      .newRecord {
         background-color: lightyellow;
      }
      .tblHdr {
         background-color: lightgray;
      }
      .listDepartments {
         width: 200px;
      }
   </style>
   <script>
      $(function(){
         $("#btnTestIt").click(function () {
                            $(".newRecord").children().each(function () {
                                                  alert($(this).text());
                             });
         });
      });
   </script>
</head>
<body>
   <strong>Employees:</strong>
   <table class="list">
      <tr class="tblHdr">
         <td>Employee Name</td><td>Department Name</td><td>Salary</td>
      </tr>
      <tr>
         <td>Jane Smith</td><td>Marketing</td><td>$95,000</td>
      </tr>
      <tr class="newRecord">
         <td>John Smith</td><td>Technology</td><td>$90,000</td>
      </tr>
      <tr>
         <td>Brian Adam</td><td>Sales</td><td>$72,000</td>
      </tr>
      <tr>
         <td>Mary Jones</td><td>Customer Support</td><td>$60,000</td>
      </tr>
      <tr>
         <td>Michael Jefferson</td><td>Technology</td><td>$85,000</td>
      </tr>
   </table><br>
    <input id="btnTestIt" type="button" value="Test It">
</body>
</html>
How It Works
In this code, the employee details—employee name, department name, and salary—are listed in tabular form using the <table>, <tr>, and <td> HTML tags. In the tabular list, there is one record with the class newRecord. When the Test It button is clicked, the following code is executed:
$(".newRecord").children().each(function () {
   alert($(this).text());
});
$(".newRecord") selects all HTML elements with the class name newRecord and returns a jQuery object. The following element is selected:
- <tr class="newRecord">
.children() selects all children elements of each of the selected HTML elements. The following children elements are selected:
- <td>John Smith</td>
- <td>Technology</td>
- <td>$90,000</td>
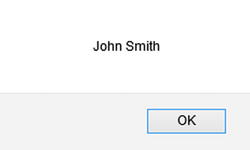
each() iterates over all of the selected elements and alert() displays each selected element’s content, as follows:
- John Smith
- Technology
- $90,000
Figure 5-1 displays the page when it is viewed in a browser.
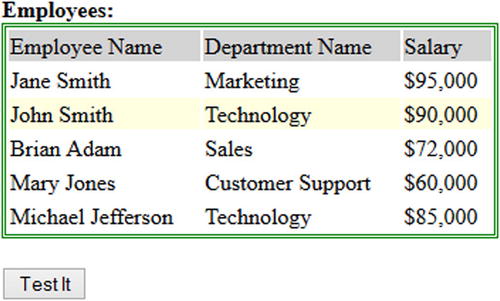
Figure 5-1. Initial page display
When you press the Test It button, the button’s click event handler displays the text content of each child element. Figure 5-2 displays the pop-up messages.

5-2. Getting the Children Nodes of All Selected Elements, Including Text and Comments Nodes
Problem
You want to get the children (including any text and comments) of each element from the set of selected elements.
Solution
The following jQuery syntax selects the content (child, text, and comment) nodes of the selected HTML elements.
$(selector).contents()
Listing 5-2 demonstrates the use of the contents() method to get the contents of the elements from a set of selected elements.
Listing 5-2. Using the contents() method to select all contents elements
<!DOCTYPE html>
<html lang="en">
<head>
   <meta charset="utf-8">
   <script src="scripts/jquery-2.1.0.min.js"></script>
   <style>
      .list {
        border:3px double green;
        width:350px;
      }
      .tblHdr {
         background-color: lightgray;
      }
      .listDepartments {
         width: 200px;
      }
   </style>
   <script>
      $(function(){
            $("#btnTestIt").click(function () {
                                           $(".list").contents().each(function() {
                                                 alert($(this).text());
                                           });
            });
      });
   </script>
</head>
<body>
   <div class="list">
              Departments:
       <ul>
         <li>Marketing</li>
         <li>Sales</li>
         <li>Technology</li>
         <li>Customer Support</li>
       </ul>
   </div><br>
   <input id="btnTestIt" type="button" value="Test It">
</body>
</html>
How It Works
In this code, the departments’ names are listed using the <ul> and <li> HTML tags. The departments’ text and <ul> are embedded in the <div> tag, which uses the "list" CSS class. When the Test It button is clicked, the following code is executed:
$(".list").contents().each(function() {
   alert($(this).text());
});
$(".list") selects all HTML elements with the class name "list" and returns a jQuery object. Only the <div> element is selected.
.contents() selects all the contents elements of each of the selected HTML elements. The following three content elements are selected:
Departments: literal string
  <li>Marketing</li>
  <li>Sales</li>
  <li>Technology</li>
  <li>Customer Support</li>
Empty string: a newline character and space between </ul> and </div> tags
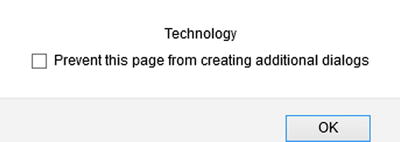
each() iterates over all of the selected elements and alert() displays each selected element’s text content. Figure 5-3 displays the page when it is viewed in a browser.
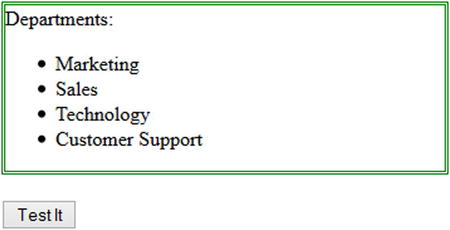
Figure 5-3. Initial page display
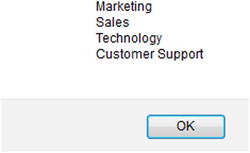
When you press the Test It button, the button’s click event handler displays the text content of each child element. Figure 5-4 displays the pop-up messages.
5-3. Getting the Descendant Nodes of All Selected Elements Filtered by a Specified Selector, jQuery Object, or HTML Element
Problem
You want to get all the descendants of each element from the set of selected elements filtered by a selector.
Solution
The following jQuery syntax selects the descendant nodes of each selected HTML element that is filtered by the specified descendantSelector as an argument.
$(selector).find(descendantSelector)
Listing 5-3 demonstrates the use of the find() method to get the descendant elements of each element from the set.
Listing 5-3. Using the find() method to select any descendant elements
<!DOCTYPE html>
<html lang="en">
<head>
   <meta charset="utf-8">
   <script src="scripts/jquery-2.1.0.min.js"></script>
   <style>
      .list {
         border:3px double green;
         width:350px;
      }
      .newRecord {
         font-weight: bold;
      }
      .tblHdr {
         background-color: lightgray;
      }
      .listDepartments {
          width: 200px;
       }
   </style>
   <script>
      $(function(){
         $("#btnTestIt").click(function () {
                            $("table, ul").find(".newRecord").css("background-color", "lightblue");
                        });
     });
   </script>
</head>
<body>
   <strong>Employees:</strong>
   <table class="list">
      <tr class="tblHdr">
         <td>Employee Name</td><td>Department Name</td><td>Salary</td>
      </tr>
      <tr>
         <td>Jane Smith</td><td>Marketing</td><td>$95,000</td>
      </tr>
      <tr class="newRecord">
         <td>John Smith</td><td>Technology</td><td>$90,000</td>
      </tr>
      <tr>
         <td>Brian Adam</td><td>Sales</td><td>$72,000</td>
      </tr>
      <tr>
         <td>Mary Jones</td><td>Customer Support</td><td>$60,000</td>
      </tr>
      <tr>
         <td>Michael Jefferson</td><td>Technology</td><td>$85,000</td>
      </tr>
   </table><br>
   <strong>Departments:</strong>
   <div>
      <ul class="list">
        <li>Marketing</li>
        <li>Sales</li>
        <li class="newRecord">Technology</li>
        <li>Customer Support</li>
      </ul>
   </div><br>
   <input id="btnTestIt" type="button" value="Test It">
</body>
</html>
How It Works
In this code, the employee details—employee name, department name, and salary—are listed in tabular form using the <table>, <tr>, and <td> HTML tags and the departments’ names are listed using the <ul> and <li> HTML tags. In both lists, there is one record with the class newRecord. When the Test It button is clicked, following code is executed:
$("#btnTestIt").click(function () {
  $("table, ul").find(".newRecord").css("background-color", "lightblue");
});
$("table, ul") selects all HTML elements with the "table" or "ul" tag name and returns a jQuery object. The following two elements are selected:
- <table class="list">
- <ul class="list">
.find(".newRecord") selects all descendant elements that have the newRecord class from the selected HTML elements. The following children elements are selected:
- <tr class="newRecord">
- <li class="newRecord">
.css("background-color", "lightblue") sets the background color of the selected elements to light blue. Figure 5-5 displays the page when it is viewed in a browser.
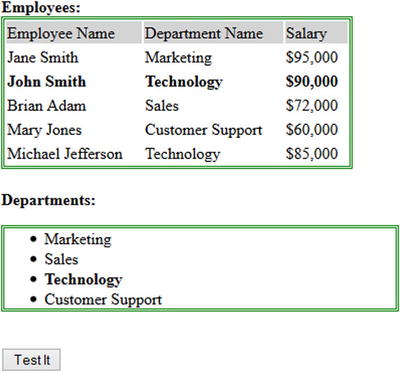
Figure 5-5. Initial page display
When you press the Test It button, the button’s click event handler highlights the records with the newRecord class name. Figure 5-6 displays the descendants that are selected by matching the specified selector.
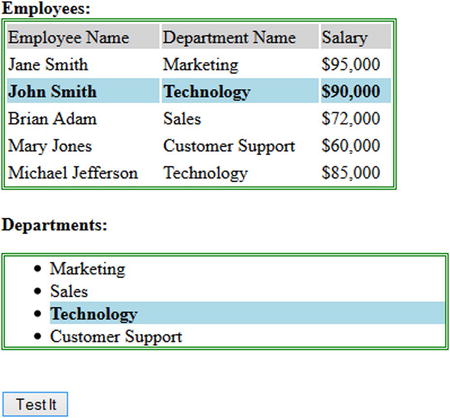
Figure 5-6. Descendant elements that have the newRecord CSS class are highlighted
Here are two other ways to use the find() method with different argument types:
- Using the find() method with the argument: jQuery object:
var jqObj = $(".newRecord");
$("table, ul").find(jqObj) ... - Using the find() method with the argument: HTML elements:
var nestedUL = document.getElementsByTagName("ul");
$("ul").find(nestedUL) ...
5-4. Getting the First Ancestor of Each Selected Element that Matches the Specified Selector
Problem
You want to find the closest ancestor of the selected elements that matches the specified selector. Traversing starts with the element itself.
Solution
The following jQuery syntax selects the closest ancestor of each selected HTML element.
$(selector).closest(ancestorSelector)
Listing 5-4 demonstrates the use of the closest() method to get the closest ancestor element from the set.
Listing 5-4. Using the closest() method to select the closest ancestor element
<!DOCTYPE html>
<html lang="en">
<head>
   <meta charset="utf-8">
   <script src="scripts/jquery-2.1.0.min.js"></script>
   <style>
      .list {
         border:3px double green;
         width:350px;
      }
      .newRecord {
         background-color: lightyellow;
      }
   </style>
   <script>
      $(function(){
         $("#btnTestIt").click(function () {
                            $(".newRecord").closest(".list").each(function () {
                                                  alert($(this).prop("tagName"));
                             });
         });
      });
   </script>
</head>
<body>
   <strong>Departments:</strong>
   <div class="list">
      <ul>
         <li>Marketing</li>
         <li>Sales</li>
         <li class="newRecord">Technology</li>
         <li>Customer Support</li>
     </ul>
   </div><br>
   <input id="btnTestIt" type="button" value="Test It">
</body>
</html>
How It Works
In this code, the departments’ names are listed using the <ul> and <li> HTML tags. One of the "li" elements has the newRecord CSS class. When the Test It button is clicked, the following code is executed:
$(".newRecord").closest(".list").each(function () {
   alert($(this).prop("tagName"));
});
$(".newRecord") selects all HTML elements with the class name newRecord and returns a jQuery object. The following element is selected:
<li class="newRecord">Technology</li>
.closest(".list") selects the closest ancestor that matches the class "list", including itself. The following ancestor element is selected:
<div class="list">
each() iterates over all of the selected elements and alert() displays each selected element’s tag name, which is:
DIV
Here is the other way to use the closest() method with a different argument type:
- Using the closest() method with the argument: jQuery object:
var jqObj = $(".list ");
$(".newRecord").closest(jqObj) ...
Figure 5-7 displays the page when it is viewed in a browser.
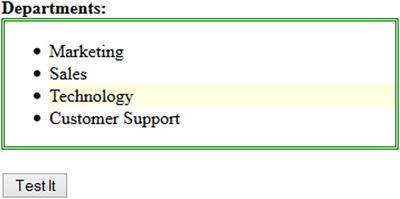
Figure 5-7. Initial page display
When you press the Test It button, the button’s click event handler displays the tag name of each selected element. Figure 5-8 displays the closest ancestor element that matches the specified selector.
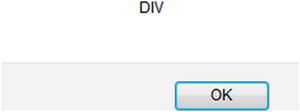
Figure 5-8. Ancestor element’s tag name that has the list CSS class
5-5. Getting the Parent of Each Selected Element
Problem
You want to get the parent of each element from the selected set.
Solution
The following jQuery syntax selects the parent node of each selected HTML element.
$(selector).parent(parentSelector)
parentSelector is optional. If it is specified, only the parents that match parentSelector are selected. Listing 5-5 demonstrates the use of the parent() method to get the parent elements from the set of selected elements.
Listing 5-5. Using the parent() method to select the parent elements
<!DOCTYPE html>
<html lang="en">
<head>
   <meta charset="utf-8">
   <script src="scripts/jquery-2.1.0.min.js"></script>
   <style>
      table {
         border:3px double green;
      }
   </style>
   <script>
      $(function(){
         $("#btnTestIt").click(function () {
            $("td").each(function (index, htmlElement){
                                           var cellValue =$(this).text();
                                           // if Department is Technology, do something
                                           if (cellValue == "Technology") {
                                                $(this).parent().css("background-color", "yellow");
                                           }
                             });
         });
      });
   </script>
</head>
<body>
   <table id="tblEmployee">
      <tr>
         <td>Employee Name</td><td>Department Name</td><td>Salary</td>
      </tr>
      <tr>
         <td>Jane Smith</td><td>Marketing</td><td>$95,000</td>
      </tr>
      <tr>
         <td>John Smith</td><td>Technology</td><td>$90,000</td>
      </tr>
      <tr>
         <td>Brian Adam</td><td>Sales</td><td>$72,000</td>
      </tr>
      <tr>
         <td>Mary Jones</td><td>Support</td><td>$60,000</td>
      </tr>
      <tr>
         <td>Michael Jefferson</td><td>Technology</td><td>$85,000</td>
      </tr>
   </table><br>
   <input id="btnTestIt" type="button" value="Test It">
</body>
</html>
How It Works
In this code, the employee details—employee name, department name, and salary—are listed in tabular form using the <table>, <tr>, and <td> HTML tags. When the Test It button is clicked, the following code is executed:
$("td").each(function (index, htmlElement){
   var cellValue = $(this).text();
   // if Department is Technology, do something
   if (cellValue == "Technology") {
            $(this).parent().css("background-color", "yellow");
   }
});
$("td") selects all HTML elements with the tag name "td" and returns a jQuery object.
.each() iterates through all the selected elements in the returned jQuery object, with the current index and htmlElement arguments.
$(this).text() gets the text content of each td element. If the text content (i.e., cell value) is equal to "Technology", $(this).parent().css("background-color", "yellow") is executed. $(this).parent() gets the parent of the td element that has a value of Technology, i.e., the "tr" element is selected. css("background-color", "yellow") changes the background color of the parent element (tr) to yellow. Figure 5-9 displays the page when it is viewed in a browser.
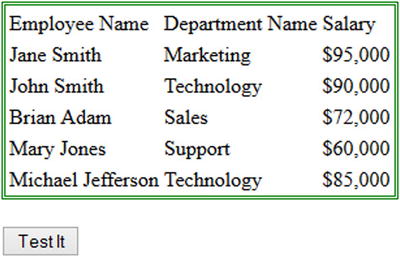
Figure 5-9. Initial page display
When you press the Test It button, the button’s click event handler highlights the parent element if the selected element’s text value is Technology. Figure 5-10 displays highlighted parent record.
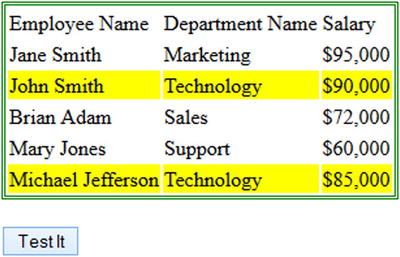
Figure 5-10. Highlighted parent records whose cell value is Technology
5-6. Getting the Ancestors of Each Selected Element
Problem
You want to get the ancestors of each element from the selected set.
Solution
The following jQuery syntax selects the ancestor nodes of each selected HTML element.
$(selector).parents(ancestorSelector)
ancestorSelector is optional. If it is specified, only the ancestors that match ancestorSelector are selected. Listing 5-6 demonstrates the use of the parents() method to get the ancestor elements of each element from the set.
Listing 5-6. Using the parents() method to select the ancestors’ elements
<!DOCTYPE html>
<html lang="en">
<head>
   <meta charset="utf-8">
   <script src="scripts/jquery-2.1.0.min.js"></script>

   <style>
      .list {
        border:3px double green;
        width:250px;
      }
       .newRecord {
          background-color: lightyellow;
       }
   </style>
   <script>
      $(function(){
         $("#btnTestIt").click(function () {
            $(".newRecord").parents().each(function () {
                                           alert($(this).prop("tagName"));
                             });
         });
     });
   </script>
</head>
<body>
   <strong>Departments:</strong>
   <div>
      <ul class="list">
         <li>Marketing</li>
         <li>Sales</li>
         <li class="newRecord">Technology</li>
         <li>Customer Support</li>
      </ul>
   </div><br>
   <input id="btnTestIt" type="button" value="Test It">
</body>
</html>
How It Works
In this code, the departments’ names are listed using the <ul> and <li> HTML tags. When the Test It button is clicked, the following code is executed:
$(".newRecord").parents().each(function () {
   alert($(this).prop("tagName"));
});
$(".newRecords") selects all HTML elements with the newRecords class name and returns a jQuery object. The following element is selected:
<li class="newRecord">
.parents() gets all the ancestors of each element. The following ancestor elements are selected:
<UL>, <DIV>, <BODY>, <HTML>
.each() iterates through each element of the selected elements.
$(this).prop("tagName") gets the value of the property tagName of the currently processed element. The tagName is displayed as a pop-up message. Figure 5-11 displays the page when it is viewed in a browser.

Figure 5-11. Initial page display
When you press the Test It button, the button’s click event handler displays the tagName of all the ancestors of the element that has a class with the name newRecord. Figure 5-12 displays the ancestors’ tag names as a pop-up message.
5-7. Getting the Ancestors of Each Selected Element Until a Node Is Reached
Problem
You want to get all the ancestors of each selected element until a node is reached that matches the specified selector.
Solution
The following jQuery syntax selects the ancestors of each selected HTML element until an ancestor is reached that matches the specified ancestorSelector.
$(selector).parentUntil(ancestorSelector)
Listing 5-7 demonstrates the use of the parentUntil() method to get all the ancestor elements until the ancestor node is reached that matches the ancestorSelector. The ancestor node that matches the specified ancestorSelector is not selected.
Listing 5-7. Using the parentUntil() method to select ancestor elements up to a specific ancestor.
<!DOCTYPE html>
<html lang="en">
<head>
   <meta charset="utf-8">
   <script src="scripts/jquery-2.1.0.min.js"></script>
   <style>
      .oldRecord {
         font-style: italic;
      }
      .listDepartments {
         width: 200px;
      }
   </style>
   <script>
      $(function(){
             $("#btnTestIt").click(function () {
                            $( ".oldRecord" ).parentsUntil("div").css( "background-color",
                             "lightblue" );
                     });
      });
   </script>
</head>
<body>
   <strong>Departments:</strong>
   <div>
      <ul class="listDepartments">
         <li>Marketing</li>
         <li>Sales</li>
         <li style="position: relative">Technology
            <ul>
               <li>Hardware Technology</li>
               <li class="oldRecord">Software Technology</li>
            </ul>
         </li>
         <li>Customer Support</li>
      </ul>
   </div><br>
   <input id="btnTestIt" type="button" value="Test It">
</body>
</html>
How It Works
In this code, the departments’ names are listed using the <ul> and <li> HTML tags. There is one <li> item with the oldRecord class. When the Test It button is clicked, the following code is executed:
$(".oldRecord").parentsUntil("div").css( "background-color","lightblue" );
$(".oldRecord") selects all the HTML elements with the oldRecord class name and returns a jQuery object. The following element is selected:
<li class="oldRecord">
.parentsUntil("div") selects the ancestors of the selected elements until an ancestor with a div tag name is found. The following ancestor elements are selected:
<ul> and <ul>
css( "background-color", "lightblue") changes the background color of the selected elements to light blue. Figure 5-13 displays the page when it is viewed in a browser.
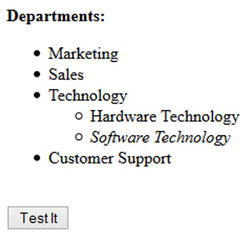
Figure 5-13. Initial page display
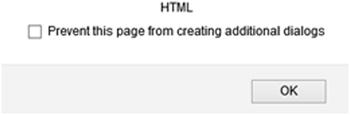
When you press the Test It button, the button’s click event handler changes the background color of the ancestors of the element having the oldRecord class name to light blue. Figure 5-14 displays the change in background color.
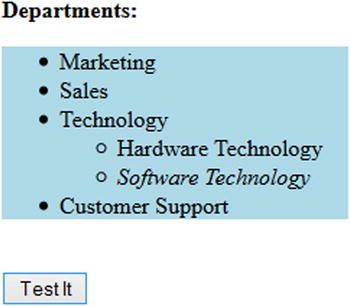
Figure 5-14. Change in ancestor elements background color
5-8. Getting the Immediately Preceding Sibling of Each Element of the Selected Elements
Problem
You want to get the preceding sibling of each element from the selected set.
Solution
The following jQuery syntax selects the immediately preceding sibling of each selected HTML element.
$(selector).prev(siblingSelector)
siblingSelector is optional. If it is specified, only the siblings that match siblingSelector are selected. Listing 5-8 demonstrates the use of the prev() method to get the preceding sibling element from the set.
Listing 5-8. Using the prev() method to select the preceding sibling elements
<!DOCTYPE html>
<html lang="en">
<head>
   <meta charset="utf-8">
   <script src="scripts/jquery-2.1.0.min.js"></script>
   <style>
      table {
         border:3px double green;
      }
      .tblHdr {
         background-color: lightgray;
      }
       .newRecord {
          background-color: lightyellow;
       }
      .listDepartments {
          width: 200px;.
       }
   </style>
   <script>
      $(function(){
         $("#btnTestIt").click(function () {
            $(".newRecord").prev().css("background-color", "lightblue");
         });
      });
   </script>
</head>
<body>
   <strong>Employees:</strong>
   <table id="listEmployees">
      <tr class="tblHdr">
         <td>Employee Name</td><td>Department Name</td><td>Salary</td>
      </tr>
      <tr>
         <td>Jane Smith</td><td>Marketing</td><td>$95,000</td>
      </tr>
      <tr class="newRecord">
         <td>John Smith</td><td>Technology</td><td>$90,000</td>
      </tr>
      <tr>
         <td>Brian Adam</td><td>Sales</td><td>$72,000</td>
      </tr>
      <tr>
         <td>Mary Jones</td><td>Customer Support</td><td>$60,000</td>
      </tr>
      <tr>
         <td>Michael Jefferson</td><td>Technology</td><td>$85,000</td>
      </tr>
   </table><br>
   <strong>Departments:</strong>
   <ul class="listDepartments">
      <li>Marketing</li>.
      <li>Sales</li>
      <li class="newRecord">Technology</li>
      <li>Customer Support</li>
   </ul><br>
   <input id="btnTestIt" type="button" value="Test It">
</body>
</html>
How It Works
In this code, the employee details—employee name, department name, and salary—are listed in tabular form using the <table>, <tr>, and <td> HTML tags and the departments’ names are listed using the <ul> and <li> HTML tags. In both lists, there is one record with the class newRecord. When the Test It button is clicked, the following code is executed:
$(".newRecord").prev().css("background-color", "lightblue");
$(".newRecord") selects all HTML elements with the class name newRecord and returns a jQuery object. The following two elements are selected:.
- <tr class="newRecord">
- <li class="newRecord">Technology</li>
.prev() selects the immediately preceding sibling of each of the selected HTML elements. The following sibling elements are selected:
- <tr><td>Jane Smith</td><td>Marketing</td><td>$95,000</td></tr>
- <li>Sales</li>
css("background-color", "lightblue") changes the background color of the selected elements to light blue. Figure 5-15 displays the page when it is viewed in a browser.

Figure 5-15. Initial page display
When you press the Test It button, the button’s click event handler changes the background color of the preceding sibling of each originally selected element. Figure 5-16 displays the change in the background color.
Figure 5-16. Preceding sibling elements are highlighted with a light blue background color
The syntax for similar methods, which can be used to get siblings, is as follows:
The $(selector).prevAll() method can be used to get all the preceding siblings of each element from the selected elements.
The $(selector).prevUntil(siblingSelector) method can be used to get all the preceding siblings of each element from the selected elements until a sibling matching the siblingSelector is found. All the preceding siblings up to (but not including) the sibling element that match the specified siblingSelector are selected.
5-9. Getting the Immediately Following Sibling of Each Element from the Set
Problem
You want to get the immediately following sibling of each element from the set.
Solution
The following jQuery syntax selects the immediately following sibling of each selected HTML element.
$(selector).next(siblingSelector)
siblingSelector is optional. If it is specified, only the siblings that match siblingSelector are selected. Listing 5-9 demonstrates the use of the next() method to get the following sibling element of each element from the set of selected elements.
Listing 5-9. Using the next() method to select the preceding sibling element
<!DOCTYPE html>
<html lang="en">
<head>
   <meta charset="utf-8">
   <script src="scripts/jquery-2.1.0.min.js"></script>
   <style>
      table {
         border:3px double green;
      }
      .tblHdr {
         background-color: lightgray;
      }
      .newRecord {
          background-color: lightyellow;
      }
      .listDepartments {
          width: 200px;
      }
   </style>
   <script>
      $(function(){
         $("#btnTestIt").click(function () {
            $ (".newRecord").next().css("background-color", "lightblue");
         });
      });
   </script>
</head>
<body>
   <strong>Employees:</strong>
   <table id="listEmployees">
      <tr class="tblHdr">
         <td>Employee Name</td><td>Department Name</td><td>Salary</td>
      </tr>
      <tr>
         <td>Jane Smith</td><td>Marketing</td><td>$95,000</td>
      </tr>
      <tr class="newRecord">
         <td>John Smith</td><td>Technology</td><td>$90,000</td>
      </tr>
      <tr>
         <td>Brian Adam</td><td>Sales</td><td>$72,000</td>
      </tr>
      <tr>
         <td>Mary Jones</td><td>Customer Support</td><td>$60,000</td>
      </tr>
      <tr>
         <td>Michael Jefferson</td><td>Technology</td><td>$85,000</td>
      </tr>
   </table><br>
   <strong>Departments:</strong>
   <ul class="listDepartments">
      <li>Marketing</li>
      <li>Sales</li>
      <li class="newRecord">Technology</li>
      <li>Customer Support</li>
   </ul><br>
   <input id="btnTestIt" type="button" value="Test It">
</body>
</html>
How It Works
In this code, the employee details—employee name, department name, and salary—are listed in tabular form using the <table>, <tr>, and <td> HTML tags and the departments’ names are listed using the <ul> and <li> HTML tags. In both lists, there is one record with the class newRecord. When the Test It button is clicked, the following code is executed:
$ (".newRecord").next().css("background-color", "lightblue");
$(".newRecord") selects all HTML elements with the class name newRecord and returns a jQuery object. The following two elements are selected:
- <tr class="newRecord">
This node has the record <td>John Smith</td><td>Technology</td><td>$90,000</td>
- <li class="newRecord">Technology</li>
.next() selects the immediately following sibling of each of the selected HTML elements. The following sibling elements are selected:
- <tr><td>Brian Adam</td><td>Sales</td><td>$72,000</td></tr>
- <li>Customer Support</li>
css("background-color", "lightblue") changes the background color of the selected elements to light blue. Figure 5-17 displays the page when it is viewed in a browser.
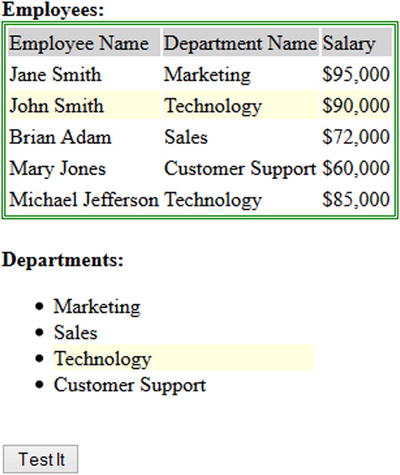
Figure 5-17. Initial page display
When you press the Test It button, the button’s click event handler changes the background color of the following sibling of each originally selected element. Figure 5-18 displays the change in the background color.
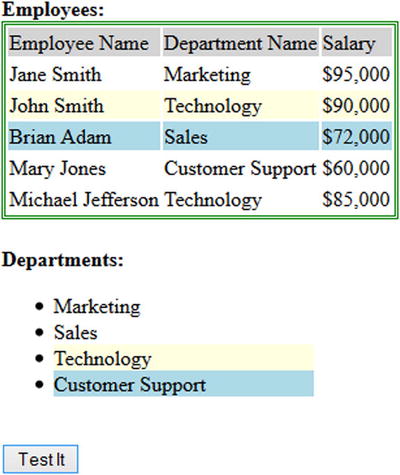
Figure 5-18. Preceding sibling elements are highlighted with a light blue background color
The syntax for similar methods, which can be used to get siblings, is as follows:
The $(selector).nextAll() method can be used to get all the following siblings of each element from the set.
The $(selector).nextUntil(siblingSelector) method can be used to get all the following siblings of each element until a sibling matching the siblingSelector is found. All the siblings up to (but not including) the sibling element that match the specified siblingSelector are selected.
5-10. Getting All Siblings of Each Element of the Set
Problem
You want to get all the siblings of each element from the selected elements.
Solution
The following jQuery syntax selects all the siblings of each selected HTML element.
$(selector).siblings(siblingSelector)
siblingSelector is optional. If it is specified, only the siblings that match siblingSelector are selected. Listing 5-10 demonstrates the use of the siblings() method to get all the sibling elements of each element from the set.
Listing 5-10. Using the siblings() method to select all sibling elements
<!DOCTYPE html>
<html lang="en">
<head>
   <meta charset="utf-8">
   <script src="scripts/jquery-2.1.0.min.js"></script>
   <style>
      table {
         border:3px double green;
      }
      .tblHdr {
         background-color: lightgray;
      }
      .newRecord {
         background-color: lightyellow;
      }
      .tableFooter {
        background-color: lightgray;
      }
   </style>
   <script>
      $(function(){
         $("#btnTestIt").click(function () {
            $("tr.newRecord").siblings().not(".tblHdr, .tableFooter").css("background-color", "lightblue");
         });
      });
   </script>
</head>
<body>
   <strong>Employees:</strong>
   <table id="listEmployees">
      <tr class="tblHdr">
         <td>Employee Name</td><td>Department Name</td><td>Salary</td>
      </tr>
      <tr>
         <td>Jane Smith</td><td>Marketing</td><td>$95,000</td>
      </tr>
      <tr class="newRecord">
         <td>John Smith</td><td>Technology</td><td>$90,000</td>
      </tr>
      <tr>
         <td>Brian Adam</td><td>Sales</td><td>$72,000</td>
      </tr>
      <tr>
         <td>Mary Jones</td><td>Customer Support</td><td>$60,000</td>
      </tr>
      <tr>
         <td>Michael Jefferson</td><td>Technology</td><td>$85,000</td>
      </tr>
      <tr class="tableFooter">
         <td colspan="2">Total Salary:</td><td>$373,000</td>
      </tr>
   </table><br>
   <input id="btnTestIt" type="button" value="Test It">
</body>
</html>
How It Works
In this code, the employee details—employee name, department name, and salary—are listed in tabular form using the <table>, <tr>, and <td> HTML tags. There is one record with the newRecord class. When the Test It button is clicked, the following code is executed:
$("tr.newRecord").siblings().not(
    ".tblHdr, .tableFooter").css("background-color", "lightblue");
$("tr.newRecord") selects all HTML elements with the tag name "tr" and the class name "newRecord" and returns a jQuery object. The following element is selected:
<tr class="newRecord">
.siblings() selects all the siblings of each of the selected HTML elements.
.not(".tblHdr, .tableFooter") excludes the selected elements that have a "tblHdr" or "tableFooter" class name.
css("background-color", "lightblue") changes the background color of the selected elements to light blue. Figure 5-19 displays the page when it is viewed in a browser.
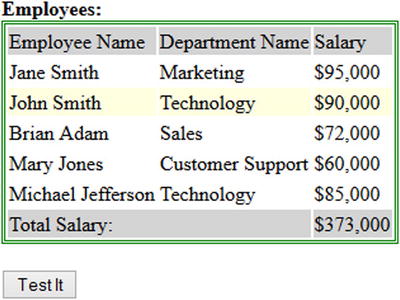
Figure 5-19. Initial page display
When you press the Test It button, the button’s click event handler changes the background color of all siblings of each selected element. Figure 5-20 displays the change in the background color.
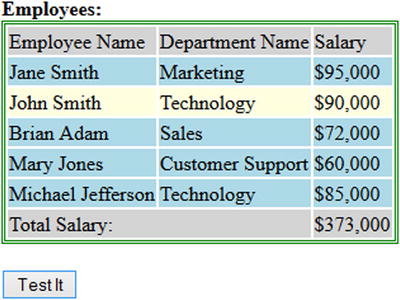
Figure 5-20. Preceding sibling elements are highlighted with a light blue background color
Summary
This chapter covered jQuery selectors that you use to filter and expand methods for selecting node(s) (HTML elements), and then how to traverse the DOM tree to look for ancestors, siblings, or descendants using DOM traversing methods. It covered the following commonly used DOM traversing methods:
- children(selector)
- find(selector)
- closest()
- parent()
- parents()
- prev()
- prevAll()
- next()
- nextAll()
- siblings()
Other methods you saw in this chapter, which are covered in detail in Chapter 6, are text(), contents(), and css()
.