
![]()
Event Handling
This chapter covers event handlers, including event handler binding (or registration) and event handler execution. jQuery provides convenience methods to register event handlers for system-generated and user interaction events and provides a mechanism to pass information between elements, which initiated the event and event handlers. Event handlers are inline (anonymous) or named functions that are executed when an event is triggered by the browser or by user interaction.
There are two types of events—system-initiated events (such as the DOM ready event) and user-initiated events (such as the button click event, the form element getting focus event, and so on). If you want to perform some action when a specific event occurs, you need to identify the element’s event, write the event handler to perform that action, and bind (register) the element’s event to the event handler. When the event occurs, the registered event handler is executed. The terms—attaching, registering, and binding—are used interchangeably.
This chapter includes recipes that cover the following topics:
- Binding event handlers
- Event objects
- Preventing a default event action
- Event propagation (bubbling)
- Event delegation
7-1. Performing an Action When an Event Occurs
Problem
You want to perform an action (for example, display a message, prompt for confirmation, or submit form data) when the user clicks the Submit button.
Solution
The following jQuery syntax is used to register an event handler for an element’s event.
$(selector).on("eventName", function() { .... })
$(selector) selects the desired element(s). The on() method binds an event handler function (function()) to the selected elements for the specified event (eventName). eventName is the name of a valid event for the selected elements (for example, click is a valid event for the HTML element <button>). When the event occurs, code segments in the function() are executed. Listing 7-1 demonstrates the use of the on() method to bind (register) an action to the selected elements’ events.
Listing 7-1. Using the on() method to bind an event handler to a button’s click event
<!DOCTYPE html>
<html lang="en">
<head>
     <meta charset="utf-8">
     <script src="scripts/jquery-2.1.0.min.js"></script>
        <script>
                 $(function() {
                     $("#btnSubmit").on("click", function() {
                                 alert("Submit button is clicked.")
                        });
                 });
       </script>
</head>
<body>
     <button id="btnSubmit">Submit</button>
</body>
</html>
How It Works
In the document ready function, the on() method is used to bind the click event of the selected elements to the event handler. When the event occurs (such as when a button is clicked), the event handler displays the pop-up message using the alert() command. At the time of the event handler binding, no action in the event handler is performed. When the user clicks the button, the system checks if there is an event handler associated with the click event. If there is one, it is executed. In this case, a pop-up message is displayed. Figure 7-1 displays the page when the Submit button is clicked.
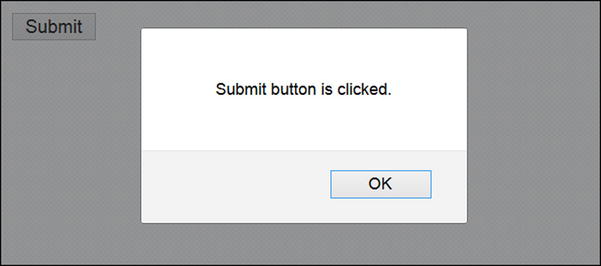
Figure 7-1. This pop-up message is displayed when the Submit button is clicked
A few points to note:
- When you’re binding event handlers, you can use the bind() method too. The only difference between the bind() and on() methods is that the on() method provides a mechanism to delegate events to the element’s parent.
- The same event handler can be registered for different events by using the following syntax:
$(selector).on("eventName1 eventName2 ... ", function() { .... })
- Event handlers are attached only to elements that already exist. If new DOM elements are created after the event handler is registered, the event handler won’t be registered for them. In order to bind event handlers to future elements, you can either of these two methods:
- Pass a selector for the descendants as an argument of the on() method.
- Use the delegate() method.
You will read about these methods in the Recipe 7-7, later in this chapter.
- jQuery provides convenience (shortcut) methods to register event handlers for commonly used events. These methods can be used instead of the on() method. Table 7-1 displays these convenience methods and describes the events for which these convenience methods can be used.
Table 7-1. Convenience Methods to Bind Event Handlers
|
Method |
Event Description |
|---|---|
|
load() |
Triggered when the element and all its descendants are loaded. |
|
ready() |
Triggered when the document is ready (when the DOM is completely created). |
|
blur() |
Triggered on an element when it loses the focus. |
|
change() |
Triggered on an element when users change its value. |
|
click() |
Triggered on an element when it is clicked. |
|
error() |
Triggered on an element when it is not loaded correctly. |
|
focus() |
Triggered on an element when it gets the focus. |
|
focusin() |
Triggered on an element when it or its descendants gets the focus. |
|
hover() |
Called when an element’s mouseenter or mouseleave events occur. |
|
resize() |
Triggered when the browser window is resized. |
|
scroll() |
Triggered when the user scrolls to other section of the element. |
|
select() |
Triggered when a text selection is made in <text> and <textarea>. |
|
submit() |
Triggered when a form is submitted. Applies to the <form> element only. |
Other such methods are dblclick(), focusout(), keydown(), keypress(), keyup(), mousedown(), mouseenter(), mouseleave(), mousemove(), mouseout(), mouseover(), and mouseup().
The following is the commonly used syntax for these convenience methods (except for hover()):
$(selector).convenienceMethod(function() { .... })
For the hover() method, the syntax is:
$(selector). hover(function() { .... }, function() { .... })
The first function argument is called when the mouseenter event is triggered and the second function argument is called when the mouseleave event is triggered for the element.
The error event (convenience method error()) is triggered when the HTML element has failed to load. The following code segment explains this:
HTML Code: <img id="img1">
JavaScript Code:
$(function() {
      $("#img1").error(function() {
            alert("image is not loaded.")
      });

      $("#img1").attr("src", "images/someImage.png");
});
This code loads the $("#img1").attr("src", "images/someImage.png") image. If the image doesn’t exist, an error event will be triggered when loading has failed.
7-2. Preventing a Default Event Handler
Problem
You want to prevent the execution of an event’s default event handler.
Solution
The following jQuery syntax is used to prevent a default event handler:
$(selector).on( "eventName", function(eventObj) {eventObj.preventDefault()})
If there is a default action (event handler) associated with an event and you want to implement your own action and prevent the execution of the default action, you can use the event object’s preventDefault() method. For example, when the user clicks an anchor (<a>) link, the default action of the click event is to go to the URL specified in the href attribute. You can prevent this default behavior by using preventDefault() in the user-defined event handler. Listing 7-2 shows the use of the preventDefault() method to prevent the default action of the click event of the anchor link. Listing 7-3 provides a sample page called department.htm, which is displayed when users click the Sales or Marketing department links.
Listing 7-2. Using event object’s preventDefault() method to prevent default event handler execution
<!DOCTYPE html>
<html lang="en">
<head>
     <meta charset="utf-8">
     <script src="scripts/jquery-2.1.0.min.js"></script>
     <script>
              $(function() {
                   $("#lnkSales").click(function(eventObj) {
                            var message = $(this).prop("tagName") + " is clicked.
";

                            eventObj.preventDefault();
                            message += "Default event handler is prevented...";

                            alert(message);
                   });

                   $("#lnkMarketing").click(function(eventObj) {
                            var message = $(this).prop("tagName") + " is clicked.
";
                            message += "Default event handler is NOT prevented...";
                            alert(message);
                   });
              });
     </script>
</head>

<body>
    Departments:
    <ul id="listDepartments">
        <li><a id="lnkSales" href="department.htm">Sales</a></li>
              <li><a id="lnkMarketing" href="department.htm">Marketing</a></li>
              <li>Technology</li>
              <li>Customer Support</li>
    </ul><br>
</body>
</html>
Listing 7-3. Sample department.htm file
<!DOCTYPE html>
<html lang="en">
<head>
    <meta charset="utf-8">
</head>

<body>
     Details about the department ...
</body>
</html>
How It Works
In the document ready function shown in Listing 7-2, two anchor click event handlers are defined—one for the Sales department link and another one for the Marketing department link. In the Sales link click event handler, the event object’s preventDefault() is called. When the Sales link is clicked, a pop-up message is displayed. Since preventDefault() is called, control remains on the same page and department.htm is not displayed. When the Marketing link is clicked, a pop-up message is displayed. Since preventDefault() is not called, after displaying the message, the default action of the anchor click event is executed and the department.htm page is displayed. Figure 7-2 displays the page that appears when the Sales link is clicked. After the user clicks the OK button, control remains on the existing page.

Figure 7-2. This pop-up message is displayed when the Sales link is clicked
Figure 7-3 displays the page that appears when the Marketing link is clicked. After the user clicks the OK button, the department.htm page is displayed, as depicted in Figure 7-4.
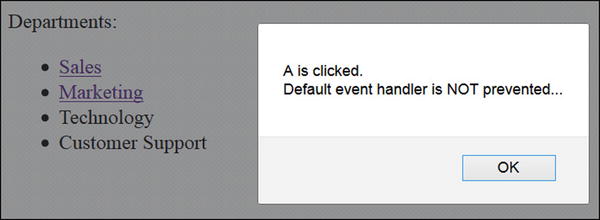
Figure 7-3. This pop-up message is displayed when the Marketing link is clicked
![]()
Figure 7-4. The department.htm file is displayed
You can call eventObj.isDefaultPrevented()to check if preventDefault() was called for the event on the element. It returns true or false.
7-3. Binding Different Event Handlers to the Same Element
Problem
You want to change the opacity of an image when the mouseenter event is triggered and then revert to its original opacity when the mouseleave event is triggered.
Solution
The following jQuery syntax binds the event handlers to the selected elements for different events:
$(selector).on( {"eventName1": function() { .... },
                           "eventName2": function() { .... },
                           ...)
Listing 7-4 uses the on() method to bind multiple event handlers to the selected elements’ events.
Listing 7-4. Using the on() method to bind event handlers to an image’s mouseenter and mouseleave events
<!DOCTYPE html>
<html lang="en">
<head>
   <meta charset="utf-8">
   <script src="scripts/jquery-2.1.0.min.js"></script>
   <script>
      $(function() {
         $("#imgSample").on(
              {
                   "mouseenter": function() { $(this).css("opacity", 0.5);  },
                   "mouseleave": function() { $(this).css("opacity", 1.0); }
              });
      });
   </script>
</head>
<body>
              <img id="imgSample" src="images/butterfly3.png"><br>
</body>
</html>
How It Works
In the document ready function, the on() method binds two event handlers—one for the mouseenter event and the other for the mouseleave event. Instead of having to make multiple calls to the on() method, one for each event, you can use a single on() method call. The event handler attached to the mouseenter event changes the opacity of the selected image to 0.5 and the event handler attached to the mouseleave event returns the opacity to 1.0. Figure 7-5 displays the change in the image’s opacity when the user moves the mouse cursor over the image. When the mouse cursor moves out of the image, its opacity returns to 1.0.
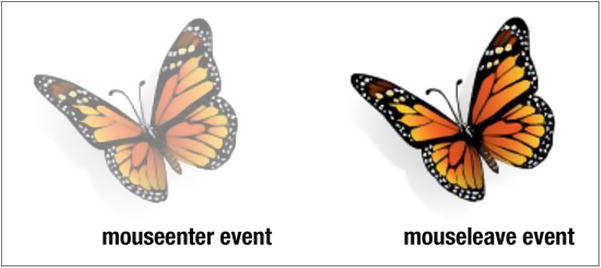
Figure 7-5. Change in the image opacity due to the mouseenter and mouseleave events
If the event handler has more than a few lines, it is better to rewrite the code in the following format to improve the code readability and maintainability:
var changeOpacityFunc = function changeOpacity(elem, opacityVal) {
elem.css("opacity", opacityVal);
      }  $(function() {
         $("#imgSample").on({
           "mouseenter": function() { changeOpacityFunc($(this), 0.5)},
           "mouseleave": function() { changeOpacityFunc($(this), 1.0)}
                       });
      });
In this case, the event handler is implemented using a named function instead of an inline (anonymous) function.
7-4. Getting an Event Object’s Properties
Problem
You want to get the properties of the element that triggered the event.
Solution
The following jQuery syntax is used to get the properties of the element that triggered the event:
$(selector).on("eventName", function(eventObject) { .... })
Every event handler gets an event object as an argument. This object contains event-related properties. These are properties of the element that have triggered the event and the methods to change the default behavior of the event handler processing model. Listing 7-5 demonstrates some of the properties of the event object.
Listing 7-5. Getting properties of the event object
<!DOCTYPE html>
<html lang="en">
<head>
     <meta charset="utf-8">

<script src="scripts/jquery-2.1.0.min.js"></script>
   <script>
              function getEventObjectProperties(eventObject) {
                   // eventObject.target is the DOM element that triggered
                   // the element

                   // Get properties of the element, which has triggered
                   // the event
                  var message = "<u>" + eventObject.type + "</u> event is triggered on <u>" +
                                          eventObject.target.nodeName.toLowerCase()  +
                                           "</u> with the id: <u>" +
                                             $(eventObject.target).attr("id") + "</u><br>";

                 message += "Key/Button was pressed: <u>" + eventObject.which + "</u><br>";

                 message += "(x, y) coordinate of the mouse when event is triggered: (<u>" +
                                      eventObject.pageX + "</u>, <u>" + eventObject.pageY + "</u>)";

                 $("#message").html(message);
              }

              $(function() {
                    $("img").on("mouseenter", function(eventObject) {
                            getEventObjectProperties(eventObject);
                    });

                   $("input").on("focus", function(eventObject) {
                            getEventObjectProperties(eventObject);
                   });

                  $("button").on("click", function(eventObject) {
                            getEventObjectProperties(eventObject);
                  });
              });
      </script>
</head>
<body>
     <img id="imgSample" src="images/butterfly3.png"><br>

     Enter Image Title: <input id="txtImageTitle" type="text"><br><br>

     <button id="btnSubmit">Submit</button>

     <button id="btnCancel">Cancel</button><br><br>

     <div id="message"></div>
</body>
</html>
How It Works
In this code, the eventObject is passed to the event handler as an argument. The eventObject contains properties of the element that triggered the event. eventObject.target is the DOM element that triggered the event. eventObject.target.propertyName can be used to get the property of the DOM element, $(eventObject.target). jQueryMethodName() can be used to execute any of the jQuery methods that are valid for a jQuery object. For example, in the previous code:
- eventObject.target.nodeName is used to get the tag name of the HTML element.
- $(eventObject.target).attr(attributeName) is used to get the specified attribute’s value of the HTML element.
- eventObject.type contains the type of event (such as click, change, focus, and so on).
- eventObject.which contains the key or mouse button used to initiate the event.
- eventObject.pageX contains the x-coordinate of the mouse position.
- eventObject.pageY contains the y-coordinate of the mouse position. The (0,0) coordinate is the top-left edge of the page.
Figure 7-6 displays the properties of eventObject when the mouse cursor is moved over the image.
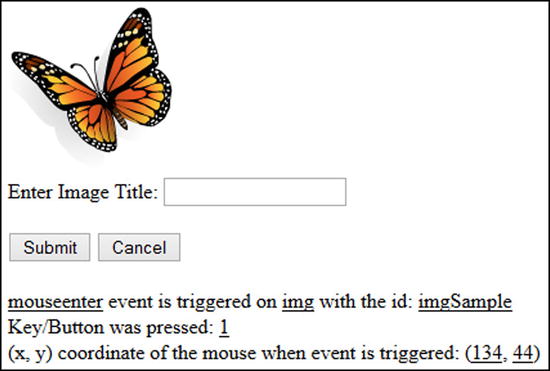
Figure 7-6. Displays event object properties when the image’s mouseenter event is triggered
Figure 7-7 displays the properties of the eventObject when the textbox gets the focus. This event doesn’t trigger a keyboard or mouse event, depending on which mouse and keyboard related properties are 0 or undefined.
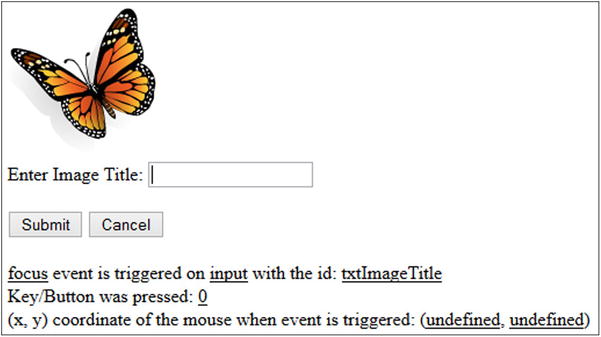
Figure 7-7. Displays event object properties when the textbox focus event is triggered
Figure 7-8 displays the properties of the eventObject when the button is clicked.
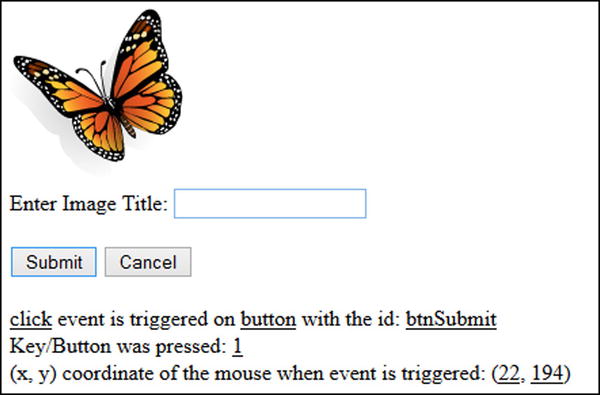
Figure 7-8. Displays event object properties when the button’s click event is triggered
7-5. Passing Custom Data to the Event Handler
Problem
You want to pass custom data, based on some logic, to the event handler.
Solution
The event object has many properties that can help to implement processing logic. In certain cases, if you want to pass more information to the event handler through the event object, you can do it at the time of event binding.
The following jQuery syntax is used to send custom data to the event handler:
$(selector).on("eventName",
{"dataKey1" : "dataValue1", "dataKey2" : "dataValue2", ...},
 function(eventObj) { ... })
or:
$(selector).on("eventName",
{"dataKey1" : "dataValue1", "dataKey2" : "dataValue2", ...},
 namedFunctionName)
In order to pass custom data to the event handler, you can pass a map object containing a key/value pair as an argument to the on() method. The key contains the variable name and the value contains the variable’s value. Listing 7-6 demonstrates the use of the on() method to pass custom data to the event handler.
Listing 7-6. Using the on() method to pass custom data to the event handler
<!DOCTYPE html>
<html lang="en">
<head>
     <meta charset="utf-8">
     <script src="scripts/jquery-2.1.0.min.js"></script>
     <script>
              var processFunc = function(eventObj) {
                                          var message = "User Role: " + eventObj.data.userRole +
                                                                    "<br>Department: " + eventObj.data.department;

                                          $("#message").html(message);
               }

                $(function() {
                         $("#btnSubmit").on("click", {"userRole" : "Admin", "department":"IT"}, processFunc);
                         $("#txtName").on("change", {"userRole" : "Certifier", "department":"Sales"}, processFunc);
                 });
     </script>
</head>
<body>
     Name: <input id="txtName" type="text"><br><br>

     <button id="btnSubmit">Submit</button>

     <div id="message"></div>
</body>
</html>
How It Works
In the document ready function, the event handler processFunc() is registered to the click event of the Submit button and the same event handler is attached to the name textbox. If you want to pass custom data to the event handler so that it can perform some action based on the custom data, you can set and pass the map object as a second argument in the on() method. The map object contains set of key/value pairs, where key is the variable name and value is the value of the variable. In the event handler, custom data can be accessed by using eventObj.data.variableName. This example passes the userRole and department variable names along with their values to the event handler using the map object as a second argument in the on() method. In the event handler, the value of these variables can be accessed by using eventObj.data.userRole and eventObj.data.department. Figure 7-9 displays the custom data value from the event handler when the value is changed in the name textbox and the user tabs out of the field.
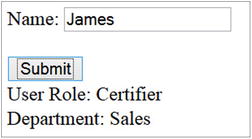
Figure 7-9. Displays custom data when the value of the name textbox is changed
Figure 7-10 displays the custom data value from the event handler when the Submit button is clicked.
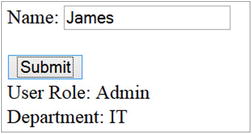
Figure 7-10. Displays the custom data when the Submit button is clicked
Problem
You want to understand event propagation, also called event bubbling.
Solution
When an event is triggered on an element, its event handler is executed. Once the execution is complete, the same event is triggered on the element’s parent and then the parent’s event handler is executed; it keeps on propagating to the subsequent element’s parent until the root element is reached in the DOM. Such upward propagation of an event in the DOM hierarchy is called event bubbling. Listing 7-7 demonstrates the concept of event propagation.
Listing 7-7. Event propagation in the DOM hierarchy
<!DOCTYPE html>
<html lang="en">
<head>
     <meta charset="utf-8">
     <script src="scripts/jquery-2.1.0.min.js"></script>
     <script>
              $(function() {
                   $("a").click( function(eventObj) {
                            $("#message").append("Executing anchor (A) link click event handler ...<br>");
                            eventObj.preventDefault();
                   });

                   $("li").click( function() {
                            $("#message").append("Executing LI click event handler...<br>");
                   });

                   $("ul").click( function() {
                            $("#message").append("Executing UL event handler...<br>");
                   });

                   $("body").click( function() {
                            $("#message").append("Executing BODY event handler...<br>");
                   });

                  $("html").click( function() {
                            $("#message").append("Executing HTML event handler...<br>");
                   });


                   $(document).click( function() {
                            $("#message").append("Executing DOCUMENT event handler...<br>");
                   });

                   $(window).click( function() {
                            $("#message").append("Executing WINDOW (Browser) event handler...<br>");
                   });
              });
     </script>
</head>

<body>
   <div><strong>Departments:</strong></div>
    <ul id="listDepartments">
        <li><a href="department.htm"><strong>Sales</strong></a></li>
              <li>Marketing</li>
              <li>Technology</li>
              <li>Customer Support</li>
    </ul>

     <div id="message"></div>
</body>
</html>
How It Works
The code in the document ready function provides separate click event handlers for the following elements: <A>, <LI>, <UL>, <BODY>, <HTML>, document, and window (the browser). It does so by using the following code format:
$(selector).click( function() {
              $("#message").append("Executing selectorElement event handler...<br>");
     });
The purpose of these handlers is to display a message when an element’s click event handler is executed. When anchor link Sales is clicked, the click event handler of the tag <A> is executed. The event handler of the following elements are then executed in the order of child to parent propagation: <LI>, <UL>, <BODY>, <HTML>, document, and window (the browser). This event propagation follows the path from the initiating element to the root level of the DOM tree. Figure 7-11 displays the messages displayed when the Sales link is clicked.
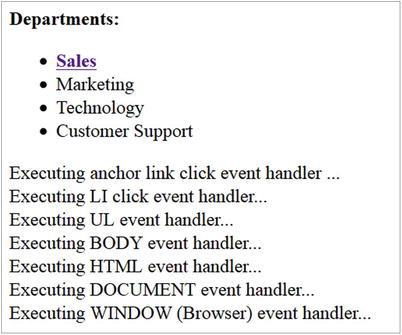
Figure 7-11. Displays the event handler execution messages due to the event propagation
If you want to stop this event propagation at any point in any of the elements’ event handlers, you can use the event object’s stopPropagation() method. The following jQuery syntax is used to stop event propagation:
$(selector).on( "eventName", function(eventObj) {eventObj. stopPropagation()})
7-7. Event Delegation
You want to bind the event handler of an event not only to the existing elements but also to the elements that will be created in future.
Solution
When an event handler is bound to an event of an element type, it will be valid only for the existing elements in the DOM. If you add a new element and the event is then triggered, the specified event handler won’t be executed. For example, $("li").on("click", function() { .... }), binds the event handler for the click event to all the existing "li" elements. If you add a new "li" element (for example, by using .append("<li>Production Support</li>")), the event handler won’t be attached to this new element. One solution is to reattach/re-register the event handler. This is not an ideal solution. By using the concept of event propagation, you can delegate the event to the element’s (li) parent, which is "ul", by binding the event handler to "ul" instead of "li". When the click event is triggered on the "li" element, the event is propagated to "ul" and the registered event handler is executed. There are two advantages of this approach—the event handler is not bound to individual "li" elements and the system doesn’t have to listen to the event on these many elements. This will improve the performance. The other advantage is that if you add a new "li" element at runtime and the click event is triggered, the event handler will be executed. If you want the event handler to be executed only if "li" is clicked and not any other child element of the "ul" element, then you can specify "li" as a second parameter of the on() method. The following jQuery syntax is used to register event handler using the concept of event delegation:
$(selector).on("eventName", "childSelector", function() { .... })
The second parameter of the on() method tells the event handling process to check if the triggering element matches the "childSelector". Only if it matches will the event handler be executed. Listing 7-8 shows a new element that’s added and an event is triggered, but the event handler won’t be executed.
Listing 7-8. Using the on() method to bind the event handler at the individual elements level
<!DOCTYPE html>
<html lang="en">
<head>
    <meta charset="utf-8">
    <script src="scripts/jquery-2.1.0.min.js"></script>
    <script>
         $(function() {
              $("li").on("click", function(eventObj) {
                   alert("Clicked '" + $(eventObj.target).text() + "'");
              });

              $("button").on("click", function() {
                   $("ul").append("<li>Production Support</li>");
              });
          });
    </script>
</head>
<body>
   <div><strong>Departments:</strong></div>
    <ul id="listDepartments">
         <li>Sales</li>
              <li>Marketing</li>
              <li>Technology</li>
              <li>Customer Support</li>
    </ul><br>

    <button id="btnCreate">Create New Department</button>
</body>
</html>
How It Works
In the document ready function, there is a click event handler for the <LI> element:
$("li").on("click", function(eventObj) {
     alert("Clicked " + $(eventObj.target).text());
});
When the "li" element (the department name) is clicked, a pop-up message is displayed showing the department’s name.
Figure 7-12 displays the pop-up message when a department’s name is clicked.
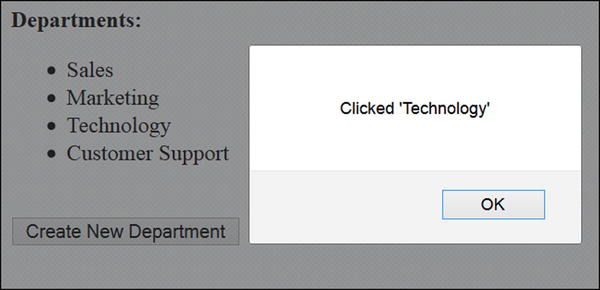
Figure 7-12. This pop-up message is displayed with the clicked department name
There is an event handler for the button’s click event. When the button is clicked, a new department called Production Support is added to the list of departments. Figure 7-13 displays the new department that’s been added to the list since the Create New Department button was clicked.
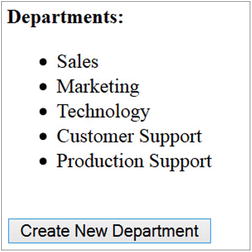
Figure 7-13. Displays the new department called Production Support
After creating the new department, if it is clicked, the "li" click event handler is not executed and no pop-up message will be displayed. To resolve this issue, you need to replace the following code line:
$("li").on("click", function(eventObj) { ....
with this one:
$("ul").on("click", "li", function(eventObj) { ...
Now you are binding the event handler to the element "ul" (the parent of the "li" elements) click event. When the click event is triggered on "ul" or any of its children, the event handling process will check if the triggering element is "li" and if it is "li" only then is event handler executed. If you rerun the test by clicking the Create New Department button and then clicking Production Support, you will see that the click event handler is executed and a pop-up message is displayed as Clicked ‘Production Support’.
7-8. Triggering an Event Programmatically
Problem
You want to trigger an event programmatically, and it’s normally triggered by user interaction.
Solution
The following jQuery syntax is used to trigger an event:
$(selector).trigger("eventName")
The trigger() method executes the event handler of the specified eventName for the selected elements specified by the selector. Listing 7-9 demonstrates the use of the trigger() method to execute the event handler of the selected elements.
Listing 7-9. Using the trigger() method to execute the event handler of the specified event
<!DOCTYPE html>
<html lang="en">
<head>
      <meta charset="utf-8">
      <script src="scripts/jquery-2.1.0.min.js"></script>
      <script>
              $(function() {
                   $("#txtName").on("change", function() {
                            $("#message").html("Name is changed to: " + $("#txtName").val());
                   });

                  $("#btnChangeName").click(function() {
                            $("#txtName").val("John Smith");
                  });

                 $("#btnChangeNameTriggerEvent").click(function() {
                            $("#txtName").val("Jane Smith");
                            $("#txtName").trigger("change");
                 });
             });
      </script>
</head>

<body>
     Name: <input id="txtName" type="text"><br><br>

    <button id="btnChangeName">Change Name</button>
   <button id="btnChangeNameTriggerEvent">Change Name & Trigger Event</button><br><br>

     <div id="message"></div>
</body>

</html>
How It Works
In the document ready function, the event handler is registered for the change event of the textbox by using the following code:
$("#txtName").on("change", function() {
      $("#message").html("Name is changed to: " + $("#txtName").val());
});
When a user changes a value in the textbox and then tabs out of the field, the change event handler is executed. It displays the value entered in the textbox (txtName). Figure 7-14 displays the page when the name value is changed in the txtName element.
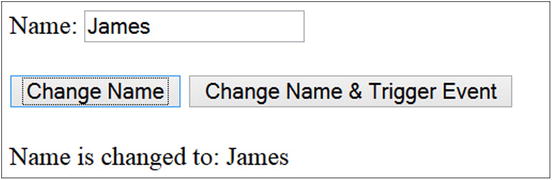
Figure 7-14. Displays the result of the change event handler execution
Another event handler is attached to the click event of the Change Name button using the following code:
$("#btnChangeName").click(function() {
              $("#txtName").val("John Smith");
    });
When the user clicks the Change Name button, this event handler changes the value of the textbox txtName. Even though the value of the txtName has changed, its change event handler is not executed because the user did not change the value manually. Figure 7-15 displays the page when the name value is changed programmatically in the txtName element.
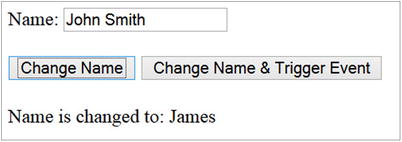
Figure 7-15. Displays the result of click event handler of the Change Name button
To force an event, you can use the trigger() method. To demonstrate a solution to the previous problem, another event handler is registered in the document ready function from the previous code:
$("#btnChangeNameTriggerEvent").click(function() {
           $("#txtName").val("Jane Smith");
           $("#txtName").trigger("change");
});
When the user clicks the Change Name & Trigger Event button, this event handler changes the value of the textbox txtName and triggers the change event of the txtName element by using the trigger() method, which will in turn execute the textbox change event handler. Figure 7-16 displays the page when the name value is changed programmatically in the txtName element and the txtName’s change event is triggered.
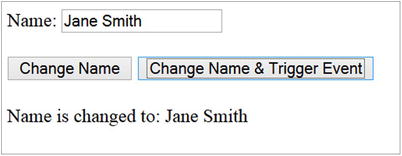
Figure 7-16. Displays the result of click event handler of Change Name & Trigger Event button.
Another example is triggering submit form event by using $("#formId").trigger("submit").
In place of the trigger() method, you can also use the triggerHandler() method, which basically does the same thing—it triggers a specified event on the selected element. It does so with the following differences: triggerHandler() doesn’t initiate the default behavior of the event; the event is triggered only on the first element of the set of selected elements; event propagation doesn’t happen; and it returns the value returned by the event handler.
7-9. Restricting Event Handler Execution
You want to execute an event handler only once. This is useful when you want to perform a task only once, such as when initializing variables or caching static data.
Solution
The following jQuery syntax is used to specify event handler so that it is executed only once:
$(selector).one("eventName", function() { .... })
During the event handler execution, if you want to, you can bind another event handler for the same event. Listing 7-10 demonstrates using the one() method to ensure that an event handler is executed only once.
Listing 7-10. Using the one() method to bind an event handler
<!DOCTYPE html>
<html lang="en">
<head>
    <meta charset="utf-8">
    <script src="scripts/jquery-2.1.0.min.js"></script>
    <script>
         $(function() {
             $("#btnSubmit").one("click",
                  function() {
                      // Placeholder for getting static data to cahce it.
                     alert("Retrieved static data.");
                  });
        });
     </script>
</head>

<body>
      <button id="btnSubmit">Submit</button>
</body>
</html>
How It Works
In the document ready function, the event handler is registered for the click event of the button using the following code:
$("#btnSubmit").one("click",
     function() {
    // Placeholder for getting static data to cahce it.
    alert("Retrieved static data.");
 });
In the event handler, you can perform one-time tasks like initializing variables or getting static data. In this case, an alert message is displayed. Since the event handler is registered using the one() method, when a user clicks the button again, the event handler won’t be executed. Figure 7-17 displays the page when the Submit button is clicked. If the Submit button is clicked a second time, no pop-up message will be displayed.
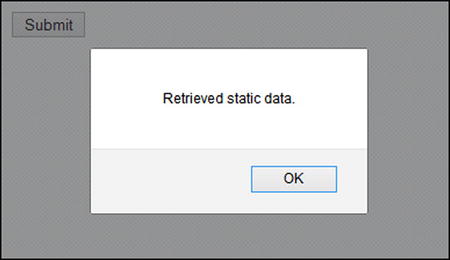
Figure 7-17. Displays this pop-up message only once, no matter how many times the Submit button is clicked
7-10. Removing the Event Handler
Problem
You want to remove the registered event handler.
Solution
The following jQuery syntax is used to remove any event handlers that are registered using the on() method:
$(selector).off( "eventName1 eventName2 ... ")
If no argument is specified for the off() method, all the event handlers will be removed for all the selected elements. Listing 7-11 demonstrates the use of the off() method to remove event handler(s) for the specified event(s) of all the selected elements.
Listing 7-11. Using the off() method to remove an event handler
<!DOCTYPE html>
<html lang="en">
<head>
    <meta charset="utf-8">
    <script src="scripts/jquery-2.1.0.min.js"></script>
    <script>
        $(function() {
              $("#btnSubmit").on("click",
                     function() {
                          alert("Submit button is clicked.");
               });

              $("#btnRemove").on("click",
                    function() {
                        $("#btnSubmit").off("click");
              });
        });
    </script>
</head>

<body>
     <button id="btnSubmit">Submit</button>
     <button id="btnRemove">Remove Event Handler</button>
</body>
</html>
How It Works
In the document ready function, the event handler is registered for the Submit button’s click event using the following code:
$("#btnSubmit").on("click",
           function() {
           alert("Submit button is clicked.");
 });
When the Submit button is clicked, a pop-up message is displayed with the "Submit button is clicked." message.
An event handler is also registered for the Remove Event Handler button’s click event using the following code:
$("#btnRemove").on("click",
                    function() {
                        $("#btnSubmit").off("click");
              });
When the Remove Event Handler button is clicked, it executes the command $("#btnSubmit").off("click"), which removes the click event handler for the Submit button. If the user clicks the Submit button again, no pop-up message will be displayed because its click event handler is already removed. Figure 7-18 displays the page when the Submit button is clicked. If the Submit button is clicked again after clicking the Remove Event Handler button, no pop-up message will be displayed.
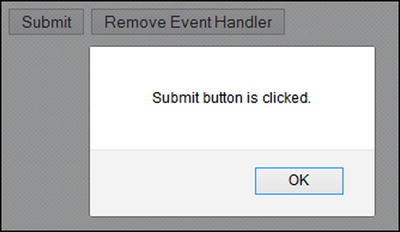
Figure 7-18. Displays this pop-up message when the Submit button is clicked
Summary
This chapter covered topics about event handlers, including passing custom data to event handlers, default events, event propagation (bubbling), triggering events, and events delegation. You learned to:
- Bind event handlers using on(), one(), and convenience methods.
- Access the event object’s properties.
- Prevent a default event action by using the event object’s preventDefault() method.
- Trigger events using the trigger() method.
- Delegate an event using the on() method.