
![]()
Introduction
jQuery is a multi-browser, lightweight, and extensible open source JavaScript library that can be used to simplify client-side and client-to-server communication scripting. It simplifies coding by replacing many lines of JavaScript code with fewer lines by using jQuery built-in methods. Some of the main features of jQuery include:
- Dynamic HTML creation and manipulation
- HTML events handling
- Effects and animations
- Client to server communication
In addition to core jQuery, this book also covers jQuery UI and jQueryMobile, which are built on the core.
As of writing of this book, the latest version of jQuery is 2.1.0. This version has the same API as the previous version 1.x, but it isn’t supported on older browsers like Internet Explorer 8 and older. The main reason for this release is to eliminate the code required to support older browsers. This has made smaller jQuery files possible and hence produced an improvement in performance. If your user base is still using Internet Explorer 8 or older, you should use the latest version of the jQuery 1.x series.
jQuery can be downloaded from http://jquery.com/download/.
jQuery 2 is compatible with jQuery 1.9. All features of jQuery 1.9 have been included in jQuery 2.
1-2. Migration Plan
If you are using a version older than jQuery 1.9, upgrade it to jQuery 1.9+ first by using the jQuery migration plug-in. As of the writing of this book, the latest version of the jQuery 1 series is 1.10.2 and latest version of the jQuery 2 series is 2.1.0.
You can use migration plug-in by replacing your current reference to jQuery library by the following:
<script src="http://code.jquery.com/jquery-1.10.2.js"></script>
<script src="http://code.jquery.com/jquery-migrate-1.2.1.js"></script>
If you want to use a local copy of the jQuery and the jQuery migration plug-in, download it from the following locations:
jQuery 1.10.2 (Development version): http://code.jquery.com/jquery-1.10.2.js
jQuery Migrate 1.2.1: http://code.jquery.com/jquery-migrate-1.2.1.js
Use the following path to use them (assuming you have saved the downloaded files under the scripts folder under your website’s root folder).
<script src="scripts/jquery-1.10.2.js"></script>
<script src="scripts/jquery-migrate-1.2.1.js"></script>
This migration tool will help you identify features/APIs that are deprecated in older versions of jQuery and removed in jQuery 1.9+. The development version of the migration plug-in will display a warning in the broswer’s console. Be sure to use browsers that support console interface. The browser console is an interface where developers and users can view information like network requests, JavaScript code, CSS, warnings, errors, and messages logged by JavaScript. Newer versions of Internet Explorer, Firefox, Chrome, Safari, and Opera have built-in consoles. Refer to Appendix B to learn about how to open the web console in different browsers.
1-3. Objects–Basic Concept
Objects are the key to understanding object-oriented technology. Each object has a state (attributes or properties) and a behavior (methods). In object-oriented terms, objects don’t have to be seen or touched. Some examples of objects are cars, bank accounts, and rectangles. A car has attributes (or properties), such as the manufacturer, model, category, color, and so on, and it has methods, such as start the car, stop the car, put it in park, apply the hand brake, and so on. A bank account has attributes, such as account holder’s name, account number, account type, current balance. It has methods such as withdraw money, deposit money, transfer money, and so on. A rectangle has attributes such as length and width and has methods such as determine its area, parameter, and so on.
A class is a general specification from which individual objects are created (instantiated).
Table 1-1 displays examples of classes and objects.
Table 1-1. Examples of classes and objects
|
Class |
Object | |
|---|---|---|
|
Class Name: Car |
Object Name: myCar | |
|
Attributes |
Attributes |
Value |
|
Manufacturer |
Manufacturer |
Lexus |
|
Model |
Model |
ES 350 |
|
Category |
Category |
Sedan |
|
Color |
Color |
White |
|
Object Name: rentalCar | ||
|
Attributes |
Value | |
|
Manufacturer |
Chverlot | |
|
Model |
Impala | |
|
Category |
Sedan | |
|
Color |
Blue | |
|
Class Name: Account |
Object Name: customer1Account | |
|
Attributes |
Attributes |
Value |
|
AccountHolderName |
AccountHolderName |
John Smith |
|
AccountNumber |
AccountNumber |
7823712924 |
|
AccountType |
AccountType |
Checking |
|
CurrentBalance |
CurrentBalance |
$1,560.78 |
|
Object Name: customer2Account | ||
|
Attributes |
Value | |
|
AccountHolderName |
Jane Smith | |
|
AccountNumber |
89127312 | |
|
AccountType |
Saving | |
|
CurrentBalance |
$14,590.80 | |
1-4. Introduction to JavaScript
JavaScript is an object-oriented scripting language that is commonly used to create interactive effects and to dynamically create web page content. JavaScript language is case sensitive. JavaScript code is executed within the web browser, on the client side. It is used to retrieve and manipulate web page data objects (DOM) for interactivity and dynamic creation of presentation.
JavaScript code can be included on the same page as the HTML code or in a separate file, which is then included in the HTML file.
The following is the syntax for the internal JavaScript code:
<script>
// JavaScript Code
</script>
The following is the syntax for including external JavaScript code:
<script src="myJavaScript.js"></script>
Note: In myJavaScript.js, the <script> and </script> tags are not needed.
1-4-1. Data Types
JavaScript has dynamic types. The DataType of the variable is based on its value. Same variables can be used as different types. If no value is assigned to the variable, the default value of null is assigned.
- Strings – Used to hold texts and are declared as follows:
Syntax: var <variableName> = "<value>";Example: var firstName = "John"; - Numbers – Used to hold numbers (integers and decimals):
Syntax: var <variableName> = "<value>";Example: var monthlySalary = 5450; - Booleans – Used to hold two values—true or false. Booleans are used to check for certain conditions:
Syntax: var <variableName> = "<value>";Example: var isContractor = true; - Arrays – Used to hold one or more than one value. They can be of the same data type of different types:
Syntax: var <variableName> = new Array();Example: Arrays can be declared and set using any of the following three methods:
var departments = new Array();
     departments[0]= "Sales";
     departments[1]= "Marketing";
     departments[2]= "Technology";

     var departments = new Array("Sales", "Marketing", "Technology");
     var departments = ["Sales", "Marketing", "Technology"];
It is not necessary that all the elements of an array are of the same data type.
The following is the syntax to access elements in an array –
arrayName[indexNumber];
where, indexNumber is the element number in the array and it is 0 based.
For example, document.write(departments[2]) displays “Technology”.
- Objects – A variable can be defined as a built-in object (like Date, Image, Array, and String) or as a custom (user-defined) object.
Syntax: var <variableName> = new ObjectName();Examples:
- var syst emDate = new Date(); // for current date
- // parameters- yr_num, mo_num, day_num
// optional - hr_num, min_num, sec_num, ms_numvar dateOfBirth – new Date(1972, 11, 30); - // parameter – dateString
var joiningDate = new Date(“10/10/2004"); - var logoImage = new Image(“images/logo.jpg");
- var firstName = new String(“John");
- var employee = {firstName: “John", lastName: “Smith", monthlySalary: 5450};
An example of an array of objects:
   var employees = new Array(
           {firstName:"John", lastName:"Smith", monthlySalary:5000},
           {firstName:"Jane", lastName:"Smith", monthlySalary:5450});
To access the firstName of the employee object, you can use employee.firstName.
1-4-2. Commonly Used JavaScript Objects and Events
When a DOM element is created using a tag in HTML code, a JavaScript object is created. This object’s attributes can be accessed (get) and set using JavaScript code. Alternatively, JavaScript can be used to create DOM elements. Listing 1-1 demonstrates an example of creating DOM elements.
Listing 1-1. DOM elements creation
<!DOCTYPE html>
<html lang=en>
<head>
   <title>HTML5 Anchor</title>
   <meta charset=utf-8>
</head>
<body>
   <a id="newsLink" href="http://msnbc.com">News</a>
</body>
</html>
When the code in the Listing 1-1 is executed in a browser and the user clicks on the News link, a page will be displayed from msnbc.com. Due to the line <a id="newsLink" href="http://msnbc.com">MSNBCNews</a>, a JavaScript object called Anchor is created that can be referenced and manipulated using the JavaScript code. Listing 1-2 demonstrates an example to access and set a DOM element.
Listing 1-2. Access and manipulate a DOM element
<!DOCTYPE html>
<html lang=en>
<head>
<title>HTML5 Anchor</title>
<meta charset=utf-8>
<script>
      function changeNewsLink() {
         var objAnchor = document.getElementById("newsLink");
                      alert(objAnchor.href);
                      objAnchor.href = "http://cnn.com";
      }
</script>
</head>
<body onload="changeNewsLink();">
    <a id="newsLink" href="http://msnbc.com">News</a>
</body>
</html>
Here’s a detailed explanation of this code:
- onload="changeNewsLink();"
calls the JavaScript function changeNewsLink when all the elements in the body of the HTML page are loaded (i.e., the DOM elements are created). It is advisable to call functions that access DOM elements using this method.
- var objAnchor = document.getElementById("newsLink");
looks for an element with the ID as newsLink and then reference that element by using the JavaScript variable objAnchor.
- alert(objAnchor.href);
displays the current href value of the Anchor object.
- objAnchor.href = "http://cnn.com";
changes the href attribute of the Anchor object to http://cnn.com. Now, when the user clicks the News link on the web page, a page from cnn.com will be displayed instead.
The following is the list of commonly used JavaScript statements:
- for. This is used to create a loop to iterate through a list of elements or perform repetitive operations for a range of values.
Syntax:
for (var i=initialValue; condition while true; incrementOrDecrementTheCount)
Listing 1-3 demonstrates an example to use for statement to display multiplication table of number 4.
Listing 1-3. Using for statement to display multiplication table
<!DOCTYPE html>
<html lang=en>
<head>
<title>Multiplication Table</title>
<meta charset=utf-8>
<script>
    for (var i=1; i <= 10; i++) {
      document.write(4 + " x " + i + " = " + (4*i) +"<br>");
    }
</script>
</head>
<body>
</body>
</html>
Listing 1-4 demonstrates an example to use for statement to iterate through an array to objects and display FirstName.
Listing 1-4. Using for statement to iterate through an array
<!DOCTYPE html>
<html lang=en>
<head>
<title>Iterate Through Objects</title>
<meta charset=utf-8>
<script>
var employees = new Array(
   {"FirstName":"John", "LastName":"Smith", "MonthlySalary": 5000},
   {"FirstName":"Jane", "LastName":"Smith", "MonthlySalary":5450});

   for (var i=0; i < employees.length; i++) {
      document.write(employees[i].FirstName +"<br>");
   }
</script>
</head>
<body>
</body>
</html>
In the above code, the short form of this line
for (var i=0; i < employees.length; i++)
can be written as
for (var i in employees)
- if … else ... This is used to execute lines of code (logic) when certain conditions are true and execute different logic when conditions are not true.
Syntax:

      if (condition is true) {
      // JavaScript Code
      } else {
      // JavaScript Code
}
Listing 1-5 demonstrates an example to display the names and bonuses for employees by using a 5% bonus for employees with a salary of $5,000 or less and a 3% bonus for others.
Listing 1-5. Using if else statement
<!DOCTYPE html>
<html lang=en>
<head>
   <title>Iterate Through Objects</title>
   <meta charset=utf-8>
   <script>
      var employees = new Array(
{"FirstName":"John", "LastName":"Smith", "MonthlySalary": 5000},
{"FirstName":"Jane", "LastName":"Smith", "MonthlySalary":5450});

   for (var i in employees) {
      var bonusPercentage;
      if (employees[i].MonthlySalary <= 5000) {
         bonusPercentage = 0.05;
      } else {
         bonusPercentage = 0.03;
      }
      document.write(employees[i].FirstName + " " +
          (employees[i].MonthlySalary*bonusPercentage) + "<br>");
   }
   </script>
</head>

<body>
</body>
</html>
- continue statement is used to go to the next iteration of the loop without performing subsequent statements in the loop block.
- break statement is used to break the loop to exit out of the loop.
The following is a list of commonly used JavaScript objects:
- Anchor
- Array
- Boolean
- Button
- Checkbox
- Date
- Document
- Form
- Image
- String
- Window
- Location
The table 1-2 lists the commonly used DOM events that occur when users perform an action. For example, when a user clicks a button on a web page, the onclick() event is triggered. If there is any function associated with the onclick event for the button, that function is executed as well.
Table 1-2. Commonly used DOM events
|
Event Type |
Event Name |
Description |
|---|---|---|
|
Mouse Event |
onclick |
When the user clicks on an element. |
|
Mouse Event |
ondblclick |
When the user clicks on an element. |
|
Form Event |
onblur |
When the user clicks some other form element or tab on the form element. |
|
Form Event |
onchange |
When a value of a form element is changed. |
|
Form Event |
onfocus |
When a form element gets focus. |
|
Form Event |
onsubmit |
When a form is submitted, that is, when a submit button is clicked in the form. |
|
Body Event |
onload |
After a page is loaded and all DOM elements are created. |
Developers can specify which JavaScript statement or function to call when an event occurs. Listing 1-6 demonstrates an example to display a message when user clicks the button.
Listing 1-6. Event handling
<!DOCTYPE html>
<html lang=en>
<head>
<title>Events</title>
<meta charset=utf-8>
<script>
    function displayName() {
      alert(frmRegister.txtName.value);
    }
</script>
</head>
<body>
<form id="frmRegister">
Name: <input type="text" name="txtName"><br>
   <input type="button" value="Register" onclick="displayName();"><br>
</form>
</body>
</html>
When the user clicks the Register button, the onclick event occurs, which calls the displayName() JavaScript function. The displayName function gets the value entered in the textbox, which is txtName, and displays it as a popup message.
1-5. About XML
XML (eXtensible Markup Language) is designed to carry and store data. It is a representation of data in a structured and pre-defined format.
Syntax: <xmlTag attributeName=“attributeValue">
           elementValue
        </xmlTag>
elementValue can be a literal value or another XML node.
An XML tag name doesn’t have any space in it. It can have zero or more attribute names and attributeValue pairs. It can have only one value. It can be nested. The start and end of a data element are represented by openingTag and closingTag, respectively. Refer to Listing 1-7 for XML representation of employee information.
Listing 1-7. XML representation of employee information
<Employees>
    <Employee>
        <Name>John Doe</Name>
        <Department>Sales</Department>
        <DateOfJoining>09/12/2001</DateOfJoining>
        <Salary>75000</Salary>
    </Employe>
    <Employee>
        <Name>Jane Doe</Name>
        <Department>Technology</Department>
        <DateOfJoining>09/12/1998</DateOfJoining>
        <Salary>85000</Salary>
    </Employe>
</Employees>
Data elements enclosed in <> are called tags. Each tag <tagName> has a closing tag, which is specified as </tagName>. For example, the <Employee>’s closing tag is </Employee>.
1-6. About JSON
JSON (JavaScript Object Notation) is a lightweight data-interchange format. A JSON object is represented as {"objectName":objectValue}. An array is represented as [object,object,...].
For example, Employees information can be represented as {"Employees":[]} where Employee is an object and Employees is an array of Employee objects. This example has two object types: Employees and Employee.
In JavaScript, the JSON string can be converted to a JavaScript object and each element can be accessed using the code segment specified in Listing 1-8.
Listing 1-8. JSON representation of employee information
<script>
   var jsonString = '{"Employees":[{"Name":"John", "Department":"Sales"},
      {"Name":"Jane", "Department":"Technology"}]}';
   var jsonObj = jQuery.parseJSON(jsonString);
   var employeesObj = jsonObj.Employees;
   for (var i=0; i<employeesObj.length; i++) {
      var employeeObj = employeesObj[i];
      var employeeName = employeeObj.Name;
      alert(i + ": " + employeeName);
   }
</script>
1-7. Introduction to Web Services
Web services are application components that can be used by other applications over HTTP or HTTPS. In a typical application (desktop and web applications), their functional components are defined in the same source code or in the same package or externally packaged software (like DLL and JAR) located on the same machine. In the case of web services, the functions provider and consumer are usually on separate servers. The web service provider and consumers don’t have to be written using same language and be running on the same type of operating system. This is one of the main advantages of using web services—it operates under heterogeneous environments.
Here’s an example of a web service specification:
- Web Service – WeatherService
- Function / Operation – getCurrentTemperature()
- Input: Zip Code
- Result: Temperature in Celsius
Figure 1-1 dispays web service request and response between the consumer and the provider.
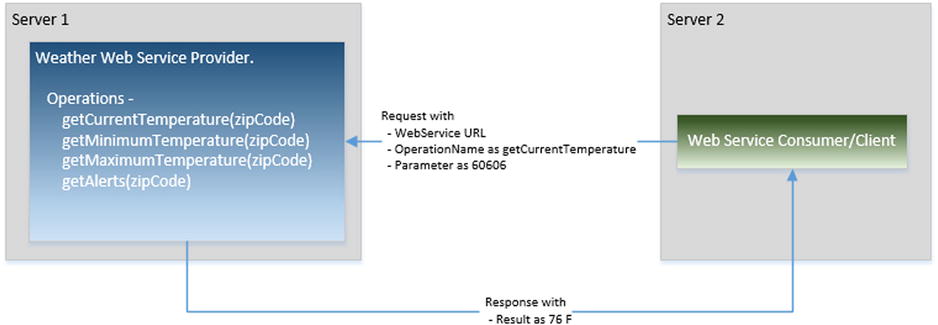
Figure 1-1. Web Service request and response
The acronym SOAP stands for Simple Object Access Protocol. It is an XML-based protocol used to consume web services. A protocol is a contract between the provider and consumer for the specification of the format of requests and responses between them. Details of services (the operations) provided by the web services are defined (by the provider) and accessed (by the users) using the Web Services Description Language (WSDL), which is in XML format. WSDL has following four main sections—message, portType, binding, and service.
Developers don’t need to code each element of the SOAP message. There are many libraries, utilities, and plug-ins available that can take an object and build the SOAP message request. Upon receiving the response, they can parse the SOAP message and build the object, which can then be used in the program. Listing 1-9 shows an example of a SOAP message request.
Listing 1-9. SOAP message request
<?xml version="1.0"?>
<soap:Envelope xmlns:soap="http://www.w3.org/2003/05/soap-envelope">
<soap:Header>
</soap:Header>
<soap:Body>
    <m:GetCurrentTemperatureRequest xmlns:m="http://www.myWeather.org/weather">
      <m:ZipCode>60606</m:ZipCode>
    </m: GetCurrentTemperatureRequest>
</soap:Body>
</soap:Envelope>
Listing 1-10 shows an example of a SOAP message response.
Listing 1-10. SOAP message response
<?xml version="1.0"?>
<soap:Envelope xmlns:soap="http://www.w3.org/2003/05/soap-envelope">
<soap:Header>
</soap:Header>
<soap:Body>
    <m:GetCurrentTemperatureResponse xmlns:m="http://www.myWeather.org/weather">
      <m:ZipCode>60606</m:ZipCode>
      <m:CurrentTemperature>76 F</m:CurrentTemperature>
    </m: GetCurrentTemperatureResponse>
</soap:Body>
</soap:Envelope>
1-7-2. RESTful Web Services
The acronym REST stands for Representational State Transfer. It is a simpler alternative to SOAP and is gaining widespread acceptance for creating web services. It transfers XML, JSON, or both (refer to Sections 1-5 and 1-6 for XML and JSON formats). REST establishes a one-to-one mapping between four basic operations—Create, Retrieve, Update, and Delete (called CRUD) operations and HTTP methods—POST, GET, PUT and DELETE. A client can access the REST resource using the unique URI and a representation of the resource is returned by the REST web service. Unlike SOAP, REST doesn’t contain a messaging layer. SOAP uses the Web Services Description Language (WSDL) to define the web services interface, whereas REST uses the Web Application Description Language (WADL) to define the web services interface.
Consider the same example from SOAP to invoke a REST service:
http://www.myWeather.com/weather/CurrentTemperature/60606
This is not the request body—it's just the URL. This URL is sent to the server using a simpler GET request, and the HTTP reply is the raw result data in XML or JSON. Unlike with SOAP, the response is not embedded inside anything.
Here’s an example of a response in JSON format:
{"ZipCode":"60606", "Temerature":"76 F"}
1-8. About jQuery UI
jQuery UI is collection of commonly used user interface widgets that responds to user initiated events and provides prebuilt themes and easily maintainable custom themes. It is built on top of the jQuery JavaScript library.
jQueryUI can be downloaded from http://jqueryui.com/download/. Refer to the Listing 1-11 to see how to use the widgets available in the jQuery UI library.
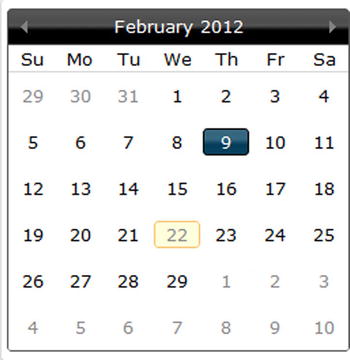
Listing 1-11. Using the jQuery UI datepicker widget
<!DOCTYPE html>
<html>
<head>
    <link rel="stylesheet" href="http://code.jquery.com/ui/1.11.1/themes/start/jquery-ui.min.css"/>
    <script src="http://code.jquery.com/jquery-2.1.0.min.js"></script>
    <script src="http://code.jquery.com/ui/1.11.1/jquery-ui.min.js"></script>
    <script>
         $(document).ready(function(){
            $("#datepicker").datepicker();
          });
    </script>
</head>
<body>
    Date: <input type="text" id="datepicker" />
</body>
</html>
Figure 1-2 displays jQuery UI datepicker widget which is created by the above code.
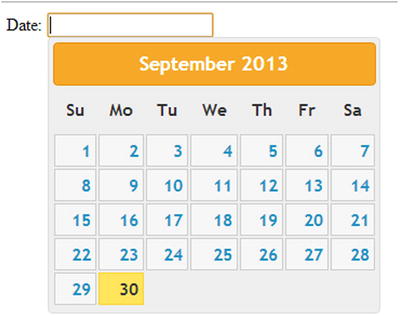
Figure 1-2. Datepicker widget
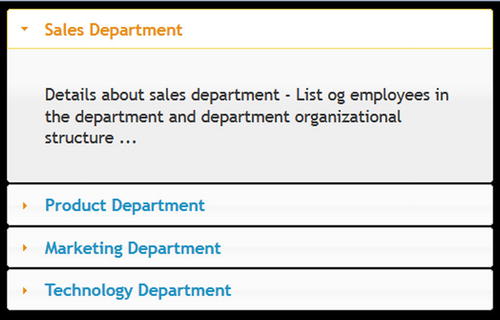
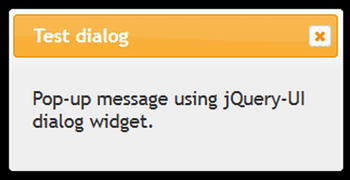
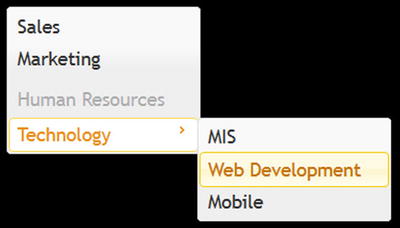
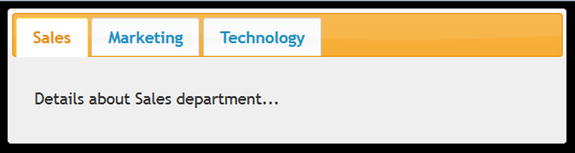
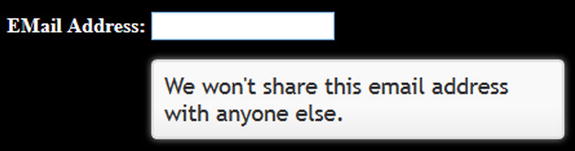
The jQuery UI is built on the jQuery JavaScript library. In order to use it, you need to download jQuery in addition to jQuery UI and include the jQuery JavaScript file before including the jQuery UI JavaScript file. Table 1-3 lists commonly used jQuery UI Widgets.
Table 1-3. Commonly used jQuery UI Widgets
|
UI Widget |
Display As |
|---|---|
|
Accordion |
|
|
Autocomplete |
|
|
Button |
Simple button:
Icons:
Checkboxes:
Radio buttons:
Toolbar:
|
|
Datepicker |
|
|
Dialog |
|
|
Menu |
|
|
Progress bar |
|
|
Slider |
|
|
Spinner |
|
|
Tabs |
|
|
Tooltip |
|


The ui-lightness theme is in for the previous examples. You’ll learn more about jQuery UI in Chapter 10.
1-9. About jQueryMobile
jQueryMobile is a JavaScript user interface library for mobile devices. It is built on the jQuery and jQuery UI JavaScript libraries. It supports responsive design, which means the user interface is adjusted depending on target platform (such as desktop browsers, smartphones, and tablets).
jQueryMobile is built on HTML5, CSS3, and the jQuery JavaScript library. In order to use it, you need to download jQuery in addition to jQueryMobile and include the jQuery .js file before including the jQueryMobile .js file.
The jQueryMobile JavaScript library can be downloaded from http://jquerymobile.com/download/. You’ll learn more about jQueryMobile in Chapter 11.
1-10. Introduction to jqWidgets
jqWidgets is a JavaScript user interface library for developing websites and applications on mobile devices. It is built on HTML5, CSS3, JavaScript, and the jQuery libraries. jQuery UI provides basic widgets, whereas jqWidgets provides advanced user interface components such as jqxGrid, jqxChart, jqxTree, and so on.
jQueryMobile is built on HTML5, CSS3, and the jQuery JavaScript library. In order to use it, you need to download jQuery in addition to jQueryMobile and include the jQuery .js file before including the jQueryMobile js file.
The jqWidgets library can be downloaded from http://www.jqwidgets.com/download/.
In order to use jqWidgets, include jQuery JavaScript and the respective jqwidgets JavaScript file in the HTML file. The table 1-4 lists commonly used widgets.
Table 1-4. Commonly used jqWidgets
|
Widget |
Display As |
|---|---|
|
jqxInput |
|
|
jqxNumberInput |
|
|
jqxCalendar |
|
|
jqxTree |
|
|
jqxMenu |
|
|
jqxGrid |
|

More details about jqWidget’s widgets are specified in Chapter 12.
1-12. About Eclipse IDE
Eclipse is an open source integrated development environment (IDE) that provides features like folder structure creation, suggestions, auto-complete, and the ability to check code in and out from commonly used source control repositories like Subversion. Eclipse installation is optional. In place of Eclipse, you can use any text editor or other IDE tools like Microsoft Visual Studio.
To download Eclipse, go to http://www.eclipse.org/downloads/. Figure 1-3 displays the latest version of eclipse available at the time of writing of this book.

Figure 1-3. Eclipse version
Check the appropriate Windows 32-Bit or Windows 64-Bit link, depending on your Windows operating system. Figure 1-4 displays the page when "Windows 64 Bit" link is clicked.
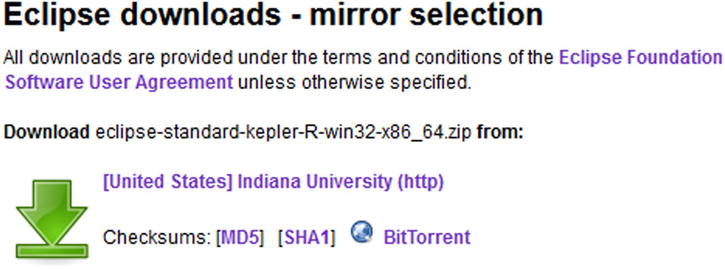
Figure 1-4. Eclipse 64 Bit downloadable file
Click on the down arrow to download and save the file. Extract the folders and files from the downloaded file called eclipse-standard-kepler-R-win32-x86_64.zip using Winzip or any other compression/decompression utility. Save the extracted files and folders under c:eclipse or any other folder you prefer. You can run eclipse by double clicking eclipse.exe.
Summary
This chapter was a high-level overview of technologies used to develop static and dynamic web and mobile applications. It introduced JavaScript, jQuery, jQueryUI, jqWidgets, and jQueryMobile, which are used to create a rich user interface. It also covered web services (SOAP and RESTful), XML, and JSON, which are used to transfer information between tiers within the same infrastructure or within infrastructures spread across the globe. The following chapters will use these technologies to understand how different sub-components of an application are designed, built, and implemented.