
Follow these steps to create an image slideshow with fancy transitions:
- We'll get started by setting up a basic HTML file and associated files and folders just like we did in Chapter 1, Designer, Meet jQuery. In the body of the HTML document, Nivo Slider simply requires a set of images inside a container
<div>.We can optionally wrap each image in a link if we want each slide of our slideshow to link off to another page or web location, but it's not required. Nivo will work fine with unlinked images as well. The
titleattribute of the<img>tag is used to display captions for the slideshow.<div id="slideshow"> <a href="http://en.wikipedia.org/wiki/Agua_Azul"><img src="images/600/AguaAzul.jpg" alt="Agua Azul" title="Agua Azul, Mexico"/></a> <a href="http://en.wikipedia.org/wiki/Burney_Falls"><img src="images/600/BurneyFalls.jpg" alt="Burney Falls" title="Burney Falls, California, USA"/></a> <a href="http://en.wikipedia.org/wiki/Venezuala"><img src="images/600/Cachoeira_do_Pacheco.jpg" alt="Cachoeira do Pacheco" title="Cachoeira do Pacheco, Venezuela"/></a> <a href="http://en.wikipedia.org/wiki/Deer_Leap_Falls"><img src="images/600/Deer_Leap_Falls.jpg" alt="Deer Leap Falls" title="Deer Leap Falls, Pennsylvania, USA"/></a> <a href="http://en.wikipedia.org/wiki/Fulmer_Falls"><img src="images/600/Fulmer_Falls.jpg" alt="Fulmer Falls" title="Fulmer Falls, Pennsylvania, USA"/></a> <a href="http://en.wikipedia.org/wiki/Hopetoun_Falls"><img src="images/600/Hopetoun_Falls.jpg" alt="Hopetoun Falls" title="Hopetoun Falls, Victoria, Australia"/></a> <a href="http://en.wikipedia.org/wiki/Ohiopyle_State_Park"><img src="images/600/Jonathans_Run.jpg" alt="Jonathan's Run" title="Jonathan's Run, Pennsylvania, USA"/></a> <a href="http://en.wikipedia.org/wiki/Kjosfossen"><img src="images/600/Kjosfossen.jpg" alt="Kjosfossen" title="Kjosfossen, Norway"/></a> <a href="http://en.wikipedia.org/wiki/Krimml_Waterfalls"><img src="images/600/KrimmlFalls.jpg" alt="Krimml Falls" title="Krimml Falls, Salzburgerland, Austria"/></a> <a href="http://en.wikipedia.org/wiki/Madhabkunda"><img src="images/600/Madhabkunda_Falls.jpg" alt="Madhabkunda Falls" title="Madhabkunda Falls, Bangladesh"/></a> <a href="http://en.wikipedia.org/wiki/Manavgat_Waterfall"><img src="images/600/Manavgat.jpg" alt="Manavgat Waterfall" title="Manavgat Waterfall, Turkey"/></a> <a href="http://en.wikipedia.org/wiki/Niagra_Falls"><img src="images/600/Niagara_Falls.jpg" alt="Niagara Falls" title="Niagara Falls, USA and Canada"/></a> <a href="http://en.wikipedia.org/wiki/British_Columbia"><img src="images/600/Nymph_Falls.jpg" alt="Nymph Falls" title="Nymph Falls, British Columbia, Canada"/></a> </div>
- Next, we'll add some CSS that will stack up the images on top of one another and set a fixed width and height for our slideshow:
#slideshow { position:relative;width:600px;height:400px; } #slideshow img { position:absolute;top:0;left:0; } - Now, head over to http://nivo.dev7studios.com/pricing/ to download the Nivo Slider plugin. You'll find the Download link in the left box that's labeled jQuery plugin.
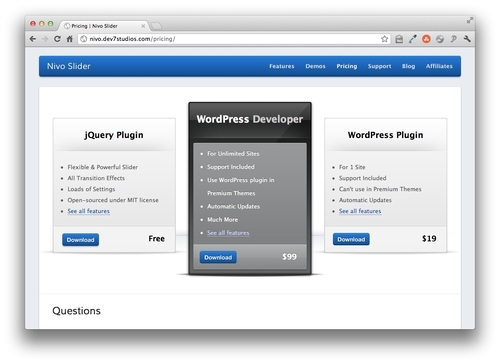
Click the Download link and save the zip file to your computer.
- Unzip the folder and take a look inside.
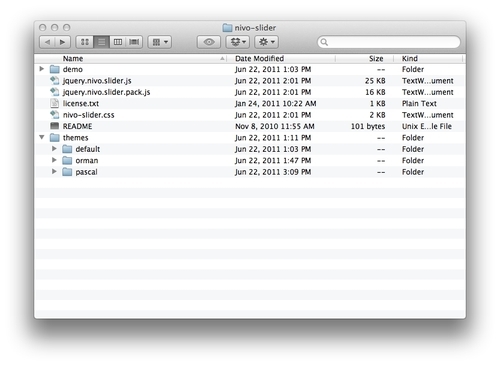
There's a demo folder that contains a sample HTML file along with images, scripts, and styles. There are two versions of the plugin—the source version and a packed and minified version. There's a copy of the license, which is shorter and simpler than you might expect, so feel free to take a look at it. There's a CSS file, and then there's a themes folder that contains three other folders: default, orman, and pascal. These are three sample themes included with the plugin. You choose one of these sample themes, create your own, or modify one of the sample themes to suit your tastes.
- Let's get the necessary files copied over and ready to use. First, copy
nivo-slider.cssto your ownstylesfolder. Select one of the themes and copy the entire folder to your ownstylesfolder as well. Then copyjquery.nivo.slider.pack.jsto your ownscriptsfolder alongside jQuery. Your setup should look like the following image: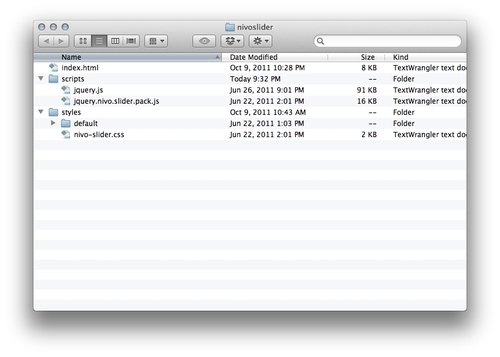
- Next, we'll get our HTML file set up to use Nivo Slider. In the
<head>section of the document, include thenivo-slider.cssfile along with theCSSfile for the theme you've selected, before yourstyles.cssfile:<head> <title>Chapter 9: Creating Slideshows</title> <link rel="stylesheet" href="styles/nivo-slider.css"/> <link rel="stylesheet" href="styles/default/default.css"/> <link rel="stylehseet" href="styles/styles.css"/> </head>
- At the bottom of the HTML document, just below the closing
</body>tag, insert the<script>tag to include the Nivo Slider plugin, between jQuery and yourscripts.jsfile:<script src="scripts/jquery.js"></script> <script src="scripts/jquery.nivo.slider.pack.js"></script> <script src="scripts/scripts.js"></script> </body>
- Open
scripts.jsand call theready()method on the document so that our slideshow will start as soon as the page is loaded in the browser window:$(document).ready(function(){ //Nivo Slider code will go here }); - Next, we'll select the container element for our slideshow:
$(document).ready(function(){ $('#slideshow'), }); - And finally, we'll call the
nivoSlider()method:$(document).ready(function(){ $('#slideshow').nivoSlider(); });Now if you view the page in the browser, you'll see our slideshow has been created. The default setting for the transition effect is to use a random different effect for each transition, so if you watch for a few minutes, you'll get a good idea of the different types of transition effects Nivo Slider includes.
You'll also notice that the value we've included as the
titleattribute for each image is being displayed as the caption for each image. - Now let's take advantage of some of the customization options available with the Nivo Slider plugin. The documentation for our options is available at http://nivo.dev7studios.com/support/jquery-plugin-usage/
You'll find a list of the available transitions at the bottom of the documentation page. My personal favorite transition is called boxRain. Let's set that up to be the only transition effect used. We'll customize the Nivo Slider plugin by passing a set of key/value pairs to the
nivoSlider()method inside a set of curly brackets:$(document).ready(function(){ $('#slideshow').nivoSlider({ effect: 'boxRain' }); }); - We can specify the number of rows and columns the box animation should include. By default, there are eight columns and four rows, but let's increase that so that the
boxRaintransition uses more (smaller) boxes:$(document).ready(function(){ $('#slideshow').nivoSlider({ effect: 'boxRain', boxCols: 10, boxRows: 5 }); }); - We can also customize the animation speed and the amount of time each slide is shown:
$(document).ready(function(){
$('#slideshow').nivoSlider({
effect: 'boxRain',
boxCols: 10,
boxRows: 5,
animSpeed: 800,
pauseTime: 4000
});
});
I've set the
animSpeedto 800 milliseconds so that theboxRaintransition effect will take 800 milliseconds to complete. I've also set thepauseTimeto 4000, so that each image in the slideshow is visible for 4000 milliseconds or four seconds.
What just happened?
We set up the Nivo Slider plugin to showcase a slideshow with impressive transition effects. We learned how to set up the HTML document appropriately, how to call the nivoSlider() method and how to customize some of the slideshow settings.
Have a go hero — customize the slideshow
In addition to the customization options we used, there are several other configuration options available for the slideshow including the ability to show or hide next/previous buttons, choices for setting up the pagination display or whether or not to show it at all, and lots of callback functions for writing custom functionality for the slideshow. On top of all that, you can completely customize the CSS and images used to create the slideshow so that it looks any way you'd like.
Try your hand at customizing a slideshow to match any design you'd like and experiment with the other customization options the Nivo Slider makes available. Create a custom slideshow of your own design.
Next up, we'll take a look at creating a thumbnail photo gallery.