Appendix A. Installing macOS High Sierra
If your computer came with macOS High Sierra already installed on it, then you can skip this appendix—at least for now. But if you’re running an earlier version of the Mac operating system and want to really savor the High Sierra experience, this appendix is for you. It describes how to install the new OS on your Mac.
If you’re new in these parts, you may be in for a shock: You can’t buy macOS in a box, or on a DVD. You download it from the Mac App Store.
There are some attractive elements to that system. For example, there’s no copy protection and no serial numbers to type in. There’s no cost to Apple for manufacturing or shipping, which may explain why High Sierra isn’t even $20 or $30, like some of its predecessors—it’s free.
Now there’s no disc to hunt down later, when you want to install macOS again (onto a new Mac, for example).
And when you do need a copy again, you’ll download the latest version—10.13.3 or whatever it is—instead of having to install whatever updates have come out since you got your DVD.
(And what if you don’t have a fast Internet connection for downloading macOS? The world won’t come to an end; read on.)
Hardware Requirements
For starters, you need to make sure you and your Mac have what it takes to handle High Sierra—specifically:
A Mac that’s not a geezer. High Sierra can run on any iMac or MacBook made in 2009 or later, or a MacBook Pro, MacBook Air, Mac mini, or Mac Pro from mid-2010 or later.
Note
Some features—like AirDrop, Power Nap, AirPlay mirroring, and Handoff—work only on more recent models.
Free storage space. You need at least 15 GB free on your Mac. More is better.
A lot of memory. Apple recommends at least 2 GB of memory, but macOS absolutely loves memory. For the greatest speed, install 4 gigabytes—more if you can afford it. (And these days, you probably can.)
A full backup. It’s a really, really good idea to back up your entire Mac before you begin this, or any, upgrade. Even if things go wrong for only, say, 0.01 percent of Mac owners, that’s still thousands of people. If you don’t have a second hard drive, this is your excuse to buy one; they’re dirt cheap these days. You can use Time Machine in your current version of macOS to make a complete, automatic backup of your Mac as it is now.
Tip
Not all programs run well on High Sierra—old ones, in particular, sometimes have problems. Before you take the upgrade plunge, therefore, you should visit roaringapps.com, a massive, crowdsourced compatibility table of every known Mac program—and its compatibility with macOS High Sierra.
The Standard Installation
To do the actual installation, open the App Store program on your Mac. If you don’t see “macOS High Sierra” advertised right there on the home page, you can find it by searching for High Sierra. Click the Free Upgrade button, and then click again when it changes to say Download (see Figure A-1).
Tip
If you don’t have a fast Internet connection, or if your Internet provider imposes monthly data limits, you might not be thrilled about the prospect of waiting for a 5-gigabyte download.
Your best bet is to take your Mac to an Apple Store and use its free, fast Wi-Fi to download High Sierra. (Or go to a friend’s house, a library, a coffee shop… .)
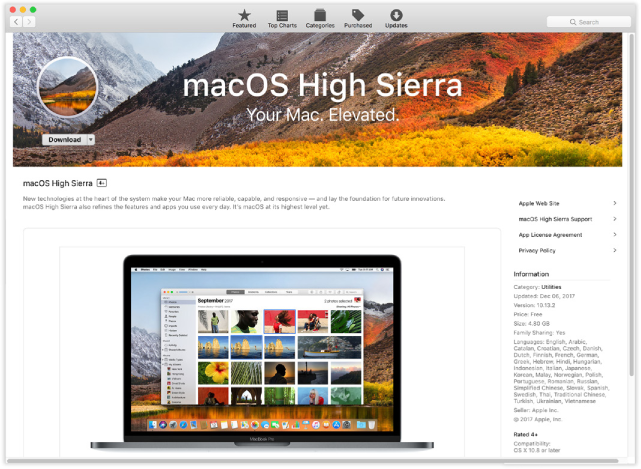
Figure A-1. Enter your Apple ID and password when you’re asked for it, and enjoy a mug of your favorite hot beverage as the download begins. If you have a typical broadband Internet connection, expect to wait nearly half an hour.
When the download begins, behind the scenes, the App Store puts a program called Install macOS High Sierra into your Applications folder and onto your Launchpad, if you have it.
Tip
At this moment, you can duck out of the installer to make a safety copy of it, so you won’t have to download it again the next time. See the box on the next page.
You’ll know when the downloading is over, because the installer opens up automatically and presents you with the logo shown in Figure A-2.
The procedure from here:
Click Continue.
The installer follows a pattern: Read the instructions, make a couple of choices, and then click Continue to advance to the next screen. As you go, the list on the left side of the screen reveals where you are in the overall procedure.
Click Agree to pass the Software License Agreement screen, and then click Agree again.
The software license agreement requires you to agree with whatever Apple’s lawyers say.
Choose the disk or partition where you want to install macOS.
The installer proposes the obvious hard drive: the main one inside your Mac.
If you have other drives, you can click Show All Disks to see their icons and choose one. Yellow exclamation-mark icons mean “You can’t install here,” for one technical reason or another. You can install High Sierra only onto a blank hard drive, formatted as a Mac drive, or onto a drive that has Snow Leopard or later on it.
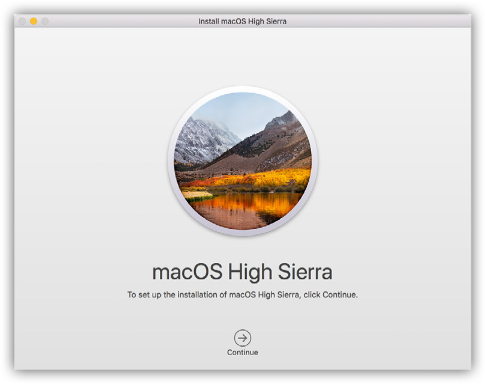
Figure A-2. Your adventure is about to begin. You’ve never experienced such a simple operating-system installation. You don’t even have to restart the computer before you start. You have far fewer options and decisions to make.
Note
As noted in ???, installing macOS High Sierra onto an SSD (solid state drive) automatically formats it with the Apple File System (APFS); installing onto a traditional spinning drive gives you Mac OS Extended (Journaled) format, described in the box below.
Click Install. Enter an administrator’s account name and password (“Administrator accounts”) when you’re asked for it.
Now you’re in for a 20- to 30-minute wait as the installer copies software onto your hard drive. (That’s why, if you’re using a laptop and it’s not plugged in, the Mac will encourage you to plug it in.) At one point, the installer restarts the Mac and carries right on.
MacOS 10.13 is now installed on your Mac. That, if you hadn’t noticed, was a far less harrowing experience than it was in some previous operating system installations. You were never asked what kind of installation you wanted, which language translations or printer drivers you wanted installed, which optional components you wanted, and so on.
Still, you’re not quite ready to dive in yet. Read on.
The Setup Assistant
What you see depends on whether you installed High Sierra onto an older macOS drive or an empty drive. Either way, it’s called the Setup Assistant, and it’s meant to interview you about which features you’d like turned on.
After Installing over an Older Version
If you installed onto a drive that already had Mac stuff on it—accounts, files, settings, and so on—then after the Mac restarts, all you have to do is log in as usual.
You’re asked for your Apple (iCloud) name and password, or you can sign up for one now. If you have two-factor authentication turned on (“macOS and Security”), you’ll have to prove your worthiness by typing in a code that Apple sends to your other Apple gadgets.
Next, you may be invited to share the data your Mac stores when it crashes with the programmers who are responsible, so they can fix it. Approve or deny.
You may also be invited to turn on “All your files in iCloud,” a confusing feature that’s described in “macOS and Security”; to turn on Siri; or to allow Apple’s apps to use your location.
Finally, you arrive at the desktop; welcome to High Sierra!
After Installing onto a Blank Drive
If you installed High Sierra onto an empty drive, then the Setup Assistant is a little more involved.
Once again, you’re in for a click-through-the-screens experience, this time with the aim of setting up your Mac’s various options. After answering the questions on each screen, click Continue. The number of information screens you encounter may vary (see Figure A-3), but here are some of the possibilities:
Welcome. Click the name of the country you’re in.
Select Your Keyboard. Different countries require different keyboard layouts. For example, if you choose the Canadian layout, then pressing the ] key on a U.S. keyboard produces the ç symbol. Click Continue.
Select Your Wi-Fi Network. This is your chance to introduce the Mac to any networks in the vicinity. Click the name of the Wi-Fi hotspot you want to join, for example. If there’s no wireless hotspot at all—hey, it could happen—then click Different Network Setup to specify, say, a wired or cellular network hookup.
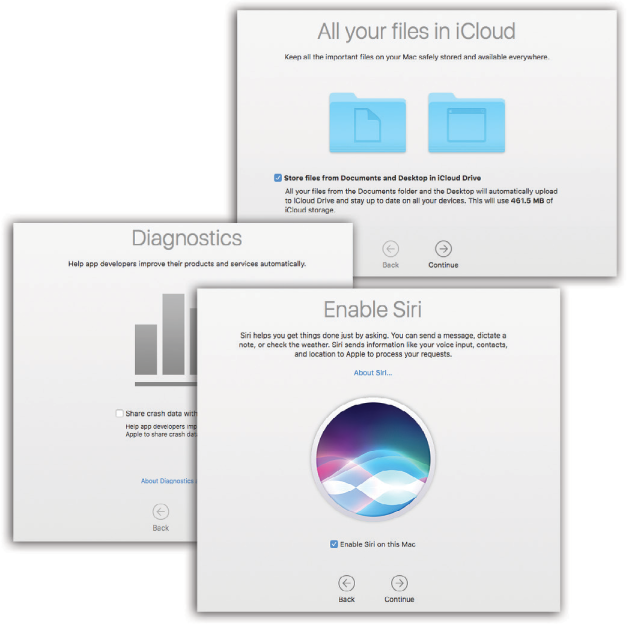
Figure A-3. The Setup Assistant is designed to walk you through macOS’s features—especially the ones that involve privacy and security—to make sure you’ve set things up the way you like.
Transfer Information to This Mac. The Setup Assistant can suck all your old programs, files, folders, and settings from the old Mac to the new one—or even from an old Windows PC to your new Mac. Meet the Migration Assistant.
Your choices here are From another Mac (connect your old Mac to this one over a network, even a wireless one); From a Windows PC (ditto); From Time Machine or other disk (connect your new Mac to your backup drive); and Don’t Transfer now.
Tip
You can always perform this sluggish task later. Just open the Migration Assistant program, in your Applications→Utilities folder, when it’s a better time. See the box below for more on migrating from Windows.
If you choose one of the first options and then click Transfer, the data-copying process begins. It can take a wicked long time.
Sign In with Your Apple ID. Here you’re offered the chance to type in an Apple ID (an email address and password for all your Apple dealings), which is more essential in High Sierra than ever before. If you don’t have one, just click Continue; you can get one and fill it in later.
Terms and Conditions. Hello, Apple lawyers!
Create a Computer Account. You’re about to create your account—your Administrator account, in fact, as described in “Administrator accounts”.
This is also where you can choose an account picture for yourself. Click the round starter icon, and then choose Defaults (an assortment of Apple-supplied images) or Camera (take a photo of yourself to use as your account icon).
iCloud Keychain. Want Apple to memorize all your passwords (for the web and for networking), so that you don’t have to reenter them on multiple gadgets (Mac, iPhone, iPad, and so on)? Then turn on iCloud Keychain and then hit Continue. Your other Apple gadgets will suddenly sprout a confirmation box to prove that you’re the owner of them all.
Express Setup. Turn on Siri, let Apple know your location (for use by Maps and other features), and share crash data with Apple. If you’re opposed, then click Customize Settings to deny or approve these one at a time.
All your files in iCloud. Do you want to keep your Desktop and Documents folders online? It’s a complicated question; see “iCloud Drive on Other Devices”.
FileVault Disk Encryption. See “FileVault”.
At last you wind up at the macOS desktop, just as described in Chapter 2.
The Homemade Installer Disk
MacOS’s download-only shtick is incredibly convenient. But sometimes you’ll miss having a physical disk with the installer on it. You might wish you had one if, for example, you want to install High Sierra on a huge array of Macs, like the ones at a school or in a business; downloading that 5-gig installer over and over again would drive you crazy.
You might also wish you had an installation disk for when your Mac starts acting up and the tricks described in Appendix B don’t seem to work.
As it turns out, you can make an installation disk fairly easily. All you need is a hard drive or a flash drive (8 GB or larger); the Install macOS High Sierra.app program that winds up in your Applications folder when you first get High Sierra (see the box in Figure A-2); and the free DiskMaker X app on this book’s “Missing CD” page at www.missingmanuals.com.
Note
DiskMaker X is free, quick, and easy. But there’s a more technical way to build the installer disk, too, using a Terminal command that Apple has built right into macOS. For instructions, visit http://j.mp/1OOafTf.
Open DiskMaker X; when it finds the High Sierra installer, click “Use this copy.” Click either “An 8 GB USB thumb drive” or (if you’re using a hard drive) “Another kind of disk.” The following screens ask you to choose the disk or partition that will become your installer—and warn you that that disk is about to be erased.
When the process is complete, you wind up with an actual High Sierra flash drive or disk that you baked all by yourself.
How to Use Your Emergency Disk
When disaster strikes, and you need to repair or reinstall your High Sierra installation, go find this emergency installer drive.
Turn off the Mac. Connect the emergency drive. When you turn the Mac back on, hold down the Option key so that a choice of startup disks appears. Click your homemade installer to start up from it.
Now you can install macOS as usual or use any of the recovery features described in Appendix B.