
6. Working with the History Panel
What You’ll Do
Work with Linear and Non-Linear History
Control the Creative Process with Snapshots
Duplicate a History State in Another Document
Save the History State of a Document
Review the History State Text File
Combine the History Brush with a History State
Change the Eraser Tool into the History Brush
Introduction
Adobe introduced the History panel in Photoshop 5 (a while back now), and the graphic design world hasn’t been the same since. On an elementary level, the History panel gives you the ability to perform multiple undos. Think of History as a magical mistake correction tool that never wears out. However, the History panel does much more than give you the ability to go back in time and correct your mistakes. The History panel is simply a tool, but when you combine the power of the History panel with the History brush and the Art History brush, you have a trio of tools that can take your creative designs to the next level and beyond.
Adobe Photoshop gives you two ways to use the History panel—linear and non-linear. The linear mode helps you keep track of your recent steps, and erases any steps that interfere with a linear flow to the panel. The non-linear mode preserves all the steps (linear or non-linear), and is useful when you need to think outside the linear box.
Photoshop raises the bar with the History panel by giving you the ability to record and save the commands performed to a document in a text file. Now, you can finally know exactly what you did to an image. And since the document can be printed, you can create History text documents of your favorite restoration and manipulation techniques, and save them.
In addition, when you combine the History brush with the History panel, you have an awesome creative tool that can’t be beat. In fact, it’s even possible to convert the Eraser tool into a History brush.
Setting History Panel Options
Working with the History panel requires a firm understanding of how the panel functions, and what you can and cannot do with History. The History panel records your steps as you work through a document. A step is defined as a specific action, such as creating a layer or adding a brush stroke. Every time you perform an action, a step is recorded in the History panel. The History panel gives you the ability to go back to a previous history state, which is the same as performing an undo command. You can perform multiple undo commands up to the number you set in Photoshop preferences for the History States. In addition, the History panel creates snapshots of the document. Snapshots are images of the current state of the document. Snapshots are used in conjunction with the History and Art History Brushes to create special effects.
Set Number of History States
![]() Click the Edit (Win), or Photoshop (Mac) menu, point to Preferences, and then click Performance.
Click the Edit (Win), or Photoshop (Mac) menu, point to Preferences, and then click Performance.
![]() Enter a value from 1 to 1000 for the number of steps recorded in the History States box.
Enter a value from 1 to 1000 for the number of steps recorded in the History States box.
![]() Click OK.
Click OK.

Did You Know?
You can duplicate a History State. Hold down the Alt (Win) or Option (Mac) key, and then click the History State you want to duplicate.
You can use keyboard shortcuts to perform multiple undos. The History panel represents the ability to perform multiple undo commands. However, when you press Ctrl+Z (Win), or ![]() + Z (Mac) you only move back and forth between the last two commands, just like a normal undo. To perform multiple undo commands, press Ctrl+Shift+Z (Win) or
+ Z (Mac) you only move back and forth between the last two commands, just like a normal undo. To perform multiple undo commands, press Ctrl+Shift+Z (Win) or ![]() +Shift+Z (Mac) to move forward through all your History steps, or press Alt+Shift+Z (Win) or Option+Shift+Z (Mac) to move backwards through the available History steps.
+Shift+Z (Mac) to move forward through all your History steps, or press Alt+Shift+Z (Win) or Option+Shift+Z (Mac) to move backwards through the available History steps.
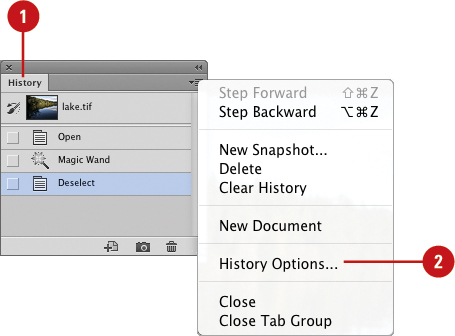
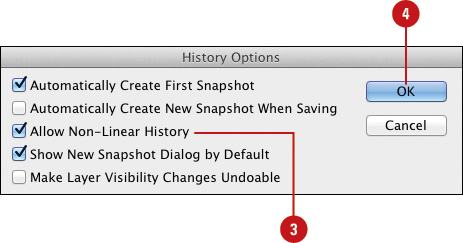
![]() Click the History Options button, and then click History Options.
Click the History Options button, and then click History Options.
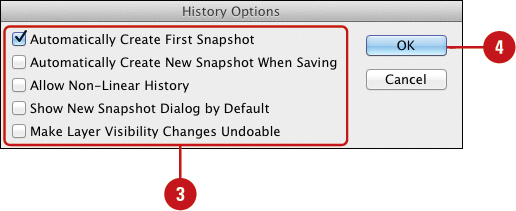
![]() Select the check boxes for the History Options you want to use:
Select the check boxes for the History Options you want to use:
♦ Automatically Create First Snapshot. Creates a snapshot (image) when the document first opens.
♦ Automatically Create New Snapshot When Saving. Creates a snapshot every time you save the document.
This is useful for keeping track of the changes made to a document.
♦ Allow Non-Linear History. Allows you to operate History in a non-linear state.
♦ Show New Snapshot Dialog By Default. Opens a dialog box with options each time you create a new snapshot.
♦ Make Layer Visibility Changes Undoable. Instructs Photoshop to make any changes made to a layer’s visibility undoable.
![]() Click OK.
Click OK.
Working with Linear and Non-Linear History
The History panel records each step performed on a Photoshop document in a linear fashion from top to bottom. However, the purpose of the History panel is not to simply record your progress through a document; it’s there to help you make changes and go back in time to correct mistakes. Photoshop gives you two History panel modes—linear and non-linear. When you work in a linear History panel, clicking on a previous step causes all steps underneath to become grayed out (unavailable). If you then add a step, the grayed-out steps are removed and the new step is added to the bottom of the list. A linear panel is organized and very RAM efficient; however, once a History Step is removed, it cannot be retrieved. When you work in a non-linear History panel, clicking on a previous step does not cause the steps underneath to become grayed out. If you then add a step, the new step is added to the bottom of the History panel. The new step represents the characteristics of the step you selected, plus any added actions. A non-linear panel is not organized and consumes more RAM. Its advantage lies in the fact that History steps are not deleted, they are simply reorganized.
Work with Linear History
![]() Select the History panel.
Select the History panel.
![]() Click the History Options button, and then click History Options.
Click the History Options button, and then click History Options.
![]() Clear the Allow Non-Linear History check box, and then click OK.
Clear the Allow Non-Linear History check box, and then click OK.
![]() Work in the document until you have generated 10 or 15 steps in the History panel.
Work in the document until you have generated 10 or 15 steps in the History panel.

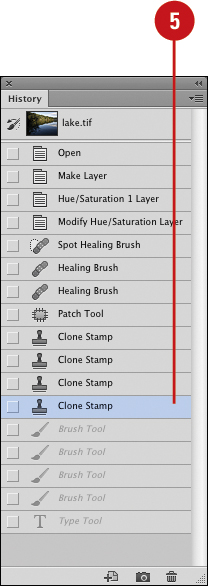
![]() Move halfway up the History panel, and then click on a step.
Move halfway up the History panel, and then click on a step.
The steps below the selected step turn gray.
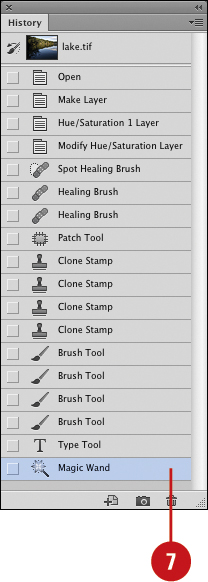
![]() Perform another action to the image.
Perform another action to the image.
The grayed steps are removed, replaced by the latest action applied to the image.

![]() Click the History Options button, and then click History Options.
Click the History Options button, and then click History Options.
![]() Select the Allow Non-Linear History check box.
Select the Allow Non-Linear History check box.
![]() Click OK.
Click OK.
![]() Work in the document until you have generated 10 or 15 steps in the History panel.
Work in the document until you have generated 10 or 15 steps in the History panel.

![]() Move halfway up the History panel, and then click on a step.
Move halfway up the History panel, and then click on a step.

The steps below the selected step do not change.
![]() Perform another action to the image.
Perform another action to the image.
The new step is added to the bottom of the History steps.
Did You Know?
You can quickly purge the History States, and therefore recoup additional RAM. In the History panel, click the History Options button, and then click Clear History. But be warned; there is no undo available. You are stuck with your decision.
You can reduce memory usage by using linear history. Non-linear History requires more RAM to maintain. If you don’t require a non-linear history and want to decrease RAM usage, then you can turn it off. In the History panel, click the History Options button, click History Options, clear the Allow Non-Linear History check box, and then click OK.
Controlling the Creative Process with Snapshots
The History panel contains more than just steps; it also holds Snapshots. A Snapshot is an image of the document as it exists at the time the snapshot was taken. The History panel can hold as many snapshots as needed, and they are not subject to the number of History States you chose in Preferences. That means they stay with the document throughout the creative process until you close or save the file. By default, Photoshop takes a snapshot of the image when it first opens. This snapshot represents the original state of the image, before any adjustments or modifications are applied, and is identified with the file name of the image. It’s a good idea to create a snapshot every time you make a major change to the image. That way, if you want to start all over, all you have to do is click on the snapshot, and Photoshop returns you to the moment in time in which the snapshot was created. It’s like having your own personal time machine.
Create Snapshots
![]() Select the History panel.
Select the History panel.
![]() Click the History Options button, and then click History Options.
Click the History Options button, and then click History Options.
![]() Select the Show New Snapshot Dialog by Default check box, and then click OK.
Select the Show New Snapshot Dialog by Default check box, and then click OK.
![]() Perform several actions to the image.
Perform several actions to the image.
![]() Click the Create New Snapshot button.
Click the Create New Snapshot button.

![]() Type a name for the new snapshot.
Type a name for the new snapshot.
![]() Click the From list arrow, and then click a save image information option:
Click the From list arrow, and then click a save image information option:
♦ Full Document. Saves the entire visible image and all layers.
♦ Merged Layers. Saves only the merged layers.
♦ Current Layer. Saves only the active layer.
![]() Click OK.
Click OK.

Duplicating a History State in Another Document
Here’s a tool to help you gain control over the creative process, and save you a lot of time and effort as well. The History panel lets you create new documents based on a specific History step or snapshot. For example, you’re working on a complicated image, and you want to isolate a portion of the image in another document. This will not only help you reduce the clutter, but working on a portion of the image in a separate document creates a document with a much smaller file size, and that will help Photoshop work faster.
Create Another Document
![]() Select the History panel.
Select the History panel.
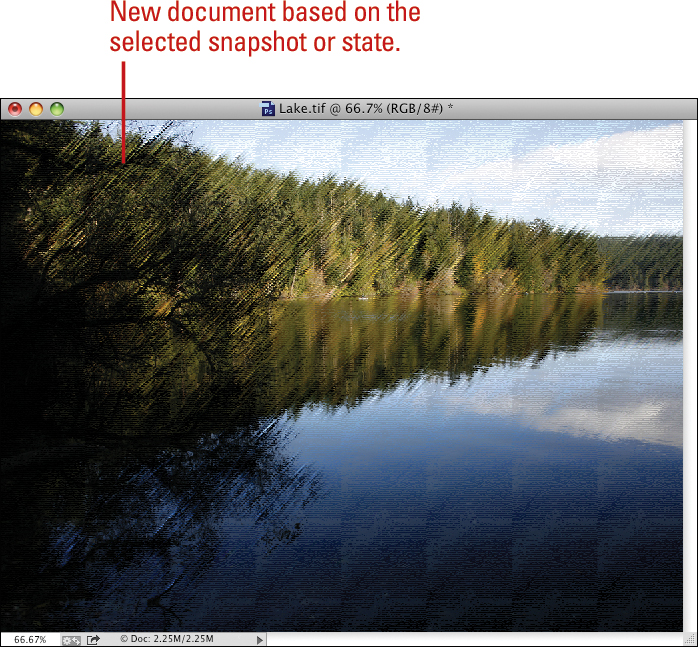
![]() Click on the snapshot or History State you want to use for the new document.
Click on the snapshot or History State you want to use for the new document.
![]() Click the Create New Document From Current State button.
Click the Create New Document From Current State button.
Photoshop creates a new document based on the selected snapshot or state. The new document’s History panel contains one snapshot or one state.

Important
Snapshots are not saved with the Photoshop document. When you reopen a document, the History panel will display one snapshot of the current state of the image or one History state.
Did You Know?
You can save RAM by using the History panel. When you create a new document using the History panel, it’s very RAM efficient, as opposed to the traditional copy and paste method.
Saving the History State of a Document
Photoshop gives you the ability to save the History states of a document as a separate text document, or as embedded metadata. Saving History is an excellent way to retrace the steps you took to produce a particular design. Not only does the saved data record the steps you took, it also records the date and time each step was performed. This gives you a running record of the time spent on a document, which is useful for client billing purposes. Photoshop saves the history files as a standard text document, which can be opened in any text-editing program you choose.
Set Up to Save History
![]() Click the Edit (Win) or Photoshop (Mac) menu, point to Preferences, and then click General.
Click the Edit (Win) or Photoshop (Mac) menu, point to Preferences, and then click General.
![]() Select the History Log check box.
Select the History Log check box.
![]() Select the file type option you want to use in saving history information:
Select the file type option you want to use in saving history information:
♦ Metadata. Records the data as embedded metadata.
♦ Text File. Records the data to a text file.
♦ Both. Records the information as both metadata and text.
![]() Click Choose, and then select a location where you want to store the files.
Click Choose, and then select a location where you want to store the files.
![]() Click the Edit Log Items list arrow, and then select the type of data you want to save:
Click the Edit Log Items list arrow, and then select the type of data you want to save:
♦ Sessions Only. Only records basic information, such as when the file was opened or closed.
♦ Concise. More information on actions taken.
♦ Detailed. The most data, including dates and times for actions, and each individual state.
![]() Click OK.
Click OK.

Reviewing the History State Text File
Photoshop creates the History State file on the fly; as you work, each step is precisely recorded. Photoshop does not create a separate data file for each working session; instead, it creates a single file recording all work sessions. If you delete the original history data file, Photoshop will create a new file, and place it in the same location with the same name. Have you ever worked on a document, performing command after command and suddenly you step back, and really like the end result? Then you immediately grab a notepad and attempt to jot down all the steps—it’s always the most important step that you forget. That won’t happen if you use the History text file. The text document faithfully records each and every step. Later, after the project is finished, you can access the file and all your commands and steps will be listed.
Open the History State Text File
![]() Close Photoshop.
Close Photoshop.
![]() Open the folder where the History text file is saved.
Open the folder where the History text file is saved.
The default name is Photoshop Edit Log.txt, and the default location is the desktop.
![]() Double-click to open the document with your default text editor.
Double-click to open the document with your default text editor.
Use NotePad (Win), TextEdit (Mac), or a word processing program, such as Microsoft Word.
♦ The date and time the file was opened is recorded at the top of the document.
♦ The steps performed are listed, one at a time.
♦ The date and time the file was closed is recorded at the bottom of the document.
![]() Close your text editor program.
Close your text editor program.

Combining the History Brush with a History State
When Adobe created History, they advertised the fact that Photoshop now had more than one undo. Multiple undos are a great thing; however, if all you use the History panel for is to correct your mistakes, you’re missing a key benefit. The History panel is linked to the History brush, which receives its information from a selected state or snapshot. For example, the History panel holds a snapshot of the way the image looked when it was first opened, and by default the History brush is linked to that snapshot. Think of the History brush as a photo restoration tool that always remembers the original state of the image. As you work on a document you will make changes. If during the current work session, you wish to restore the document back to its original (first opened) state, the History brush is your tool. The History brush is not just for correcting mistakes, but also for creating awesome special effects. All you need is a bit of imagination and a couple of additional snapshots.
Correct Mistakes with the History Brush
![]() Select the History Brush tool on the toolbox.
Select the History Brush tool on the toolbox.

![]() Select the Brush panel.
Select the Brush panel.
♦ You can click the Brush Panel button on the Options bar or click the Window menu, and then click Brush.
![]() Select a size brush.
Select a size brush.

♦ Select a Brush Preset. Click the Brush Presets button or tab, and then select a brush preset.
♦ Select and Modify a Brush. Select a brush, and then use the slider to specify the brush size. If you want, you can also adjust other options, such as Angle, Roundness, Hardness, and Spacing.
![]() Drag the History brush across the image.
Drag the History brush across the image.
The areas you drag are restored to their original (first opened) state.

Get Fancy with the History Brush
![]() Apply a major change to a document (possibility a Brush Stroke filter).
Apply a major change to a document (possibility a Brush Stroke filter).
![]() Select the History panel.
Select the History panel.
![]() Click the Create New Snapshot button to take a snapshot of the image in its current state.
Click the Create New Snapshot button to take a snapshot of the image in its current state.
![]() Click on the original snapshot to return it back to its first-opened state.
Click on the original snapshot to return it back to its first-opened state.
![]() Click in the History source box for the snapshot you created in step 3 to change the designation of the History brush.
Click in the History source box for the snapshot you created in step 3 to change the designation of the History brush.
This instructs the History brush to paint using the version of the image with the filter applied.

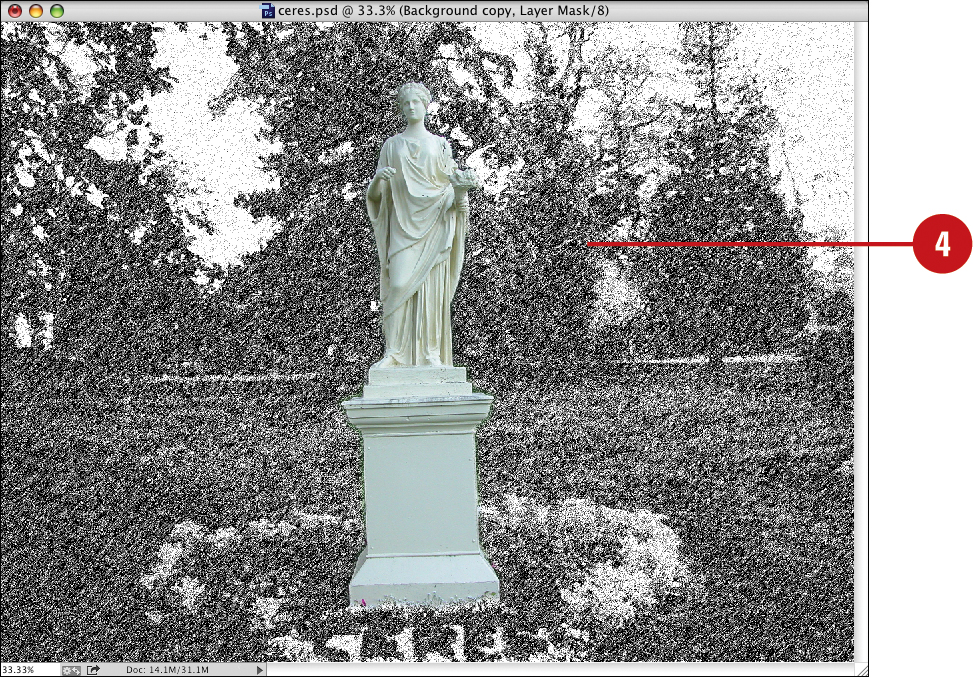
![]() Drag your mouse over the image to replace the original image with the image information contained in the selected snapshot.
Drag your mouse over the image to replace the original image with the image information contained in the selected snapshot.

Did You Know?
When you use the History brush on an image layer, you’re changing the information based on the chosen History state or snapshot. However, you will gain more control if you use the History brush in a separate layer. Just create and select a new layer, and when you use the History brush, paint in the layer. Not only does the separate layer isolate the original image from damage, but you can utilize blending modes and opacity settings for even greater creative control.
Using the Art History Brush
Photoshop comes equipped with two History brushes—the History and Art History brushes. The History brush paints the image back to whatever state or snapshot is selected. The Art History brush gives you the ability to create some painted effects, using information from one or more snapshots or History states. In effect, the Art History brush gives you the power to combine image information (based on the active snapshot or history state) with artistic brush strokes.
Use the Art History Brush
![]() Click and hold the History Brush tool on the toolbox, and then click the Art History Brush tool.
Click and hold the History Brush tool on the toolbox, and then click the Art History Brush tool.

![]() Select from the following options on the Options bar:
Select from the following options on the Options bar:
♦ Brush. Select a brush tip and style.
♦ Brush Panel. Click to show/hide the Brush panel.
♦ Mode. Select a blending mode from the list. The blending modes (for a brush) control how the colors blend with the document colors.
♦ Opacity. Enter or select a value from 1% to 100%.
♦ Style. Select a style for the Art History brush.
♦ Area. Enter a value (0 to 500) pixels to define the painting area.
♦ Tolerance. Select a value from 0% to 100%. Choosing higher values limits paint strokes to areas that differ from the color used by the Art History brush; choosing lower values lets the Art History brush use unlimited strokes, regardless of the color values in the image.
♦ Tablet Pressure Controls. Click to override settings and use tablet pressure controls.

![]() Drag your mouse over the image, using small, controlled strokes.
Drag your mouse over the image, using small, controlled strokes.

Changing the Eraser Tool into the History Brush
Photoshop has one more tool that works with the History panel—the Eraser tool. By changing a preference on the Options bar, you can turn the Eraser tool into a History brush. Using the Eraser tool to restore the image is just another way to get the same result as the History brush. And if you know anything about Adobe, they give you at least three ways to do everything. Consider multiple ways to perform the same function as a control advantage. No two Photoshop users will create the same design, and no two Photoshop users will ever tackle a problem in the same way. Adobe gives you choices, so choose the best way to accomplish a task based on the available options. And remember, if you change the color mode, resolution, or canvas size of the active image, the History brush tools will not work.
Change the Eraser Tool into the History Brush
![]() Select the Eraser tool on the toolbox.
Select the Eraser tool on the toolbox.

![]() Select the Erase to History check box on the Options bar.
Select the Erase to History check box on the Options bar.

![]() Select a history state or snapshot from the History panel.
Select a history state or snapshot from the History panel.
![]() Drag the Eraser tool in the image.
Drag the Eraser tool in the image.
The eraser tool does not erase the image; instead, it paints the image based on the current History selection.
Did You Know?
You can use multiple layers with the History brush. When you use any of the History brush tools, it’s a smart idea to create a new layer, and do your History painting in the new layer. That way, if you don’t like what you see, you can always delete the layer. In addition, placing the History information in a separate layer gives you the creative control of using layer transparency and blending mode settings to achieve greater creative results.
Controlling History States
The History panel is a fantastic tool! It can help you go back in time and correct errors, and even take snapshots of the image, which you can use to create new documents. But all great tools come with a price. The History panel’s price is consumption of RAM. The more you use the History panel, the more RAM it needs. If you find Photoshop slowing down on you, or if you get a warning message stating that Photoshop is running low on RAM, you might want to try a few things to help gain back some of that lost efficiency. Photoshop lets you choose between 1 and 1,000 History states. That’s 1,000 undos, and while that might seem like a great thing to have, History states take up memory. You can also check on your History settings. Non-linear history requires more RAM to maintain. If you don’t require a non-linear history, then you can turn it off. Since Photoshop uses a lot of RAM (64 MB just to open the program), Adobe gives you a way to purge, or clear, your memory. In addition, you can clear the cache used by video to free up space.
Purge RAM
![]() Click the Edit menu, point to Purge, and then select from the following options:
Click the Edit menu, point to Purge, and then select from the following options:
♦ Undo. Select this option to remove the Undo states from History.
♦ Clipboard. If you have used the Copy and Paste commands, that information is still contained in RAM. Use this option to purge the Clipboard memory.
♦ Histories. Select this option to purge all the states from the History panel.
♦ All. Select this option to clear all operations from memory used by Undo commands, the History panel, or the Clipboard.
♦ Video Cache. Select this option to clear memory used by video.

Important
The purge option has no undo. If you select any of the purge options, there is no going back, so make sure you want to purge memory.