6. Creating Interactive Navigation
This lesson will take approximately three hours to complete. If needed, remove the previous lesson folder from your hard drive and copy the Lesson06 folder onto it.
![]()

Let your viewers explore your site and become active participants. Button symbols and ActionScript work together to create engaging, user-driven, interactive experiences.
Getting Started
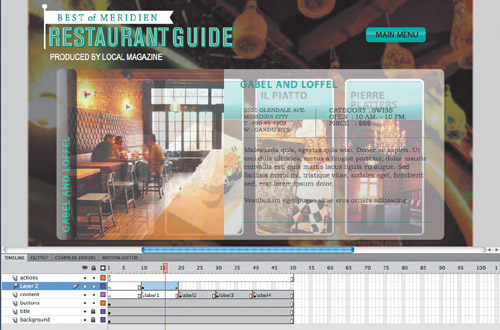
To begin, view the interactive restaurant guide that you’ll create as you learn to make interactive projects in Flash.
1 Double-click the 06End.swf file in the Lesson06/06End folder to play the animation.
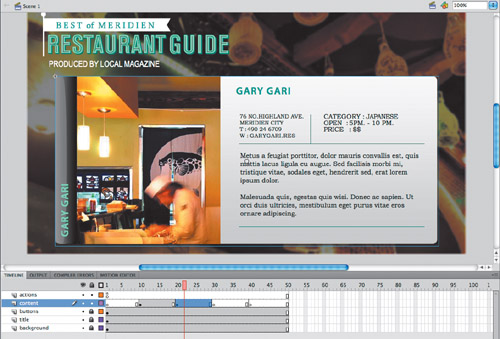
The project is an interactive restaurant guide for a fictional city. Viewers can click any button to see more information about a particular restaurant. In this lesson, you’ll create interactive buttons and structure the Timeline properly. You’ll learn to write ActionScript to provide instructions for what each button will do.
2 Close the 06End.swf file.
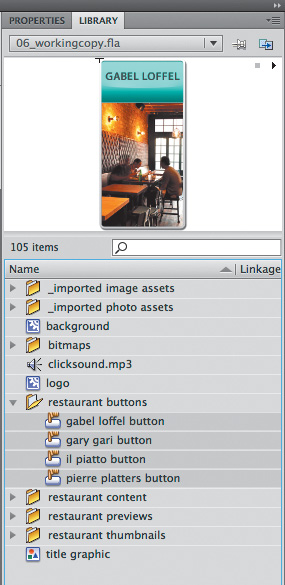
3 Double-click the 06Start.fla file in the Lesson06/06Start folder to open the initial project file in Flash. The file includes several assets already in the Library panel, and the Stage has already been sized properly.
4 Choose File > Save As. Name the file 06_workingcopy.fla and save it in the 06Start folder. Saving a working copy ensures that the original start file will be available if you want to start over.
About Interactive Movies
Interactive movies change based on the viewer’s actions. For example, when the viewer clicks a button, a different graphic with more information is displayed. Interactivity can be simple, such as a button click, or it can be complex, receiving inputs from a variety of sources, such as the movements of the mouse, key presses from the keyboard, or even data from databases.
In Flash, you use ActionScript to achieve most interactivity. ActionScript provides the instructions that tell each button what to do when the user clicks one of them. In this lesson, you’ll learn to create a nonlinear navigation—one in which the movie doesn’t have to play straight from the beginning to the end. ActionScript can tell the Flash playhead to jump around and go to different frames of the Timeline based on which button the user clicks. Different frames on the Timeline contain different content. The user doesn’t actually know that the playhead is jumping around the Timeline: The user just sees (or hears) different content appear as the buttons are clicked on the Stage.
Creating Buttons
A button is the visual indicator of what the user can interact with. The user usually clicks a button, but many other types of interactions are possible. For example, something can happen when the user rolls the mouse over a button.
Buttons are a kind of symbol that have four special states, or keyframes, that determine how the button appears. Buttons can look like virtually anything—an image, graphic, or a bit of text—they don’t have to be those typical pill-shaped, gray rectangles that you see on many Web sites.
Creating a button symbol
In this lesson, you’ll create buttons with small thumbnail images and restaurant names. A button symbol’s four special states include:
• Up state. Shows the button as it appears when the mouse is not interacting with it.
• Over state. Shows the button as it appears when the mouse is hovering over the button.
• Down state. Shows the button as it appears when the mouse button is depressed.
• Hit state. Indicates the clickable area of the button.
You’ll understand the relationship between these states and the button appearance as you work through this lesson.
1 Choose Insert > New Symbol.
2 In the Create New Symbol dialog box, select Button and name the symbol gabel loffel button. Click OK.

3 Flash brings you to symbol-editing mode for your new button.
4 In the Library panel, expand the folder called restaurant thumbnails and drag the graphic symbol gabel loffel thumbnail to the middle of the Stage.
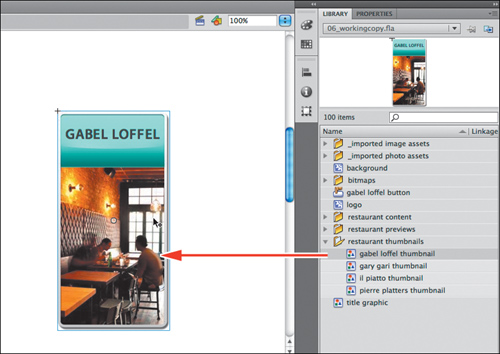
5 In the Properties inspector, set the X value to 0 and the Y value to 0.
The upper-left corner of the small gabel loffel restaurant image is now aligned to the center point of the symbol.
6 Select the Hit frame in the Timeline and choose Insert > Timeline > Frame to extend the Timeline.
The gabel loffel image now extends through the Up, Over, Down, and Hit states.

7 Insert a new layer.
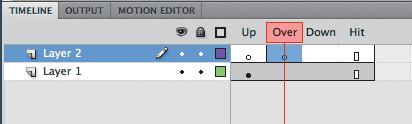
8 Select the Over frame and choose Insert > Timeline > Keyframe.
A new keyframe is inserted in the Over state of the top layer.
9 In the Library panel, expand the folder called restaurant previews, and drag the movie clip symbol called gabel loffel over info to the Stage.
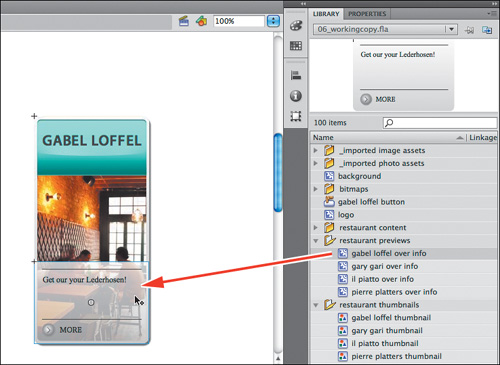
10 In the Properties inspector, set the X value to 0 and the Y value to 215.
The gray information box will appear over the restaurant image whenever the mouse cursor rolls over the button.
11 Insert a third layer above the first two.
12 Select the Down frame on the new layer and choose Insert > Timeline > Keyframe.
A new keyframe is inserted in the Down state of the new layer.

13 Drag the sound file called clicksound.mp3 from the Library panel to the Stage.

14 Select the Down keyframe where the sound form appears, and in the Properties inspector, make sure that Sync is set to Event.

Note
You’ll learn more about sound in Lesson 8, “Working with Sound and Video.”
A clicking sound will play only when a viewer depresses the button.
15 Click Scene 1 above the Stage to exit symbol-editing mode and return to the main Timeline. Your first button symbol is complete! Look in your Library panel to see the new button symbol stored there.
Duplicating buttons
Now that you’ve created one button, others will be easier to create. You’ll duplicate one button here, change the image in the next section, and then continue to duplicate buttons and modify images for the remaining restaurants.
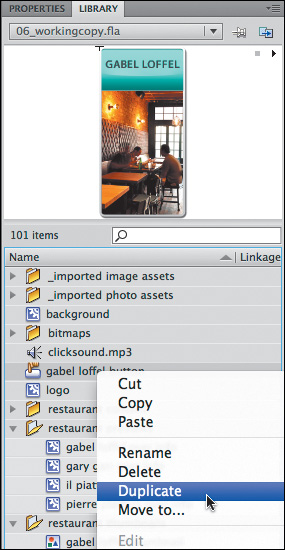
1 In the Library panel, right-click/Ctrl-click the gabel loffel button symbol and select Duplicate. You can also click the options menu at the top-right corner of the Library panel and select Duplicate.
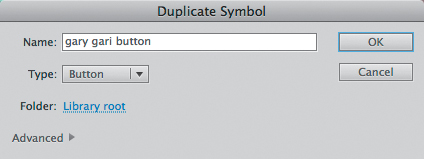
2 In the Duplicate Symbol dialog box, select Button, and name it gary gari button. Click OK.
Swapping bitmaps
Bitmaps and symbols are easy to swap on the Stage and can significantly speed up your workflow.
1 In the Library panel, double-click the icon for your newly duplicated symbol (gary gari button) to edit it.
2 Select the restaurant image on the Stage.
3 In the Properties inspector, click Swap.

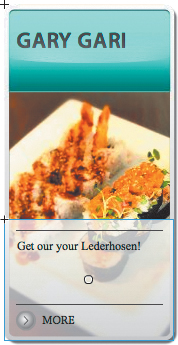
4 In the Swap Symbol dialog box, select the next thumbnail image, called gary gari thumbnail, and click OK.
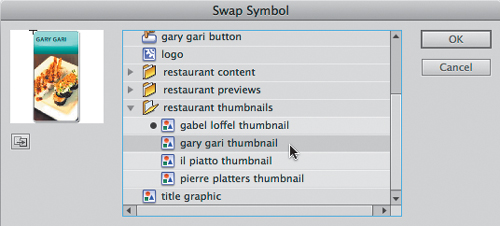
The original thumbnail (shown with a black dot next to the symbol name) is swapped for the one you selected. Because they are both the same size, the replacement is seamless.
5 Now select the Over keyframe and click the gray information box on the Stage.
6 In the Properties inspector, click Swap and swap the selected symbol with the symbol called gary gari over info.
The instance in the Over keyframe of your button is replaced with one that is appropriate for the second restaurant. Since the symbol was duplicated, all other elements, such as the sound in the top layer, remain the same.

7 Continue duplicating your buttons and swapping the two instances inside them until you have four different button symbols in your Library panel, each representing a different restaurant. When you’re done, it’s a good idea to organize all your restaurant buttons in a folder in your Library panel.
Placing the button instances
The buttons need to be put on the Stage and given names in the Properties inspector so that ActionScript can refer to them.
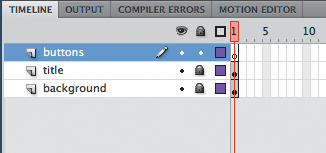
1 On the main Timeline, insert a new layer and rename it buttons.
2 Drag each of your buttons from the Library panel to the middle of the Stage, placing them in a horizontal row. Don’t worry about their exact position because you’ll align them nicely in the next few steps.

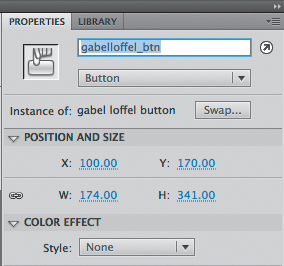
3 Select the first button, and in the Properties inspector, set the X value to 100.
4 Select the last button, and in the Properties inspector, set the X value to 680.
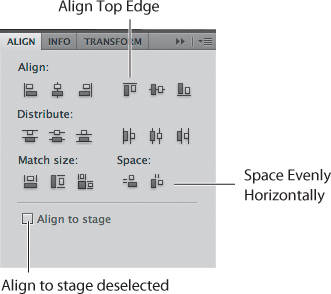
5 Select all four buttons. In the Align panel (Window > Align), deselect the Align to stage option, click the Space Evenly Horizontally button, and then click the Align Top Edge button.
All four buttons are now evenly distributed and aligned horizontally.
6 With all the buttons still selected, in the Properties inspector, enter 170 for the Y value.
All four buttons are positioned on the Stage correctly.

7 You can now test your movie to see how the buttons behave. Choose Control > Test Movie > in Flash Professional. Note how the gray information box in the Over keyframe appears when your mouse hovers over each button, and how the clicking sound is triggered when you depress your mouse over each button. At this point, however, you haven’t provided any instructions for the buttons to actually do anything. That part comes after you name the buttons and learn a little about ActionScript.

Naming the button instances
Name each button instance so that it can be referenced by ActionScript. This is a crucial step that many beginners forget to do.
1 Click on an empty part of the Stage to deselect all the buttons, and then select just the first button.

2 Type gabelloffel_btn in the Instance Name field in the Properties inspector.
3 Name each of the other buttons garygari_btn, ilpiatto_btn, and pierreplatters_btn.
Make sure that you use all lowercase letters, leave no spaces, and double-check the spelling of each button instance. Flash is very picky and one typo will prevent your entire project from working correctly!
4 Lock all the layers.
Understanding ActionScript 3.0
Adobe Flash Professional CS5 uses ActionScript 3.0, a robust scripting language, to extend the functionality of Flash. Although ActionScript 3.0 may seem intimidating to you if you’re new to scripting, you can get great results with some very simple scripts. As with any language, it’s best if you take the time to learn the syntax and some basic terminology.
About ActionScript
ActionScript, which is similar to JavaScript, lets you add more interactivity to Flash animations. In this lesson, you’ll use ActionScript to attach behaviors to buttons. You’ll also learn how to use ActionScript for such simple tasks as stopping an animation.
You don’t have to be a scripting expert to use ActionScript. In fact, for common tasks, you may be able to copy script that other Flash users have shared. And new to CS5 is the Code Snippets panel, which provides an easy way to add ActionScript to your project or share ActionScript code among developers.
However, you’ll be able to accomplish much more in Flash—and feel more confident using the application—if you understand how ActionScript works.
This lesson isn’t designed to make you an ActionScript expert. Instead, it introduces common terms and syntax, walks you through a simple script, and provides an introduction to the ActionScript language.
If you’ve used scripting languages before, the documentation included in the Flash Help menu may provide additional guidance you need to use ActionScript proficiently. If you’re new to scripting and want to learn ActionScript, you may find an ActionScript 3.0 book for beginners helpful.
Understanding scripting terminology
Many of the terms used in describing ActionScript are similar to terms used for other scripting languages. The following terms are used frequently in ActionScript documentation.
Variable
A variable represents a specific piece of data that may or may not be constant. When you create, or declare, a variable, you also assign a data type, which determines what kind of data the variable can represent. For example, a String variable holds any string of alphanumeric characters, whereas a Number variable must contain a number.
Note
Variable names must be unique, and they are case sensitive. The variable mypassword is not the same as the variable MyPassword. Variable names can contain only numbers, letters, and underscores; they cannot begin with a number. These are the same naming rules for instances. (In fact, variables and instances are conceptually the same.)
Keyword
In ActionScript, a keyword is a reserved word that is used to perform a specific task. For example, var is a keyword that is used to create a variable.
You can find a complete list of keywords in Flash Help. Because these words are reserved, you can’t use them as variable names or in other ways. ActionScript always uses them to perform their assigned tasks. As you enter ActionScript in the Actions panel, keywords will turn a different color. This is a great way to know if a word is reserved by Flash.
Arguments
Arguments provide specific details for a particular command and are the values between parentheses () in a line of code. For example, in the code gotoAndPlay(3); the argument instructs the script to go to frame 3.
Function
A function is a group of statements that you can refer to by name. Using a function makes it possible to run the same set of statements without having to type them repeatedly.
Objects
In ActionScript 3.0, you work with objects, which are abstract types of data that help you do certain tasks. A Sound object, for example, helps you control sound, and a Date object can help you manipulate time-related data. The button symbols that you created earlier in this lesson are also objects—they are Button objects.
Every object should be named. An object that has a name can be referenced and controlled with ActionScript. Buttons on the Stage are referred to as instances, and in fact, instances and objects are synonymous.
Methods
Methods are the keywords that result in action. Methods are the doers of ActionScript, and each kind of object has its own set of methods. Much of learning ActionScript is learning the methods for each kind of object. For example, two methods associated with a MovieClip object are stop() and gotoAndPlay().
Properties
Properties describe an object. For example, the properties of a movie clip include its height and width, x and y coordinates, and scale. Many properties can be changed, whereas other properties can only be “read,” meaning they simply describe the object.
Using proper scripting syntax
If you’re unfamiliar with program code or scripting, ActionScript code may be challenging to decipher. Once you understand the basic syntax, which is the grammar and punctuation of the language, you’ll find it easier to follow a script.
• The semicolon at the end of the line tells ActionScript that it has reached the end of the code line and to go to the next line in the code.
• As in English, every open parenthesis must have a corresponding close parenthesis, and the same is true for brackets and curly brackets. If you open something, you must close it. Very often, the curly brackets in ActionScript code will be separated on different lines. This makes it easier to read what’s inside the curly brackets.
• The dot operator (.) provides a way to access the properties and methods of an object. Type the instance name, followed by a dot, and then the name of the property or method. Think about the dot as a way to separate objects, methods, and properties.
• Whenever you’re entering a string or the name of a file, use quotation marks.
• You can add comments to remind you or others of what you are accomplishing with different parts of the script. To add a comment for a single line, start it with two slashes (//). To type a multiline comment, start it with /* and end it with */. Comments are ignored by Flash and won’t affect your code at all.
Flash provides assistance in the following ways as you write scripts in the Actions panel:
• Words that have specific meanings in ActionScript, such as keywords and statements, appear in blue as you type them in the Actions panel. Words that are not reserved in ActionScript, such as variable names, are in black. Strings are in green. Comments, which ActionScript ignores, are in gray.
• As you work in the Actions panel, Flash detects the action you are entering and displays a code hint. There are two types of code hints: a tooltip that contains the complete syntax for that action and a pop-up menu that lists possible ActionScript elements.
• To check the syntax of a script you’re writing, click the Check Syntax icon (![]() ). Syntax errors are listed in the Compiler Errors panel.
). Syntax errors are listed in the Compiler Errors panel.
You can also click the AutoFormat icon (![]() ) (which will also format the script according to conventions so that it is easier for others to read).
) (which will also format the script according to conventions so that it is easier for others to read).
Navigating the Actions panel
The Actions panel is where you write all your code. Open the Actions panel by choosing Window > Actions or by selecting a keyframe on the Timeline and clicking the ActionScript panel icon (![]() ) on the top right of the Properties inspector. You can also right-click/Ctrl-click on any keyframe and select Actions.
) on the top right of the Properties inspector. You can also right-click/Ctrl-click on any keyframe and select Actions.
The Actions panel gives you quick access to the core elements of ActionScript as well as provides you with different options to help you write, debug, format, edit, and find your code.
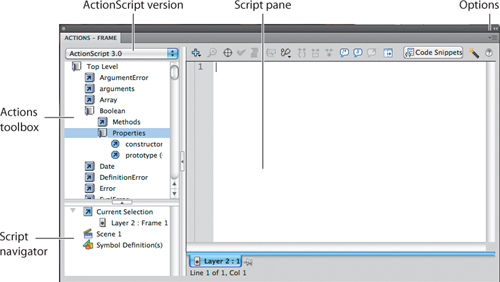
The Actions panel is divided into several panes. At the top-left corner is the Actions toolbox, which contain categories that organize all the ActionScript code. At the top of the Actions toolbox is a pull-down menu that displays only the code for the version of ActionScript you select. You should select ActionScript 3.0, the latest version. At the very bottom of the Actions toolbox categories is a yellow Index category that lists, in alphabetical order, all the language elements. You don’t need to use the toolbox to add code to your script, but it can help to ensure that you’re using the code correctly.
At the top right of the Actions panel is the Script pane—the blank slate in which all your code appears. You enter ActionScript in the Script pane just as you would in a text-editing application.
At the bottom left of the Actions panel is the Script navigator, which can help you find a particular piece of code. ActionScript is placed on keyframes on the Timeline, so the Script navigator can be particularly useful if you have lots of code scattered in different keyframes and on different Timelines.
All the panes in the Actions panel can be resized to suit your working style. They can even be collapsed completely to maximize the pane that you are working in. To resize a pane, click and drag the horizontal or vertical dividers.
Preparing the Timeline
Every new Flash project begins with just a single frame. To create room on the Timeline to add more content, you’ll have to add more frames to all your layers.
1 Select a later frame in the top layer. In this example, select frame 50.

2 Choose Insert > Timeline > Frame (F5). You can also right-click/Ctrl-click and choose Insert Frame.
Flash adds frames in the top layer up to the selected point, frame 50.

3 Select frame 50 in the other two layers and insert frames up to the selected frame.
All your layers have 50 frames on the Timeline.

Adding a Stop Action
Now that you have frames on the Timeline, your movie will play linearly from frame 1 to frame 50. However, with this interactive restaurant guide, you’ll want your viewers to choose a restaurant to see in whichever order they choose. So you’ll need to pause the movie at the very first frame to wait for your viewer to click a button. You use a stop action to pause your Flash movie. A stop action simply stops the movie from continuing by halting the playhead.
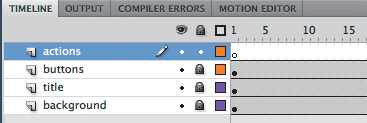
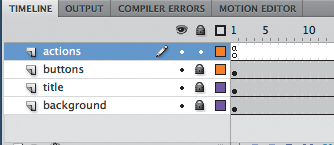
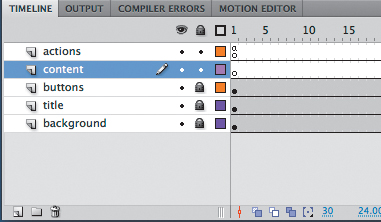
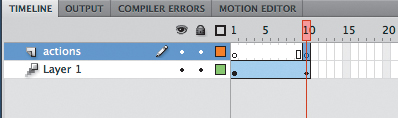
1 Insert a new layer at the top and rename it actions.
2 Select the first keyframe of the actions layer and open the Actions panel (Window > Actions).
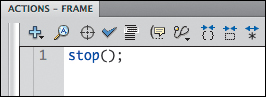
3 In the Script pane, type stop();
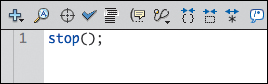
The code appears in the Script pane and a tiny lowercase “a” appears in the first keyframe of the actions layer to indicate it contains some ActionScript. The movie will now stop at frame 1.
Creating Event Handlers for Buttons
Events are occurrences that happen in the Flash environment that Flash can detect and respond to. For example, a mouse click, a mouse movement, and a key press on the keyboard are all events. These events are produced by the user, but some events can happen independently of the user, like the successful loading of a piece of data or the completion of a sound. With ActionScript, you can write code that detects events and respond to them with an event handler.
The first step in event handling is to create a listener that will detect the event. A listener looks something like this:
wheretolisten.addEventListener(whatevent, responsetoevent);
The actual command is addEventListener(). The other words are placeholders for objects and parameters for your situation. Wheretolisten is the object where the event occurs (usually a button), whatevent is the specific kind of event (such as a mouse click), and responsetoevent is the name of a function that is triggered when the event happens. So if you want to listen for a mouse click over a button called btn1_btn, and the response is to trigger a function called showimage1, the code would look like this:
btn1_btn.addEventListener(MouseEvent.CLICK, showimage1);
The next step is to create the function that will respond to the event—in this case, the function called showimage1. A function simply groups a bunch of actions together; you can then trigger that function by referencing its name. A function looks something like this:
function showimage1 (myEvent:MouseEvent){ };
Function names, like button names, are arbitrary. You can name functions whatever makes sense to you. In this particular example, the name of the function is showimage1. It receives one parameter (within the parentheses) called myEvent, which is an event that involves the mouse. The item following the colon indicates what type of object it is. If this function is triggered, all the actions between the curly brackets are executed.
Adding the event listener and function
You’ll add ActionScript code to listen for a mouse click on each button. The response will make Flash go to a particular frame on the Timeline to show different content.
1 Select the first frame of the actions layer.
2 Open the Actions panel.
3 In the Script pane of the Actions panel, beginning on the second line, type
gabelloffel_btn.addEventListener(MouseEvent.CLICK,
restaurant1);

The listener listens for a mouse click over the gabelloffel_btn object on the Stage. If the event happens, the function called restaurant1 is triggered.
4 On the next line of the Script pane, type
![]()
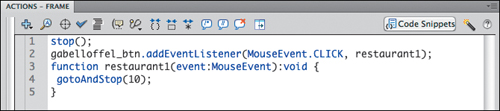
The function called restaurant1 contains instructions to go to frame 10 and stop there. The code for your button called gabelloffel_btn is complete.
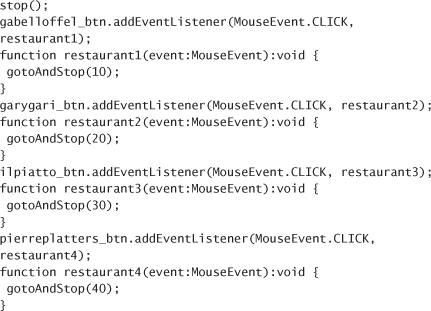
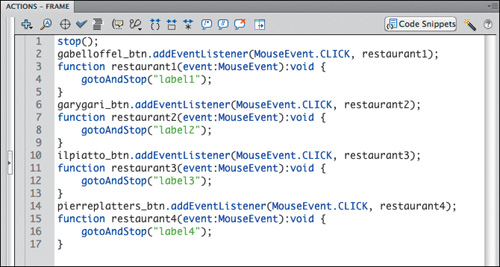
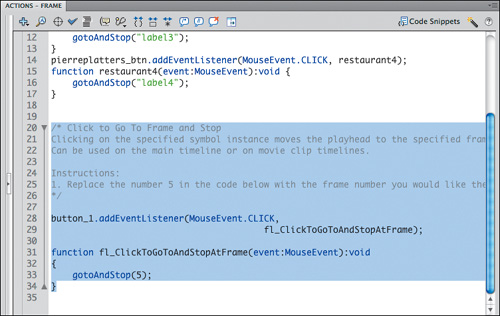
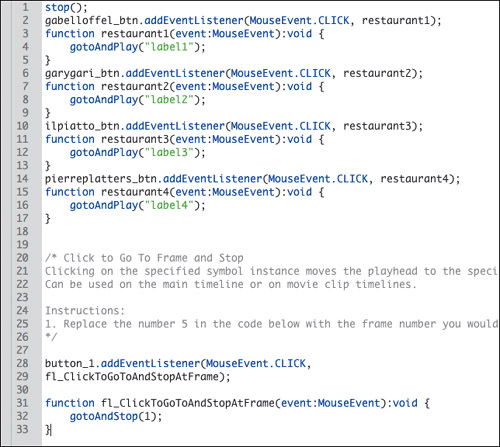
5 On the next line of the Script pane, enter additional code for the remaining three buttons. You can copy and paste lines 2 through 5, and simply change the names of the button, the name of the function (in two places), and the destination frame. The full script should be as follows:
Note
Be sure to include the final curly bracket for each function, or the code won’t work.
Checking syntax and formatting code
ActionScript can be very picky, and a single misplaced period can cause your entire project to grind to a halt. Fortunately, the Actions panel provides a few tools to help you identify errors and help you fix them.
1 Select the first frame of your actions layer and open the Actions panel if it is not already open.
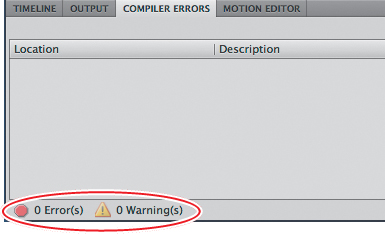
2 Click the Check Syntax button at the top of the Actions panel.
Flash checks the syntax of your ActionScript code. In the Compiler Errors panel (Window > Compiler Errors), Flash notifies you if there are errors or if your code is error free. You should get 0 Errors and 0 Warnings if your code is correct.
Note
Change the automatic formatting by selecting Preferences from the upper-right options menu. Choose Auto Format from the left menu and select the various options for formatting your code.
3 Click the AutoFormat icon at the top of the Actions panel.
Flash formats your code so it conforms to standard spacing and line breaks.
Creating Destination Keyframes
When the user clicks each button, Flash moves the playhead to a new spot on the Timeline according to the ActionScript instructions you just programmed. However, you haven’t yet placed anything different at those particular frames. That’s the next step.
Inserting keyframes with different content
You will create four keyframes in a new layer and place information about each of the restaurants in the new keyframes.
1 Insert a new layer at the top of the layer stack but below the actions layer and rename it content.
2 Select frame 10 of the content layer.
3 Insert a new keyframe at frame 10 (Insert > Timeline > Keyframe, or F6).
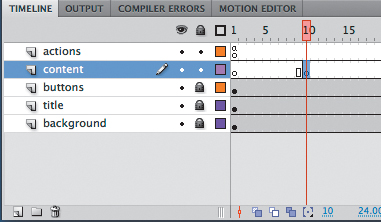
4 Insert new keyframes at frames 20, 30, and 40.
Your Timeline has four empty keyframes in the content layer.
5 Select the keyframe at frame 10.
6 In the Library panel, expand the folder called restaurant content. Drag the symbol called gabel and loffel from the Library panel to the Stage. The symbol named gabel and loffel is a movie clip symbol that contains a photo, graphics, and text about the restaurant.
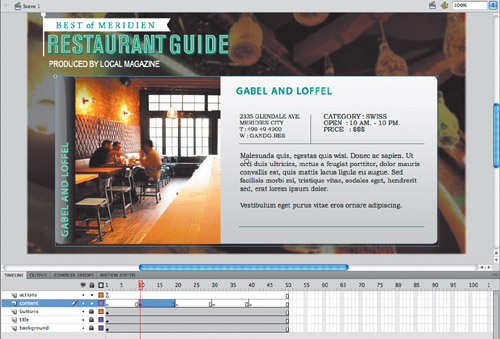
7 In the Properties inspector, set the X value to 60 and the Y value to 150.
The restaurant information about gabel and loffel is centered on the Stage and covers all the buttons.
8 Select the keyframe at frame 20.
9 Drag the symbol called gary gari from the Library panel to the Stage. The symbol named gary gari is another movie clip symbol that contains a photo, graphics, and text about this restaurant.
10 In the Properties inspector, set the X value to 60 and the Y value to 150.
11 Place each of the movie clip symbols from the restaurant content folder in the Library panel to the corresponding keyframes in the content layer.
Each keyframe should contain a different movie clip symbol about a restaurant.
Using labels on keyframes
Your ActionScript code tells Flash to go to a different frame number when the user clicks each of the buttons. However, if you decide to edit your Timeline and add or delete a few frames, you’ll need to go back into your ActionScript and change your code so the frame numbers match.
An easy way to avoid this problem is to use frame labels instead of fixed frame numbers. Frame labels are names that you give to keyframes. Instead of referring to keyframes by their frame number, you refer to them by their label. So, even if you move your destination keyframes as you edit, the labels remain with their keyframes. To reference frame labels in ActionScript, you must enclose them in quotation marks. The command gotoAndStop("label1") makes the playhead go to the keyframe with the label called label1.
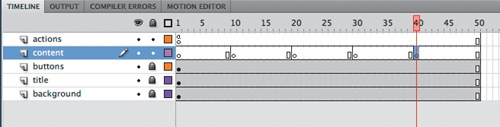
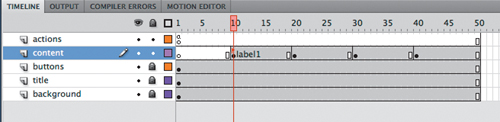
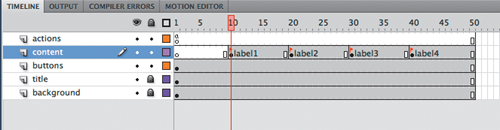
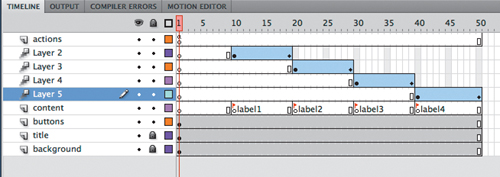
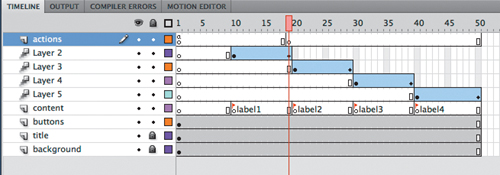
1 Select frame 10 on the content layer.
2 In the Properties inspector, enter label1 in the Label Name field.
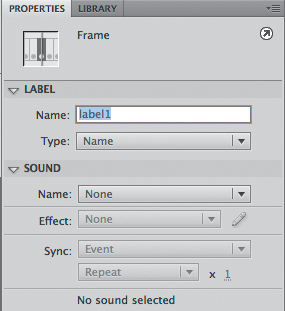
A tiny flag icon appears on each of the keyframes that have labels.
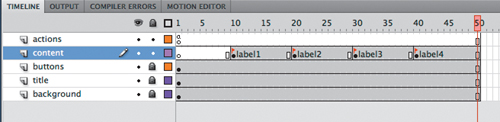
3 Select frame 20 on the content layer.
4 In the Properties inspector, enter label2 in the Label Name field.
5 Select frames 30 and 40, and in the Properties inspector, enter corresponding names in the Label Name field: label3 and label4.
A tiny flag icon appears on each of the keyframes that have labels.
6 Select the first frame of the actions layer and open the Actions panel.
7 In your ActionScript code, change all the fixed frame numbers in each of the gotoAndStop() commands to the corresponding frame labels:
• gotoAndStop(10); should be changed to gotoAndStop("label1");
• gotoAndStop(20); should be changed to gotoAndStop("label2");
• gotoAndStop(30); should be changed to gotoAndStop("label3");
• gotoAndStop(40); should be changed to gotoAndStop("label4");
The ActionScript code now directs the playhead to a particular frame label instead of a particular frame number.
8 Test your movie by choosing Control > Test Movie > in Flash Professional.
Each button moves the playhead to a different labeled keyframe on the Timeline, where a different movie clip is displayed. The user can choose to see any restaurant in any order. However, since the restaurant information covers the buttons, you can’t return to the original menu screen to choose another restaurant. You’ll need to provide another button to return to the first frame, which you’ll do in the next section.
Creating a Home Button
A home button simply makes the playhead go back to the first frame of the Timeline, or to a keyframe where an original set of choices, or the main menu, are presented to the viewer. Creating a button that goes to frame 1 is the same process as creating the four restaurant buttons. However, in this section, you’ll learn to use the new Code Snippets panel to add ActionScript to your project.
Adding another button instance
A home, or main menu, button is provided for you in the Library panel.
1 Select the Buttons layer and unlock it if it is locked.
2 Drag the button called mainmenu from the Library panel to the Stage. Position the button instance at the top-right corner.

3 In the Properties inspector, set the X value to 726 and the Y value to 60.
Using the Code Snippets panel to add ActionScript
The Code Snippets panel provides commonly used ActionScript code for you to easily add simple interactivity to your Flash project. If you are unsure of coding your own buttons, you can use the Code Snippets panel to learn how to add interactivity. You can also save, import, and share code between a team of developers to make the development and production process more efficient.
1 Choose Window > Code Snippets, or if your Actions panel is already open, click the Code Snippets button (![]() ) at the top right of the Actions panel.
) at the top right of the Actions panel.
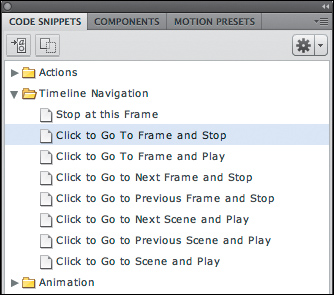
The Code Snippets panel appears. The code snippets are organized in folders that describe their function.

2 Select the Main Menu button on the Stage.
3 In the Code Snippets panel, expand the folder called Timeline Navigation and select Click to Go To Frame and Stop.
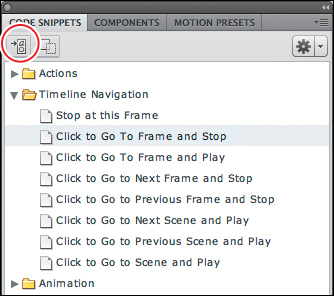
4 Click the Add to Current Frame button at the top-left corner of the Code Snippets panel.
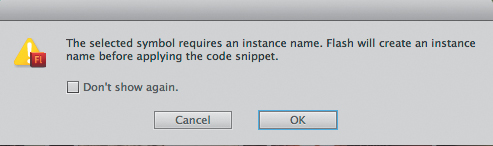
Flash creates the code necessary to add the selected interactivity. If the button has not been given an instance name, a dialog box appears to warn you that the instance will automatically be given a name. Click OK to dismiss the dialog box.
The Actions panel opens to show you the code that is generated. Flash adds the code to your existing code in the actions layer. If you don’t have existing code, Flash will create a new layer for you. The code in gray (between the /* and the */ symbols) describes how the code works and any instructions for customizing it to fit your situation.
5 Within the function called fl_ClickToGoToAndStopAtFrame, replace the gotoAndStop(5) action with gotoAndStop(1).
You want the playhead to return to frame 1 when the viewer clicks the Main Menu button, so you need to replace the argument in the gotoAndStop() action.
6 Choose Control > Test Movie > in Flash Professional.
Clicking on each button moves the playhead to a different labeled keyframe on the Timeline, where a different movie clip is displayed. Clicking the Main Menu button returns to the first frame, which displays the original four restaurant choices.

Playing Animation at the Destination
So far, this interactive restaurant guide works by using the gotoAndStop() command to show information in different keyframes along the Timeline. But how would you play an animation after a user clicks a button? The answer is to use the command gotoAndPlay(), which moves the playhead to the frame number or frame label specified by its parameter and plays from that point.
Creating transition animations
Next, you will create a short transition animation for each of the restaurant guides. Then you’ll change your ActionScript code to direct Flash to go to each of the keyframes and play the animation.
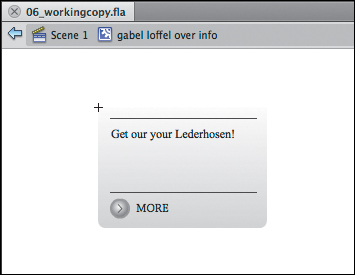
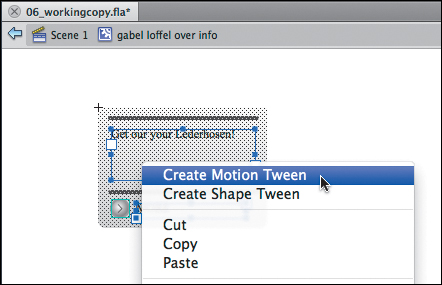
1 Move the playhead to the label1 frame label.
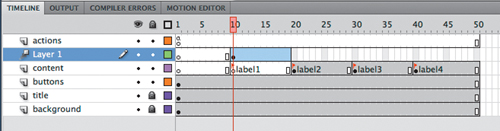
2 Right-click/Ctrl-click on the instance of the restaurant information on the Stage and choose Create Motion Tween.
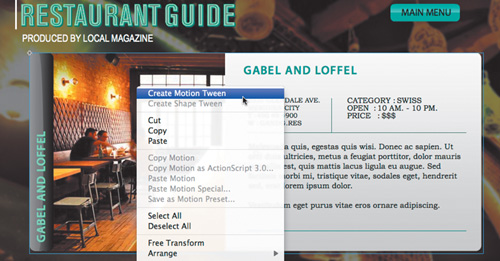
Flash creates a separate Tween layer for the instance so that it can proceed with the motion tween.
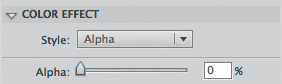
3 In the Properties inspector, select Alpha from the Style pull-down menu in the Color Effect section.
4 Set the Alpha slider to 0%.
The instance on the Stage becomes totally transparent.
5 Move the playhead to the end of the tween span at frame 19.
6 Select the transparent instance on the Stage.
7 In the Properties inspector, set the Alpha slider to 100%.
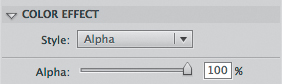
The instance is displayed at a normal opacity level. The motion tween from frame 10 to frame 19 shows a smooth fade-in effect.
8 Create similar motion tweens for the remaining restaurants in the keyframes labeled label2, label3, and label4.
Note
Recall that you can use the Motion Presets panel to save a motion tween and apply it to other objects to save you time and effort. Select the first motion tween on the Timeline and click Save selection as preset. Once saved, you can apply the same motion tween to another instance.
Using the gotoAndPlay command
The gotoAndPlay command makes the Flash playhead move to a specific frame on the Timeline and begin playing from that point.
1 Select the first frame of the actions layer and open the Actions panel.
2 In your ActionScript code, change all the first four gotoAndStop() commands to gotoAndPlay() commands. Leave the parameter unchanged:
• gotoAndStop("label1"); should be changed to gotoAndPlay("label1");
• gotoAndStop("label2"); should be changed to gotoAndPlay("label2");
• gotoAndStop("label3"); should be changed to gotoAndPlay("label3");
• gotoAndStop("label4"); should be changed to gotoAndPlay("label4");
Make sure you keep the function for your Main Menu button unchanged.
You’ll want that function to remain a gotoAndStop() command.
For each of the restaurant buttons, the ActionScript code now directs the playhead to a particular frame label and begins playing at that point.
Note
A fast and easy way of doing multiple replacements is to use the Find and Replace command in the Actions panel. From the options menu in the upper-right corner, select Find and Replace.
Stopping the animations
If you test your movie now (Control > Test Movie > in Flash Professional), you’ll see that each button goes to its corresponding frame label and plays from that point, but it keeps playing, showing all the remaining animations in the Timeline. The next step is to tell Flash when to stop.
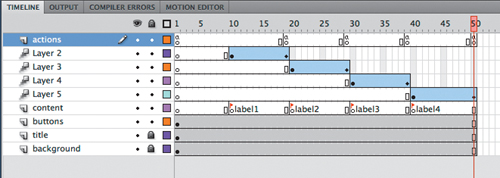
1 Select frame 19 of the actions layer, the frame just before the label2 keyframe on the image layer.
2 Right-click/Ctrl-click and choose Insert Keyframe.
A new keyframe is inserted in frame 19 of the actions layer.
The Script pane in the Actions panel is blank. Don’t panic! Your code has not disappeared. Your code for the event listeners is on the first keyframe of the actions layer. You have selected a new keyframe in which you will add a stop command.
4 In the Script pane, enter stop();
Flash will stop playing when it reaches frame 19.
5 Insert keyframes at frames 29, 39, and 50.
6 In each of those keyframes, add a stop command in the Actions panel.
7 Test your movie by choosing Control > Test Movie > in Flash Professional.
Each button takes you to a different keyframe and plays a short fade-in animation. At the end of the animation, the movie stops and waits for the viewer to click the Main Menu button.
Note
If you want a quick and easy way to duplicate the keyframe containing the stop command, hold down the Alt/Option key while you move it to a new location on the Timeline.
Animated Buttons
Animated buttons display an animation in the Up, Over, or Down keyframes. When you hover your mouse cursor over one of the restaurant buttons, the gray additional information box appears. But imagine if that gray information box were animated. It would give more life and sophistication to the interaction between the user and the button.
The key to creating an animated button is to create an animation inside a movie clip symbol, and then place that movie clip symbol inside the Up, Over, or Down keyframes of a button symbol. When one of those button keyframes is displayed, the animation in the movie clip plays.
Creating the animation in a movie clip symbol
Your button symbols in this interactive restaurant guide already contain a movie clip symbol of a gray information box in their Over states. You will edit each movie clip symbol to add an animation inside it.
1 In the Library panel, expand the restaurant previews folder. Double-click the movie clip symbol icon for gabel loffel over info.
Flash puts you in symbol-editing mode for the movie clip symbol called gabel loffel over info.
2 Select all the visual elements on the Stage (Ctrl/Command+A).
3 Right-click/Ctrl-click and choose Create Motion Tween.
4 In the dialog box that appears asking for confirmation to convert the selection to a symbol, click OK.
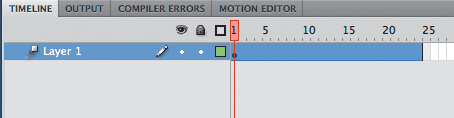
Flash creates a Tween layer and adds one second worth of frames to the movie clip Timeline.
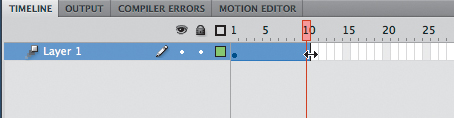
5 Drag the end of the tween span back so the Timeline only has 10 frames.
6 Move the playhead to frame 1 and select the instance on the Stage.
7 In the Properties inspector, select Alpha from the Style pull-down menu in the Color Effect section and set the Alpha slider to 0%.
The instance on the Stage becomes totally transparent.
8 Move the playhead to the end of the tween span at frame 10.
9 Select the transparent instance on the Stage.
10 In the Properties inspector, set the Alpha slider to 100%.
Flash creates a smooth transition between the transparent and opaque instance in the 10 frame tween span.
11 Insert a new layer and rename it actions.
12 Insert a new keyframe in the last frame (frame 10) of the actions layer.
13 Open the Actions panel (Window > Actions) and enter stop(); in the Script pane.
Adding the stop action in the last frame ensures that the fade-in effect only plays once.
14 Exit symbol-editing mode by clicking the Scene 1 button above the Stage.
15 Choose Control > Test Movie > in Flash Professional.

When your mouse cursor hovers over the first restaurant button, the gray information box fades in. The motion tween inside the movie clip symbol plays the fade-in effect, and the movie clip symbol is placed in the Over state of the button symbol.
Note
If you want an animated button to repeat its animation, leave out the stop command at the end of the movie clip’s Timeline.
16 Create identical motion tweens for the other gray information box movie clips so that all the restaurant buttons are animated.
Review Questions
1 How and where do you add ActionScript code?
2 How do you name an instance, and why is it necessary?
3 How can you label frames, and when is it useful?
4 What is a function?
5 What is an event? What is an event listener?
6 How do you create an animated button?
Review Answers
1 ActionScript code resides in keyframes on the Timeline. Keyframes that contain ActionScript are indicated by a small lowercase “a”. You add ActionScript through the Actions panel. Choose Window > Actions, or select a keyframe and click the ActionScript panel icon in the Properties inspector, or right-click/Ctrl-click and select Actions. You enter code directly in the Script pane in the Actions panel, or you can select commands from the categories in the Actions toolbox. You can also add ActionScript through the Code Snippets panel. Select an instance on the Stage, choose an interaction in the Code Snippets panel, and then click the Add to Current Frame button.
2 To name an instance, select it on the Stage, and then type in the Instance Name field in the Properties inspector. You need to name an instance to reference it in ActionScript.
3 To label a frame, select a keyframe on the Timeline, and then type a name in the Frame Label box in the Properties inspector. You can label frames in Flash to make it easier to reference frames in ActionScript and to give you more flexibility. If you want to change the destination of a gotoAndStop or gotoAndPlay command, you can move the label rather than having to locate every reference to the frame number in the script.
4 A function is a group of statements that you can refer to by name. Using a function makes it possible to run the same set of statements without having to type them repeatedly into the same script. When an event is detected, a function is executed in response.
5 An event is an occurrence that is initiated by a button click, a key press, or any number of inputs that Flash can detect and respond to. An event listener, also called an event handler, is a function that is executed in response to specific events.
6 Animated buttons display an animation in the Up, Over, or Down keyframes. To create an animated button, make an animation inside a movie clip symbol, and then place that movie clip symbol inside the Up, Over, or Down keyframes of a button symbol. When one of those button keyframes is displayed, the animation in the movie clip plays.