
10. Publishing Flash Documents
This lesson will take less than an hour to complete. If needed, remove the previous lesson folder from your hard drive and copy the Lesson10 folder onto it.
![]()
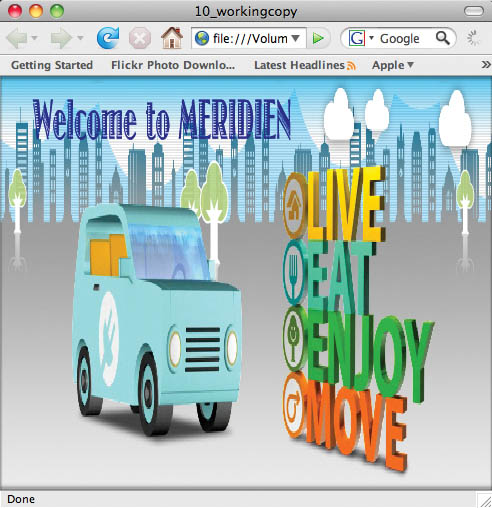
When you’ve finished your Flash project, publish it as a SWF file for a Web site or as a projector for ultimate portability, or save frames from the animation as image files.
Getting Started
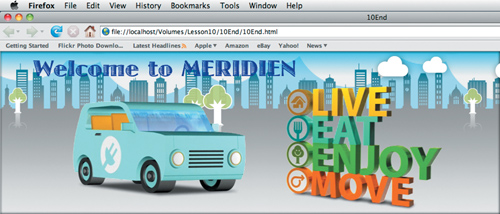
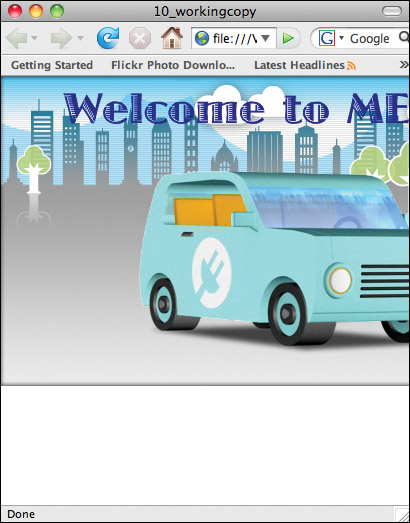
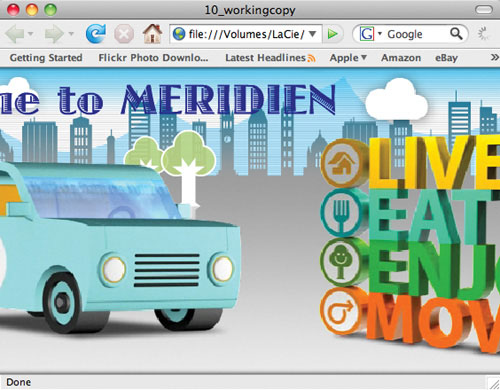
In this lesson, you’ll publish an animation that has already been completed. The project is an animated banner for the familiar fictional city of Meridien, whose interactive restaurant guide you created in Lesson 6, and whose realtor site you created in Lesson 7. You’ll publish the movie for the Web, capture specific frames as images, and save the movie so that even viewers who don’t have the Flash Player can see it.
1 Double-click the 10End.html file in the Lesson10/10End folder to open the finished project.
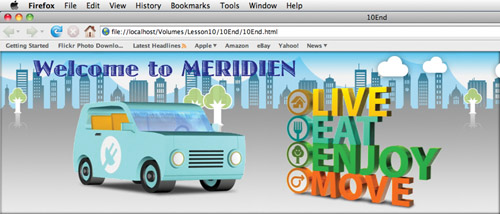
A Web browser launches and plays the HTML file, which displays the SWF file. The HTML file tells the browser how to show the SWF file. Quit the Web browser.
2 Double-click the 10Start.fla file in the Lesson10/10Start folder to open it in Flash.
The project displays video, images, and motion tweens, and all the assets are contained within the FLA file.
3 Choose File > Save As. Name the file 10_workingcopy.fla and save it in the 10Start folder. Saving a working copy ensures that the original start file will be available if you want to start over.
Testing a Flash Document
Troubleshooting is a skill you develop over time, but it’s easier to identify the cause of problems if you test your movie frequently as you create content. If you test after each step, you know which changes you made and therefore what might have gone wrong. A good motto to remember is “Test early. Test often.”
One fast way to preview a movie is to choose Control > Test Movie > in Flash Professional (Ctrl+Enter/Command+Return), as you’ve done in earlier lessons. This command creates a SWF file in the same location as your FLA file so you can play and preview the movie; it does not create the HTML file or any other files necessary to play the movie from a Web browser.
When you believe you’ve completed your movie or a portion of the movie, take the time to make sure all the pieces are in place and that they perform the way you expect them to.
1 Review the storyboard for the project, if you have one, or other documents that describe the purpose and requirements of the project. If such documents do not exist, write a description of what you expect to see when you view the movie. Include information about the length of the animation, any buttons or links included in the movie, and what should be visible as the movie progresses.
2 Using the storyboard, project requirements, or your written description, create a checklist that you can use to verify that the movie meets your expectations.
Note
The default behavior for your movie in the Test Movie mode is to loop. You can make your SWF play differently in a browser by selecting different publish settings, as described later in this chapter, or by adding ActionScript to stop the Timeline.
3 Choose Control > Test Movie > in Flash Professional. As the movie plays, compare it with your checklist. Click buttons and links to ensure they behave as expected. You should click on every possibility that a user may encounter. This process is called QA, or quality assurance. In larger projects, it may be referred to as beta testing.
4 Choose File > Publish Preview > Default (HTML) to export a SWF file and an HTML file required to play in a browser and to preview the movie.
A browser opens, if one is not already open, and plays the final movie.
5 Upload the two files (the SWF and HTML) to your own Web server and give your colleagues or friends the Web site address so they can help you test the movie. Ask them to run the movie on different computers with different browsers to ensure that all the files are included and that the movie meets the criteria on your checklist. Encourage testers to view the movie as though they were its target audience.
Note
You can also just choose File > Publish (Shift+F12) to export the SWF file and the HTML file without previewing the movie in a Web browser.
If your project requires additional media, for example, FLV or F4V video files, skin files for your video, or external SWF files that are loaded, you must upload them along with your SWF and HTML file.
6 Make changes and corrections as necessary to finalize the movie, upload the revised files, and then test it again to ensure it meets your criteria. The iterative process of testing and making revisions may not sound like fun, but it is a critical part of launching a successful Flash project.
Understanding the Bandwidth Profiler
You can preview how your final project might behave under different download environments by using the Bandwidth Profiler, a useful panel that is available when you are in Test Movie mode.
View the Bandwidth Profiler
The Bandwidth Profiler provides information such as the overall file size, the total number of frames, the dimensions of the Stage, and how your data is distributed throughout your frames. You can use the Bandwidth Profiler to pinpoint where there are large amounts of data so you can see where there may be pauses in the movie playback.
1 Choose Control > Test Movie > in Flash Professional.
Flash exports a SWF and displays your movie in a new window.
2 Choose View > Bandwidth Profiler.
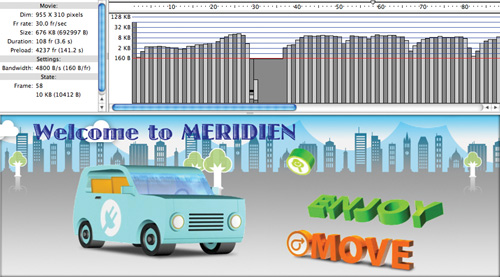
A new window appears above your movie. Basic information about your movie is listed on the left side of the profiler. A timeline appears on the right side of the profiler with gray bars representing the amount of data in each frame. The higher the bars the more data is included.
You can view the graph on the right in two ways: as a Streaming Graph (View > Streaming Graph) or as a Frame By Frame Graph (View > Frame By Frame Graph). The Streaming Graph indicates how the movie downloads over the Web by showing you how data streams from each frame, whereas the Frame By Frame Graph simply indicates the amount of data in each frame. In Streaming Graph mode, you can tell which frames will cause hang-ups during playback by noting which bar exceeds the given Bandwidth setting.
Test download performance
You can set different download speeds and test the playback performance of your movie under those different conditions.
1 While in Test Movie mode, choose View > Download Settings > DSL.
The DSL setting is a type of Internet connection and a measure of the download speed that you want to test. It corresponds to 32.6 kilobytes per second. Choose higher or lower speeds depending on your target audience.
2 Choose View > Simulate Download.
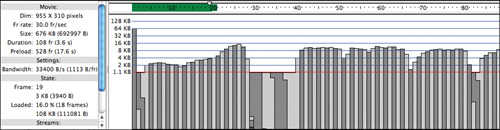
Flash simulates playback over the Web at the given Bandwidth setting (DSL). A green horizontal bar at the top of the window indicates which frames have been downloaded, and the triangular playhead marks the current frame that plays. Notice that there is a slight delay at frame 1 while the data downloads. Anytime a gray data bar exceeds the red horizontal line (the one marked 1.1 KB), there will be a slight delay in the playback of your movie.
Once sufficient data has downloaded, the movie plays, though you may still see some pauses when the playhead catches up to the downloaded portions.
3 Choose View > Download Settings > T1.
T1 is a much faster broadband connection than DSL, which simulates download speeds of 131.2 kilobytes per second.
4 Choose View > Simulate Download.
Flash simulates playback over the Web at the faster speed. Notice that the delay at the beginning is very brief, and the movie plays almost seamlessly as the movie downloads quick enough so the playhead never catches up.
5 Close the preview window.
Note
The download speeds listed for DSL, T1, and the other preset options represent Adobe’s estimate of those standard Internet connections. You should determine the actual speed of your Internet provider. You can customize the options and their speeds by choosing View > Download Settings > Customize.
Adding Metadata
Metadata is information about data. Metadata describes your Flash file so other developers with whom you share your FLA can see details that you want them to know, or a search engine on the Web can find and share your movie. Metadata includes a document’s title, a description, keywords, the date the file was created, and any other information about the document. You can add metadata to a Flash document, and that metadata is embedded in the file. Metadata makes it easier for other applications and Web search engines to catalog your movie.
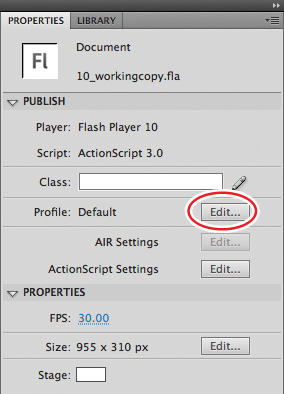
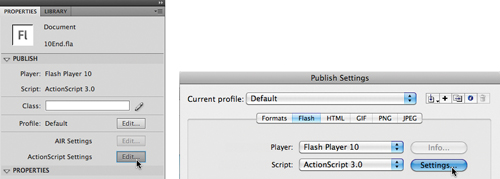
1 Choose File > Publish Settings or click the Edit button next to Profile in the Properties inspector.
The Publish Settings dialog box appears.
2 Click the Flash tab.
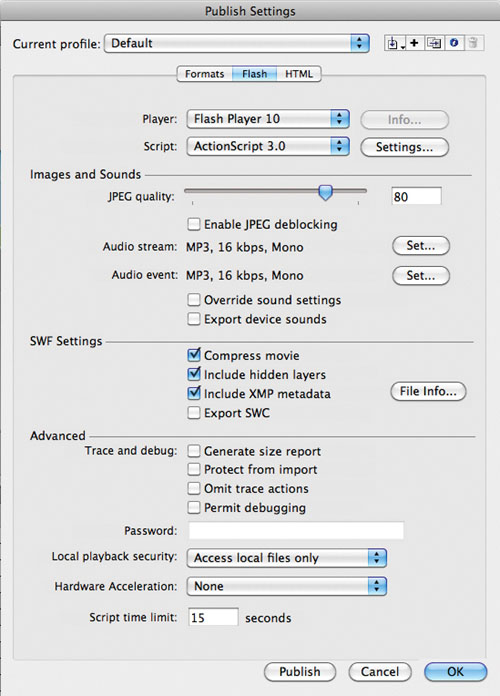
3 In the SWF Settings, select Include XMP Metadata and click File Info.
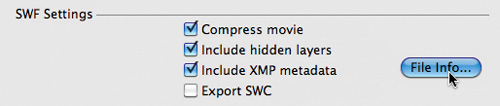
The XMP Metadata dialog box appears.
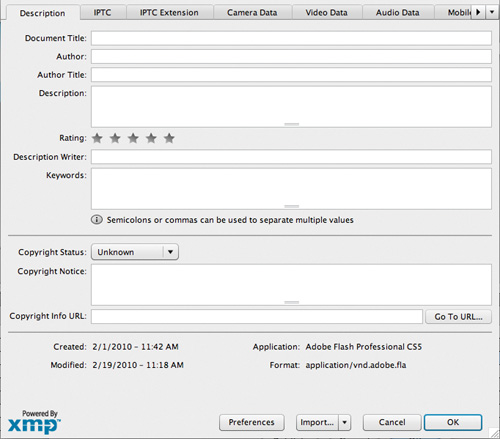
4 Click the Description tab.
5 In the Document Title field, type Welcome to Meridien.
6 In the Keywords field, type Meridien, Meridien City, relocation, tourism, travel, urban, visitor guide, vacation, city entertainment, destinations.
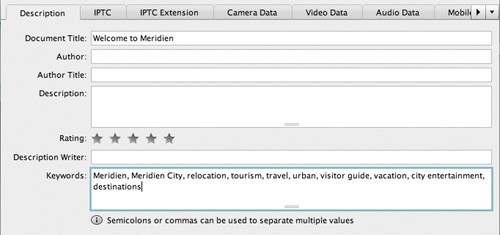
7 Enter any other descriptive information in the other fields. Click OK to close the dialog box. Click OK to close the Publish Settings dialog box.
The metadata will be saved with the Flash document and will be available for other applications and Web search engines.
Publishing a Movie for the Web
When you publish a movie for the Web, Flash creates a SWF file and an HTML document that tells the Web browser how to display your Flash content. You need to upload both files to your Web server along with any other files your SWF file references (such as FLV or F4V video files and skins). The Publish command saves all the required files to the same folder.
You can specify different options for publishing a movie, including whether to detect the version of Flash Player installed on the viewer’s computer. When you change the settings in the Publish Settings dialog box, they are saved with the document.
Specifying Flash file settings
You can determine how Flash publishes the SWF file, including which version of Flash Player it requires, which version of ActionScript it uses, and how the movie is displayed and plays.
1 Choose File > Publish Settings.
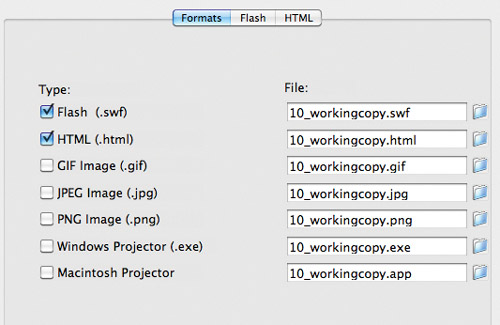
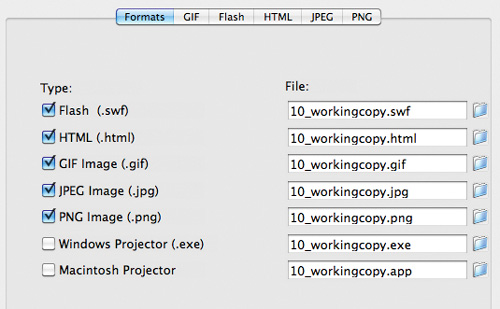
2 Click the Formats tab and select Flash and HTML. You can also choose to publish the file in additional formats.
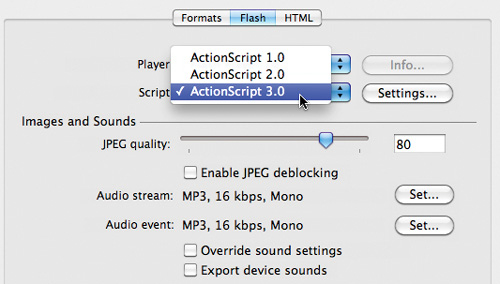
3 Click the Flash tab.
Note
You can change the name of the published file by typing a different filename in the boxes. You can also change the location where the files are saved by clicking the folder icon.
4 Select a version of Flash Player.

Some Flash Professional CS5 features will not play as expected in versions of the player earlier than Flash Player 10. If you are using the latest features of Flash CS5, you must choose Flash Player 10.
5 Select the appropriate ActionScript version. You’ve used ActionScript 3.0 in lessons in this book, so choose ActionScript 3.0.
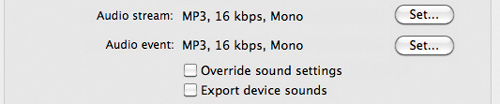
6 If you’ve included sound, click the Set buttons for the Audio stream and Audio event to choose the quality of the audio compression. In this interactive banner, there is no sound, so there’s no need to change the settings.
7 Select Compress movie if the file is large and you want to reduce download times. If you select this option, be sure to test the final movie before uploading it.
8 Select Include XMP metadata if you want to include information that describes your movie.
Note
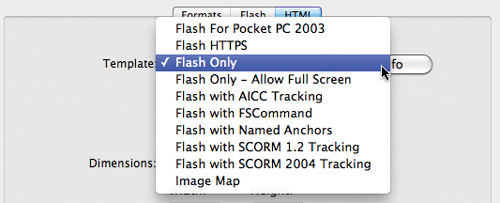
To learn about other template options, select one and then click Info.
10 Select Flash Only from the Template menu.
Detecting the version of Flash Player
Some Flash features require specific versions of Flash Player to play as expected. You can automatically detect the version of Flash Player on a viewer’s computer; if the Flash Player version is not the one required, a message will prompt the viewer to download the updated player.
1 Choose File > Publish Settings if the Publish Settings dialog box is not already open.
2 Click the HTML tab in the Publish Settings dialog box.
3 Select Detect Flash Version.
4 In the Version fields, enter the earliest version of the Flash Player to detect.

5 Click Publish, and then click OK to close the dialog box.
Flash publishes several files. Flash creates a SWF file, an HTML file, and an additional file named swfobject.js that contains extra JavaScript code that will detect the specified Flash Player version. If the browser does not have the earliest Flash Player version you entered in the Version fields, a message is displayed instead of the Flash movie. All three files need to be uploaded to your Web server and are necessary for your movie.
Changing display settings
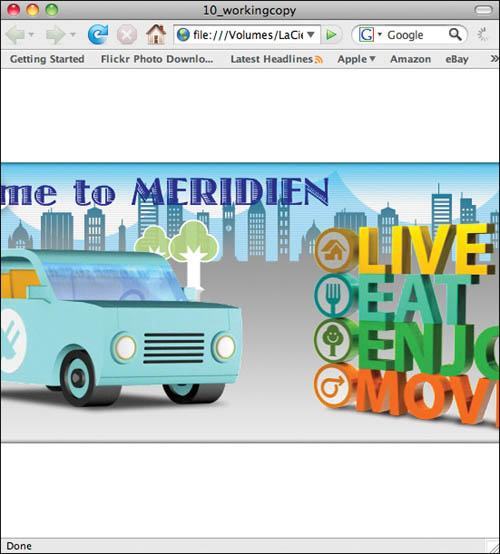
You have many options to change the way your Flash movie is displayed in a browser. The Dimensions options and the Scale options work together to determine the movie’s size and amount of distortion and cropping.
1 Choose File > Publish Settings.
2 Click the HTML tab in the Publish Settings dialog box.
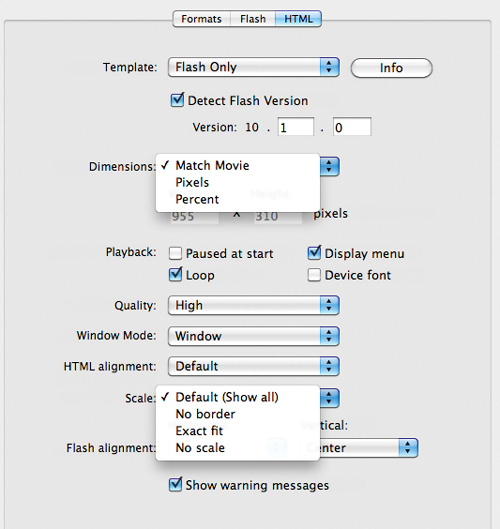
• Select Match Movie for the Dimensions to play the Flash movie at the exact Stage size set in Flash. This is the usual setting for almost all your Flash projects.
• Select Pixels for the Dimensions to enter a different size in pixels for your Flash movie.
• Select Percent for the Dimensions to enter a different size for your Flash movie as a percentage of the browser window.
• Select Default (Show all) for the Scale option to fit the movie in the browser window without any distortions or cropping to show all the content. This is the usual setting for almost all your Flash projects. If a user reduces the size of the browser window, the content remains constant but is clipped by the window.
• Select Percent for Dimensions and No border for the Scale option to scale the movie to fit the browser window without any distortions but with cropping of the content to fill the window.
• Select Percent for Dimensions and Exact fit for the Scale option to scale the movie to fill the browser window on both the horizontal and vertical dimensions. With these options, none of the background color shows, but the content can be distorted.
• Select Percent for Dimensions and No scale for the Scale option to keep the movie size constant no matter how big or small the browser window is.
Changing Playback settings
You can change several options that affect the way your Flash movie plays within a browser.
1 Choose File > Publish Settings.
2 Click the HTML tab in the Publish Settings dialog box.

• Select Paused at start for the Playback option to have the movie pause at the very first frame.
• Deselect Loop for the Playback option to have the movie play only once.
• Deselect Display menu for the Playback option to limit the options in the context menu that appears when you right-click/Ctrl-click on a Flash movie in a browser.
Note
In general, it is best to control a Flash movie with ActionScript than to rely on the Playback settings in the Publish Settings dialog box. For example, add a stop() command in the very first frame of your Timeline if you want to pause the movie at the start. When you test your movie (Control > Test Movie > in Flash Professional), all the functionality will be in place.
Alternative Publishing Options
By default, Flash creates SWF and HTML files for your project. However, you can also choose to save specific frames of the movie as images or to save the file as a projector, which can play on computers that do not have Flash Player installed.
Saving frames as images
Sometimes you might not want to share an entire movie but want to display a particular frame. Exporting a frame as a GIF, JPEG, or PNG image might be useful if you need an image for a portfolio or want to provide an end image to a viewer who doesn’t have Flash Player. You can also use individual images to compile a storyboard of multiple scenes to share with a client before the Flash file is interactive.
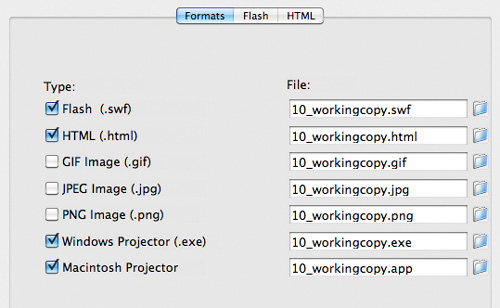
1 Choose File > Publish Settings, and then click the Formats tab. Flash (.swf) and HTML (.html) are selected by default.
2 Select GIF Image (.gif), JPEG Image (.jpg), and PNG Image (.png).
These options export the frame currently selected in the Flash document. For additional settings for each of the image formats, click on the tabs at the top.
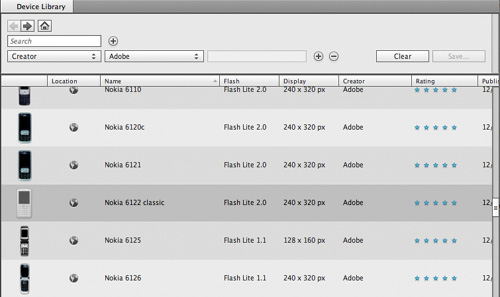
Publishing Movies for Mobile Devices
Although the lessons in this book have been geared toward creating rich, interactive content for the Web, you can also use Flash Professional CS5 to develop and publish content for mobile phones or mobile devices such as the Apple iPhone, iTouch, or iPad.
Mobile devices use only a subset of the Flash CS5 features, so rather than publishing a finished Flash project for a mobile device, it’s essential that you begin a Flash project with the particular mobile device in mind. When you create a new Flash document (File > New), the New Document dialog box allows you to choose your target device.
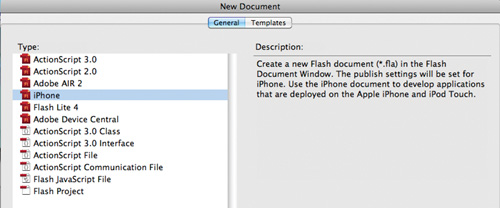
You can choose a Flash Lite document, which uses a scaled-back version of the Flash Player for mobile devices; or an iPhone document, which is specific for creating apps on the iPhone, iTouch, or iPad; or you can launch Adobe Device Central, a separate application that lets you browse various devices and their requirements.
Understanding and creating successful mobile device apps are beyond the scope of this book and require obtaining specific developer certificates for distribution. At the time of this writing, Apple does not allow apps that are developed from cross-platform technologies like Flash CS5, so make sure you understand the latest licensing agreements. To learn more about publishing for mobile devices, refer to both Flash Help and Device Central Help.
3 Click OK to close the Publish Settings dialog box.
4 Select the last frame in the Timeline (frame 108). This is the frame that Flash will export as image files.
5 Choose File > Publish. Flash publishes the files to the folder that contains the Flash document file.
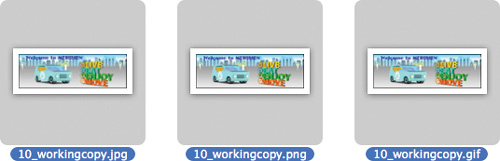
6 Navigate to the Lesson10/10Start folder. In addition to the SWF and HTML files, the folder contains GIF, PNG, and JPEG files. Open the image files to view them.
Note
Which file format you choose depends on the type of content. If the frame contains an illustration with flat, simple colors, GIF is a good option. If the frame is more photographic and you don’t mind compressing image data, JPEG or PNG may be the best choice.
Creating a projector
Most computers have the Flash Player installed with their browsers, but you may need to distribute your movie to someone who doesn’t have the Flash Player or who has an older version, or you just want your movie to run without a browser. You can save your movie as a projector, a stand-alone application that includes all the files necessary to play the movie. Because a projector contains all the data to play your movie, projector files are larger than SWF files.
1 Choose File > Publish Settings, and click the Formats tab.
2 Deselect GIF, JPEG, and PNG. Select Windows Projector and Macintosh Projector.
Projectors and TLF Text
The interactive banner in this lesson doesn’t contain any TLF Text. However, if your movie includes TLF Text and you want to create a projector, you must merge the Text Layout SWF into the projector. The Text Layout SWF contains the necessary code that supports the new TLF Text engine. Click the Edit button for ActionScript Settings in the Properties inspector or the ActionScript Settings button in the Publish Settings dialog box.
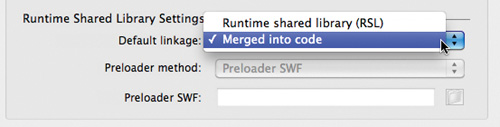
In the Advanced ActionScript 3.0 Settings dialog box that appears, select Merged into code for the Default linkage in the Runtime Shared Library Settings near the bottom.
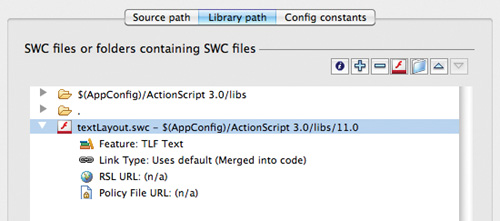
The TLF Text engine that is listed in the display window now shows that its Link Type is to be merged into code rather than linked to a shared external library. This means that the code for the TLF Text engine will be included in the single projector file.
Refer back to Lesson 7 for more information about TLF Text and the additional Text Layout SWF.
4 When the file has been published, click OK to close the dialog box.
5 Open the Lesson10/10Start folder.
6 Open the projector file for your platform (Windows or Mac). The Windows Projector file has an .exe extension and the Mac Projector file has an .app extension, though your operating system may hide the extension in the filename.
Both the Windows and the Mac projectors can be double-clicked to play without a browser. You can share the projectors on portable media such as a CD or DVD. You can use these publishing methods to finalize any Flash projects you create and share them with the world.
Next steps
Congratulations! You’ve made it through the last lesson. By now you’ve seen how Flash Professional CS5, in the right creative hands, has all the features to produce media-rich, interactive projects. You’ve completed these lessons—many of them from scratch—so you understand how the various tools, panels, and ActionScript work together for real-world applications.
But there’s always more to learn. Continue practicing your Flash skills by creating your own animation or interactive Web site. Get inspired by seeking out Flash movies on the Web. Expand your ActionScript knowledge by exploring the Adobe Flash Help resources and other fine Adobe Classroom in a Book manuals.
Review Questions
1 What is the Bandwidth Profiler, and why is it useful?
2 What files do you need to upload to a server to ensure your final Flash movie plays as expected in Web browsers?
3 How can you tell which version of Flash Player a viewer has installed, and why is it important?
4 Define metadata. How do you add it to a Flash document?
5 What is a projector file?
Review Answers
1 The Bandwidth Profiler provides information such as the overall file size, the total number of frames, the dimensions of the Stage, and how your data is distributed throughout your frames. You can use the Bandwidth Profiler to preview how your final project might behave under different download environments.
2 To ensure your movie plays as expected in Web browsers, upload the Flash SWF file and the HTML document that tells the browser how to display the SWF file. You also need to upload the swfobject.js file, if one was published, and any files your SWF file references, such as video or other SWF files; be sure that they are in the same relative location (usually the same folder as the final SWF file) as they were on your hard drive.
3 Select Detect Flash Version in the HTML tab in the Publish Settings dialog box to automatically detect the version of Flash Player on a viewer’s computer. Some Flash features require specific versions of Flash Player to play as expected.
4 Metadata is information about data. Metadata includes a document’s title, a description, keywords, the date the file was created, and any other information about the document. Metadata in a Flash document is published with the Flash file, making it easy for search engines to search and share your movie. To add metadata to a Flash document, choose File > Publish Settings, click the Flash tab, and select File Info under the SWF Settings. In the XMP Metadata dialog box that appears, enter the information you want to include.
5 A projector is a stand-alone application that includes all the information necessary to play the movie without a browser, so people who don’t have the Flash Player or who don’t have the current version can view your movie.