CHAPTER 1
Before Jumping into Flash: Rich Media Design Principles and Practice
Well-crafted rich media experiences rapidly draw viewers into your scene. Rich media tools such as Flash allow designers to bring action to a scene and provide ways to tell the viewer more than what they can simply read on a page.
When creating rich media, you need to consider your client—their intended audience and the purpose for the media they want you to create. You’ll also need to pick the media type relevant to the content’s purpose and master basic project management techniques so you can keep your efforts on track. Other up-front considerations are the accessibility issues some users face and copyright and publishing rules.
- Working with clients to create rich media projects
- Addressing accessibility issues in rich media
- Understanding project management 101
- Understanding copyright issues when using others’ work
Working with Clients to Create Rich Media Projects
Your rich media design experiences will likely start with your clients. While your customers have probably had the pleasure of experiencing rich media environments for themselves, they most likely want you to make rich media content for them because they don’t have the expertise in tools such as Flash. In fact, when asked how to create rich media, most people don’t have the slightest idea where to start or even know what the term entails.
What Is Rich Media?
Depending on whom you query, you will find that the basic definition for rich media sounds something like this: Rich media tools serve as a way to provide the viewer with more interesting methods of garnering information than just a static web page with infrequently changing text.
Rich media can include streaming video, rich Internet applications (RIAs) created with Adobe AIR that do some job for the viewer, buttons, music, mouse cursor changes, color variations, animations, games, cartoons, banner ads, floating ads, tickers, special effects, and much more. Flash isn’t the only rich-media publishing method. You can use Flash to publish Adobe AIR apps as well. AIR apps can be published to iOS or Android devices, or do the desktop.
Rich media also has the ability to use well-crafted designs to get at a variety of subtler elements. For example, you may be interested in the age of your viewers, their affluence (or lack thereof), the kind of work they do, their educational level, various demographics such as ethnicity or urban clustering, and so forth. You can even adapt your rich media to non-computer-literate types: neophytes to the web. For example, Flash has found a fantastic foothold in creating games for young children—teaching them to garner the tools needed to be computer literate long before they ever take a computer class in school.
The user interface (UI) for Flash is easy to learn and yet amazingly powerful. Moreover, all the other products in the Adobe Creative Suite (CS), such as Illustrator, Fireworks, and Photoshop, have been designed to easily interact with one another.
Beginners can accomplish many great things using the native Flash UI, but there is also a scripting language associated with Flash called ActionScript (currently in version 3.0; we typically refer to it as AS3). When the Flash UI meets AS3, some pretty sophisticated things can begin to happen. There is also a formal integrated development environment (IDE) for AS3 programmers called Flash Builder (formerly called Flex), but that topic is way out of scope for this book and for the Adobe Certified Associate (ACA) exam for Rich-Media Communication using Flash, which I will heretofore call simply the “ACA Exam.” (There may be some very minor AS3 questions on the exam, so I’ll cover some AS3 basics in Chapter 13, “Working with ActionScript.”)
Although rich media isn’t limited to websites, in the majority of cases the Web is where you will find rich media content, and it is most likely the place where your customer will want you to do your work. That said, all Flash creations can be easily copied onto USB drives or CDs or DVDs and installed on local computers. The name of the working file you’ll use while you’re developing your Flash rich media content has the extension .fla, but once you publish it, the content is converted into a movie with the filename extension .swf and can be run from any computer with Flash Player installed whether or not Flash itself is installed on the computer. There are other file types with different filename extensions that can be created with Flash, but .fla and .swf are the most common. Rich media designers building content for the web, mobile or AIR apps should be highly cognizant of download and overall application speed, as well as general design principles.
With Flash Player installed, a SWF file (pronounced “swiff file”) can run on a variety of platforms—a very cool feature. Flash also includes robust tools for developing applications for other devices such as Android or Apple (e.g. iOS) smartphones using the built-in templates for creating AIR for Android or AIR for iOS. Because Flash is capable of so many things, designers need to be always cognizant of how quickly the viewer will be able begin viewing the content.
Viewing Great Rich Media Examples
![]() Flash is in use all over the globe, in a plethora of environments. All you need to do is Google “best Flash websites” and you’ll have more than you can look at in a week. Let’s take a look at a few Flash-based sites that have been recognized for their excellence in design. As you look at these sites, think about what makes them interesting and at the same time informative because this is the nexus where rich media lives:
Flash is in use all over the globe, in a plethora of environments. All you need to do is Google “best Flash websites” and you’ll have more than you can look at in a week. Let’s take a look at a few Flash-based sites that have been recognized for their excellence in design. As you look at these sites, think about what makes them interesting and at the same time informative because this is the nexus where rich media lives:
FIGURE 1.1 The Otoko music site: The viewer can see progress without a progress bar!
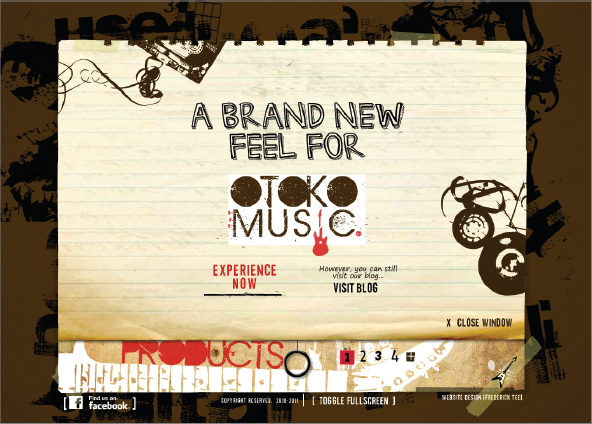
FIGURE 1.2 The Stephano Canturi site
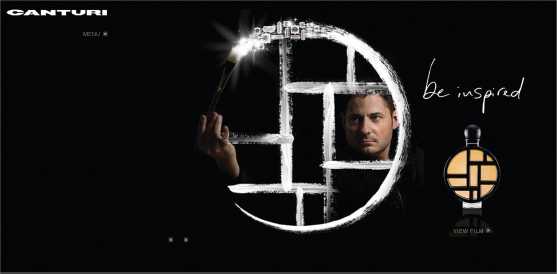
FIGURE 1.3 The Leon Vanrentergem site: Whimsical, charming, amusing, language translation almost unnecessary
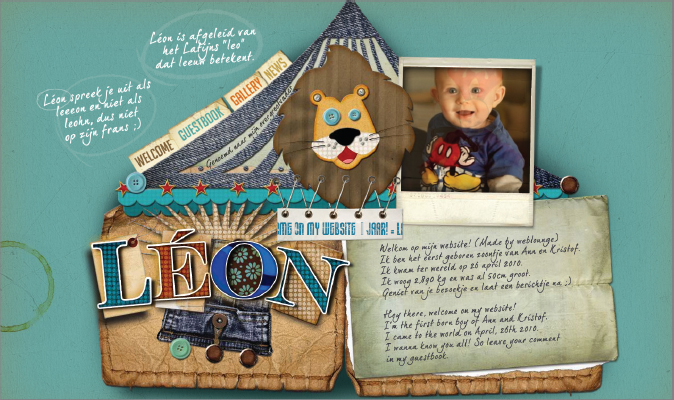
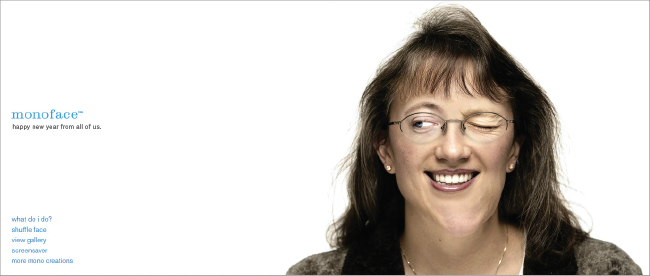
FIGURE 1.4 The Monoface site: Clever, simple, fun
Right-clicking in any of the sites produces the context menu shown in Figure 1.5. This is a Flash menu telling you that you are viewing the site’s content using Flash Player. This single context menu easily tells you when you’re viewing a Flash-based site and when you’re not. It also tells you your Flash Player’s current version (versions are covered in Chapter 13. One of the things that makes Flash such a great rich media product is the ubiquity of Flash Player. See Adobe’s “census” site for more Flash Player ubiquity information:
FIGURE 1.5 Flash Player context menu in a website
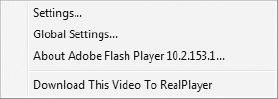
www.adobe.com/products/player_census/flashplayer/version_penetration.html.
If you take a second look at the sites listed, what is one element that sticks out? It is the use of ample space on the site. The designer’s term for this is white space, and it is every bit as important as the site’s content.
![]() The old literary adage advises writers to “show, don’t tell.” Using the power of video, audio, and animation, when coupled with your creative imagination, Flash equips you to bring visualization to the message. This is incredibly powerful stuff because once you have the viewer hooked, you can take them anywhere you want—so long as your creativity is consistent, consuming, and provocative.
The old literary adage advises writers to “show, don’t tell.” Using the power of video, audio, and animation, when coupled with your creative imagination, Flash equips you to bring visualization to the message. This is incredibly powerful stuff because once you have the viewer hooked, you can take them anywhere you want—so long as your creativity is consistent, consuming, and provocative.
What NOT to do
The above sites show great design examples, but what is it that designers shouldn’t be doing? These are probably intuitive to you, but here’s a small list: extraneous graphics, site/scene inconsistency, overcrowded layout, distracting colors, use of numerous outrageous or garish fonts, providing lots of information in paragraph rather than bulleted- or numbered-list form, and not providing navigation cues.
Identifying Your Content’s Purpose and Audience
![]() Whether you’re aware of it or not, whenever you develop rich media, you have a client. It may be the end users of a game you’re developing to upload to a site such as Kongregate (www.kongregate.com). If you’re a working designer and you (rightly) believe you can attract more by assimilating rich media skills, you will definitely have a client sitting in front of you describing the work they want you to create for them.
Whether you’re aware of it or not, whenever you develop rich media, you have a client. It may be the end users of a game you’re developing to upload to a site such as Kongregate (www.kongregate.com). If you’re a working designer and you (rightly) believe you can attract more by assimilating rich media skills, you will definitely have a client sitting in front of you describing the work they want you to create for them.
Given Flash’s sky-is-the-limit capabilities for even newbies to the tool, you may be so excited about your task that you’re inclined to provide your client with something different than they had imagined. Your client says “water,” and with your newfound Flash skills you immediately start thinking about oceans, rivers, waterfalls, infinity pools, and other beautiful moving sources. But in reality what they they have in mind is an attractive ice-cold shimmering glass of water with droplets tantalizingly dripping down the outside. It’s the same water but two different stories.
The disconnect comes about for a couple of primary reasons:
- You have not listened carefully to your client, which means even though your client may be a poor communicator, the onus is on you to gather the appropriate requirements for the job.
- You have assumed you know what the client wants.
It’s important to apply the technology to the customer, not the customer to the technology. Develop great listening skills, ask probing questions, and garner information about what your customers really want from you. But it’s not enough to simply hear what your customers are saying; it’s important that you process what’s being said—that you get at the nuggets of detail your customer is trying to share with you. There are two salient questions you can ask that will cause your customer to give you more detail:
The last item is important because it speaks to the client’s core business. If you’re doing work for a bank, you probably don’t want to send a message about being colorful, playful, and fun loving. Not that these aren’t traits a bank may exhibit. But the conservative notions that people have about banks and their money stored therein don’t lend themselves to those descriptors. On the other hand, a children’s clothing store may very well want to convey such notions. So, understanding the customer’s audience is quite important.
When you’re dealing with rich media, it’s important that you go beyond thinking about the descriptive text and begin cultivating a visual, audible, and animatable feel for what your client wants. It’s wise for you to first meet your client, hear them, ask the questions that give you more detail and information, and then begin sketching out some ideas. You should take the ideas you draw while sitting in front of your client back to your office where you can work on more formal storyboards. A storyboard is a hand-drawn, painted, or digital rendition of how you imagine the scene or scenes playing out. Storyboards are the first draft of how you plan on turning into rich media what you thought you heard your client saying. I’ll cover storyboards more in Chapter 7.
Along with the two basic questions listed earlier, you have some practical questions to ask:
- Why do you want to do this? You want to understand their motivation. Is it money? Time savings? Connectivity options? Getting more customers?
- On what media sources would you like to have this material presented (e.g., Web, game, applet, iPhone or Android app)?
- When are you requiring this work to be finished (e.g., what’s my deadline)?
- Do you have a certain budget in mind?
- Can you give me ideas about some of the things that have worked for you in the past?
- Are there certain topics or ideas I should stay away from?
- May I see some of your products or services in use by your customers?
- If you had to tell me in one minute or less what you want done, what would you say?
Your efforts here are in getting the client to compartmentalize their thoughts and to use words that point to targets they’re thinking about. At the same time you’re listening to this, you can be thinking about how this translates into animated storylines.
The bottom line is that you should get to know your client and find out the reason they want to do this project and the audience it will reach. Write these things down, print them out, and tape them to your desk where you can see them as you work on the project. Hit the targets the client gives you and you’re likely to be successful and also obtain more work from them in the future.
Choosing the Best Media Types
![]() Once you determine what your client wants to say with the rich media content you’re creating—basically, what its purpose is—you can then determine the media types that are best for the content. Flash can host a variety of media types that may be relevant for your client’s content:
Once you determine what your client wants to say with the rich media content you’re creating—basically, what its purpose is—you can then determine the media types that are best for the content. Flash can host a variety of media types that may be relevant for your client’s content:
FIGURE 1.6 The Code Snippets panel in Flash
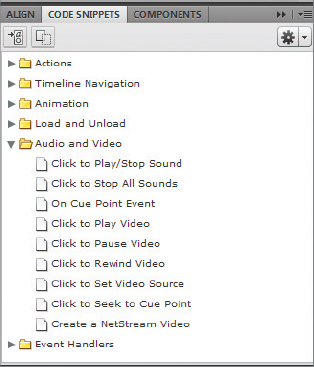
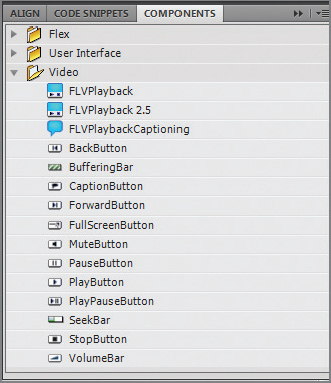
FIGURE 1.7 The Components panel in Flash
Your ultimate goal is not only to make the new deliverable pleasing, but also consistent. Buttons look alike, pages behave the same, there are no unexpected elements with which the viewer must grapple. Consistency not only improves your viewer’s experience, it also helps you churn out cleaner work in a more efficient, timely manner.
Addressing Accessibility Issues in Rich Media
![]() It’s important to design for all potential viewers of your page, and Flash has significant built-in tools for providing accessibility to people with disabilities.
It’s important to design for all potential viewers of your page, and Flash has significant built-in tools for providing accessibility to people with disabilities.
The following categories of people require accessibility options in their rich media experience:
You shouldn’t diminish Flash’s rich media capabilities for your able users just to provide accessibility to your less-ably-equipped users. On the other hand, you should be completely cognizant of those users with accessibility needs and understand (as best as you can) how they’ll access your content. In some ways this concept represents the dividing line between good design and great design.
Moreover, there may be rich media projects you create in which you or your clients simply don’t think there will be much interaction by those requiring accessibility options. For example, a rapidly paced first person shooter (FPS) game in Flash probably won’t get a lot of hits by blind users. In cases like this, you may make just cursory use of Flash’s accessibility tool.
From a client perspective, the accessibility question arises when you’re determining who your client thinks their audience is. It’s quite likely your client hasn’t even considered accessibility issues with the content they’d like to present. Conversely, they may simply assume that you’ll automatically cover that angle since you’re the expert. In either event, it’s up to you to ask about accessibility and make sure this topic is discussed.
Designing for People Who Are Blind
Screen readers are software products—whether built into the operating system or stand-alone, commercially available for a price, or free—that read aloud the screen’s content for blind (and vision-impaired) users. The verbosity of the output can be controlled in the software so users aren’t barraged with audio content. Screen readers can also read the labels on buttons or other labeled objects. It’s important to note that with screen readers, blind users don’t even necessarily need a display hooked up to be able to utilize computers. (Some blind readers also have equipment that translates the computer’s text into Braille.)
The essence of the screen reader idea is similar to having someone read a newspaper to you. It works well in static text environments where nothing changes but could become confusing and clumsy in rich media environments.
Some of the more popular Windows-based screen readers are Freedom Scientific’s JAWS, GW Micro’s Window-Eyes, and IBM’s Home Page Reader. In addition to the commercial products, Windows includes its own screen reader called Narrator (shown in Figure 1.8), and the Mac has a built-in screen reader called VoiceOver. There are also open-source screen readers for our Linux friends.
FIGURE 1.8 The Windows 7 Narrator
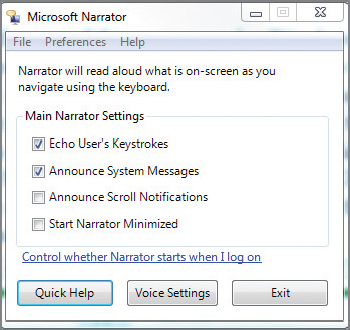
While screen reader software is a really cool idea, you should turn on Narrator and work with it awhile to see what the experience is really like. If you’re like me, you’ll find the verbosity to be both annoying and confusing, and it probably won’t take you long to turn it off. To start it in Windows 7, make sure your computer’s speakers are on and then just click the Start button. In the Run box, type narrator. Windows 7 will show you the Narrator icon. Just press Enter or double-click the icon to launch the program. Work with it awhile, surfing the Web, hitting a Flash site or two, launching Word—you’ll come away with a new appreciation for the difficulty our vision-impaired friends go through daily when trying to work with computers.
![]() When developing accessibility options for rich media content, Windows users will (unwittingly) use Microsoft Active Accessibility (MSAA; see www.microsoft.com/enable/). MSAA is bundled into the Windows operating system (OS) and is able to talk to commercial screen reader software. MSAA reads text inside Flash movies when they are playing. MSAA frees you from having to worry about the complex interactions of rich media software and your own code—the screen reader software simply retrieves from MSAA the audio version of the text on the screen. Because MSAA comes with Windows, Flash movies and screen readers are able to play nicely in the sandbox together.
When developing accessibility options for rich media content, Windows users will (unwittingly) use Microsoft Active Accessibility (MSAA; see www.microsoft.com/enable/). MSAA is bundled into the Windows operating system (OS) and is able to talk to commercial screen reader software. MSAA reads text inside Flash movies when they are playing. MSAA frees you from having to worry about the complex interactions of rich media software and your own code—the screen reader software simply retrieves from MSAA the audio version of the text on the screen. Because MSAA comes with Windows, Flash movies and screen readers are able to play nicely in the sandbox together.
However, even with MSAA, screen reader software may have a difficult time accurately reading aloud to the user what’s going on in the Flash movie. Suppose, for example, you have an animation on the stage showing a string of letters making up a word, each of which is randomly dancing and jumping around on the stage—say for a children’s activity page. This is quite easy to accomplish in Flash, but it creates havoc with screen readers because they don’t know how to react to each individual letter of the animation. It’s likely the screen reader will attempt to read aloud each succeeding letter on the screen, which of course will be nonsensical to the listener.
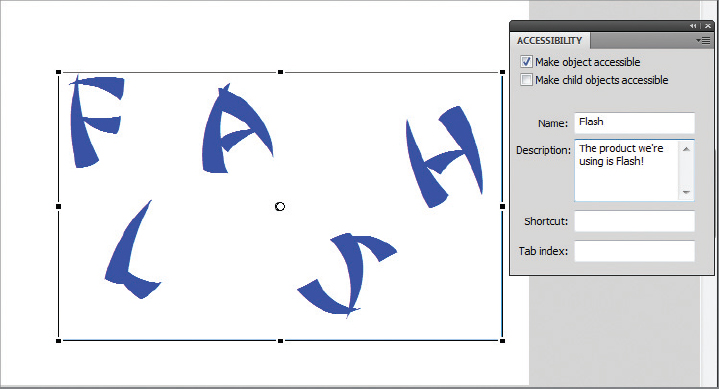
There are several workarounds for this kind of problem, but you must consider the options and integrate them into the design before the work proceeds. Flash rich media designers can overcome issues with screen readers in three ways:
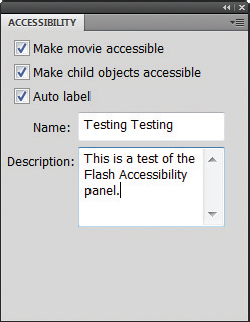
FIGURE 1.9 Inaccessible letter array
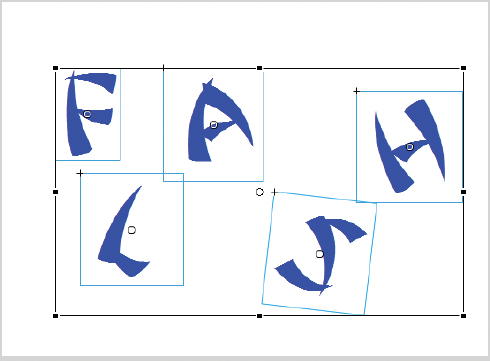
FIGURE 1.10 Converting an inaccessible letter array using the Flash Accessibility panel
Designing for Low-Vision Viewers
Certain viewers have some vision, but it is quite limited. They can read content on the screen, but it has to be displayed in ways that make it accessible to them. In fact, your users may or may not have access to screen reader software. But you can be sure they have the screen resolution set very high so they can read the letters on the screen. How to best meet the needs of these users? Here are some simple solutions:
FIGURE 1.11 What the person with low vision sees
FIGURE 1.12 What average sighted people see

FIGURE 1.13 The Flash Logo: normal size
FIGURE 1.14 The scaled Flash logo

FIGURE 1.15 Fl text object in 40-point Arial
FIGURE 1.16 Fl text object in 120-point Arial

- You can provide a button that vision-impaired users can click to take them to a scene with much larger font detail and minimal artwork. This will require you to understand how to place a button on the screen, give it an instance name, and add code in the form of an event listener and a function that takes the viewer to the new scene. Fortunately, Adobe has automated much of the work for you so you don’t need to stay up late at night reading tutorial sites on how to create buttons that work in Flash. The Code Snippets panel contains lots of prewritten code that you can easily put into your content for purposes such as this.
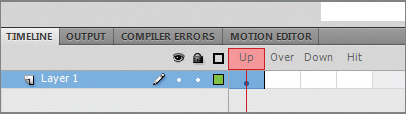
- You can make text items clickable so viewers can click them to enlarge them. This would involve turning text objects into button objects. Buttons are essentially movie clips that have four separate action sections to them, called hit states (see Figure 1.17): Up, Over, Down and Hit. What this means is that different scenes can happen based upon what the viewer is doing with the button. When the button is up (e.g., it’s not being clicked right now), it displays one way, but it displays another when the user hovers over it or clicks it. (Hit is a special hit state that can be used for buttons with complex shapes). By simply turning a text object into a button, you can set the Over hit state to greatly enlarge the text’s font so it’s easily readable. As soon as the viewer navigates away, it goes back to its normal size.
FIGURE 1.17 Flash button hit states
One last note: Be consistent! If you are committed to providing limited-vision or low-vision visitors with content they can access, do so throughout your design. You can’t have one scene that’s supportive of limited-vision viewers and another that’s not.
Designing for Hearing-Impaired and Deaf Viewers
Hearing-impaired individuals have a different Flash problem: If you provide music or sounds in your rich media, they will likely not be able to hear it. This could become a big issue if your design relies on sound media to convey the elements of your content.
The strongest and best thing you can do when thinking about accessibility for your hearing-impaired or deaf viewers is to provide descriptive text for any sound events you have going on in your content. For example, maybe you have a movie in your content that shows how to do something or that includes a person talking about a subject that pertains to your scene’s content. In cases like this, your hearing-impaired viewers won’t be able to hear the movie’s sound, so for those viewers, you’ve lost the effect you trying to accomplish. Sure, some of your viewers can read lips, so maybe not all is lost, but then again, with tutorial movies you typically don’t see the speaker talking—the focus is on their hands and the activity they’re trying to show you.
To get around this problem, you can provide a closed-caption effect. To do this, you’ll need to go through three steps:
You can also provide scene-wide support for hearing-impaired people by putting a Closed Caption button at the entry point to your content. When someone clicks the button, screen hinting becomes available, which means that at any point where you decide hearing-impaired folks would not be able to understand what’s happening, you place a text box on the screen that tells them.
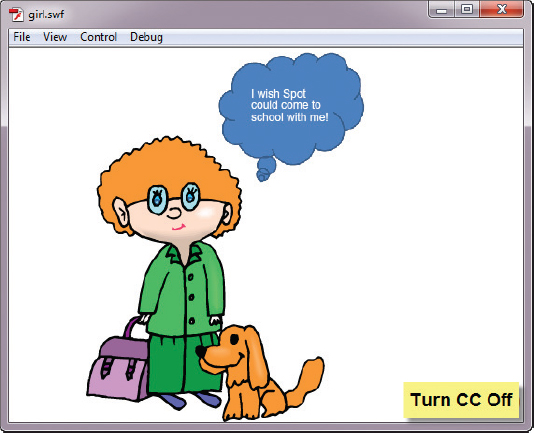
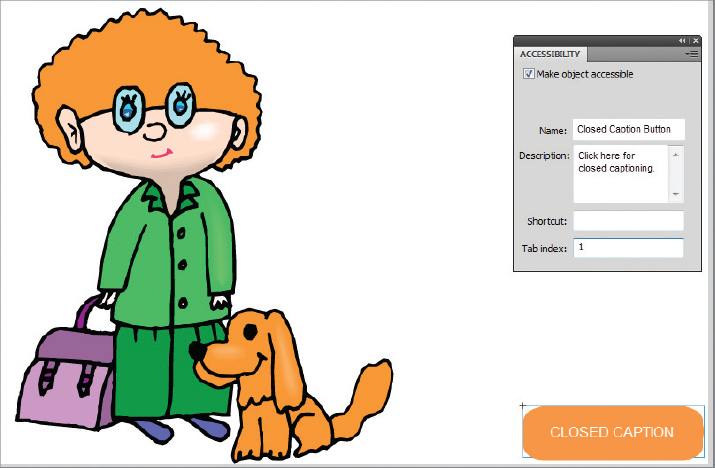
For example, consider Figure 1.18. When designing this scene, you might decide to record a youngster saying, “I wish Spot could come to school with me!” and then put it into your content so when viewers navigate to this scene, the clip plays. By providing a Closed Caption button, you easily send a signal to your hearing-impaired viewers that there is alternative content available for them. You can accomplish all of this by simply creating a text object such as the cartoon balloon shown in the figure, converting it into a symbol such as a movie clip, and then adjusting its alpha value to 0% upon initial entry into the scene. When a hearing-impaired viewer clicks the Closed Caption button, your AS3 code sets the cartoon balloon’s alpha value to 100% and changes the text on the button to Turn CC Off (see Figure 1.19). If the hearing-impaired viewer has read the cartoon balloon and now wants to get rid of it, they simply click the button and your code reverses the preceding process.
FIGURE 1.18 Little girl with doggie scene and Closed Caption button
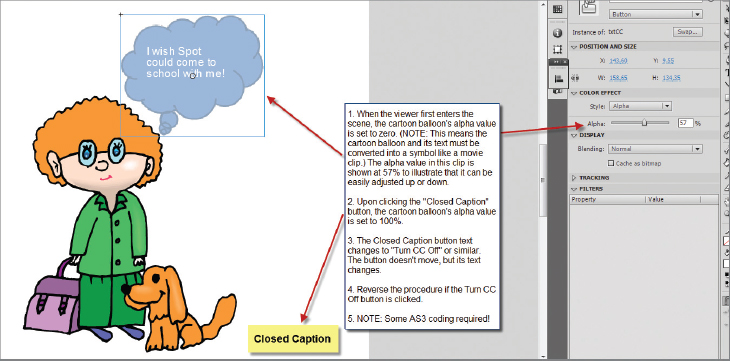
FIGURE 1.19 Text on Closed Caption button changed
What’s cool about this process is that you’re not limited to the type of text box and associated text you put up: You have quite robust design freedom to match the emotion and intent of your scene.
You don’t need to or may not always want to go through this process, however. Using Flash’s ability to turn just about anything into a button, you can also create hot spots that when hovered over put up some text. You’ve seen this technique used in various computer programs. If you hover over an area very long, some text pops up to provide you with a description of what you’re looking at or more detailed information. When the user hovers over a region that has been turned into a button, you can programmatically pop up some text that goes away as soon as they leave the area.
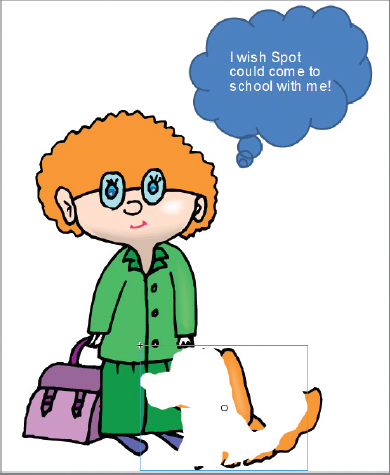
To accommodate this, you need an outline of the graphic you which to turn into a button. Figure 1.20 shows the little girl with her doggie as well as the doggie’s outline converted into a button symbol and ready to move into place. I’ve already made a tan cartoon balloon with the text “Me too!” I then set the outline in the appropriate place over the doggie on the stage, and turned its alpha value down to zero.
FIGURE 1.20 Doggie button outline being moved into place
Designing for People with Physical Limitations
Viewers who have lost most or all of the use of their hands and fingers may not have the ability to manipulate a keyboard and mouse very easily. In fact, some users may be limited to just a couple of keys—perhaps the arrow keys, for example. The important element for users like this is a tab order assigned to the relevant objects in the scene and commensurate AS3 code that provides objects with shortcut keys. The tab order is a numbering system applied to active objects on the stage in such a way that when the Tab key is pressed, the navigation flows from one object to the next.
Providing accessibility for these users is handled via two steps:
FIGURE 1.21 The Flash Accessibility panel honed in on a single Button object: setting tab order
Users who lack the use of their digits will likely not have a screen reader, so it’s up to you to somehow flag that the shortcut keys are out there for them to use.
Designing for People with Cognitive Limitations
Users with cognitive limitations may not be able to keep up with rapid-fire screen movements and animations. The trick here is to craft animations that are not so slow the average user will walk away from your content but not so fast that slower users will become frustrated.
The Flash frame rate is a measurement of how rapidly each of the frames plays in a second. The default is 24 frames per second (fps), but it can be ratcheted up or down for slower or faster motion. One idea you might consider as a designer developing rich media content for a variety of users is to provide some sort of “slower-motion” button or slider that slows down rapidly playing content to a lower frame rate. This, of course, will require AS3 coding to make it happen, but it’s worth considering if you believe your site will likely have a lot of viewers with cognitive disabilities. It’s important to note that once the frame rate is lowered, it applies to the entire scene, so everything slows down. If you consider programmatically changing frame rates, you need to make sure you put them back to the original frame rate once the activity is done.
You should also note that slowing down frame rates when there is a film on the timeline (with or without narration) could be problematic.
Designing for People with Photosensitive Epilepsy
Those who have this disorder could be sent into an epileptic seizure with the right combination of jittering screen movements, flashing lights, and rapid movement through time and space in your scenes. Unless your goal is to design a rich media environment with lots of optical illusions—easily accomplished in Flash—it’s best to stay away from the jittery stuff anyway. If you do happen to need animations that could affect those with photosensitive epilepsy, it’s wise to put some sort of disclaimer on the front of your work so they’re aware of it going in.
Understanding Project Management 101
![]() To successfully navigate your customer’s job from initial request to completed deliverable, you need to have a solid understanding of basic project management concepts. Knowing and following these principles will greatly assist you in formulating your work into a project plan, which makes it much easier for you to follow the train of activities and tasks it will take for you to complete the job.
To successfully navigate your customer’s job from initial request to completed deliverable, you need to have a solid understanding of basic project management concepts. Knowing and following these principles will greatly assist you in formulating your work into a project plan, which makes it much easier for you to follow the train of activities and tasks it will take for you to complete the job.
Identifying a Project
The first thing you must understand about project management is that not everything is considered a project. For example, work that’s ongoing, such as a help desk operation or a fast-food assembly line, does not qualify as a project. The sidebar “How Do You Know You Have a Project?” provides a definition to help you decide whether you are or are not looking at a project.
Creating the Project Plan
For the most part, you don’t need to be heavily concerned with reams of paper for your project, although bigger projects certainly do have a multiplicity of documents associated with them. There are a handful of documents you should use as you develop your project. These documents are included in the project plan and will be reviewed and signed off by your customer.
In a nutshell, the project plan simply says what you’re going to do and how you’re going to do it. The project plan is a result of some fairly extensive requirements-gathering on your part to determine exactly what your customer wants you to do. It can be one document or several, depending on how elaborate you want to (or should) make things. A caution here: Don’t go overboard with project documentation! This might be a huge turn-off to your client. Provide enough documentation so your client is convinced you know what you’re doing but not so much they’ll be overloaded with your verbosity.
You don’t need special software for any of these activities; word processing and spreadsheet software will do. But it does help to use a product like Microsoft Project because the software has been designed for this kind of work. Using Microsoft Project, you can manage a database of the staff members you have doing the work, the project schedule, and associated tasks. Project keeps a Gantt chart for you—a stairstep-style chart that shows when tasks begin and end and the connectedness between them.
Creating the Project Schedule
PMs who have taken and passed the Project Management Institute (PMI, see www.pmi.org) Project Management Professional (PMP)® exam don’t call the WBS the project schedule or vice versa, but for most of your purposes, they are one and the same, especially if you’re using Microsoft Project. You should be aware of a couple of fundamental ideas behind the project schedule:
- Each work package is on a primary line.
- Each task that belongs to a work package is on an indented line.
- Each task has a task duration: a beginning date and an ending date (or time, in the case of a task that takes a few hours).
- Each task may have a predecessor and a successor task. A task that has a predecessor requires that the predecessor be done before it can start. A task with a successor means that there is a task waiting on it to be completed. For example, you cannot finish your characters until they’ve been drawn and colored in.
- The shortest line from start to finish between adjoining predecessor and successor tasks is called the critical path. This is your shortest actual project duration.
- Some tasks can be completed without either a predecessor or a successor. It’s important for you to be aware of those kinds of tasks because they can happen simultaneously alongside the other work you’re doing. For example, someone can be working on the background layer while others are working on the characters.
- The project schedule has names tied to it: who’s doing what task. Some tasks will have more than one name tied to them; others only a single name.
As important as the project schedule is, there’s a balance to it. It’s important that you allow the correct amount of time for each task to start and finish and not go over or under by too much. Remember that you’re committing to your customer that you will finish the project by a certain date and within a certain budget.
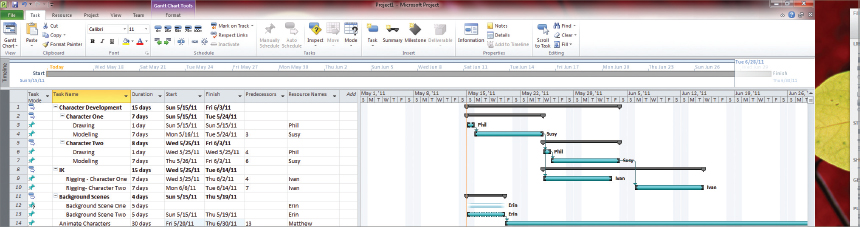
Figure 1.22 shows an example work schedule of an animation activity using Microsoft Project 2010.
FIGURE 1.22 Animation project shown in Microsoft Project 2010
Properly Closing Out the Project
You should have a formal sign-off process at the conclusion of the project. Here’s the minimum you should do:
- You and your team have exhaustively tested the product, and any testers your customer designates have also gone through a testing cycle to make sure any bugs have been worked out.
- Project closure may include such steps as end-user training and development of technical documentation.
- Once the customer is satisfied that the product is complete, they need to sign off on the project closure, indicating that all the work is done. Once the customer signs off, any updates or changes represent “version 2.” They are not part of the original project.
Understanding Copyright Issues When Using Others’ Work
![]() One of the big disadvantages of the Web is that it has become incredibly easy to steal someone else’s work. Such is the power of free speech on the Web. But just because speech is free doesn’t mean you or someone else can simply use it without permission. The key to great rich media design is to be completely original in your approach; it’s also the way to attract clients and foster new business.
One of the big disadvantages of the Web is that it has become incredibly easy to steal someone else’s work. Such is the power of free speech on the Web. But just because speech is free doesn’t mean you or someone else can simply use it without permission. The key to great rich media design is to be completely original in your approach; it’s also the way to attract clients and foster new business.
Understanding Text Copyright
According to the Fair Use Doctrine (i.e. US Copyright Laws), your rich media content is protected when “...it is fixed in a copy or phonorecord for the first time” (see www.copyright.gov/circs/circ01.pdf). The key to this statement are the words “for the first time.” If someone else said the same thing you just wrote and they beat you to it with their copyright, the text has not been said on your site for the first time. Someone else said it first.
You cannot simply copy and paste another site’s content verbatim into your rich media content. If you do this, and the site has been copyrighted, you could be asking for trouble; an infringement suit could be brought against you in a court of law. Moreover, it’s stealing someone else’s work, regardless of whether it has been copyrighted or not. Simply put, it is plagiarism. The better approach is to either obtain permission from the site owner to copy some of their work or, better yet, gain a more robust understanding of the underlying concepts the author (and other authors) are talking about with regard to the subject and write your own text in your own words. This way you can copyright the material for yourself.
When creating a website or other rich media source a viewer will be watching, I typically affix the copyright symbol (©) and write alongside it the year the content was posted, as well as the statement “All rights reserved” and my name: © 2011 All rights reserved. William Heldman. This is a “poor person’s” copyright; it does indeed protect you as the owner of the content but may not be as helpful as if you were to obtain a formal copyright registration. Formally registering your copyright creates a public record of your copyright claim, allows you to file a formal infringement suit in a US court, provides prima facie (at first sight) evidence of the validity of your copyright, allows you to collect attorney’s fees when you pursue and win an infringement suit, and allows you to pursue registration with the US Customs Service to prevent foreign impingement of your copyright.
Filing for a formal copyright involves a cost and a wait time. In many cases, it may simply not be worth it. But in any case this will most likely be a decision for your client. If you understand copyright law, you are equipped to advise your client on best approaches. See www.copyright.gov for more information. You should be aware that once you’ve sought and received a copyright for a work, any other works that arise out of that work are called ‘derivative works’. For example, you copyright a web site that includes videos, animations and maybe even some music your team wrote and recorded. These elements are derivatives of the copyrighted material on the site.
In many cases you may cite another person’s material provided you correctly cite it in your content. If the content you want to cite has a stated policy that you must contact the owner for permission before doing so, you’d better seek said permission. You also need to be aware that copyrighted material and other inventions such as designs, songs, or videos may be someone’s intellectual property, and could even be patented.
Understanding Music Copyright
The same is true with music. You cannot simply grab an MP3 of your favorite band’s song and include it with your rich media content without first garnering permission. You are violating the band’s copyright and could be sued.
Today’s software music synthesizers and music digitizing programs make it easy for you to create your own music (or hire someone to create it for you) that brings originality to your work anyway. This may be a better way to go than risking a lawsuit by including someone else’s MP3.
There is some music that’s in the public domain and free for you to use. Simply Google “public domain music” to find it. You might consider this option when thinking about including music in your rich media content.
Understanding Video Copyright
YouTube and frame-grabbing software tools have made it easy to quickly grab video content. However, this content may well be protected by copyright, just like its text and music cousins. If you’re building content that will run on a website, many video providers such as YouTube offer a way to embed their video in your site royalty free. With a little creativity, you can come up with unusual and interesting ways to display video content.
Understanding Animation Copyright
With so many Flash sites in the world these days, you may be tempted to try duplicating someone else’s animation efforts. But animations also qualify as copyrighted work, and you could easily get yourself into trouble if your animation looks quite like another’s. The trick is to think about the ideas the other animator used in crafting their animation and then come up with your own animation that may be somewhat similar in style but completely different in the way it’s presented, or vice versa. The point is to not simply copy someone else’s work. When you create your own work, you are thus far less likely to suffer from copyright infringement accusations.
Understanding Trademarks
A trademark is some kind of word, sign, symbol, artwork, or other type of indicator used by individuals or corporations to help others easily recognize their products or services. Note that the font or style used to create a trademark is included with the trademark.
Writers fall into the trap of using trademarks all the time, and their editors typically coach them out of it, to keep them out of legal trouble. For example, when we sneeze, you and I often ask someone if they would hand us a Kleenex. But that term is a trademark—even though it has entered the normal vocabulary as an indicator of a tissue you use to blow your nose. It’s no big deal to substitute the word tissue to avoid any problems down the road.
In the end, look at it this way: A rich media content designer’s bread and butter is the content they have crafted and are selling to others. If you simply (and scurrilously) rip off their efforts and have the audacity to call it your own, not only are you stealing, but you are potentially taking bread out of their mouths. You deserve a lawsuit!