CHAPTER 12
Working with Video
Because video is such an intrinsic element in our lives, any rich media document must be able to support videos that tell all or part of your story. The developers of Flash have made it amazingly easy to incorporate your videos into your rich media documents.
- Understanding supported Flash video file types
- Setting up ActionScript cue points
Understanding Supported Flash Video File Types
Humans are analog creatures. When you talk, your voice creates nice round undulating waves of sound, and when you listen, your ears receive waves of sound. When you smell, you receive waves of smell. When you feel warmth on your body, you are receiving waves of heat. Humans and all other life forms live in an analog—in other words, streams of waves—environment. Figure 12.1 shows what the analog waveform for the sentence “Hello, my name is Bill” looks like.
FIGURE 12.1 What the sentence “Hello, my name is Bill” looks like in analog waveform

Video represents the same kind of waves. Creatures typically move in a smooth analog kind of way. When someone shoots a video of the real world, they are capturing analog signals.
But computers are digital. They like to have nice sawed-off square waves (see Figure 12.2) because the waves represent sequences of ons and offs. In the end, that’s all a computer really knows about: 0s or 1s, which signify on or off, respectively.
FIGURE 12.2 Digital waves: on/off

So, the problem becomes how to take an analog sound or video and convert it into something computers can understand and yet still have realistic sound and video—in other words, maintain that fidelity to the ears and eyes.
This is a job for a codec. Codecs are simply software applications that do two jobs: convert analog signals to digital while at the same time compressing what would otherwise be a huge file size into something more manageable. The level of compression, hence the fidelity of the file, is relative to the kind of codec chosen.
When you want to include video files in Flash, you must use one of three different file formats:
- FLV, which uses the Sorenson Spark codec (see http://en.wikipedia.org/wiki/Sorenson_codec) or the On2 VP6 codec (see http://en.wikipedia.org/wiki/VP6). (Sorenson Spark is the older of the two codecs.) FLV files are embedded directly into Flash Player. They’re great when you have a quick little video you want to embed into the timeline. These are intended for smaller videos—you’ll want to consider the F4V file type, which is a file that sits alongside your SWF, for larger videos. There’s nothing wrong with embedded videos, but go carefully! For larger files you’ll want to use the F4V format instead.
- F4V, which uses the H.264 codec (see http://en.wikipedia.org/wiki/H.264). F4V files sit alongside the SWF file and are consumed by the Flash Player a little bit at a time. The F4V format is useful for larger videos.
- MP4, which also uses the H.264 codec.
You should also be aware that Flash also supports server-side streaming video, and as a matter of fact, Adobe manufactures video streaming software. See www.adobe.com/products/flashmediaserver/ for more details. This is a topic that’s beyond the scope of this book, so just be aware there is a hierarchy of video-serving capability via Flash. In most cases, you’ll likely use the FLV format and occasionally use F4V. There are many benefits for using FLV for Adobe AIR apps including popular file format, good audio and video quality, good compression, ease of editing, and copyright protection among others.
Converting Non-supported File Types
Fortunately for you, the folks at Adobe have included two different programs that can help you get your videos into Flash:
- The Flash Media Encoder utility
- The Flash Import Video Wizard
First, there is a nifty little utility called the Adobe Media Encoder that will take your video in an unsupported file type and convert it to one Flash can use. This is a separate program from Flash Pro and is invoked the same way you start any program. If you lack a video to convert, feel free to use RaymondLeeTheDrummerDude.wmv on this book’s website at www.sybex.com/go/flashessentials.
FIGURE 12.3 The Adobe Media Encoder 6.0 program screen
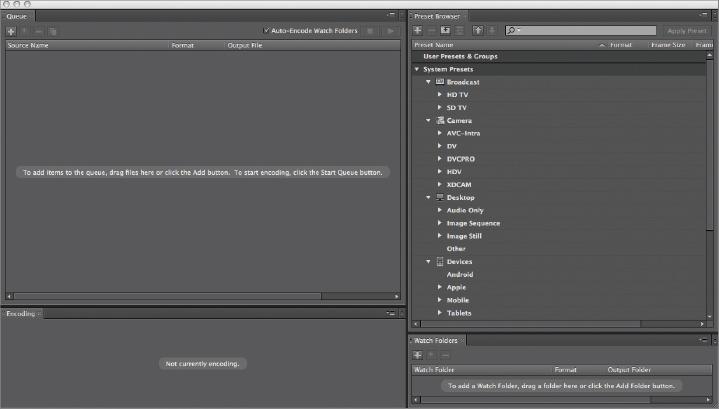
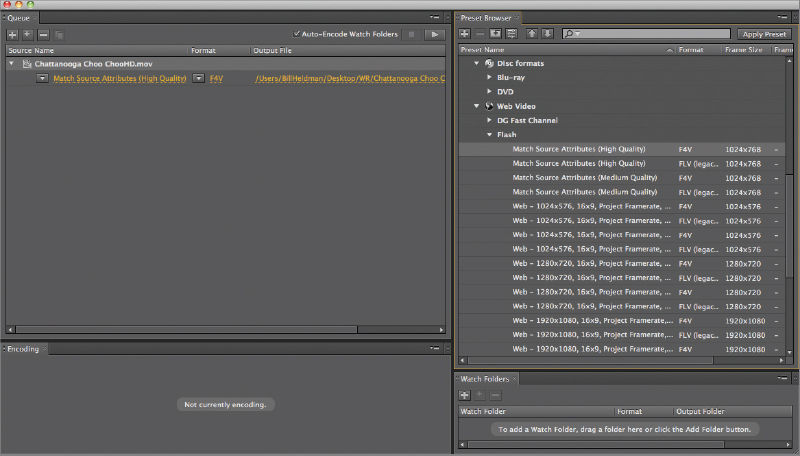
FIGURE 12.4 With movie now loaded, select a conversion type.
The process can take a bit of time and will show you each frame as it is processed.
Using the Import Video Wizard
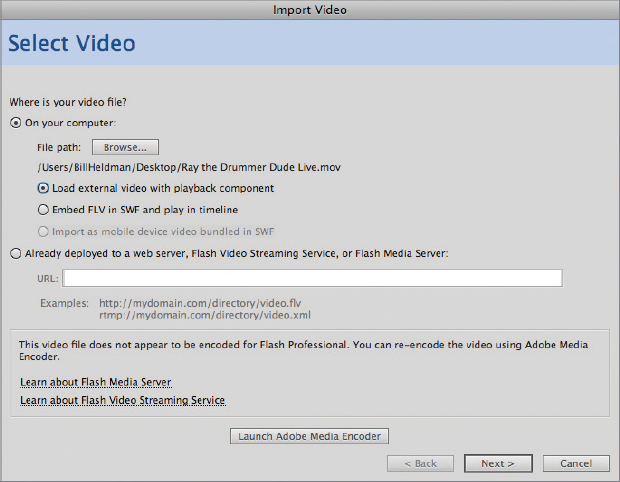
Unless you’re interested in converting your movie to a different size or frame rate, you will usually want to use the Flash Import Video Wizard in place of the Media Encoder program. When you use the Flash Import Video Wizard, you will have a choice between two ways Flash will import the video for you:
- Load external video with playback component.
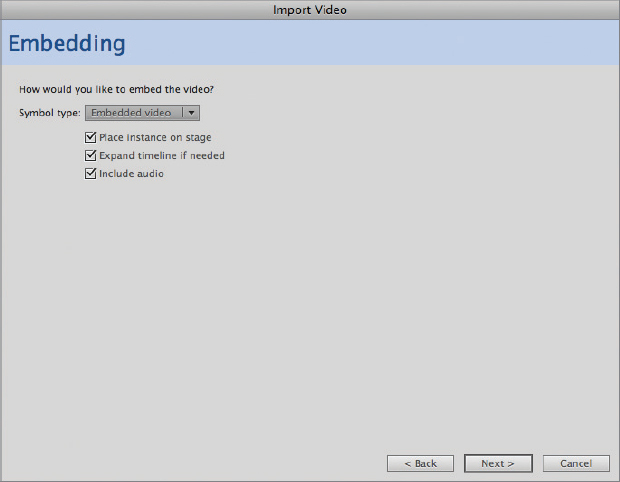
- Embed FLV in SWF and play in timeline.
![]() Generally speaking, the first option (the default in the Flash Import Video Wizard) is the best because the movie stays separate from the Flash SWF file. You should be aware that when FLVs are placed on the timeline, their frame rate must match the frame rate of the SWF (24 fps by default). Also, it’s important to point out again that using longer videos on the timeline may produce syncing bugs. And, you cannot import video to a Flash document when the publish style is HTML.
Generally speaking, the first option (the default in the Flash Import Video Wizard) is the best because the movie stays separate from the Flash SWF file. You should be aware that when FLVs are placed on the timeline, their frame rate must match the frame rate of the SWF (24 fps by default). Also, it’s important to point out again that using longer videos on the timeline may produce syncing bugs. And, you cannot import video to a Flash document when the publish style is HTML.
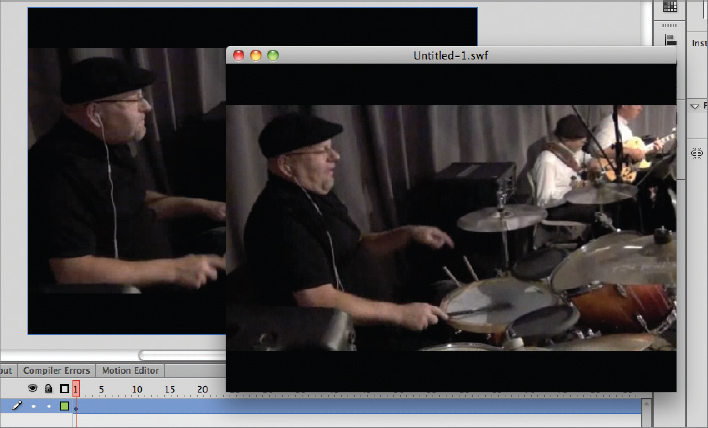
In this exercise you will use the movie RaymondLeeTheDrummerDude.f4v that’s included on the book’s website. This is a movie of a drummer rehearsing various songs with a big band jazz group.
FIGURE 12.5 The Flash Import Video Wizard
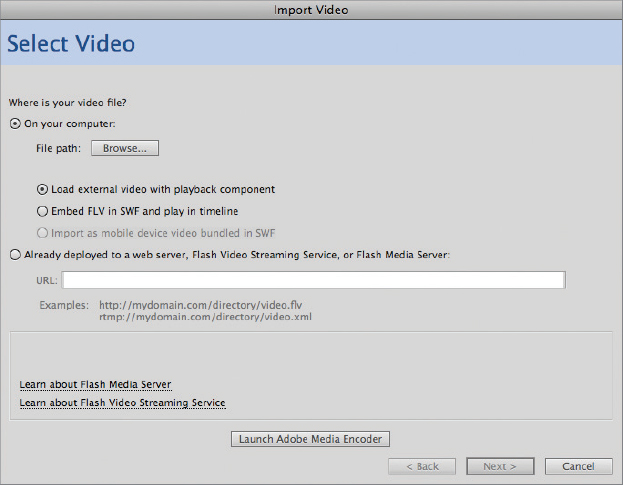
FIGURE 12.6 The Flash Import Video Wizard Skinning dialog

FIGURE 12.7 The list of playback component styles from which you can choose when in the Flash Import Video Wizard
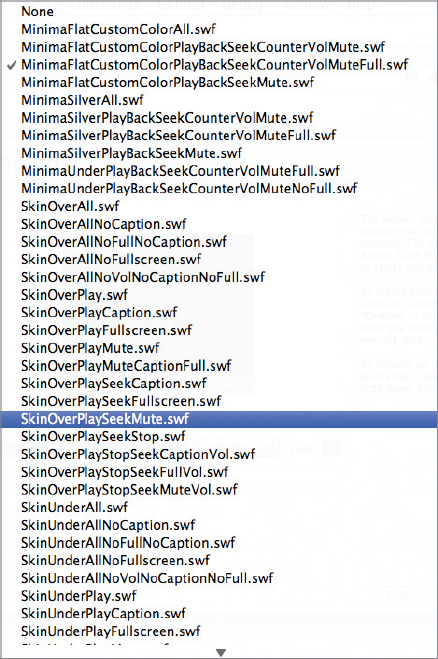
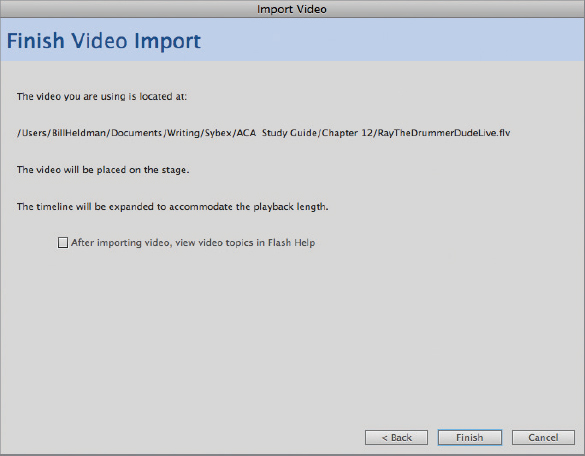
FIGURE 12.8 The Finish Video Import summary report
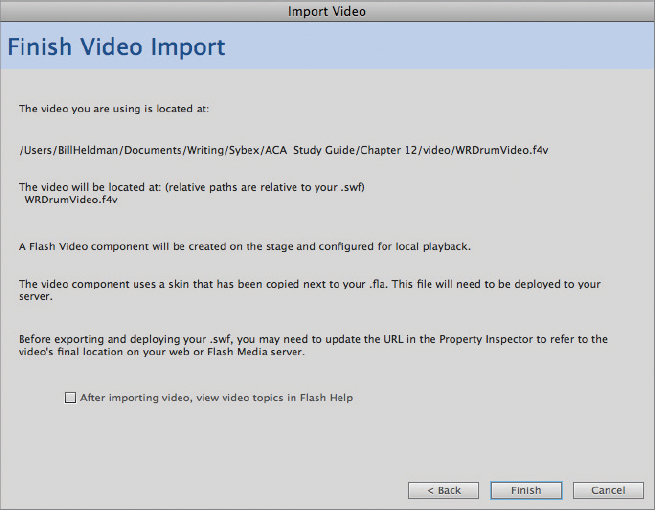
FIGURE 12.9 Aligning the movie to the size of the stage
Once you have a movie on the stage, Flash notes in the Property Inspector that your movie is an instance of FLVPlayback and provides you with several different control elements for adjusting your movie (Figure 12.10) in the Component Parameters section. Additionally, the library has an FLVPlayback component in it.
FIGURE 12.10 The FLVPlayback Component Parameters section in the Property Inspector
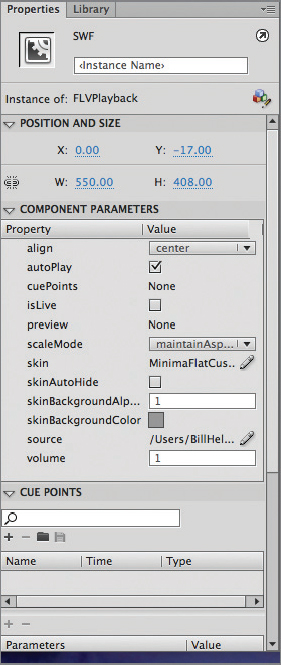
The following list includes brief explanations of the FLVPlayback component parameters, some of which are directly adjustable within the Property Inspector; others must be managed via code:
- align: Determines the alignment of the video within the FLVPlayback component bounds.
- autoPlay: A Boolean (true/false) value that determines if the video will immediately begin playing when the Flash movie is launched.
- cuePoints: If cue points are used in the video (more on that in the next section), the points are noted here.
- isLive: If the video is being served up by Flash Media Server, this check box should be checked.
- preview: Provides a preview image that will appear before the video plays. The viewer sees the playback controls and the preview image.
- scaleMode: This dropdown allows you to select aspect ratios for the video should you resize the playback screen. The default is to maintain the vertical and horizontal aspect ratio.
- skin: This is the skin you picked when you ran the Import Video Wizard.
- skinAutoHide: Hides the skin when the mouse cursor is not over the video.
- skinBackgroundAlpha: Sets the transparency value (0: 1) of the skin. This is a percentage value. Zero is no alpha—completely transparent, whereas one means completely opaque. Think of this the same way you would express a percentage without using the percent sign (e.g., 50% = 0.50). Thus a 50% alpha value would be expressed as 0.5 in this field.
- skinBackgroundColor: Sets the background color of the skin.
- source: The relative path to the video. Relative means that you don’t include a drive letter; you use slashes (/) and folder names to point to the video file. This is hugely important when you’re ready to install the video on a web server. Flash needs to know the path to the video.
- volume: Sets the volume (0: 1). See note above about how this number setting works.
Setting Up ActionScript Cue Points
The drummer in the movie—Raymond Lee—plays drums for a big band jazz and swing group in the Denver area called William and the Romantics. This video was shot during a rehearsal session. Ray used his video editing software to chop out various sections of his playing to reduce the video down to a few short segments. There are two songs he is rehearsing with the band: Louis Prima’s famous “Sing, Sing, Sing” and Glen Miller’s “I’ve Got a Gal in Kalamazoo.” The video switches between the two songs several times.
As you watch the video, you’ll see that there are distinct places where the video changes somehow. These would be ideal locations to introduce cue points (provided, that is, you would like to have places to which viewers can jump in the video).
Adding ActionScript Cue Points to Your Video
In this exercise, you will use the FLVPlayback component you created in the previous exercise and add some ActionScript cue points. Additionally, you will include some buttons on the stage so that viewers can navigate to the various sections of the video using the ActionScript cue points. (Reference the file RayTheDrummerDude2.fla on this book’s website if needed.) As you do this work, pay attention to the location in which the video is located. This path must match the path you use on the web server at the time you decide to publish the movie and the SWF file or the cue point data will be erased.
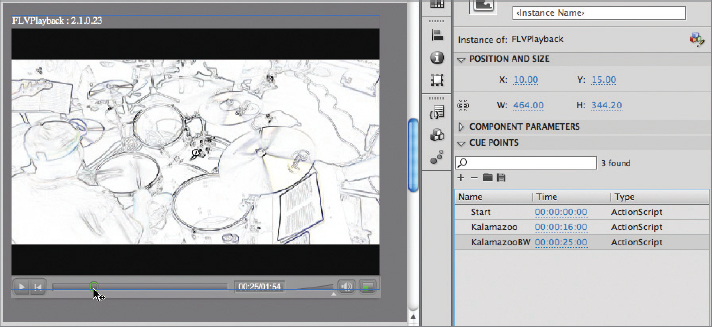
FIGURE 12.11 The Cue Points section of the FLVPlayback properties

FIGURE 12.12 Making the FLVPlayback component smaller, getting ready for buttons

FIGURE 12.13 Giving an ActionScript cue point a name
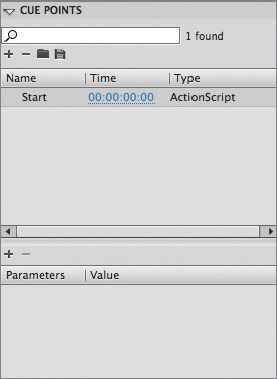
FIGURE 12.14 Adding additional ActionScript cue points
Adding Parameters to Cue Points
Now that you have some cue points set up, you can add parameters to them. Parameters are simply data points that describe more about a specific cue point. The parameters consist of two sections: parameter and value. In the Parameters part, you type the name of the parameter. In the Value section, you type the data you’d like to store. The data can be anything, but if you type words, you need to use underscores to separate them: no spaces!
In this exercise you’ll add some parameters to a couple of your cue points.
FIGURE 12.15 Giving an ActionScript cue point a parameter

You can assign as many parameters and values for each cue point as you like. Programmatically, you could access these values using ActionScript.
Adding the Buttons
Now all you have to do is add some buttons that, when pressed, navigate the user to a particular cue point. With the Flash Code Snippets panel, this job is easier than it sounds.

Now it’s time to add the code to the buttons.
FIGURE 12.17 Adding ActionScript code to the button: two places where you change the video instance name and one place where you key in the cue point name
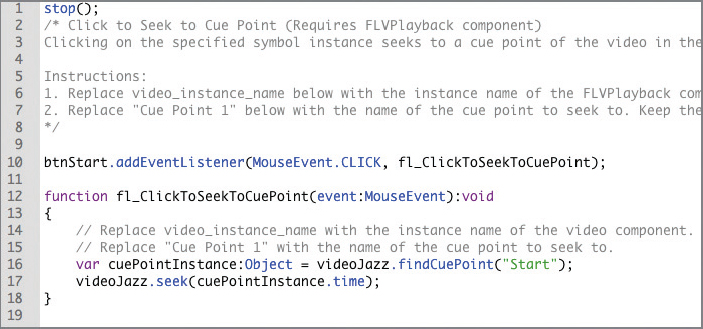
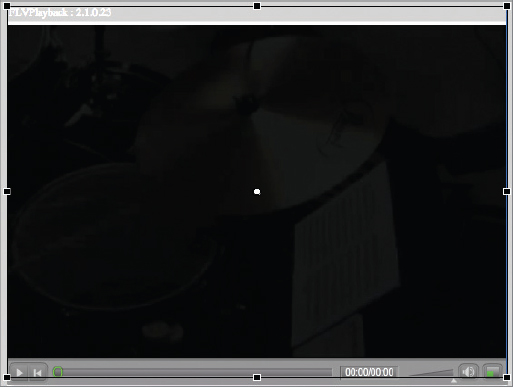
FIGURE 12.18 Final video product running in a Flash movie