Every April 14 users throughout the United States venture to Adobe's Web site to download the Adobe Reader software. The day before U.S. income taxes are due, users are acquiring Adobe Reader because all U.S. Internal Revenue Service (IRS) tax forms are PDF documents.
Perhaps one of the most frequent uses of Adobe Reader is for filling out Adobe PDF forms. But unless PDF forms carry special usage rights, you can't save the form data after you complete a form. These forms are designed for filling in data fields and printing the form or sending the data back to the initiator. If you return to the form after closing it, you'll see that all data are lost. You'll need to fill in the data fields again and reprint the form.
When PDF forms include usage rights added with the Adobe LiveCycle Reader Extensions Server, filled-in forms can be saved in Adobe Reader. If you download any IRS form developed after October 25, 2004, you can fill in the form and save the form with the data intact.
When you click a link in the scroll box of forms on the IRS site, the form is listed with a hyperlink to the PDF document. Click the link and the form opens in an inline view in your default Web browser. Save the form from your Web browser, and you can open it directly in Adobe Reader.
Before you start working with Adobe PDF forms, you should modify some preferences settings to help make your form sessions a little easier. Form preferences help you with viewing form fields, handling data, and activating auto-completion tasks.
Note
PDF Forms with special usage rights can be downloaded from the U.S. Internal Revenue Service Web site at http://www.irs.gov/formspubs/index.html. Click the link for “Forms and Publications by Date.” A list of PDF forms appears in a scrollable box in descending date order. Download any form after October 25, 2004, and the form data you add to the form can be saved from within Adobe Reader.
To set form preferences options:
Press Ctrl/Command+K to open the Preferences dialog.
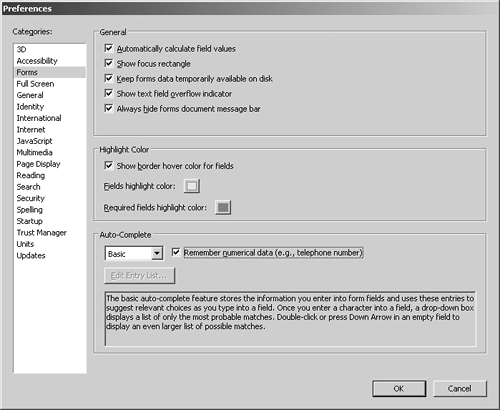
Click Forms in the left pane, and the Forms preferences appear in the right pane (Figure 19.1).
By default, the first four check boxes are enabled. If you want the forms message bar to disappear when working on forms, check the box for Always hide forms document message bar. Hiding the Document Message Bar provides you with more room to work in the Document pane.
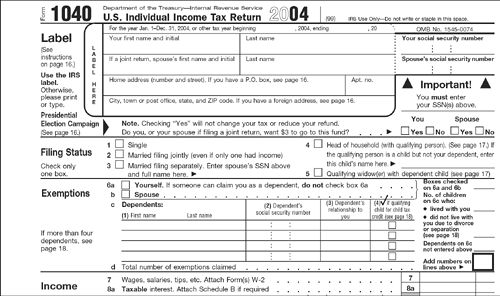
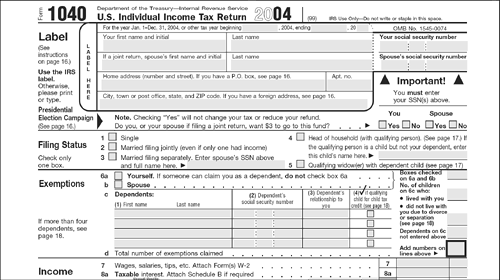
If you have problems finding fields on a given form, check the box for Show border hover color for fields. You can change the Fields highlight color by clicking on the color swatch. The default color is adequate for most documents, but if the color conflicts with the background color, open the swatch palette by clicking the color swatch and choose a different color. Likewise, the Required fields highlight color can be changed by clicking the second color swatch and choosing another color from the palette options. Figure 19.3 shows the border hover color disabled. Figure 19.4 shows an example of the same form when the border hover color is enabled.
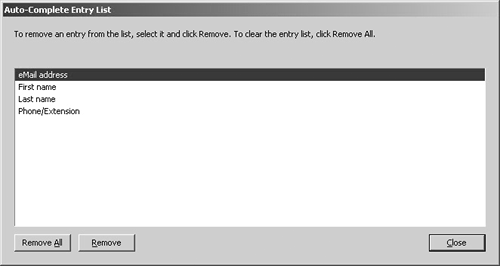
Open the Preferences Auto-Complete pull-down menu. By default, the Auto-Complete features are set to None. You can use a Basic or Advanced option where Adobe Reader records field entries and later automatically fills in fields when it encounters a similar field it thinks is likely to be populated with the same data. Select Basic, and check the box for Remember numerical data (e.g., telephone number).
Click OK in the Preferences dialog and the preferences options remain in effect until you change them.
Before you start filling out Adobe PDF forms, look over the types of fields on the forms and identify the common items you typically see on forms. PDF authors can choose from seven field types.
Text fields. Text fields are placeholders for both text and numbers. Text fields can be assigned special formats such as date fields, telephone numbers, social security numbers, and more. When you type text in fields assigned with special formats, you need to enter data that conforms to the format type. For example, typing your name in a field is not acceptable if the field is formatted as a date field. When entering data in text fields and all other field types, use the Hand tool.
Check box fields. Check boxes are designed for selecting one or more items in a group. You can check a check box by clicking it with the Hand tool, and remove the checkmark by clicking a checked box. Figure 19.5 shows a series of check boxes designed for a user to choose the type of credit card to use for payment.
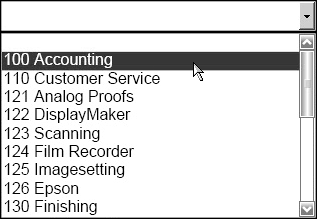
Combo box. Combo boxes are like pull-down menus (Figure 19.6). Click a down arrow to open the menu, and select an item from the list. You can make only a single selection from combo box choices.
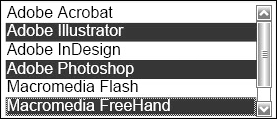
List box. List boxes are similar to combo boxes but the box contains scroll bars and has no pull-down menu. The primary distinction between this field type and combo boxes is that list boxes can be used to make multiple choices—that option is up to the PDF author. Figure 19.7 shows a list box where multiple selections are permitted.
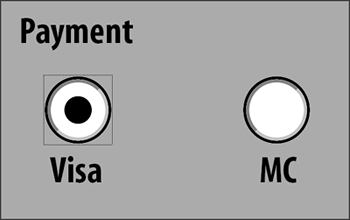
Radio buttons. Radio buttons can look much like check boxes, and you may not see the difference when using them on a form. A radio button is typically (though not always) shaped like a circle (Figure 19.8), which differs from choices available for check boxes. The main distinction between radio buttons and check boxes is that once you click a radio button, you can't remove the check mark/bullet by clicking on it again. Often Radio buttons are used for either/or conditions or a single choice from within a group. For example, you may be asked to select a gender response (either/or) or a credit card type from among choices for Visa, M/C, AMEX, and so on. Only one choice in either example is an acceptable response.
Buttons. Buttons are intended to invoke actions. Quite often, you find buttons designed to reset a form and to submit a form. Reset Form (Figure 19.9) is often used to clear all the data on a form. Be careful when clicking this button, as it often clears all the data on the form. The Submit button action often sends the data to a URL or email address. PDF authors use Submit buttons to collect data electronically. Although you can't save form data from Adobe Reader without special usage rights, you can submit data to PDF authors when the button actions are so designed.
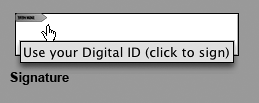
Signature. Signature fields are designed for using a Digital ID and electronically signing a form (Figure 19.10). Unless a form has special usage rights created with the Adobe LiveCycle Reader Extensions, you can't use these fields. When you receive documents that have been signed, you can click the signed field to validate the signature. For more information about using digital signatures, see Chapter 17 “Using Digital Signatures and Security.”
Barcode form fields. Adobe LiveCycle Designer is a separate program that ships with Acrobat 7 Professional. Adobe Designer is used to author Adobe XML-based PDF forms and is available only on Windows. When using Adobe Designer, a PDF author can create barcode fields. Barcodes can be static or interactive. Static barcodes appear similar to barcodes you see on product labels in stores. Interactive barcode fields automatically encode the data that's entered in the respective barcode field(s).
To help clarify the difference between static and interactive barcode fields, look at the PDF form shown in Figure 19.11. There are two barcodes on the form. The first barcode appearing on the top-right side of the form is a static barcode. The barcode appearing on the lower-left side of the form is an interactive barcode. The static barcode has a pre-assigned value. This is a generic barcode used to identify the 2004 Conference Registration Form. No matter what an attendee types on the form, the barcode data are fixed and do not change the value assigned to the barcode. The interactive barcode on the lower-left side of the form reforms as data are typed on the form. The barcode is dynamic and changes to record new data typed on the form.
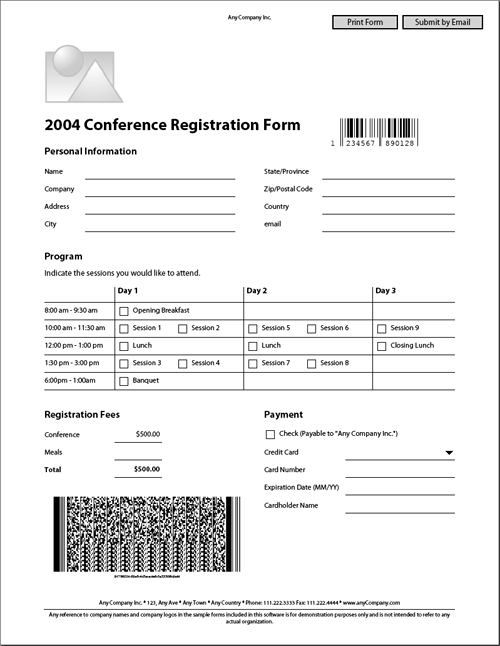
Figure 19.11. A PDF form contains a static barcode on the top-right side of the form and an interactive barcode on the lower-left side of the form.
Other common items on PDF forms include:
Tool tips. When you move the cursor to a field and pause, a pop-up tool tip displays a message such as the one shown in Figure 19.10. Not all fields contain tool tips. If the PDF author did not include them in the design of the form, you may not see a tool tip when the cursor is placed over a field. If the form was created with Adobe LiveCycle Designer, however, the name of the field will show up in the tool tip by default.
Icons. Button fields can be designed with button images where a PDF author uses an image to indicate what a button may be used for. Most common are navigational buttons with left and right arrows or some other icon indicating that you click the button to navigate pages. For an example of a document containing navigation buttons, open the hawaiiNewslettser.pdf file. The palm tree icons at the bottom of the pages are navigational buttons: Click a button on the lower-right side of a page to advance forward through pages, and click the button on the lower-left side of a page to move to previous pages.
Inoperable buttons. You may find buttons on forms that do nothing when you click on them. Adobe Acrobat Standard and Adobe Acrobat Professional have many features that the Adobe Reader software isn't capable of using. For instance, it can't introduce data, generate new pages from templates, swap data between forms, add new fields, and many more actions. It's good practice for PDF authors to create custom dialogs to explain the limitations for Adobe Reader users, but not all PDF authors add these warning messages. If a button does nothing, it's likely that the action can't be performed in Adobe Reader.
Tip
You can view JavaScript action errors in Adobe Reader to find out if a button invokes an action not permitted in Reader. Open the Preferences dialog box (Ctrl/Command + K) and click JavaScript. Check the Show console on errors and messages box. When you click a button that is assigned a JavaScript that cannot be invoked in Adobe Reader, a pop-up console window reports an error.
Locked fields. Some form fields may be locked if the attributes are set to read-only. If you try to edit some text in a text box but can't, the field is likely a read-only field.
You can use the following keyboard shortcuts to navigate and edit fields:
Tab. Press the Tab key to move from one field to another. If the PDF author set the proper tab order, the cursor jumps to the next logical field when you press the Tab key. If the cursor jumps around the page when you press Tab, use the Hand tool and click on fields you want to edit.
Shift+Tab. Moves the cursor to the previous field.
Esc/Return/Enter. Ends text entry.
Up/down arrow keys. For combo boxes and list boxes, press the up and down arrow keys to move up and down the lists. Press Tab after making a selection.
Up arrow key in text fields. Moves to the beginning of the text line.
Down arrow key in text fields. Moves to the end of the line of text.
Select All. With the cursor inside a Text field, press Ctrl/Command+A to select all existing text. Press any key, and the selected text is deleted and replaced by the character you type.
Double-click. Double-click a word in a text field to select it.
Triple-click. Triple-click inside a text box and all text is selected. This keyboard shortcut is the same as using Select All.
If you fill in a form that doesn't have Adobe Reader usage rights enabled, you need to print the form to keep a record of the data. If a Submit button appears on the form, you can send the form data to the PDF author's URL or email address. The author determines the target destination. In Adobe Designer 7, PDF form designers create Email buttons designed to mail forms back to PDF authors. Notice that in Figure 19.11 a button on the top-right side of the form appears as Submit by Email. This form was designed in Adobe Designer 7.
For forms enabled with usage rights, you can save the data added to the form without having to print copies for your personal records. Regardless of which type of form you work with, you fill out the form in the same way.
Note
Download the form f1040.pdf from the IRS Web site. Scroll the list of forms to find Form 1040 U.S. Individual Income Tax Return. Click the form name and then click the download link to open the file in your Web browser. Save the file from your Web browser to your hard drive. This form has been enabled with usage rights using the Adobe LiveCycle Reader Extensions Server.
To fill in an Adobe PDF form:
Open the f1040.pdf file.
Press the Tab key. When no field is selected, the cursor jumps to the first field on the form
Enter the date for the “tax period beginning” and press Tab.
Continue adding data and tabbing from field to field to complete the identifying information for the Label.
Close the document without saving.
Reopen the document and fill in the same fields. If your Auto-Complete feature is functioning properly, you should see some fields completed as you type a few characters (Figure 19.12).
To accept a suggestion from the Auto-Complete response, press the down arrow key or press Tab if all the data are supplied in the Text box.
Finish completing page one on the form. Type text in the text boxes and select the check boxes that apply to your situation. Fill in amounts for the Income and Adjusted Gross Income sections using arbitrary values.
Select File > Save As. Provide a new name for the form, and save the file to your hard drive.
When forms are enabled with usage rights, you can import and export form data between forms. The requirement for importing form data is that the names of the form fields must match identically on both forms. If the field names don't match, the data are not imported into similar fields. As an Adobe Reader user, you do not have the option of changing field names; therefore, the only thing you can do is try and see if the data are imported into the correct fields.
To export and import form data:
Open the file that you saved in the previous exercise. If the file isn't open in the Adobe Reader Document pane, open it.
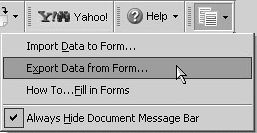
Open the Form Tasks button pull-down menu (Figure 19.14).
Note
The menu options shown in Figure 19.14 are available only when working with forms that have been enabled with usage rights so that the form data can be saved. If you're using an Adobe PDF form without usage rights, the Form Tasks button doesn't appear in the Toolbar Well.
Select Export Data from Form.
The Export Form Data As dialog opens. Navigate your hard drive to locate a target folder in which to save the file. Click Save to export the data.
From the Form Tasks pull-down menu select Import Data to Form.
The Select File Containing Form Data dialog opens.
Locate the exported data file on your hard drive if it doesn't appear in the Select File Containing Form Data dialog. If the file doesn't appear in the dialog, navigate to the folder location where you saved the data. Select the file and click Select.
Note
Data exported from forms are exported in a Form Data Format format (or in XML format when the form was created with Adobe Designer) and appear with an .fdf (or .xml) extension. Similarly, when you import data, the Select File Containing Form Data dialog displays .fdf (or .xml) files. The files are thereby easy to locate when browsing your hard drive.
The data are imported into the same form fields.
You can check spelling for all data you type into forms. The spelling checker is the same one used when checking spelling on documents containing comments.
Note
Use any Adobe PDF form that has text fields such as the form f1040, or the eSupportForm you can download from the Peachpit Web site.
To check spelling in form fields:
Select Edit > Check Spelling > In Form Fields. Note that the menu command changes from In Comments to In Forms when you open a PDF document containing form fields.
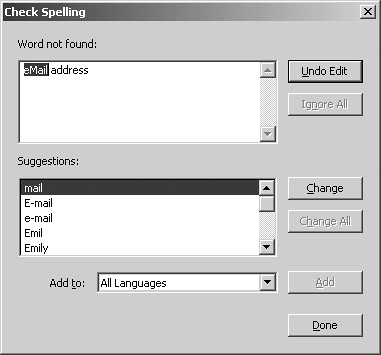
The Check Spelling dialog opens (Figure 19.15).
Click Start. The button name changes to Undo Edit.
Choose from options to change words, change all occurrences of a given misspelled word, add a word to your dictionary, or change language dictionaries.
Click Done after completing the spelling check.
Note
For a complete description of using the Check Spelling dialog, see Chapter 11, “Using Comment Tools.”
