
Some of the best new features in Adobe Reader 7 are the abilities to comment on and mark up documents, participate in review sessions, and save files after making comments and markups. For those of you who work in an environment where review and approval of documents is part of your job, the new commenting features in Adobe Reader will surely impress you. This chapter, and the next few as well, will teach you some nifty ways of working with PDF documents with usage rights enabled for Adobe Reader.
To comment and mark up documents in Adobe Reader, you must use a PDF that was prepared in Adobe Acrobat 7 Professional with usage rights enabled for Reader users, or else you must use a PDF with Reader Extensions added via the Adobe LiveCycle Reader Extensions Server. You can't create such PDF documents in Adobe Reader; you must receive them from a PDF author.
Note
For information on PDFs enabled with the Adobe LiveCycle Reader Extensions Server, see Appendix A, “Creating PDF Files.”
Figure 11.1 helps you to understand how a PDF author enables a document for you to add comments and markups. The figure shows a simple menu command available in Acrobat Professional. When the Acrobat 7 Professional user selects Comments > Enable for Commenting in Adobe Reader, a Save As dialog opens and the PDF author saves a copy with the usage rights added to the file. It's simple and takes little effort on the part of PDF authors to create a document that permits you to use an abundant set of commenting and markup tools, participate in review sessions, add custom stamps to your tool arsenal, and attach files to documents. For information on working in review sessions, see Chapter 15, “Working with Reviews and Markups. For information on creating custom stamps see Chapter 12, “Working with Stamps Comments.” For information on adding file attachments to PDFs, see Chapter 13, “Working with File Attachments.”

When you open a file that has been enabled with usage rights for Adobe Reader users, the Commenting and Drawing Markups toolbars load in the Reader application. These tools are not available to you unless you're working on a PDF that has had usage rights applied. By default, the toolbars are hidden from view. You need to open the toolbars to use the commenting tools.
Note
If you don't have a file with usage rights enabled, use the draftLayout.pdf file from www.peachpit.com/adobereader7 for all the steps related to using the Commenting toolbar.
To open the Commenting and Drawing Markups toolbars in Adobe Reader:
Open a PDF document with usage rights enabled for Adobe Reader.
Open a context menu in the Toolbar Well and select Commenting (Figure 11.2). Return to the menu and select Drawing Markups and again to select Properties Bar.
The toolbars open as floating toolbars in the Adobe Reader window. Return to the context menu and select Dock All Toolbars. The toolbars are docked in the Toolbar Well. You'll want to open these toolbars each time you engage in commenting and review sessions.
Tip
You can also open comment tools from the Comment & Markup task button that appears in the Toolbar Well. From the task button pull-down menu select commands for opening the toolbars.
Note
When you open your first PDF document for which Reader usage rights have been enabled, all the toolbars are hidden from view. After you open the toolbars and dock them in the Toolbar Well, the new toolbar locations become a default. When you quit Adobe Reader, relaunch the program and open a file with usage rights enabled, the toolbars appear as you last left them in the Toolbar Well.
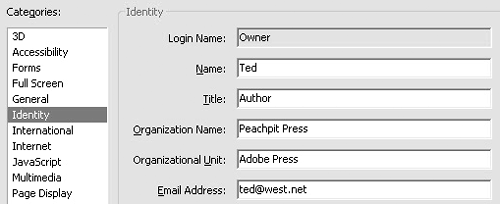
To further prepare you for commenting, verify that the Identity preferences are set properly. Open the Preferences dialog and click Identity in the left pane (Figure 11.3). Verify that the text boxes contain your personal identity information (or, if they don't, enter the info).
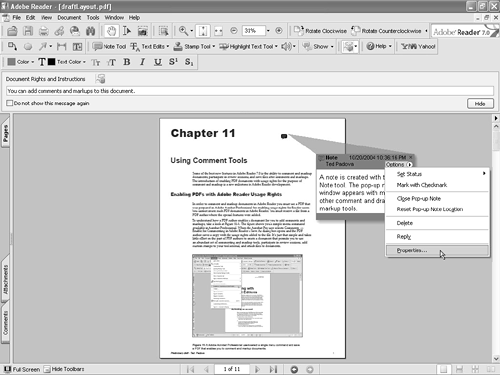
Open Help in the How To window. You may want some help while working in a commenting session. Quick access to help information is provided in the How to Window. Open a pull-down menu from the Comment & Markup task button and select How To…Add Comments & Markups (Figure 11.4). When you select the menu command, the help categories are listed in the How To window to the right of the Document pane. Click an item in the list to obtain help information that corresponds to the item. When finished reviewing information, click the Hide button to provide more working area in the Document pane.


You have many commenting tools available to you. The Note tool, sometimes referred to as the “sticky note” is a good one to start with to understand how to work with comments in Adobe Reader. When you add a note to a PDF document, you can assign attributes to the note (such as color or position). Learning how to assign attributes in the Note tool will help you understand how to work with the other commenting tools as well. Once you learn the options available for a note pop-up window created with the Note tool, you'll know how to assign options to all other comments and markups that have associated note pop-up windows.
To use the Note tool and set note pop-up window options:
Open a document enabled with usage rights enabled for Adobe Reader.
Click the Note tool.
Click on a document page. A note pop-up window appears to the right of the Note icon (Figure 11.5).
Click inside the pop-up window. When you see a blinking I-beam cursor, you can start typing your comment.
Click the right pointing arrow beside Options in the pop-up note window. A pop-up menu opens.
Select Properties from the menu options. The Note Properties dialog box opens.
Notice the scrollable list of icons in the Appearance tab. Click an icon in the list. Notice that the icon on the page dynamically changes while the dialog is open (Figure 11.6). Be aware that notes can be represented by many different icons. Becoming familiar with the Note icons means you'll likely recognize that a note exists when you review a document. In some cases, note windows may be collapsed; therefore the only way you can know a note exists when navigating pages is by viewing the icons.
To change the note color, click the color swatch. You might participate in review sessions where a review initiator assigns a different note color to each participant. When the review initiator collects all the participant comments, he or she can easily identify author comments by observing the Note icon and window colors.
A pop-up color swatch palette opens (Figure 11.7). Click one of the preset colors in the palette to change the note color.
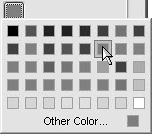
Figure 11.7. Click the color swatch to open a pop-up color palette, and then click a color in the palette to change the note color.
You have two options available to you when changing note properties. You can use the Properties dialog or you can use the Properties Bar. When you open a file enabled with usage rights, open a context menu in the Toolbar Well and select Properties Bar. As you work with any comment tool, the respective tool properties are shown in the Properties Bar (Figure 11.8).
Notice that the Properties Bar offers you pull-down menus for changing Color, Icon, and Opacity. Click the down arrows to open the pull-down menus, and make selections from the menu choices for changing comment properties.
The Properties Bar changes according to what you've selected in the Document pane. If you select a Comment icon, the Properties Bar shows a More button. If you select any comment tool, the Properties Bar loses the More button and shows you a check box for Keep tool selected, as shown in Figure 11.9.

Figure 11.9. Click any comment tool, and the Properties Bar replaces the More button with a check box for Keep tool selected.
Each time you create a comment, the comment tool changes to the Hand tool when you release the mouse button. If you want to create several comments with the same tool, check that box; that way, each time you release the mouse button after creating a comment, the same comment tool remains selected.
While the Properties Bar is open, you can easily access the comment Properties dialog. Click a comment note or markup on a page so that the More button is shown in the Properties Bar. (Note that if you select a comment tool in the Toolbar Well, the More button is not shown in the Properties Bar. You must first create a comment and then select the comment in order for the More button to appear.) Click the More button, and the Properties dialog opens. Although you can see an author name in the Properties Bar, the author name can't be changed here. You need to open the Properties dialog in order to edit the author name. Additionally, the Opacity adjustments are at fixed intervals. If you want to adjust note pop-up colors to opacities different than the fixed values, you need to open the Properties dialog box.
When to use the Properties dialog box and when to use the Properties Bar is a personal choice. As a matter of practice, you'll want the Properties Bar open during each comment session. You can quickly make changes to note colors, icons, and opacity levels. However, if you need to change additional properties such as the author name or the subject, or you need to examine review history, you need to open the Properties dialog box. For all commenting sessions it will be helpful to you to know how to use both items and become familiar with those options you can set in the Properties Bar and when you need to open the Properties dialog.
Click the General tab in the Note Properties dialog (Figure 11.10). Two text boxes are editable. The author name should appear the same as your name in the Identify preferences. If you want to change the name, type the new name in the Author text box. If you change the Note icon, you may want to change the Subject to a more descriptive name. In this example, I used the Insert Text icon and changed the Subject to Insert Text.
You might participate in different review sessions and want to choose between using a familiar or formal style for your author name. For example, you may want to use your surname on note comments in some sessions and use only your first name in other sessions. The point is, Adobe Reader accommodates your personal preferences for changing the author name for any review.
Changing the subject offers you a way to clarify your comment. When a note pop-up window is open, both the author name and the subject appear in the note title bar. In Figure 11.11, I use only my first name for the author name and I changed the Subject to Revise, which informs the reader that a revision is requested.
Click OK to apply the new property changes. You'll note that Review History is another tab in the Note Properties dialog. This tab reflects the history of changes in review sessions and is not editable. For information on review sessions, see Chapter 15.


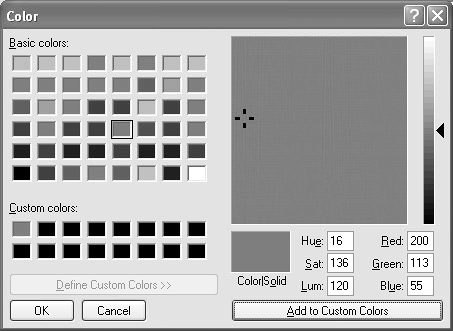
Open the pop-up color palette by clicking on the color swatch. At the bottom of the palette you see Other Color. Click Other Color, and your system color palette opens. You can change the color for your notes to any one of your operating system's 16.7 million colors.
In Windows, click on the color spectrum and click Add to Custom Colors (Figure 11.12). The custom color is added to the swatches appearing under Custom Colors. Click OK, and the note appearance assumes the new color. If you want to return to the same color in a different commenting session, open the Custom Color dialog and click the custom color swatch among the rows below Custom Colors.
On the Macintosh, you open the system color palette the same as when opening the palette in Windows. Click Other Colors, and the Colors palette opens. Click a color in the color wheel, and the bar across the top of the dialog changes to the selected color (Figure 11.13). Click anywhere inside the bar and drag down to the row of swatches at the bottom of the dialog. Your new custom color is added to the Colors palette and changes the note color when you click OK.
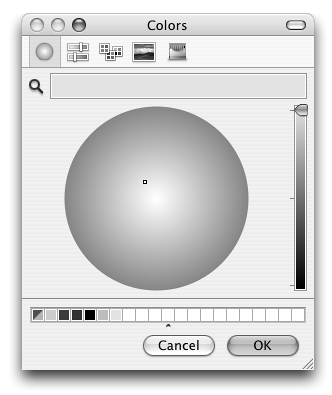
Figure 11.13. Click the color wheel. Click the bar across the top of the dialog and drag to a swatch at the bottom of the dialog.
In addition to adding custom colors, you can change color tints by adjusting the opacity. Type a value in the text box next to Opacity in the Note Properties dialog, or move the slider that's below the text box.
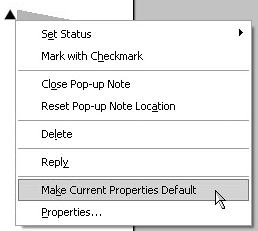
If you made changes to the Note Properties (see above section) that you'll continue to use, change the defaults to reflect these changes when you add more notes to a document. So each time you create additional notes, the notes will take on the new default appearance.
To change note appearance defaults:
Move the cursor over the Note icon. Be certain the cursor appears over the icon and not over the note pop-up window.
Open a context menu. From the menu items select Make Current Properties Default (Figure 11.14). Selecting the menu command captures the note properties assigned to the Note icon you select and applies the property choices to new defaults.
As you type text in note pop-up windows Adobe Reader dynamically checks your spelling. When you see text appearing with a wavy red underline, the word is marked as questionable. You can check the spelling as you type text in note windows, or you can check spelling after completing all of your comments.
Why don't I see Check Spelling in my context menu?
If you click a Note icon, menu options are different than when you click inside the note window. Likewise, if you click on the note title bar above the note contents, the menu options are the same as when clicking on the Note icon (Figure 11.15). When performing a spelling check, be certain to click inside the window where you typed your note text.

To check spelling in comment notes:
Open a context menu from inside the note window.
Select Check Spelling. The Check Spelling dialog opens (Figure 11.16).
Click Start. Adobe Reader checks words in all installed languages and stops at a word that does not match a word in one of the language dictionaries (Figure 11.17).
The Start button changes to Ignore when Reader stops at a suspected word. You can ignore the current selection, ignore all occurrences of the suspect word, or click Change to change to the default selection from the Suggestions list at the bottom of the dialog. If the default is not the proper word, scroll the list to find a suggestion that matches your meaning.
Click Change All if you find a suspect reoccurring and you want all forms of the misspelled word changed to the word selected in the Suggestions list.
Select a language dictionary from the Add to pull-down menu if you want to add a word to one of the dictionaries. Click the Add button, and the word is added to the respective dictionary. This option is particularly helpful when using proper names or technical terms not commonly found in dictionaries.
Click Done when finished with the spelling check.


When you click the Note tool, a note pop-up window automatically opens. All other comment tools by default have the associated note pop-up window collapsed. If you want to move either the note pop-up window or the icon, you need to use a tool that permits you to move items.
To move Note icons and note pop-up windows:
Select the Hand tool and then click the title bar on a note window. Keeping the mouse button pressed, drag the window where you want it. Notice that note pop-up windows can be moved with any comment tool but only when dragging the title bar.
Select any comment tool, the Hand tool, or the Select tool, and click and drag the Note icon. Notice that any of these tools can be used to move the icon and that the icon moves independently of the note pop-up window.
When you create a note comment, the Note icon and the note pop-up window may appear in one of two places. The Note icon is always created at the cursor position where you click with the Note tool. Where the note pop-up window appears depends on a choice you make in the Show pull-down menu.
Click the Show pull-down menu on the Commenting toolbar to open it, and notice the checkmark for Align New Popups by Default. When the check box is selected, anytime you click the Note tool anywhere on a page, the Note pop-up window opens on the right side of the Document pane (top Note icon in Figure 11.18).

Figure 11.18. Note pop-up windows appear to the right of the Document pane or adjacent to a Note icon, depending on the option you choose in the Show pull-down menu.
When you uncheck the menu option in the Show pull-down menu, the Note pop-up window appears immediately to the right side of the Note icon (bottom icon in Figure 11.18).
In the Properties dialog for all comment types, you'll notice a check box for an option called Locked. You can lock the position of the markups for any comment type by checking the Locked check box in the Properties dialog. Locking a markup also locks the property attributes such as color, line weight, font size, and so on. However, the one item not affected by the Locked option is note pop-up windows. The markups and icons are locked to position, but you can move the note pop-ups freely after you lock a comment.
Move the cursor over the note window with the Hand tool selected. Notice that the cursor may be positioned inside the note window or over the title bar. When the cursor enters the note pop-up window space, a connector line appears between the window and the Note icon (Figure 11.19).
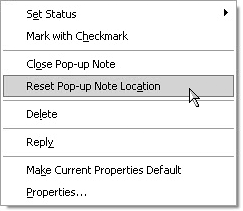
Reset pop-up note locations. If you create notes where the note pop-up windows appear on the right side of the Document pane and you subsequently move a note window, you can realign the window to the default position. To realign a note pop-up window to its original position, open a context menu from the Note icon, the note pop-up window, or inside the note pop-up window, and select Reset Pop-up Note Location (Figure 11.20).

Note
If you create notes where the note pop-up window appears adjacent to the Note icon, selecting Reset Pop-up Note Location moves the note pop-up window to the right side of the Document pane. There is no way to realign a pop-up window to appear adjacent to the Note icon.
If the note pop-up windows appear cluttered on a page, you can close the windows by clicking the X in the top-right corner of the pop-up window title bar (Figure 11.21).
To open a collapsed note, select the Hand tool or the Select tool, and click once on the Note icon. Using any of the comment tools creates additional notes, so be certain to use either the Hand tool or the Select tool instead of comment tools to open note pop-up windows.
All the property changes you make to the note pop-up windows are applicable for any comment tool that uses a note pop-up window. But a few comment tools don't have associated note pop-up windows such as the Callout tool, the Dimensioning tool, the Text Box tool, the Record Audio Comment tool, and the Attach a File as a Comment tool.
You have two groups of comment tools contained in separate toolbars at your disposal in Adobe Reader. A number of miscellaneous tools appear in the Commenting toolbar, and another set of tools designed for drawing objects on a page as comments is contained in the Drawing Markups tools.
The Commenting toolbar contains a number of tools designed for making comments on text; it also includes a few tools designed for other purposes such as adding highlights, strikeouts, underlines, and file attachments, and recording audio comments.
The tools used for marking up text all have associated note pop-up windows. Much like you mark up analog documents with highlights, strikethroughs, and underlines, you use these tools to mark up a document and add comment notes to those markings on text. Text marking tools are contained in two toolbars: the Text Edits toolbar and the Highlighting toolbar.
Text Edit tools are similar to tools used in word processing programs for making comments on documents. When you first look at the tools, you may wonder why tools for highlighting, strikethroughs, and underlining exist among the Text Edit tools when you have the same tools available among the highlighting tools. The distinction lies in what can be done with the markups in Adobe Acrobat Professional. You as an Adobe Reader user can mark up documents with the Text Edit tools and see no more than the comments and markups you make. Acrobat Professional users can take the comments a step further and export those comments back to a Microsoft Word document if the PDF was originally created in a Word document.
If you know the PDF author of the file you're marking up is an Acrobat Professional user who created the PDF in Microsoft Word, you might want to use the Text Edit tools for all your text commenting.
To use the Text Edit tools:
Open a document with usage rights enabled for Adobe Reader.
Click the Select tool in the Toolbar Well.
Note
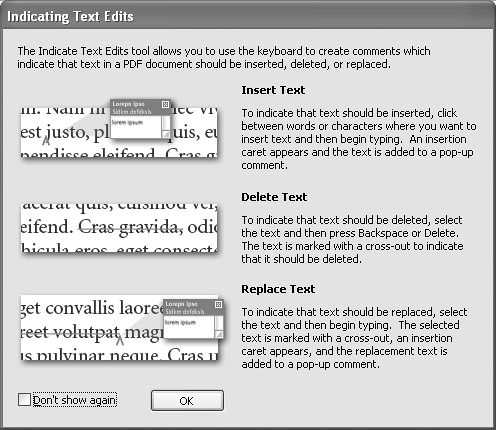
Alternatively, you can click the Text Edits tool in the Commenting toolbar. The first time you click the tool, the Indicating Text Edits dialog opens. The dialog tells you how to mark text for insertion, deletion, and replacement. You can choose not to show the dialog the next time you click the Text Edits tool by checking the box for Don't show again. The next time you click the Text Edits tool, you can select text like you do with the Select tool.
Open the pull-down menu beside the Text Edits tool. Notice that aside from the first and last menu commands, the menu items are grayed-out. You must first select text to make the remaining commands active.
Select Indicate Text Edits Tool from the menu. The Indicating Text Edits dialog opens (Figure 11.22).
The Indicating Text Edits dialog offers you a quick help reference for working with text edits. Read the information shown for Insert Text, Delete Text, and Replace Text. Click OK after browsing the information.
Drag across a word or line of text on the document page with the Select tool or the Text Edit tool.
Open the Text Edits pull-down menu and select a command. In the example shown in Figure 11.23, Replace Selected Text is selected in the menu.
A note pop-up window appears. Type text in the note pop-up to replace text, highlight text, add a note, insert text at cursor, underline text, or cross out text.
Note
If you want to replace text or delete text you can avoid using the Text Edit menu commands. Highlight text to be replaced and start typing. Adobe Reader assumes you want to replace the highlighted text and opens a pop-up note window where the replacement text is added. Press the Delete/Backspace key, and Adobe Reader adds a strikethrough to the highlighted text indicating a text deletion.
Practice adding Text Edits comments by using all the Text Edits menu options.
Click the Save tool to update your edits.

The Highlighting toolbar contains three tools: the Highlighter tool, the Underline Text tool, and the Cross-Out Text tool. The Text Edits tools have equal counterparts in these tools. If you know your comments are not going back to a Microsoft Word document, you can use these tools to make comments similar to the way you would in a word processor. The advantage to using Highlighting tools instead of Text Edits tools is that you can open the Highlighting toolbar as a floating toolbar and drag it around the Document pane to access the tools much more easily than if you use menu commands. When you need to quickly highlight, underline, and strikeout text, use the floating toolbar. The downside to using the Highlighting tools is that any markups you make on a document can't be exported to Microsoft Word by a PDF author.
To use the Highlighting tools:
Use the same document you were working with in the previous section.
Open the Highlighting toolbar pull-down menu, and select Show Highlighting Toolbar. The toolbar opens as a floating toolbar in the Document pane.
Select a tool in the Highlighting toolbar and drag across text on a page. When you release the mouse button, the text is highlighted, but the associated tool pop-up note is collapsed.
Select the Hand tool and click the highlight. A pop-up note opens.
Type text in the note window. Create two other comments using one or two of the other tools and type text in the note windows similar to those in Figure 11.24.

Additional tools in the Commenting toolbar include the Stamp tool, the Attach a File as a Comment tool, and the Record Audio Comment tool. The Stamp tool is covered in Chapter 12, and the remaining tools are covered in Chapter 13.
Drawing Markups can be used in any commenting sessions where you need to use markups to annotate documents. These tools are meant to be used primarily with engineering and scientific drawings. All of the tools—with the exception of the Callout tool, the Text Box tool, and the Pencil Eraser tool—have associated note pop-up windows.
Note
If you don't have a file enabled with usage rights, use the housePlan.pdf file, located at www.peachpit.com/adobereader7, for all the steps using Drawing Markups tools.
The Callout tool comprises a text box where you add comments and a line used to point to an area of a drawing or other kind of document related to the comment note.
To use the Callout tool:
Open a file enabled with Adobe Reader usage rights. If you're using a large drawing, zoom in on the document to the area where you want to create a callout.
Select the Callout tool from the Drawing Markups toolbar.
As you move the cursor into the Document pane, the cursor changes to an I-beam. Click and drag a rectangle to define the size of the callout text box. The box created with the Callout tool is where you type text; therefore a note pop-up window is not needed, nor is one available when using this tool.
As you draw the callout box rectangle, a connecting line with an arrowhead is automatically created. On the connecting line are handles that appear as small rectangles. You can move the handles to reshape the line. Next, drag the arrowhead to the desired location.
Type your text note in the callout box as shown in Figure 11.25.
To move the callout box and/or connecting line, select the Hand tool. First click in an open area on the document page to deselect the callout box, then click the box and drag it to the desired location.
You might notice that when you zoom in on a drawing, the text in a callout is legible. However, when the document is viewed at full size (or zoomed out), the text in the callout may be too small to view. Using the Properties Bar, you can change the text size by opening a pull-down menu or typing in a value in the text box for the point size. In Figure 11.25 the type size was changed to 72 points in the Properties Bar.
Click the Save tool to save your edits.

The Callout tool connector line by default extends from the left side of the callout box. If you want the line drawn from the right side, select the callout box with the Hand tool. Three handles appear on the connector line. A handle is visible on the arrowhead, another at the point where the connector line is attached to the callout box, and another between the two. Drag the middle handle (Figure 11.26) to the right side of the box so that it rests where you see the selection arrowhead. The connector line switches sides. You can then move the arrowhead by dragging that handle to the desired location.

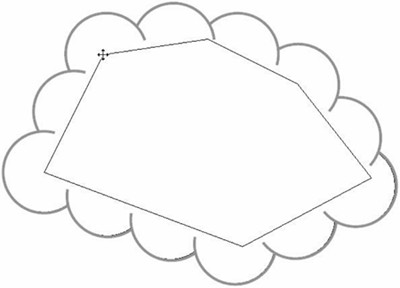
Graphic designers may find the Cloud tool as appealing as engineers and architects do. The Cloud tool is used to create a polygon shape around an area you want to target for a comment. When you release the mouse button, a bubble cloud appears around the area where you created the polygon. This tool is handy for annotating a diagram, a body of text, a photo image, an illustration, or any area where a portion of a document page needs annotation. The Cloud tool is particularly handy when you work with drawings that have drawing elements such as circles, squares, and rectangles. Using the Cloud tool is an easy way to distinguish the comment markup from the drawing elements.
To use the Cloud tool:
Continue using the same document where you added other drawing markups.
Select the Cloud tool from the Drawing Markups toolbar.
Click the cursor where you want to begin a rough trace of an image, drawing, text block, and so on. Release the mouse button and move the cursor away from the first click. As you move the cursor, a line from the first click to the cursor position is drawn. Usually short lines work best. Click again and a point is plotted. Continue clicking and moving the cursor to create a polygon shape around the item you want to annotate. Return to the point of origin, click, and Adobe Reader completes the path, creating the cloud.
By default the cloud fill color is set to None. If you want to fill the shape, open a context menu on the cloud outline and select Properties. In the Polygon Properties dialog (Figure 11.27), select the color fill you want to apply to the shape. If you want the fill to appear transparent, adjust the Opacity by moving the slider to the left. Note that you can change the stroke color by selecting a color from the Color swatch and the fill color by selecting a color from the Fill Color swatch. The Style pull-down menu offers you several line styles. Alternatively, you can make similar choices in the Properties Bar. As with the note properties, your opacity adjustments are fixed at intervals from preset choices. If you want to use arbitrary opacity settings, use the Properties dialog box.
Click the Save tool to save your edits.

All the polygon shapes can be changed after you create them. Adobe Reader generates an appearance from the polygon shape you draw when using the Cloud tool. To display the polygon after creating the shape, select the Hand tool and click the cloud image. The polygon appears as a series of straight black lines.
Move the cursor to an intersection of the polygon lines. When the cursor shape changes as shown in Figure 11.28, click and drag the intersection to move it. When you release the mouse button, Adobe Reader reshapes the cloud figure.
The Arrow tool is the default tool that appears in the Drawing toolbar. From a pull-down menu, you can choose from several other tools to create lines and shapes. You can also open the Drawing toolbar by selecting Show Drawing Toolbar from the pull-down menu. The toolbar opens as a floating toolbar (Figure 11.29).
Note
If you select a tool from the Arrow Tool pull-down menu, the selected tool becomes the new default tool in the Drawing Markups toolbar. If you don't see the Arrow tool, open the pull-down menu beside the tool that appears immediately to the right of the Cloud tool.
Each mark created with the Drawing tools except the Pencil Eraser tool has an associated note pop-up window. Line tools have this added feature for adding arrowheads, and the Shape tools have a note pop-up window for filling the shape contents.
The Arrow tool and the Line tool offer identical options. Both tools offer you settings for adding arrowheads, changing colors and line widths, changing opacity values, and adding text within the line. You might choose the Arrow tool to identify particular arrowheads, and use the Line tool to create lines without arrowheads or arrowheads of a different style. This workflow eliminates the need to return to the Properties dialog every time you want to change the line ends.
The Polygon Line tool offers the same options as the Arrow and Line tools except that you can draw polygon line shapes.
The Pencil tool supports neither text within a line nor adding arrowheads. However, it differs from all other tools in that you can draw free-form and irregular lines. When lines are drawn with the Pencil tool you can use the Eraser tool to erase portions of the line.
The Rectangle, Oval, and Polygon tools all offer the same options in the Properties dialog: You can change border and fill colors, line styles, and opacity values.
To use the Drawing tools:
Continue using the same document where you added other drawing markups.
Select the Line tool from the Drawing toolbar.
Click and drag a line on the document page. To constrain the line to a straight line, hold the Shift key down as you drag the mouse.
Select the Hand tool. Click the line to select it, open a context menu, and select Properties.
Check the box for Show Text in Line. Change the point size for the Thickness by typing a value in the text box. In this example, I use a thickness of 12 (Figure 11.30).

Figure 11.30. Check the box for Show Text in Line and change the line weight in the Thickness text box.
Note
You have one of two options for displaying the note associated with a line—either in line or in a pop-up window. If you use text in line, the text within the line serves as the note. Deselecting the check box deletes the text within a line but adds a note pop-up with the text added in the note window.
Select an arrowhead style from the Start and End pull-down menus. Click Close to exit the Line Properties dialog.
With the Hand tool selected, double-click on the line drawn with the Line tool. A blinking I-beam cursor appears. Type the text you want to appear within the line.
All the Properties associated with the various Drawing tools are self-explanatory. Try practicing using different tools and setting different properties.
You can easily see note contents by opening the Comments pane (see Chapter 14, “Managing Comments,” for information on using the Comments pane). All document comments are listed according to page number, along with the note contents.
For a quick look at note contents, select the Hand tool and move the cursor over a comment. A tool tip opens displaying the note contents. When using the Line tool and adding text within a line, you can also view the tool tip to show comments in a larger point size than what appears within the line (Figure 11.31).
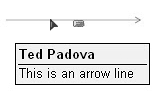
Figure 11.31. Move the cursor over any comment with a collapsed note or over small text appearing within a line, and a tool tip opens displaying the note text.
Using tool tips is often preferred when you don't need the options available in the Comments pane. When the Comments pane opens, it takes up much of the Document pane, leaving less viewing area for the PDF pages. If you want to view note pop-up contents quickly, move the cursor over the icons to see the note text in tool tips.
The Dimensioning tool is particularly helpful when making annotations between two points, such as a door's width on architectural drawings, office furniture dimensions on interior designs, and similar illustrations that need definition between distances.
To use the Dimensioning tool:
Continue using the same document where you added other drawing markups.
Select the Dimensioning tool in the Drawing Markups toolbar.
Click and drag from one point to another where you want a dimension comment to appear. To constrain movement to a straight line, hold the Shift key down as you drag the mouse.
After you release the mouse button, a blinking I-beam cursor appears. Type text you want to appear within the line, as shown in Figure 11.32. Note that the default for the Dimensioning tool is set to show text within the line. You can change the default by opening the Properties dialog box and removing the checkmark for Show Text in Line. Doing so eliminates the text from the line and places it in a pop-up note.

Tip
By default the text appears right side up. If you want to reverse the text, select the Hand tool and open a context menu. From the menu options select Flip Line. The text appears upside down. You can rotate the dimension markup by dragging the handle on either end and then choose the best view for displaying the text when the line is rotated.
The Text Box tool is ideal for adding long comment notes and for adding text to documents where you need more control over font and paragraph attributes than those provided with the Note tool. The Text Box tool offers you many font and paragraph alignment options such as changing fonts, point sizes, styles, and paragraph alignment in the same text box. None of these options are available in note pop-up windows.
Continue using the same document where you added other drawing markups.
Select the Text Box tool in the Drawing Markups toolbar.
Drag open a rectangle to define the Text box size. In large drawings you can draw the box as large as the page size.
Type text in the text box. To change font and paragraph attributes, use the options choices in the Properties Bar (Figure 11.33). From the font pull-down menu you can select different fonts for selected words, lines of text, or text to be typed at a new cursor position.
You can change the color of the text box in the Properties Bar, alter font attributes including superscript and subscript text, and change text alignment. Figure 11.34 shows several font changes and paragraph alignment variations.
