Lesson 5. Hardware Tools
Reference Files
MacBook (13-inch) service manual (macbook_13in.pdf)
Mac Pro service manual (macpro.pdf)
Combined Tools List (Combined Tools List.pdf)
Notes on Multimeter Use (Notes on Multimeter Use.pdf)
Time
This lesson takes approximately 45 minutes to complete.
Goals
Identify the correct hardware tools to service specific Apple products
Identify specialized tools available to AASPs from Apple
Given a specific Apple product, identify all hardware tools needed to perform a particular module replacement
This lesson reviews the hand tools you need for troubleshooting and servicing Apple desktop and portable products. In addition, it explains how to correctly identify tools for servicing Apple products.
Tip
See also Lesson 4, “Safe Working Procedures and General Maintenance,” for essential safety equipment.
Using the Right Tools
Experienced technicians can easily spot a bad repair when they see:
• Stripped screws
• Missing screws
• Bent pins
• Broken connectors
• Improperly bent cables
Many of these problems occur because someone was in a hurry and “made do” with the tools that were immediately available.
Such problems make repairs more difficult and time consuming. They complicate isolating any one issue because one badly done repair may create additional problems.
You can avoid all of these problems by following some basic steps:
• Review the service manual before attempting a new procedure.
• Identify and have on hand the correct tools called out in the service manual. Avoid “making do” with incorrect tools.
• Keep careful track of screws and other small parts to avoid using the wrong screw in the wrong place.
• If a procedure involves removing multiple parts, make sure that you have sufficient static bags for storage and some means of keeping track of the screws or other small parts you take out of the system.
Apple Authorized Service Providers (AASPs) can order tools from Apple via Global Service Exchange (GSX). They are ordered in the same fashion as service parts. You can see the complete array of Apple tools by doing a service part search for tool.
Tip
For a consolidated shopping list of tools, refer to the Combined Tools List (Combined Tools List.pdf) on this book’s companion website, www.peachpit.com/ats.deskport3.
Tools Common to Desktops and Portables
If you are planning to do repairs on a wide range of Apple desktop and portable systems, be sure to have the following tools on hand.
Most of these tools are available from a number of hardware stores and tool manufacturers; some are only available from Apple.
Phillips Screwdrivers
![]()
• Phillips #0 screwdriver (3- to 4-inch shaft is recommended for desktops)
• Phillips #00 screwdriver
• Phillips #1 screwdriver (10-inch shaft for desktops)
• Phillips #2 screwdriver (10-inch shaft for desktops)
• Phillips #2 screwdriver short (because a full size screwdriver does not always fit in a computer)
Make sure that the shafts of the #1 and #2 screwdrivers are at least 10 inches long to easily work on the heatsink of most Mac Pro systems.
Torx Screwdrivers
![]()
Torx screwdrivers have a six-pointed cross section and provide a precise fit to the matching screw. For this reason, you should never try to use the wrong size Torx screwdriver.
• T6 screwdriver
• T8 screwdriver
• T10 screwdriver
AASP technicians should get a T10 Torx screwdriver with an 8-inch shaft directly from Apple (part number 922-7083).
Nut Drivers
Nut drivers are used to work on six-sided bolts in some systems.
• 3 mm nut driver
• 4 mm nut driver
• 5 mm nut driver
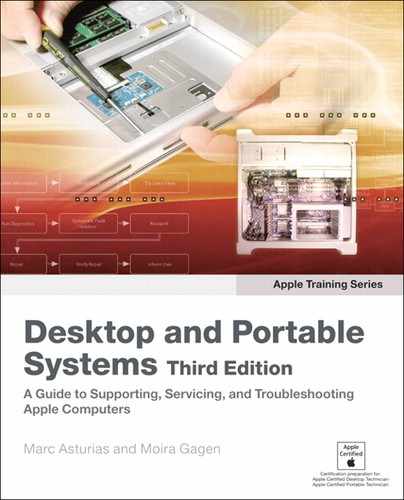
Hex Drivers
![]()
Set of metric hex keys (including 1.5 mm, 2 mm, 2.5 mm)
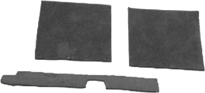
Miscellaneous Tools
• Nylon probe tool (also known as a black stick, available from Apple, part number 922-5065)
![]()
• Magnetizer/demagnetizer

• Precision needlenose pliers (small tips)
• X-Acto knife or razor blade
• Electrostatic discharge (ESD)–safe plastic probe
• Plastic tweezers
• Paper clip (put one in your tool kit since you can never find one when you need it)
• Coin (another thing you can never find when you need it)
• Multimeter
• 12-partition (or more) ESD-safe screw box (paper cups also work)
• White cotton gloves
• Dental pick
• Flashlight
• Metal tweezers
A magnetizer/demagnetizer enables you to magnetize your screwdrivers and other tools. It also allows you to demagnetize them in situations where a magnetized tool will harm components.
A multimeter is an instrument for measuring several electrical elements. You need to measure voltage and resistance in MacBook (13-inch) systems and Mac Pro systems. A multimeter can be very useful in many other troubleshooting situations, and is specifically called for in various Apple service documents and Apple Knowledge Base articles.
More Info
For more on how to use a multimeter, refer to Notes on Multimeter Use (Notes on Multimeter Use.pdf) on the companion website, www.peachpit.com/ats.deskport3.
Desktop Tools
If you are planning to do repairs on a wide range of Apple desktop systems, you’ll need the following tools in addition to the common tools listed in the preceding sections.
Most of these tools are available from a number of hardware stores and tool manufacturers; some you will have to purchase directly from Apple.
Torx Screwdrivers
![]()
• T15 screwdriver
• T25 screwdriver
Hex Drivers
![]()
2.5 mm hex driver with a 10-inch shaft
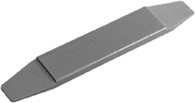
Flat-Blade Screwdriver
![]()
Flat-blade jeweler’s screwdriver
Miscellaneous Tools
• Alignment tool, display service (available from Apple, part number 922-3504)
![]()
• Processor alignment tool for Xserve (available from Apple, part number 922-5856)
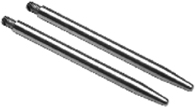
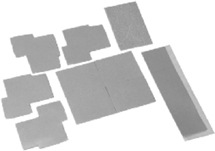
• Thermal pads (available from Apple, part number 076-0925, 076-0950)
• Putty knife for opening Mac mini models (available from Apple, part number 922-6761)

Note
The putty knife available from Apple has been specifically modified for separating the Mac mini housing. If you substitute a standard putty knife, be sure and modify it per the instructions in the applicable service manual.
• 3 mm flathead hex driver with 8-inch shaft (available from Apple, part number 922-7122)
• 4 mm ballhead hex driver with 8-inch shaft (available from Apple, part number 922-7082)
• Cathode ray tube (CRT) discharge tool
• Glue gun/glue sticks
• Cup ring
Portable Tools
If you are planning to do repairs on a wide range of Apple portable systems, you’ll need the following tools in addition to the common tools listed in the preceding sections.
Most of these tools are available from a number of hardware stores and tool manufacturers; some you will have to purchase directly from Apple.
• Thermal grease, G751 (available from Apple, part number 922-6495)

• Display take apart tool (available from Apple, part number 922-6120)
• Thermal pads (available from Apple, part number 076-1053) for PowerBook G4, PowerBook G4 (12-inch 1.33 GHz), PowerBook (12-inch DVI)
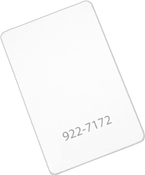
• Access card (available from Apple, part number 922-7172)
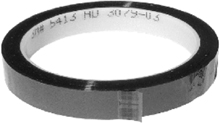
• Kapton tape (available from Apple, part number 922-1731)
• Small soft cloth
Lesson Review
Using the Mac Pro service manual, answer the following questions:
1. You need to replace the processor. What tools do you need to do this?
2. Is it all right for the thermal grease on the heatsink to come in contact with the processor connector?
3. What two steps must you be sure to take when reinstalling the processor heatsink cover?
Using the MacBook (13-inch) service manual, answer the following questions:
4. You are replacing the optical drive. What size Phillips screwdriver do you need?
5. What tools do you need to remove the display bezel?
Answer Key
1. No tools are required for this procedure. However, you may find a flathead screwdriver helpful in releasing the processor holder latch
3. Make sure the heatsink cover slides below slot #1 on the PCI card guide, and align the four slots on the underside of the heatsink cover’s left edge with the four tabs on the front fan