
Lesson 21. Maintenance, Intrusion Detection, and Auditing
|
Time |
This lesson takes approximately 2 hours to complete. |
|
Goals |
Understand which files to watch for modification Detect malicious software Use virus protection software Use rootkit safely |
When it comes to Mac OS X security, it is crucial to regularly monitor your system for changes in software, look for signs of intruders, and detect malicious software. We hope that you already have a clear understanding of the way your system works every day. The more familiar you are with your system when it is running properly, the more obvious it will be when something unauthorized is happening. Although Trojan horses, viruses, worms, and other malicious software are less common in the UNIX and Mac OS X world than on other platforms, they should be taken very seriously.
In this lesson, you will learn how to maintain the security of your Mac OS X computers through proper maintenance and auditing, how to detect malicious software and deal with it appropriately, and how to constantly monitor your system to ensure you are aware of any changes.
Differentiating Between Types of Malicious Software
There’s a wide variety of malware types and technologies out there, all waiting to attack—and possibly damage—your network and individual computers on that network. To effectively diagnose and resist malware attacks, you must learn the differences between, for example, a Trojan horse, a virus, a worm, and other types of malicious software.
Trojan Horses
Just as in the classic Homer legend, Trojan horse software seems like something you can use, but actually conceals something that can cause as much destruction to data as an entire legion of soldiers.
It is extremely unlikely that well-known, shrink-wrapped software will contain a Trojan horse. The main concern here is that shareware, freeware, or other software distributed through nonretail channels can easily be modified by a malicious attacker. A well-written Trojan horse, however, can install itself on top of shrink-wrapped software to disguise its actual source—so it may not be have originated in the application you purchased or downloaded, but from another source entirely.
Viruses
A virus attaches itself to a good program and can not only attack its host computer, but, like a biological virus, can replicate itself and spread to other computers. Viruses can be triggered only when an infected program is opened, so human “cooperation” is required—most commonly by inadvertently opening an attachment from an email. If a virus-infected program is not opened or executed, the virus will not infect a system.
Note
Currently, Microsoft Office Macros can adversely affect your Microsoft Office documents, depending on the type of virus.
Worms
Worms are similar to viruses, with one important exception: Worms can spread to other computers without human involvement. A worm will take advantage of a transport mechanism on a single computer and automatically spread itself to other computers.
The most common worm is an email-address bookworm, which obtains all of the email addresses stored on a single computer and sends a copy of itself to each addressee.
The email attachment that it sends is often a virus that installs a worm that repeats the process, infecting all of the computers in the recipient’s address book.
Note
Microsoft Outlook e-mail worms can spread to other computers if you forward e-mails that have not been checked for Outlook worms.
Spyware
Spyware is very insidious. A system may seem like it is running normally, but a spyware is running in the background, secretly sending private information to an unauthorized recipient. A spyware-infected computer may be transmitting anything from address book contacts to passwords to confidential client information without the user even being aware that unauthorized data-sharing is happening.
Note
Spyware can also masquerade in the form of Microsoft Internet Explorer helper objects.
Understanding the Opener Rootkit
A rootkit is a hacker term for a software package whose intent is to provide the hacker with access to a system’s root account. In UNIX systems, the root account has superuser capabilities and can make changes anywhere in the system. In other words, if you have root access, you control the system and can have it do anything that you would like. Rootkits are used to extend the attacker’s capabilities once he already has root access, often by introducing backdoors into the system that the attacker can use at a later date.
Mac OS X and Mac OS X Server are UNIX-based and therefore do have root accounts. By default, the root account is disabled on Mac OS X but not Mac OS X Server. Even though the account itself is disabled, the support for the superuser account still exists. It is possible for an application to take on the superuser privileges to accomplish some task. This ability is important and is often used by trusted applications to effect changes within the operating system itself. A prime example of this legitimate usage is within the programs that make up the Systems Preferences panel.
Since there is this vulnerability, an attacker can use a rootkit to create additional, unauthorized programs that run as the superuser. With a rootkit installed, the hacker can execute any program with superuser privileges. This allows the hacker to make the system do anything he or she wants. Of course, even with root access the attacker still needs access to the system.
Most rootkits include additional programs that support remote access of the system and, as part of the rootkit installation, make configuration changes that enable the remote access programs. For example, most rootkits will enable the secure shell, ssh, that listens on Transmission Control Protocol (TCP) port 22 as well as adding a separate, “backdoor” application that is listening on another known TCP port. Either of these access points can be used to gain control over the system.
Because of the nefarious nature of most rootkits, additional work is performed during the installation to help hide the fact that the rootkit has been installed. This “hiding” process typically involves the installation of custom versions of many programs that are used to determine the status of a server. Some examples include ls and du, which are modified to not “see” the rootkit directory in the location that it has been installed; netstat, which is modified to not “see” the TCP ports that the backdoor programs are using; and ps, which is modified to not “see” any background processes that the rootkit has installed. Additional configuration changes will also be made to facilitate this “hiding” as well as to enable the continued operation of the rootkit. For example, changes will be made to the firewall configuration to open the backdoor TCP ports as well as the addition or modification of startup scripts to start up the rootkit programs whenever the system is restarted.
The installation of a rootkit on a system can lead to significant issues. Many rootkits are used to enable costly or destructive services such as anonymous email relays, file sharing, game servers, port scanners, Denial of Service (DoS) agents, IRC bots, and so forth. These services can cause the system or the local Internet connection to slow down to a crawl and impact their use for legitimate work. Even if a rootkit is not being used to implement a costly service, there can be other detrimental problems. If the rootkit installed was not built for the exact version of the operating system that it is installed on, there can be conflicts with the system libraries or event the kernel itself. This can cause the programs to behave erratically or even not work at all. Since these programs are often used either directly by users or by scripts and programs running on the system, this can cause significant problems.
Since the rootkits make many changes to a system, it is often very difficult to remove the rootkit and still have a working system. Because of this, if a system is ever compromised by a rootkit, recovery often requires a complete reinstallation the operating system from scratch.
It is important to note that the installation of a rootkit requires the use of superuser privileges. On Mac OS X (not Mac OS X Server), the root account is disabled by default. System administrators must use the sudo command to execute an application as the superuser. This significantly lessens—but does not eliminate—the possibility of a rootkit being installed. In addition to a user explicitly executing a program as the superuser, there are those legitimate programs that also operate with superuser privileges. The system’s package installation program is a prime area of risk for a rootkit installation. By necessity the package installation program has to operate with superuser privileges to be able to install legitimate programs. This can be abused to install a rootkit as well. If you have administration access to the system, it is important that you know exactly what applications are being installed when you are prompted to enter the administrator password.
Even with all of the negative aspects of rootkits, they can have a noble use. In certain situations, it may be desirable to have backdoor access to a system. For example, you may have systems that have been deployed in a semipublic venue and you want to minimize the administration access to the systems. In that case, you may either disable the administration account or provide a random password to the administration account. This effectively locks out administration of the system. In this case, having undocumented, backdoor, superuser access can be beneficial.
If you do intend to install a rootkit on a system, it is important that you configure a system to be exactly the same as the system on which you want to install the rootkit. You will then need to build the rootkit on that system so that all of the versions of the rootkit programs and the libraries will match. Also, you will need to build an updated rootkit and reinstall the updated rootkit after each software update.
Currently, there were only three known rootkits for Mac OS X—osxrk, WeaponX, and jworm (known as Opener or SH/Renepo)—and all of them are out of date. They will work only on Jaguar or Panther systems. Opener is a simple shell script that is a rootkit only in that it opens a system for someone to access that system as root. It does not have any provisions for the typical rootkit hiding. It should also be noted that even though Opener is labeled a worm, it has not been seen replicating in the wild.
Understanding Infection Effects
Malware produces a wide variety of results, from relatively innocuous to devastatingly destructive. In learning how to repel or repair the results of malware, it is important to understand what can happen to a system once you have been infected.
“Cute”
Some infections are meant as a “joke” for the recipient. An infected computer may have its screen reversed, have all of its windows move about randomly, or display the message “You Have Been Infected” on the screen. These infections may be considered harmless by the author (who is often just trying to show off), but they can be very annoying to the recipient.
“Cute” infections may also be used by its creator or programmer to verify a new security hole that allows the infection to spread. Therefore, a so-called harmless “cute” infection may portend a more serious infection.
Identity Theft
Some frightening statistics bring to light the overall costs of identity theft. According to the Identity Theft Resource Center, approximately 20,000 people per day are victims of identity theft; each of them spends an average of 600 hours over a period of years recovering from this crime. Some studies estimate that up to $92,000 per name is lost to the business community in fraudulent charges, and victims spend an average of $1,400 clearing their records. All it takes to get the ball rolling is for someone to capture an unencrypted password.
More Info
For more on identify theft, go to www.idtheftcenter.org/facts.shtml.
Destructive
The worst type of infection is the one that actually causes your computer to no longer function properly. Destructive infections may cause permanent loss of your data or require you to reinstall the operating system.
Protecting Against Malicious Software
It’s true on the sports field and it’s true when you’re facing off against malware: The best offense is a good defense. By responsibly using preventative procedures and implementing protective features built into Mac OS X, you can avoid malware attacks and improve your chances of total recovery if a system or network does become infected.
Backing Up Data and Testing the Backup
The first line of defense and a sure way to prevent an extreme crisis if a computer is infected is to back up data! Be extremely proactive in regularly backing up important data on all the computer systems that fall under your responsibility. Just as important is to test the integrity of those backups and your ability to restore that data from that backup.
The goal of performing a backup isn’t to archive data—it is to actually restore the original data. If you cannot take your backup to that last step of full restoration, your backup efforts are worthless.
Using Virus Protection Software
You now know how bad malicious software can be, including the damage that it can do to your machine and how it can be transmitted to other machines. Although there are few (if any) Mac OS X viruses today, there likely will be in the future, and you’ll be better off if you’re prepared before it happens rather than scrambling to figure out what to do after it happens. Lesson 19, “Mail Security,” talked about what you, as an email server administrator, can do to quickly add antivirus protection to the users of your email service. But what can end users do to protect their machines?
You no doubt know that there are a number of popular antivirus programs available for other popular operating systems. A number of those are even available on Mac OS X. But as it turns out, there’s a free program available called Clam AntiVirus, or ClamAV. This is the same software that the Mac OS X Server mail server uses, and it can protect your workstation too.
Obtain ClamAV
ClamAV is normally distributed as source from www.clamav.net, which you have to download and compile on your machine. After compiling, you must configure and run ClamAV from the command line. Thankfully, Mark Allan has developed a free port called ClamXav, which includes an easy way to use GUI. Here’s what to do:
1 Download ClamXav from www.clamXav.com.
2 Open the disk image and drag the ClamXav application to your Applications folder.
3 Open the ClamXav application.
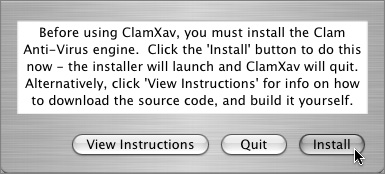
4 When prompted to install the ClamAV engine, click the Install button, and proceed through the prompts to complete the installation.
5 After the installation of the engine is complete, you’ll probably have to relaunch ClamXav.
6 Click the “Update virus definitions” button.
You’ll want to do this every time you run ClamXav to ensure that your computer always knows about the most recent viruses.
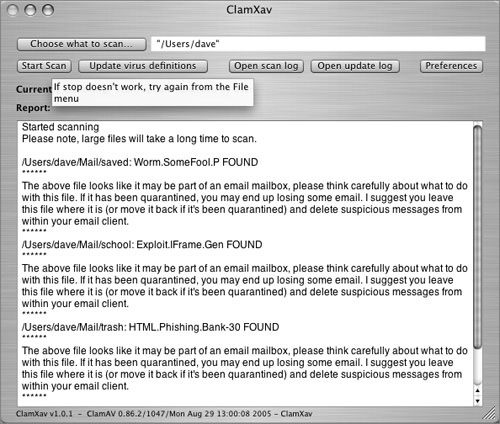
7 Click the “Choose what to scan” button.
Scanning your whole drive is optimal but can take some time, so you may need to scan only your home directory.
8 Click the Preferences button.
9 On the Internet tab, you probably want to check the boxes at the bottom to automatically check for ClamXav, ClamAV, and virus definitions updates.
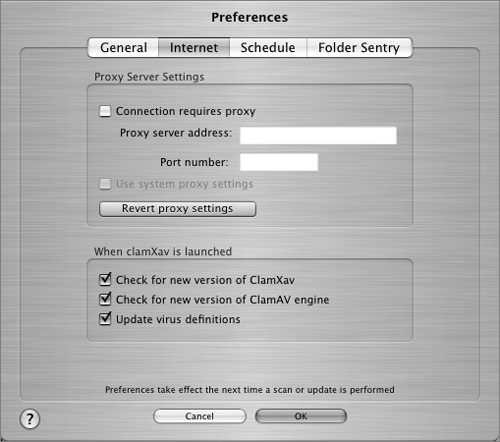
10 The rest of the tabs in the preferences window contain a number of options that you may want to set, particularly the ones that enable automatic scheduled virus scans. For now, just click the OK button to close the preferences window.
11 Click the Start Scan button in the main ClamXav window.
Understanding Maintenance
Maintenance on Mac OS X all comes down to doing your homework through updates to your applications, operating system, and security safeguards. Checking Apple-specific security sites is an excellent way to stay on top of events that may have an impact on computers within your organization. Here are some websites that provide information relevant to Macintosh computers:
• Apple product security: www.apple.com/support/security/index.html
• Apple security mailing list: http://lists.apple.com/mailman/listinfo/security-announce
• SecureMac: www.securemac.com
• Macintosh Security: www.macintoshsecurity.com
You should also have an arsenal of general security websites as resources to find information about potential threats to your computers and your system. The following offer late-breaking information on other security matters, such as network security, security standards, and potential threats:
• U.S. Department of Energy Computer Incident Advisory Capability: www.ciac.org/ciac
• Carnegie Mellon Software Engineering Institute: www.cert.org
• U.S. National Institute of Standards and Technology Computer Security Resource Center: http://csrc.nist.gov
• The Center for Education and Research in Information Assurance and Security: www.cerias.purdue.edu
• SANS Institute: www.sans.org/aboutsans.php
What if you have already been the victim of an attack? AFP548.com is a website devoted to Mac OS X Server, but in recent years it has become a premier site for all things Mac OS X. You’ll find discussions of security issues, as well as articles devoted to locking down and monitoring your system, and what to do if you’ve experienced an attack. You can find more information about this at www.afp548.com/Articles/security/postmortem.html.
Developing a good security policy is the best way to manage your users and systems. Coming up with that policy can be a daunting task, as you balance personal freedom with company policy, outside threats, inside threats, and legal repercussions. You should add these websites—devoted to guiding administrators into these waters—to your list of frequently visited places:
• National Security Agency: www.nsa.gov
Security Guidance for Mac OS X 10.3, Mac OS X 10.3 Server, and Mac OS X 10.4 (forthcoming)
• Defense Information Systems Agency: www.disa.mil
• Center for Internet Security: www.cisecurity.org
• National Institute of Standards and Technology, Computer Security Resource Center: http://csrc.nist.gov
• National Institute of Standards and Technology, Common Criteria Evaluation and Validation Scheme: http://niap.nist.gov/cc-scheme/index.html
No matter where you get your information, be aware of how Apple institutes its policies regarding certain vulnerabilities and security updates. Apple is a member of the Forum of Incident Response and Security Teams (FIRST), www.first.org, which handles security incidents as a group. When Apple posts a security notice, CERT distributes it simultaneously.
Performing Security Updates
Software Update allows Apple to send the latest security updates to the operating system and system software, and install them. Run Software Update regularly so that every computer checks with the Apple servers for all available updates to the system software, applications, and utilities installed on each system. Software Update can be run manually, or you can configure it to open on a set schedule.
Note
Using Software Update may require an active connection to the Internet if a Software Update server is not available.
You can also proactively check for security updates from Apple by visiting http://docs.info.apple.com/article.html?artnum=61798.
Software Update updates only those programs that Apple publishes or supports. Since any given system probably has an array of third-party programs also in use, it is important to check individual third-party websites for any security or version updates available for their programs.
Detecting Intrusions
With intrusion detection, vigilance is the name of the game,—but when you’re trying to figure out whether someone has been on your network or computer, others are likely to accuse you of attempting to get into their system.
To help you watch your network, you can turn to several tools, such as a network intrusion detection system (NIDS), intrusion detection system (IDS), or heuristic packet sniffer. Attack tools send out known patterns of packets; an IDS listening silently on the network can detect these patterns and warn the administrator. However, these tools cannot warn of brand-new types of attacks until the library of known patterns is updated. Still, intrusion detection software will often point out weaknesses in the entire system.
Let’s take a look at two of the detection tools available for Mac OS X: Network Mapper (nmap) and HenwWen. Both systems rely on the network administrators of the network to be aware of the detection methods in progress, so that they are not mistaken for additional attacks.
Using nmap
Open ports are often the first casualties in the assault against systems, since open ports and the associated processes that run on them are open doors and thus vulnerable to attacks. An attacker can send packets to your open FTP port (port 21) and possibly trick the process into accepting it. One tool for watching these ports is Network Mapper (nmap), an open-source application designed to detect various types of information about systems on your network. While nmap can be considered attack software, it is a useful tool when the administrator uses it to discover holes in a network. It’s important to be careful when using nmap with an organization’s network, because some NIDS tools will see nmap activity as an attack and report it thusly.
Using HenWen
Another detection tool is HenWen, a GUI for the Mac OS X that is derived from the popular open -source tool is Snort, which has a GUI version available for Mac OS X called HenWen. HenWen is based on rules and can be used in various modes, such as:
• Sniffer mode: This is the basic mode that collects packets on the network and continually displays them in the window. Similar to the basic tcpdump.
• Inline mode: A more advanced mode, this mode collects packets from iptables.
• Packet-logger mode: Logs all packets to the disk of your choice.
• NIDS mode: The most advanced mode, NIDS allows you to capture traffic and filter it based on rules you’ve set up. Post-capture macros or scripts can manipulate and compare the data captured.
Like nmap, HenWen is often considered attack software, as it can show passwords sent in the clear, unauthorized access attempts to servers, and open ports on systems. Use caution when rolling out HenWen on a network.
Monitoring the System Using UNIX Commands
It is important to familiarize yourself with the list of processes that commonly run on Mac OS X and Mac OS X Server to be able to identify those processes that do not belong to a normal Mac OS X configuration. UNIX has a wealth of command-line features and utilities that show you what is currently running on a system. In addition to the command line, Mac OS X and Mac OS X Server provide an excellent graphical tool, the Activity Monitor, to access those same powerful resources.
Note
Some of the UNIX techniques explained in this lesson assume your prior knowledge of the UNIX command-line interface.
Using ps
The ps command enables you to identify processes that are running and processes that other users are running. When it is executed, ps takes a snapshot of the running processes at that moment in time.
If you don’t add any arguments to the command, ps returns all of the processes that you are running within the current shell. For example:
powerbook:~ localuser$ ps
PID TT STAT TIME COMMAND
575 p1 S+ 0:00.05 -bash
1471 p4 S 0:00.03 -bash
In this example, you don’t receive much information. All you see is that the localuser user is running two interactive CLI bash shells. You know that more processes are running, but using ps doesn’t display that—you need more information!
Adding arguments to the ps command will provide more information about what is actually running on the system. There are many arguments available to ps, but an excerpt from the output from one of the most popular sets of arguments, -auxww, can be seen here:
powerbook:~ localuser$ ps -auxww
USER PID %CPU %MEM VSZ RSS TT STAT STARTED TIME COMMAND
localuser 1799 12.8 7.2 289696 75636 ?? S 5:35AM 14:18.54 /Applications
local/Microsoft Office X/Microsoft Word /Applications/
local/Microsoft Office X/Microsoft Word -psn_0_17694721
localuser 184 6.6 11.4 327132 119880 ?? Ss Sat07PM 46:59.47 /System/
library/Frameworks/ApplicationServices.framework/Frameworks/
CoreGraphics.framework/Resources/WindowServer -daemon
localuser 1394 4.9 6.1 248684 64336 ?? S Sun08PM 16:44.85 /Applications
local/Acrobat 6.0 Professional/Acrobat 6.0.1 Professional.app/Contents/
MacOS/Acrobat /Applications/local/Acrobat 6.0 Professional/
Acrobat 6.0.1 Professional.app/Contents/MacOS/Acrobat -psn_0_10485761
localuser 698 4.5 2.4 233192 25496 ?? S Sat08PM 39:26.15 /Applications
iTunes.app/Contents/MacOS/iTunes -psn_0_2752513
localuser 811 1.1 1.6 174020 17188 ?? S Sat11PM 3:03.64 /Applications
local/RBrowser.app/Contents/MacOS/RBrowser -psn_0_3538945
localuser 573 0.6 0.9 160232 9288 ?? S Sat08PM 2:20.93 /Applications
Utilities/Terminal.app/Contents/MacOS/Terminal -psn_0_2097153
localuser 1296 0.3 9.0 308440 94860 ?? S Sun04PM 17:15.86 /Applications
iWork/Keynote.app/Contents/MacOS/Keynote -psn_0_8781825
root 117 0.0 0.0 27672 352 ?? Ss Sat07PM 0:01.40 netinfod -s local
root 119 0.0 0.0 18056 100 ?? Ss Sat07PM 0:22.11 update
root 122 0.0 0.0 18080 108 ?? Ss Sat07PM 0:00.03 dynamic_pager
-F /private/var/vm/swapfile
This set of arguments tells ps to output all processes (in this case, you see the processes run by users root and localuser), to include the full path to the executable, and to not truncate the output of the line (that’s what the ww does). The columns show the owner of the process, the process ID, the percentage of the CPU processing currently being used by that process, some memory statistics, the time the process was started, and the full path to the command that was executed to start the process.
If you don’t need the entire path to the executable, which saves a lot of screen real estate and scrolling, you may give the argument -aucxww to ps and receive a result that looks like this:
powerbook:~ localuser$ ps -aucxww
USER PID %CPU %MEM VSZ RSS TT STAT STARTED TIME COMMAND
localuser 1394 16.5 6.1 248684 64316 ?? S Sun08PM 17:17.06 Acrobat
localuser 1799 16.1 7.6 290892 79284 ?? S 5:35AM 15:46.90 Microsoft Word
localuser 1296 9.9 9.0 308440 94860 ?? S Sun04PM 18:12.78 Keynote
localuser 184 6.5 11.5 328504 120952 ?? Ss Sat07PM 47:43.31 WindowServer
localuser 698 4.1 2.5 233224 25948 ?? S Sat08PM 40:38.55 iTunes
localuser 338 0.7 2.7 264472 27872 ?? S Sat07PM 18:55.44 Finder
root 93 0.0 0.0 18676 232 ?? Ss Sat07PM 0:00.67 notifyd
root 117 0.0 0.0 27672 352 ?? Ss Sat07PM 0:01.40 netinfod
root 119 0.0 0.0 18056 100 ?? Ss Sat07PM 0:22.17 update
root 122 0.0 0.0 18080 108 ?? Ss Sat07PM 0:00.03 dynamic_pager
It will take a little time, but do some research on each of the processes using man pages or a Web-based search engine. It’s good to learn more about what your Mac OS X is doing. After you’ve familiarized yourself with typical processes running on your system, it will be easier to spot rogue processes.
Note
To view all the arguments that can be used with ps, open Terminal and enter man ps.
Using ps and grep
Sometimes seeing all the information available from ps is a little overwhelming. A common technique used to search for specific processes without scrolling through them is to use a UNIX pipe to combine the ps command with grep –i (this finds matches that are not case-sensitive).
powerbook:~ localuser$ ps -auxww | grep –i httpd
root 2003 0.0 0.3 31456 2844 ?? Ss 9:00AM 0:00.04 /usr/sbin/httpd
www 2012 0.0 0.0 31456 320 ?? S 9:00AM 0:00.01 /usr/sbin/httpd
localuser 2024 0.0 0.0 18644 100 std R+ 9:00AM 0:00.00 grep httpd
Notice how you not only found the two Apache (httpd) Web-server processes, but you also found the process running your grep search. (It was running as you ran ps!)
If you are looking for a specific rogue process (for instance, seen on a security page that you actively peruse), you can enter that process name instead. Below is a search for a process called trojanhorse:
powerbook:~ localuser$ ps -auxww | grep –i trojanhorse
localuser 2024 0.0 0.0 18644 100 std R+ 9:00AM 0:00.00 grep trojanhorse
In this example, you see only the grep itself, so you know that trojanhorse is not running.
Using top
The top command is similar to the ps command, but instead of taking a “process snapshot” in time, top checks the running processes and dynamically outputs their names to the screen.
Without any arguments, top sorts its output based on process ID (PID), with the highest process ID (the most recently launched process) listed first:
powerbook:~ localuser$ top
Processes: 95 total, 2 running, 93 sleeping... 283 threads 09:10:36
Load Avg: 0.65, 0.94, 0.77 CPU usage: 36.6% user, 16.8% sys, 46.6% idle
SharedLibs: num = 123, resident = 50.9M code, 3.02M data, 13.4M LinkEdit
MemRegions: num = 14690, resident = 369M + 17.8M private, 292M shared
PhysMem: 106M wired, 579M active, 304M inactive, 990M used, 33.6M free
VM: 7.68G + 85.2M 108983(0) pageins, 72106(0) pageouts
PID COMMAND %CPU TIME #TH #PRTS #MREGS RPRVT RSHRD RSIZE VSIZE
2164 top 11.7% 0:08.12 1 16 26 420K 440K 796K 27.1M
1817 QuickTime 0.0% 0:20.05 3 276 249 3.34M 23.0M 11.2M 169M
1800 Microsoft 0.0% 0:07.26 1 65 134 1.86M 8.76M 4.41M 138M
1799 Microsoft 14.8% 18:11.02 1 92 445 62.0M 64.1M 83.4M 287M
1689 lookupd 0.0% 0:00.32 2 34 60 356K 884K 1.12M 28.5M
1681 Mail 0.0% 2:35.43 6 128 292 10.1M 29.0M 29.6M 177M
1475 bash 0.0% 0:00.18 1 12 19 172K 836K 812K 18.2M
1474 su 0.0% 0:00.01 1 14 41 84K 732K 636K 27.2M
1471 bash 0.0% 0:00.03 1 12 19 120K 864K 804K 18.2M
1470 login 0.0% 0:00.02 1 13 38 124K 440K 488K 26.9M
1394 Acrobat 0.6% 17:41.50 4 81 354 31.4M 57.8M 62.5M 242M
1353 RealPlayer 0.0% 28:58.16 9 398 611 15.7M 28.9M 23.1M 216M
1296 Keynote 5.5% 19:50.65 5 325 563 90.4M 47.5M 92.5M 301M
1177 writeconfi 0.0% 0:00.30 1 26 31 348K 784K 1.58M 27.6M
1148 NetCfgTool 0.0% 0:00.28 1 22 25 424K 660K 1016K 27.4M
1146 System Pre 0.0% 1:27.43 7 457 472 10.1M 31.1M 17.1M 232M
When using top, it is usually more useful to sort the output based on percentage of CPU being utilized by each process, rather than process ID. You can do this by adding the argument -u.
powerbook:~ localuserlocal$ top -u
Processes: 95 total, 2 running, 93 sleeping... 283 threads 09:12:31
Load Avg: 1.08, 0.96, 0.79 CPU usage: 62.3% user, 31.4% sys, 6.3% idle
SharedLibs: num = 123, resident = 50.9M code, 3.02M data, 13.4M LinkEdit
MemRegions: num = 14686, resident = 370M + 17.8M private, 292M shared
PhysMem: 106M wired, 579M active, 305M inactive, 992M used, 31.8M free
VM: 7.68G + 85.2M 109013(30) pageins, 72106(0) pageouts
PID COMMAND %CPU TIME #TH #PRTS #MREGS RPRVT RSHRD RSIZE VSIZE
573 Terminal 28.0% 2:50.25 7 96 270 7.38M- 17.5M 11.8M- 160M
1799 Microsoft 12.6% 18:29.13 1 92 447 62.8M 64.2M 84.3M 287M
0 kernel_tas 9.7% 28:22.48 43 2 2784 20.9M 0K 91.3M 846M
2165 top 6.5% 0:01.04 1 16 26 420K 440K 796K 27.1M
184 WindowServ 6.1% 48:37.69 2 489 1281 15.3M+ 126M- 121M+ 322M+
1296 Keynote 6.1% 19:59.78 5 325 563 90.4M 47.5M 92.5M 301M
698 iTunes 4.0% 42:27.73 8 252 692 16.0M 34.9M 25.0M 227M
1394 Acrobat 1.6% 17:42.39 4 81 354 31.4M 57.8M 62.5M 242M
338 Finder 0.8% 19:48.39 6 318 520 18.2M 43.0M 26.8M 258M
467 UniversalA 0.4% 3:18.68 1 58 96 804K 4.88M 2.25M 143M
189 loginwindo 0.4% 2:23.07 5 224 166 1.67M 8.06M 3.70M 136M
1048 TextEdit 0.4% 1:48.07 2 119 207 5.12M+ 17.7M 9.14M+ 167M
119 update 0.4% 0:22.41 1 9 16 40K 336K 100K 17.6M
1353 RealPlayer 0.0% 28:58.59 9 398 611 15.7M 28.9M 23.1M 216M
937 Safari 0.0% 12:25.63 9 279 374 14.7M 35.4M 29.7M 258M
811 RBrowser 0.0% 3:06.65 5 234 257 4.23M 23.8M 16.8M 169M
Auditing Mac OS X
Auditing involves checking your Mac from time to time to make sure that nothing has happened to make it less secure. There are several ways to do this, including checking that the actual files on your computer have not been tampered with, monitoring your log files, and using a standard set of tools to determine whether your computer is as safe as other systems.
Monitoring Log Files
It may seem a bit academic, but watching log files is an excellent way to monitor the health of your computer. Inside Mac OS X are dozens of log files, all of which are important in one way or another. With respect to security, however, the following two log files, located in /var/log, stand out from the rest.
secure.log
secure.log relays information about users’ attempts at accessing rights in the /etc/ authorization file, such as whether the screen saver has been invoked and a password is needed to unlock the screen, whether Fast User Switching is being used, whether there has been an attempt to use su or sudo from the command line, and whether there has been any attempt at unlocking a System Preferences pane.
Like the wtmp file, whether the user has logged in via the Login Window or remotely (usually via SSH), secure.log will show all logins and logouts. secure.log is extremely useful when watching attempts to access rights that may not be granted to the user. You can search for the word failed in the log; conversely, an administrator whose account may have been compromised can search for the word succeeded, which will indicate the acceptance of authentication to a given right. If attackers gain access to your system, the first thing they do is doctor or delete the log files in an attempt to hide their presence. So if you are an administrator, you may want to look for any absence of normal day-to-day authorization, as well.
wtmp
wtmp keeps a listing of restarts, shutdowns, logins, and logouts, both from the login window and via remote access (SSH). wtmp is a powerful log file that can show you who logged in to your computer, when it was shut down or restarted, whether anyone else has a hidden account on your machine, and whether he or she is using that account to access your computer. You cannot view the wtmp file directly; you must use the last command to view the contents of the file.
Using a Centralized Log Server
Reading log files to monitor the security health of your computer may seem like a good idea, and most of the time it is. But what if you have been attacked and your computer has been compromised? Remember, the first thing an attacker will do is doctor the log files to disguise their presence.
Therefore, you may want to create a centralized log server whose only job is to accept log files from another server (such as a Mac OS X Server running file services). If that file server is compromised, the attacker has no way to doctor the log files. You have a better chance to discover what happened and trace it back if your log files are safe from editing or deletion. When doing this, you must open up additional ports. It’s not always possible to secure the log server against spoofing.
Apple Certification Compliance
Apple has augmented its commitment to security by becoming Common Criteria—certified for both Mac OS X and Mac OS X Server for version 10.3.6 and later. Achieving Common Criteria certification, a standard method of evaluating the security capabilities of information technology products, provides for a safer, more user-centered computing experience. Along those lines, Apple is working to comply with various security standards that many software companies, organizations, governments, and even nations are using. Among the certifications Apple adheres to are the following:
• Controlled Access Protection Profile/Evaluation Assurance Level (CAPP/EAL3): This is set forth by the National Security Agency to ensure security requirements and baselines for IT infrastructure with the U.S. government. EAL3 is the common denominator among assurance levels with respect to operating systems.
• National Institute of Standards and Technology, Federal Information Processing Standards (FIPS 140-2): Used to set security standards for cryptographic modules.
• Common Criteria: This internationally approved set of security standards provides a clear and reliable evaluation of products’ security capabilities. By furnishing an independent assessment of a product’s ability to meet security standards, Common Criteria gives customers more confidence in the product’s security and leads to more informed decisions. Security-conscious customers, such as the U.S. government, are requiring Common Criteria certification as a determining factor in their purchasing decisions. Because the requirements for certification are clearly established, vendors can target very specific security needs with a broad range of offerings.
A protection profile defines a standard set of security requirements for a specific type of product. Common Criteria rates these as Evaluation Assurance Levels (EALs) numbering 1 to 7.
Common Criteria Tools
The Common Criteria tools available from Apple let administrators audit their systems. Running Common Criteria tools does not make an operating system inherently more secure, but it offers stellar event reporting via auditing, and a manageable way to benchmark one system against another. Keep in mind that a higher EAL level does not necessarily mean the system is more secure. The profile from Common Criteria must be matched against the EAL and measured against others in its category. In this manner, a more realistic view of the level of security can be established.
Common Criteria tools allow administrators to review results based on how secure the operating system environment is compared with the CCAP standard. Once the tools are installed, you configure the line AUDIT=–ABC– in the /etc/hostconfig file, where ABC can be one of four options:
• AUDIT=–YES–
Enable auditing and ignore failure.
• AUDIT=–FAILSTOP–
Enable auditing and allow processes to quit or halt if failures occur.
• AUDIT=–FAILHALT–
Enable auditing and allow the operating system to halt if a failure occurs.
• AUDIT=–NO–
No audits are run.
Once an audit option has been chosen, it will add records of certain events to a log file whose name is based on the date and time the file was created and stopped. For example, a log named 20051017060025.20051017113047 indicates that the log was started on October 17, 2005, at 6:00 A.M. and 25 seconds and stopped on October 17, 2005, at 11:30 A.M. and 47 seconds. If an audit is still in progress, the ending date and time will not be shown. Instead, the text not_terminated will appear in the log file name.
By using commands, you can force the rotation of log files (audit –n) and reload the criteria settings (audit –s), which will also automatically rotate the log file for you. The audit command has several other flags, all of which should be explored more thoroughly by reviewing the man page for audit.Once you have logged your audits, you can begin to make some sense of them. The auditreduce command lets you select only those topics relevant to you from the records. For example, you may want to see only those entries that exist when you log in as an administrator, rather than logging in as a regular user. In that case, you would use:
auditreduce –e shortnameofuser /var/audit/20051017060025.20051017113047
to view only audited items pertaining to that user from that particular log file. The praudit tool allows you to print audit records.
Several files (audit_class, audit_control, audit_event, and audit_user) let you manage the breadth and scope of your auditing. Another part of auditing is the ability to configure the auditing subsystem to handle audit events. The file audit_class shows a list of those audit events and can configure the auditing subsystem based on your criteria. For example, a line in the audit_class file could be 0x00000000:fr:file read, indicating that the event file read is a recordable event.
The file audit_control can be edited to change where the log files are stored, specify which event classes are audited for all users and which are to be audited when a user cannot be identified, and set a limit on the amount of free space that must exist before warnings are issued and logging is potentially halted.
You use the audit_event file to view events indicated by number, name, description, and class.
Edit the audit_user file to specify which audit event classes are recorded for a given user. This is very useful when attempting to audit one user out of ten on a given machine. For example, you would add +lo to log events performed by a specific user or users.
Finally, audit_warn—which is not really a file but a script—will send messages to the audit_messages file, such as whether the system is running, a given directory is out of space, or errors have occurred in the shutdown of the auditd process.
Auditing Software Using Checksums
A very sneaky technique to breach security is to replace known programs on a system with new versions of those programs that seem to operate like the normal versions, but allow easy access to an attacker.
Most likely replaced by a Trojan horse program, any common program can be replaced by an evil version, including UNIX daemons (such as ftpd, sshd, httpd, and so on) or, less likely but still possible, desktop applications.
Using mathematical calculation done in a predictable way, it is possible for auditing software to create a specific “number” for any file on the file system. If anything about that file is changed, even one byte of it, the number that is generated will be changed. This number is called a checksum. It is nearly impossible for two very different (or even very similar) files to generate the same checksum value.
Since programs on a computer are merely executable files in the file system, you can utilize auditing software to generate checksum values for some, or all, of the programs on a computer. Often, software developers will include the associated checksum with their software, either in the associated Read Me file, or on a webpage that contains the download link.
You can use the checksum mechanism to pre-audit the “correct” versions of the software, and then proactively check those checksums during regular security audits of the system. If the checksum has changed, either a new, legitimate version of software has been installed (which you can verify), or an unauthorized attacker has modified the program, perhaps with the intention of breaching the security of the system. There are existing utilities that permit this method of detection.
One type of checksum generator utilizes the Method Digest 5 (MD5) technique. To generate MD5 checksums, Mac OS X includes a program called md5.
Detecting UNIX Hacks
Virus scanners are great for detecting known viruses, particularly those popular with email. The downside, though, is that they often don’t know about UNIX hacks. The UNIX hacks mentioned at the beginning of this lesson usually involve modifying a script, or completely replacing a system binary with one that has malicious intent. Virus scanners may not always know about or be able to detect these types of infections. This is where intrusion detection comes in.
Some tools used for intrusion detection compare binary checksums of the known good system and important files with current files. Tripwire is a well-known example. Tripwire detection involves scanning the entire file system of a computer and saving that snapshot. Later (usually once every day), you rescan the entire file system and compare this scan with the snapshot you saved earlier. If there are new files, or files that have changed, you should be suspect as to why they changed. The changed files could be totally normal. Maybe someone installed a new version of some software on the computer, or an administrator updated a configuration file. But if you didn’t modify your computer and files are showing up as changed in a tripwire report, you should use some extra caution until you can rule out the possibility that they may now be malicious files.
There are a number of popular intrusion detection packages available:
• Commercial and open-source products named Tripwire (www.tripwire.com, http://sourceforge.net/projects/tripwire)
• FSLogger (www.kernelthread.com/software/fslogger)
• fsdiff, part of the radmind project (http://eq.rsug.itd.umich.edu/software/radmind)
• logGen (www.lsa.umich.edu/lsait/admin/mac/software/index.asp)
These products range in levels of sophistication from complex to simple. For example, Tripwire lets you decide if you want to omit certain directories, flag what signifies a change of a given file or directory (timestamps, file hash, file size, etc.), and specify options useful in special directories (like log file directories) to tell you only if a file has appeared or disappeared but to ignore changes to existing files. On the other end of the spectrum, logGen can ignore directories, but lacks other customization. logGen does offer a much more compressed set of output, however, in that it compresses the output down to show only the top level of a directory as changed rather than all of the files inside it. This is particularly useful if you’re using logGen to create packages:
1 Take a snapshot of the system with logGen.
2 Install the software you want to package.
3 Run logGen again to see what files or directories were created, modified, or deleted.
These are the files or directories you need to include in your package.
Tripwire
You must have the Apple Developer Tools (Xcode) installed to build Tripwire from scratch. Although there is a precompiled version available from www.macguru.net/~frodo/Tripwire-osx.html, compiling it from source is fairly simple, as shown in the following steps. The site www.macguru.net/~frodo/Tripwire-osx.html does have some good documentation, and is worth the read.
1 Download Tripwire from www.frenchfries.net/paul/tripwire.
This is an updated port of the open-source Tripwire software that has been fixed up a bit to be easier to compile and use on Mac OS X.
tar –zxf tripwire-portable-0.9.tar.gz
cd tripwire-portable-0.9
./configure
make (this will take a while...)
sudo make install
3 When prompted for the keyfile pass-phrases, enter something that you’ll remember but that’s secure.
4 Examine the twpol.txt and twcfg.txt files.
Their locations should be indicated in the last few lines of output from the installation, and may vary for your site. These files control how much Tripwire will scan. You may need to modify them to accommodate your specific configuration, but just leave the files alone for now. If you do make changes, use the twadmin command to create new signed versions of these files that Tripwire will actually use.
5 Type sudo /usr/local/sbin/tripwire –init and enter your passphrase when prompted.
This will initialize your tripwire database. This process takes a snapshot of what your system should look like, and will take a while to run.
6 Type sudo touch /etc/testfile.
7 Type sudo /usr/local/sbin/tripwire –check (you won’t have to enter your passphrase this time).
You’ll see output that contains something similar to the following:
------------------------------------------------------
Rule Name: OS Boot and Configuration Files (/private/etc)
Severity Level: 100
------------------------------------------------------
Added:
"/private/etc/testfile"
Modified:
"/private/etc"
------------------------------------------------------
Rule Name: Variable System Files (/private/var/db)
Severity Level: 60
------------------------------------------------------
Modified:
"/private/var/db/shadow/hash/A90B4CDD-8696-11D9-9221-000D93BFA322.state"
------------------------------------------------------
Rule Name: Variable System Files (/private/var/tmp)
Severity Level: 60
------------------------------------------------------
Modified:
"/private/var/tmp"
As you can see, even though you made only one tiny change, there are many other files being changed automatically in the background. This is why customizing the configuration of Tripwire is important.
logGen
Once you install logGen on your computer, you’ll want to test it by creating new files, modifying those files, and comparing the initial state with the older state looking for differences.
1 Create some new files on your system by entering the following:
sudo mkdir /etc/tripdemo
sudo chmod 777 /etc/tripdemo
cp /etc/hosts /etc/tripdemo/hosts
cp /etc/motd /etc/tripdemo/motd
2 Download logGen from www.lsa.umich.edu/lsait/admin/macenv.asp.
3 Double-click the package to install logGen.
4 Type sudo /usr/local/sbin/logGen /var/db/logGen-baseline.
This process takes a snapshot of what your system should look like, and will take a while to run:
logGen -- version 1.5
Copyright 2005 - The Regents of the University of Michigan
All Rights Reserved
Checking File: 237202
---------------
/
---------------
0 changed files
0 deleted files
5 Create some new files on your system by entering the following:
touch /etc/tripdemo/file1
mkdir /etc/tripdemo/testdir
touch /etc/tripdemo/testdir/file2
touch /etc/tripdemo/testdir/file3
6 Modify a file on your system by entering the following:
echo "changing..." >> /etc/tripdemo/hosts
7 Delete a file on your system by entering the following:
rm /etc/tripdemo/motd
8 Compare what’s currently on the file system with the baseline, and output the difference by entering the following:
sudo /usr/local/sbin/logGen /var/db/logGen-current /var/db/logGen-baseline
This command also outputs a new file (logGen-current) as a snapshot of how it currently looks. You can either move that into place (replacing the baseline file) if you want it to be the new baseline, or just ignore it.
logGen -- version 1.5
Copyright 2005 - The Regents of the University of Michigan
All Rights Reserved
Checking File: 237202 of 237202 (100%)
4 new files:
---------------
/private/etc/tripdemo/file1
/private/etc/tripdemo/testdir/
---------------
1 changed files:
---------------
/private/etc/tripdemo/hosts
---------------
1 deleted files:
---------------
/private/etc/tripdemo/motd
---------------
Notice that logGen reported all of the changed, deleted, and new files, and that even though both file2 and file3 were new, it didn’t list them individually because the entire directory that contains them is new.
9 If your files were legitimately updated, you may want to move the current logGen snapshot to the location of your baseline with this command:
sudo cp /var/db/logGen-current /var/db/logGen-baseline
Detecting Mac OS X Intrusions
Older installation packages created in Mac OS X v10.3 and earlier and those created by third-party software vendors may ask for prebinding, a process to speed up application launch times and generally improve the user experience. It accomplishes this, however, through some changes to each application’s executable file. The side effect of this is that a simple prebinding action (the step you see when you install software and at the end where it optimizes your system performance) can literally cause all of the executables to be shown as changed. Because of this, you may need to take a new baseline snapshot of your system every time you install new software.
You should also take some time to configure your intrusion detection application to your specific system. Both Tripwire and logGen offer ways to customize the directories that are searched or ignored.
As with any intrusion detection system, you’ll want to keep a copy of your baseline snapshot file on a CD-R outside of your computer. The whole point of intrusion detection software is to detect if your computer has been compromised and your files have been changed. If that’s happened, the attacker could quickly modify your baseline snapshot to hide the changes they made. However, if you keep your snapshot on read-only media or completely off your computer, you always have a picture of what your computer looked like while it was clean.
Intrusion detection is really effective only if you regularly run reports to detect any differences. Mac OS X offers a number of different options for regularly running software, but the easiest method is to simply create a shell script containing the commands you want to run every night and drop it in /etc/periodic/daily.
What You’ve Learned
• Vigilance is paramount when watching for any sort of malicious software.
• Intrusion detection software such as logGen should be run on a regular basis if operating a computer as administrator.
• The auditd process creates files that use the date and time they were created as the name of the file.
• You can use the audit_event file to view events indicated by number, name, description, and class.
References
Administration Guides
Mac OS X Server Getting Started: http://images.apple.com/server/pdfs/Getting_Started_v10.4.pdf
Mac OS X Server Command-Line Administration: http://images.apple.com/server/pdfs/Command_Line_v10.4.pdf
URLs
Rootkits explained: http://channels.lockergnome.com/windows/archives/20050630_sorry_rootkits_have_nothing_to_do_with_cheerleaders.phtml
MD5 Instructions: www.cert.org/security-improvement/implementations/i002.01.html
Lesson Review
1. What does a Trojan horse application do?
2. What binary does a checksum on a file?
3. What commands can you use to indicate whether processes are running?