4. Work with the iPhone’s Health App
In This Chapter
![]() Set up the Health app on your iPhone
Set up the Health app on your iPhone
![]() Use the app’s Medical ID feature
Use the app’s Medical ID feature
![]() Track your activity, health, and fitness data using Health
Track your activity, health, and fitness data using Health
![]() Share your health data or keep it private
Share your health data or keep it private
The Health app comes preinstalled with iOS 8 and iOS 9. On its own, this app doesn’t do a whole lot. However, when used with other iPhone health, medical, and fitness-related apps, the Apple Watch, and/or other health and fitness-oriented devices that can link wirelessly to the iPhone (such as a scale, blood pressure monitor, or a treadmill), the Health app becomes a centralized place for collecting, viewing, analyzing, storing, and potentially sharing a wide range of personal health, medical, and fitness-related data and information.
Included in iOS 8 and iOS 9 is a collection of specialized app programming tools, known as HealthKit, that allows app developers to utilize the sensors and tools built in to the iPhone and Apple Watch to collect a lot of different types of health, medical, and fitness-related information about the user. As this information is gathered, it can be automatically imported into the Health app, allowing you to access crucial data (see Figure 4.1).

FIGURE 4.1 The sharing of activity, fitness, or health-related data collected by the Apple Watch, for example, can automatically happen in real time with the Health app on your iPhone while you’re on the go.
In addition, you can manually enter personal information and data into the app as needed, allowing you to create a highly personalized database that stores specific types of health, medical, and/or fitness-related information that’s collected over time.
Data collected from the Activity and Workout apps on an Apple Watch, as well as heart rate data and data collected by some third-party apps, can automatically be sent to, shared with, and stored in the Health app for analysis, viewing, and archiving.
![]() Note
Note
Just as Notification Center serves as a centralized place to collect and view alerts, alarms, and notifications the iPhone and the apps running on it generate, the Health app serves as a centralized place for collecting, viewing, analyzing, storing, and sharing health, medical, and fitness-related data.
This data can include everything from your movement throughout the day (step count), to your heart rate, blood pressure, weight, caloric intake, respiratory rate, body temperature, and/or other information that the iPhone, Apple Watch, apps, and any other equipment that’s linked to your iPhone collect in real time and on an ongoing basis.
You can set up virtually all the medical, health, fitness, nutrition, and sleep-related apps you’ll ultimately be using (some of which the later chapters of this book cover) to work with the Health app. However, you can also opt to keep data collected by other stand-alone apps, or the specialized apps associated with a fitness/activity tracker (or other equipment), totally separate from the Health app. This gives you a lot of flexibility in terms of how you utilize the Health app in your everyday life.
![]() Tip
Tip
If you want, you can forego using the Health app altogether so that the app does not collect, track, or store any health, medical, activity, or fitness-related data.
For example, Jawbone activity and fitness trackers have their own proprietary app to collect and manage data. You can share this data automatically with the Health app, or not, based on how you have each set up on your smartphone.
To deactivate the Health app, launch Settings on your iPhone, tap on the Privacy option, and then tap on the Health option. If the Health menu screen lists any apps, tap on each one, and turn off all their virtual switches.
Next, return to the Privacy menu in Settings, and tap on the Motion & Fitness option. Turn off the virtual switches for Fitness Tracking and Health.
In the future, if you install any Health-compatible apps onto your iPhone, when prompted, deny permission to share information and data with the Health app. This option typically appears when you launch a Health-compatible app for the first time.
After adjusting the privacy-related settings for the Health app, you might need to adjust additional app-specific settings for other apps, first to establish a link between those other apps and the Health app, and then to properly manage app-specific data.
![]() Caution
Caution
As an iPhone user, you have 100 percent control over what information the Health app collects, as well as how, when, and with whom to share this information or data.
You learn how to set up the private and sharing features in the Health app on the iPhone later in this chapter. How you ultimately want to share and utilize each type of data is up to you, though.
For example, you might opt to share your caloric intake and weight data with your dietitian or personal trainer, but share other medical-related data exclusively with your physician or another medical professional. At the same time, you might opt to share details about your fitness-related activities, such as milestones you’ve achieved, with your friends on social media, such as Facebook, but keep everything else private. You can do all this with the Health app, provided you set up the privacy settings correctly.
Many health and fitness experts, including several you’ll be reading interviews with throughout this book, believe that one of the best ways to help yourself achieve your goals is to track your progress along the way so you can see firsthand how you’re doing.
The Health app collects specific data that’s directly relevant to your goal(s), and displays this information in a graphical, “snapshot” way that enables you to see the cause-and-effect relationship between your actions and their impact on your goals.
Set Up the Health App
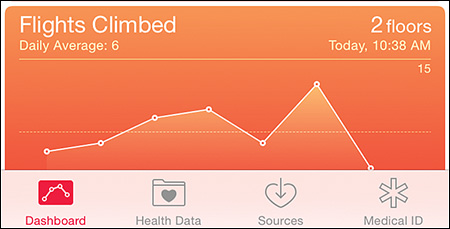
Any time you launch the Health app, four command icons appear along the bottom of the screen (see Figure 4.2): Dashboard, Health Data, Sources, and Medical ID.
Tap on the Dashboard icon to display the data collected by the Health app in a somewhat customizable format. You decide what information appears, and by tapping on the Day, Week, Month, or Year tab (see Figure 4.3), you determine over what time period specific data covers using a graphical, easy-to-understand, “snapshot” format.
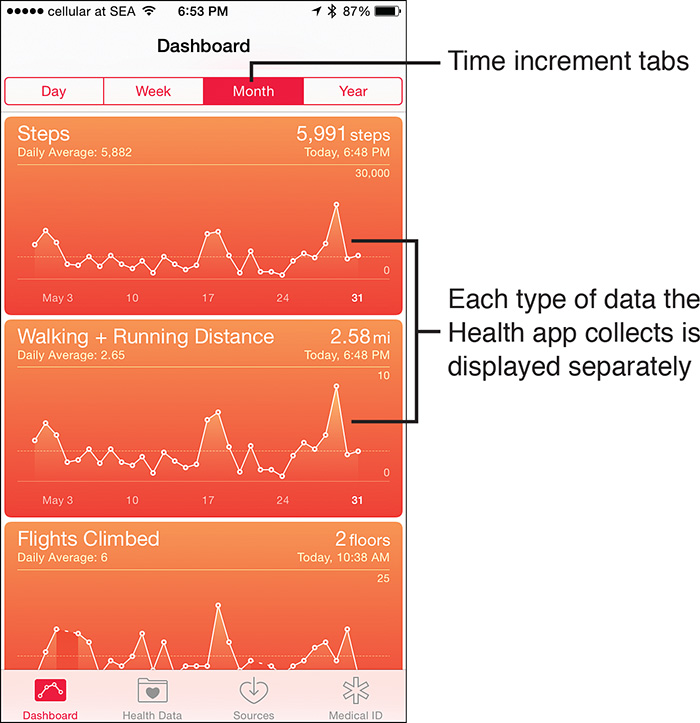
FIGURE 4.3 Tap on the Dashboard icon to choose the time increment in which you want to view your data. Options include Day, Week, Month, or Year.
Tap on the Health Data icon to determine what data you want to collect and how and what information to share, and what to display on the app’s Dashboard.
Tap on the Sources tab, to see from where the Health app gathers information and real-time data. This can include from the iPhone itself, from the Apple Watch, from specific apps (running on the iPhone), or from equipment that’s linked with your iPhone (such as a Bluetooth scale, or a compatible piece of medical or fitness equipment).
Tapping on the Medical ID icon reveals personal details about yourself and medical history (after you’ve set it up). This feature is particularly useful to a doctor or emergency first responders to quickly get them up to speed about you and your medical condition(s) and history, if you experience an emergency and require treatment.
![]() Tip
Tip
A doctor or emergency medical personnel can access the information you provide in the Medical ID feature of the Health app from your iPhone’s Lock screen, so they can view this content even if you’re not conscious, or unable to unlock the phone yourself.
To turn on the feature that allows someone to view Medical ID information from the Lock screen, tap on the Medical ID icon when running the Health app, tap on the Edit option in the top-right corner of the screen, and then turn on the virtual switch for the Show When Locked option.
To view Medical ID information from your iPhone’s Lock screen, turn on or wake up the iPhone. From the Lock screen, swipe from left to right to access the Touch ID or Enter Passcode screen. Tap on the Emergency option in the bottom-left corner of the screen (see Figure 4.4), and then tap on the Medical ID option.
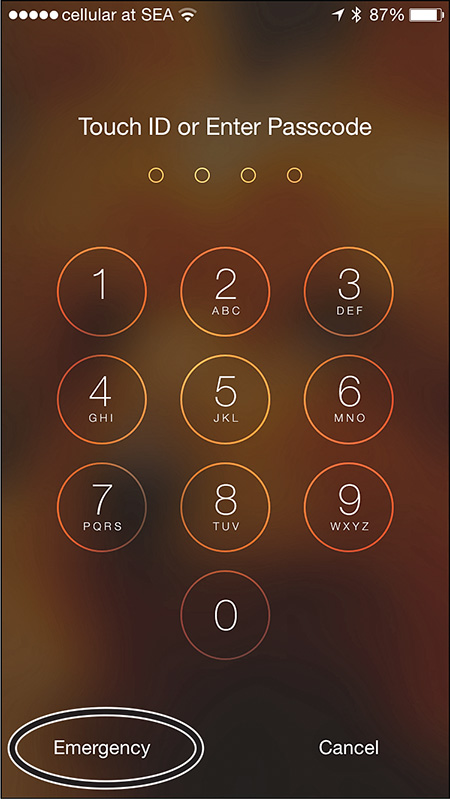
FIGURE 4.4 Tap on this Emergency option, followed by the Medical ID option, to reveal the app’s Medical ID screen from the Lock screen.
Only the data you opt to include in the Medical ID portion of the Health app appears.
Customize the Dashboard’s Display
To set what information appears on the Health app’s Dashboard (refer to Figure 4.3), tap on the Health Data icon. A menu appears that divides the types of data the app can collect and track into categories (see Figure 4.5). Each menu option has a submenu that you can access by tapping on a specific listing.
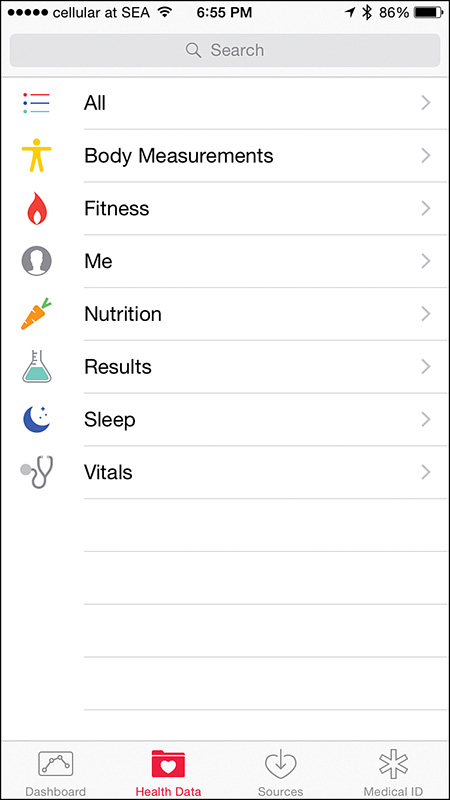
FIGURE 4.5 Select the information you want to display on the Dashboard screen from any of these main categories, each of which has submenu options.
![]() Tip
Tip
To see this comprehensive listing of the types of data the Health app can track, tap on the All option at the top of the Health Data screen (see Figure 4.6).
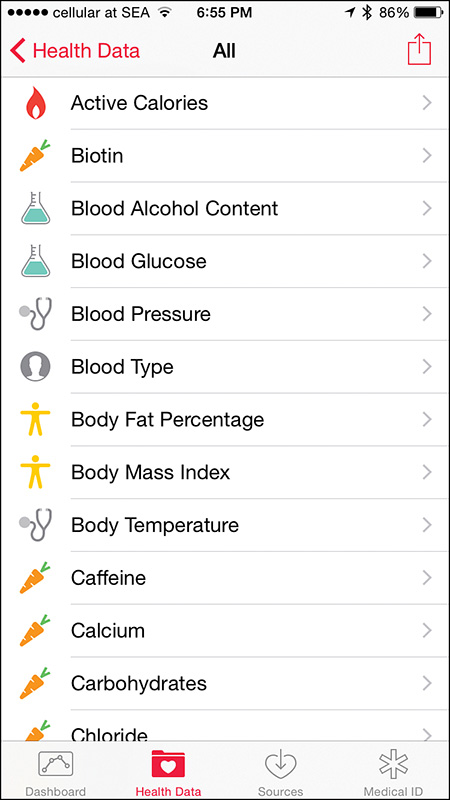
FIGURE 4.6 Tap on the Health Data icon, and then tap on the All option to view all the different types of data that the Health app can monitor and track.
You can manually enter certain types of information into your iPhone, have the iPhone (or Apple Watch) collect it automatically, or have optional equipment linked to the iPhone collect specialized data, and then transfer it to the Health app automatically.
For example, if you have a Bluetooth scale linked to your iPhone, then each time you weigh yourself, the iPhone records the time, date, and your exact weight. This information transfers to the Health app, where you can view the data as it’s collected, or refer to the data collected in the past.
So, by tapping on the Dashboard icon, followed by the Day, Week, Month, or Year tab, you can view how your weight fluctuates over a specific time period, and then compare that data with corresponding activity and caloric intake data, for example, for that same period, to see the positive or negative impact of your actions over time.
Some data, however, remains constant, such as your height and birthday (which the app uses to determine your age), and you can manually enter it into the app.
Tap a main menu option and its submenu options to determine whether the Health app collects and monitors a particular data type, and set how to display and share that data.
For example, tap on the Health Data icon and Body Measurements option (see Figure 4.7); from the resulting submenu, tap on the Weight option to see its submenu (see Figure 4.8).

FIGURE 4.7 From the Body Measurements submenu, tap each option to customize its settings and to determine whether to have the Health app track this type of data.
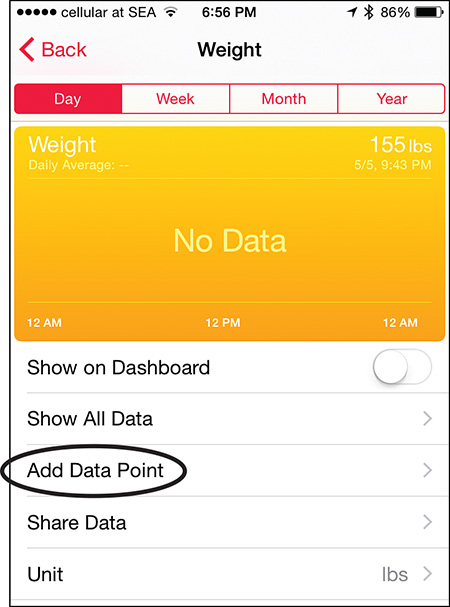
From this submenu, to see collected weight-related data and display it on the Dashboard, turn on the Show On Dashboard option. At any time, to see what weight-related data the app has collected thus far, tap on the Show All Data option.
To manually add your weight data, tap on the Add Data Point option. For example, if you typically use a Bluetooth scale at home, but you’re traveling and weigh yourself in your hotel room or at a gym, tap on the Add Data Point option (refer to Figure 4.8), and fill in the prompts on the Add Data screen (shown in Figure 4.9). Tap on the Add option (in the top-right corner of the screen) to add the information to the Health app.
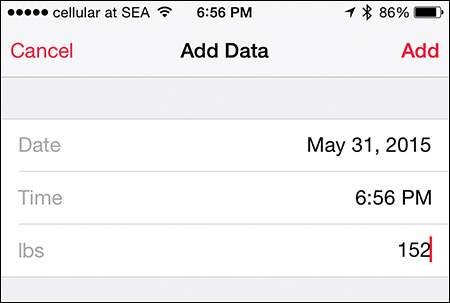
FIGURE 4.9 You can manually enter any type of data the Health app can monitor. This is called a Data Point. This figure shows the Add Data screen for the Weight option.
To enable the Heath app to share your Weight data, tap on the Share Data option (see Figure 4.10) on the Weight screen. Any other apps installed on your iPhone that can utilize your weight data appear below the Share Data With heading. Tap on one listing at a time, if applicable, to grant or deny permission for the listed app to access, utilize, and potentially share that specific data, which in this case is weight-related data.
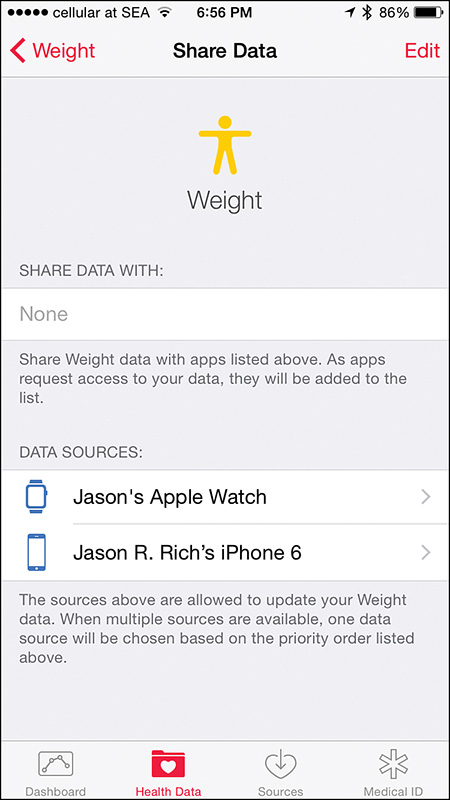
FIGURE 4.10 You determine what information the Health app monitors from other apps and equipment, and how to use and potentially share it.
Also from the Share Data screen, you can set the sources from which you want data collected, such as your iPhone, Apple Watch, or your Bluetooth scale. For example, for the Weight option, to enable your Bluetooth scale to send your weight to the iPhone’s Health app automatically each time you weigh yourself, you must grant permission once from this Share Data submenu, after you’ve paired the iPhone and scale.
![]() Note
Note
For directions on how to pair optional Bluetooth-compatible equipment with your iPhone, refer to the instruction manual provided with that equipment; the steps for Bluetooth pairing vary.
The Health app requires you to select units of measurement for certain types of data. Unit options for Weight, for example, include pounds (lbs), kilograms (kgs), or stones (st).
![]() Tip
Tip
For each Health Data menu option, tap on only the submenu items that are relevant to your own health, fitness, nutrition, diet, or sleep-related goals. Unless you manually activate tracking for a specific item or type of data, it will remain inactive, and the Health app will not automatically collect or track it.
You only need to adjust each setting once, or when you want to alter what information the Health app collects and monitors.
The main Health Data menu options include:
![]() Body measurements—Submenu listings for this option include Body Fat Percentage, Body Mass Index, Height, Lean Body Mass, and Weight. Tap on each option, one at a time, to set whether the Health app collects, tracks, displays, and shares this type of data.
Body measurements—Submenu listings for this option include Body Fat Percentage, Body Mass Index, Height, Lean Body Mass, and Weight. Tap on each option, one at a time, to set whether the Health app collects, tracks, displays, and shares this type of data.
![]() Fitness—Submenu listings for this option include Active Calories, Cycling Distance, Flights Climbed, NikeFuel, Resting Calories, Steps, Walking+Running Distance, and Workouts.
Fitness—Submenu listings for this option include Active Calories, Cycling Distance, Flights Climbed, NikeFuel, Resting Calories, Steps, Walking+Running Distance, and Workouts.
![]() Me—From this submenu, manually enter details about yourself, including your birthdate (used for calculating your age), Sex, and Blood Type.
Me—From this submenu, manually enter details about yourself, including your birthdate (used for calculating your age), Sex, and Blood Type.
![]() Nutrition—This submenu has more than three dozen options that enable you to track your intake of specific nutrition-related items, such as Caffeine, Fiber, Protein, Sodium, or Sugar. If you’re sticking to a specific diet and using a diet or nutrition app, collecting and tracking this type of information can be extremely useful.
Nutrition—This submenu has more than three dozen options that enable you to track your intake of specific nutrition-related items, such as Caffeine, Fiber, Protein, Sodium, or Sugar. If you’re sticking to a specific diet and using a diet or nutrition app, collecting and tracking this type of information can be extremely useful.
![]() Results—This submenu enables you to collect data from specialized pieces of medical equipment that are linked to your iPhone. You can also manually enter data related to things such as Blood Alcohol Content, Blood Glucose level, Inhaler Usage, or Oxygen Saturation, for example.
Results—This submenu enables you to collect data from specialized pieces of medical equipment that are linked to your iPhone. You can also manually enter data related to things such as Blood Alcohol Content, Blood Glucose level, Inhaler Usage, or Oxygen Saturation, for example.
![]() Sleep—When used with specialized apps and equipment (such as the S+ Sleep Better device or a Jawbone Up tracker), the iPhone (and the Health app) can monitor and track your sleep patterns and habits. See Chapter 11, “Monitor Your Sleep and Sleep Better.”
Sleep—When used with specialized apps and equipment (such as the S+ Sleep Better device or a Jawbone Up tracker), the iPhone (and the Health app) can monitor and track your sleep patterns and habits. See Chapter 11, “Monitor Your Sleep and Sleep Better.”
![]() Vitals—The Health app can monitor your Blood Pressure, Body Temperature, Heart Rate, and Respiratory Rate using data collected by your iPhone, Apple Watch, and other equipment that’s linked to your iPhone.
Vitals—The Health app can monitor your Blood Pressure, Body Temperature, Heart Rate, and Respiratory Rate using data collected by your iPhone, Apple Watch, and other equipment that’s linked to your iPhone.
To track and analyze specific types of data, it will either need to be collected by the iPhone, Apple Watch, an optional fitness/activity tracker, or an optional piece of equipment that wirelessly links with the iPhone, such as a Bluetooth scale or sleep monitor. Nutrition data, for example, typically needs to be entered manually, although there are specific third-party apps (which you’ll learn about later) that make this a very easy process.
![]() Tip
Tip
If you’re an Apple Watch user and want the Health app to track your Heart Rate, after your iPhone and Apple Watch are paired, launch the Health app, tap on the Health Data icon, select the Vitals option, and then tap on the Heart Rate option. From the Heart Rate submenu, turn on the Show On Dashboard option, and then tap on the Share Data option to make sure your Apple Watch is listed (which should happen automatically).
The information for which you turn on the Show On Dashboard feature determines the appearance of your Dashboard. You can set up the Health app to track certain types of data, but not display them on the Dashboard.
![]() Tip
Tip
On the Dashboard display, tap on any data’s graph to return to the Health Data menu and further customize that type of data’s options. To switch between the Day, Week, Month, or Year view, simply tap on the appropriate tab. All data the Dashboard screen displays is in real time, or represents the most current information collected by the Health app.
At any time, if you want to discontinue the type of data another app or device gathers, launch the Health app, tap on the Sources icon, and then tap on the applicable app or equipment listed in the Sources menu. Turn off the virtual switches for the type(s) of data you no longer want tracked.
For example, if you were using the Nike+ Running app to track your runs, but choose to stop using the app, or don’t want the Health app to track your running data, tap on the Running app listed in the Health app’s Sources menu, and then turn off the NikeFuel, Workouts, and Heart Rate options.
Remember, you must adjust each type of data that the Health app can monitor separately.
Adjust Health-Related Options from the Settings Menu
Before you begin to fully utilize the Health app, be sure to launch Settings, tap on the Privacy option, and then tap on the Health option to make adjustments to third-party apps that can share information with the Health app. Only apps that are compatible with the Health app display. Tap an app’s listing on the Health screen to adjust what data flows between it and the Health app.
Figure 4.11 shows the options available in Settings for the popular Nike+ Running app. Based on how the options on this screen are set up, the Nike+ Running app can send NikeFuel and Workouts-related data to the Health app to be monitored and collected, and at the same time, the Nike+ Running app can access Heart Rate data from the Health app (that may be collected from the Apple Watch or another activity/fitness tracker or manually entered into the Health app).
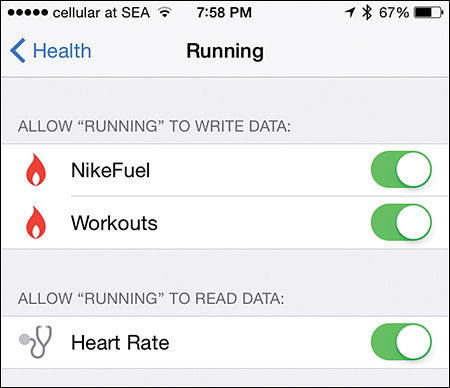
FIGURE 4.11 To adjust the Health app-related options for specific third-party apps, tap the Privacy option in Settings, and then tap on the app’s listing.
Also from the Privacy menu in Settings, tap on the Motion & Fitness option. From this submenu you can turn on the iPhone’s ability to track fitness-related data using its built-in sensors and equipment, plus allow the Health app to access this data as the iPhone collects it.
Add Personal Information to the Health App’s Medical ID Feature
Nobody wants to experience a medical emergency, but in the event something does happen, your iPhone and the Health app can help you be prepared, and provide the doctors and/or emergency first responders with valuable information about you, your medical history, allergies, and other data that can help potentially save your life.
The Medical ID feature of the Health app is simply a database that stores personal information about you, your emergency contacts, and important aspects of your medical history, and then makes it available to someone in the event of an emergency.
To set up the Medical ID feature, launch the Health app and tap on the Medical ID icon. The first time you use this feature, tap on the Create Medical ID option (see Figure 4.12), and then fill in each field on the resulting screen (see Figure 4.13). The Health app pulls some information, such as your profile picture, name, and birthday, from your own entry in the Contacts app to save you time entering information.
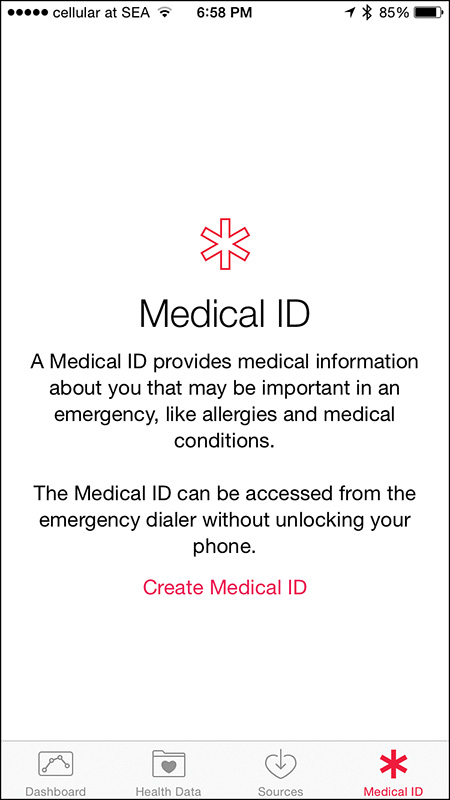
FIGURE 4.12 The first time you launch the Health app and tap on the Medical ID icon, you need to tap on the Create Medical ID option to continue.
![]() Tip
Tip
When creating or editing your Medical ID information, make sure that the Show When Locked option is turned on. This allows emergency responders or doctors to quickly access potentially vital information about you if you can’t communicate yourself in an emergency situation.
Even if you opt to use the Health app for no other purpose, turn on the Medical ID feature, and be sure to include the information the app requests. Doing this could someday help save your life.
Some of the data fields in the Medical ID menu screen might already be populated with personal information you have already entered into your iPhone via the Health or other compatible apps. Tap any field that’s populated with data to update it manually, or tap an empty field to enter the requested information.
If your profile photo has not already been imported into the Health app, then as you fill in the Medical ID information, tap the Photo icon, and select a recent photo of yourself that nicely showcases your face. The Medical ID screen displays a thumbnail of the selected photo to help health workers verify that the data they see applies to you.
Fill in the following data fields with up-to-date information:
![]() Name—Type in your full name as it appears on your driver’s license or in your medical records.
Name—Type in your full name as it appears on your driver’s license or in your medical records.
![]() Birthdate—Enter your complete birthdate, including month, day, and year. This allows the app to calculate how old you are, and makes it easier for an emergency responder or doctor to access your medical records and ensure the records match up with you.
Birthdate—Enter your complete birthdate, including month, day, and year. This allows the app to calculate how old you are, and makes it easier for an emergency responder or doctor to access your medical records and ensure the records match up with you.
![]() Medical Conditions—Use the iPhone’s virtual keyboard to describe any medical conditions you have, whether it’s high blood pressure or anything else that a doctor should know about.
Medical Conditions—Use the iPhone’s virtual keyboard to describe any medical conditions you have, whether it’s high blood pressure or anything else that a doctor should know about.
![]() Medical Notes—Add any additional information you would want a doctor to know about you, your medical history, and your current medical condition(s). Be as detailed as possible.
Medical Notes—Add any additional information you would want a doctor to know about you, your medical history, and your current medical condition(s). Be as detailed as possible.
![]() Allergies and Reactions—Create a list of your allergies, including those to medications.
Allergies and Reactions—Create a list of your allergies, including those to medications.
![]() Medications—Create a detailed list of the prescription medications you currently take. Include the name of the medication, the dose, and the frequency you take it. Again, the more information you provide, the better.
Medications—Create a detailed list of the prescription medications you currently take. Include the name of the medication, the dose, and the frequency you take it. Again, the more information you provide, the better.
Tap on the Add Emergency Contact field (see Figure 4.14), and select a contact from your Contacts database. You can include separate listings for multiple people, such as a spouse, relative, or close friend whom you would want contacted in the event of an emergency.
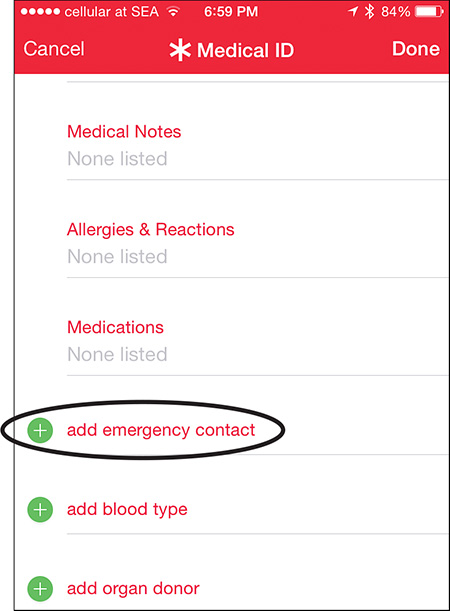
FIGURE 4.14 Add one or more emergency contacts, such as your spouse, a relative, a friend, and your primary care physician. If you work with a specialist for a particular medical issue, list that person as well.
After selecting a contact, from the Relationship screen, tap on the person’s relationship to you. Choose one of the dozen or so options listed, such as Mother, Brother, Friend, Spouse, or Doctor.
![]() Tip
Tip
Use the Add Emergency Contact feature to list your primary care physician, along with any other doctors or specialists you work with, based on who you would want contacted in an emergency. For example, if you have a heart condition, be sure to list your cardiologist.
Tap on the Add Blood Type field to enter your blood type, if you know it. If you don’t know it, consider calling your primary care physician and asking. Also, if you’re an organ donor, tap on the Organ Donor option, and select the Yes option.
If the Health app has not already imported this information, enter your Weight and Height in the fields provided.
After entering all the information on the Medical ID screen, tap on the Done option (in the upper-right corner of the screen) to save your information.
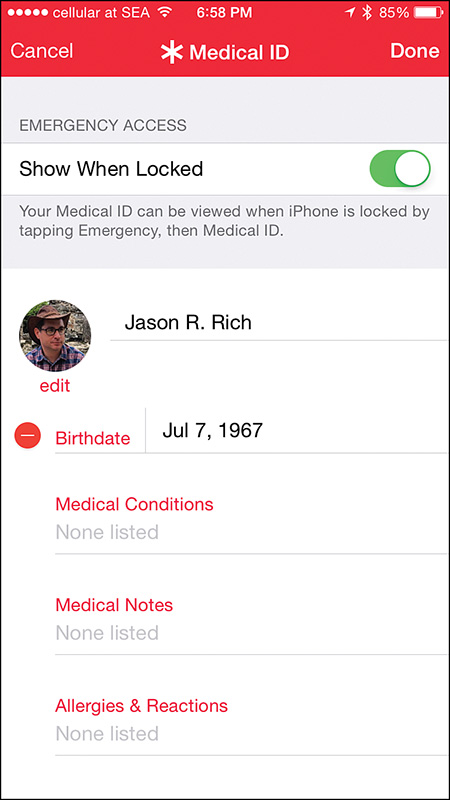
Figure 4.15 shows what the Medical ID screen might look like if someone were to access it from the Lock screen of your iPhone.
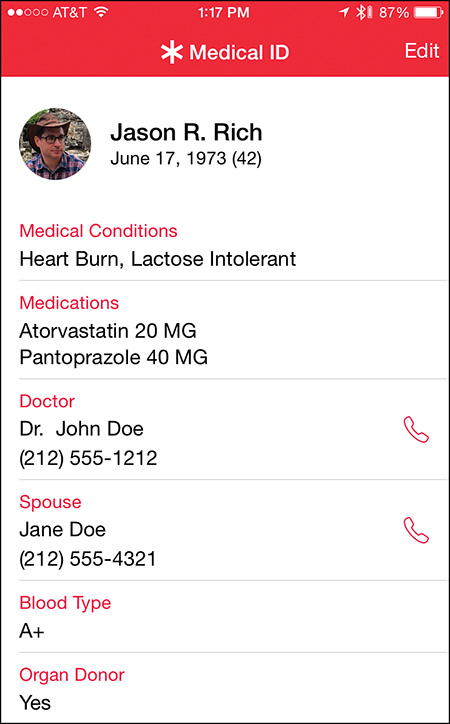
FIGURE 4.15 This is what the Medical ID screen might look like if a doctor were to access it from your iPhone’s Lock screen.
At any time, if you want to delete all information stored in the Medical ID portion of the Health app, launch the app, tap on the Medical ID icon, tap on the Edit option, and then scroll down to the bottom of the screen. Tap on the Delete Medical ID option.
Instead, if you want to edit or update any of the Medical ID fields, launch the app, tap on the Medical ID icon, tap on the Edit option, and then tap on the field you want to modify. Tap the Done option after updating your information to save your changes.
![]() Caution
Caution
In addition to medical professionals, anyone who picks up your iPhone can potentially access your Medical ID information, even if the phone is locked (assuming you’ve turned on the Show When Locked feature). You can turn off this feature, but doing this also prevents medical professionals from accessing the information in an emergency situation. Using this feature, and the personal details you share with it, is a matter of personal preference.