
Using Sensor Data
To incorporate sensor data into the logic of a game and its updates, you need to pass the data into the game’s View class. First add this to the MainActivity class:
GameView mGameView;
You must also add the code shown in Listing 3-19 to the onCreate() method:
Listing 3-19. GameView Instance
mGameView = new GameView(this);

setContentView(mGameView);
You now have a GameView instance from which you can call various methods. Next, in GameView, you need to add a new function to which you pass your orientation data to. Listing 3-20 shows the call to add within onSensorChanged().
Listing 3-20. Sending Sensor Data
@Override

public void onSensorChanged(SensorEvent event) {


if(event.sensor.getType() == Sensor.TYPE_ACCELEROMETER){

        float orientation[] = new float[3];

        for(int i = 0; i < 3; i++){

                orientation[i] = event.values[i];

        }


        mGameView.processOrientationEvent(orientation);


        Log.d("azimuth",Float.toString(event.values[0]));

        Log.d("pitch",Float.toString(event.values[1]));

        Log.d("role",Float.toString(event.values[2]));

}


}
The new portion of the code is the processOrientationEvent() call to gameview. Notice that you’re sending the orientation data array to it. Listing 3-21 contains the code for processOrientationEvent() in GameView.java.
Listing 3-21. Processing Sensor Data
public void processOrientationEvent(float orientation[]){


        float roll = orientation[2];

        if (roll < -40) {

                sprite.setMoveX(2);

        } else if (roll > 40) {

                sprite.setMoveX(-2);

        }


}
Here you look at only the roll of the device. If it’s low enough, then you want the sprite to move to the right. If the roll is high, then you have the sprite move to the left. To make this a bit more exciting, comment out the lines of the update() function. Listing 3-22 shows what that part looks like now.
Listing 3-22. Letting the Sprite Move Freely
public void update(int adj_mov) {

        if (sprite.getX() >= getWidth()){

                //sprite.setMoveX(0);

        }

        if (sprite.getX() <= 0){

                //sprite.setMoveX(0);

        }

        sprite.update(adj_mov);


}
Test this on your Android tablet device, and you’ll struggle to maintain the sprite within the screen. If you desire, you can set the movement to zero when the tablet is held relatively straight. Here you use a very simple implementation of the sensor data, but in the final game project, you add a shake event that lets the user shake the tablet to restart the level. For now, you can play with the roll, azimuth, and pitch of the tablet data.
You must understand several aspects of sensor data to make them work. Accelerometer data is traditionally dealt with based on gravity. Therefore, when the tablet is still, the acceleration is still around 9.8 m/s^2. Many Android functions handle this for you, but if you come across functions that don’t, you need to subtract out this gravitational influence. Looking up the Android documentation can help with this. Humorously, Android has built-in gravity constants for all the planets, including Earth. This way, you can adjust the accelerometer reading depending on the planet your device is currently on.
Finally, the coordinate axes are unique in that they take into account both magnetic north as well as the traditional dimensions. This means the x-axis is roughly from east toward the west, whereas y goes toward north and z points into the center of the Earth. The image in Figure 3-8 is from Android’s own documentation on the subject.
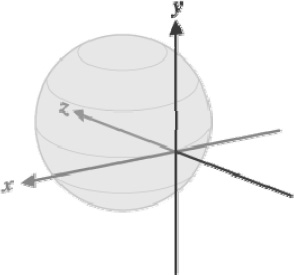
Figure 3-8. The coordinate axes for Android tablets
Because accelerometer and gyroscope readings are inherently in three dimensions, understanding matrices is very important for some of their data. To work around this, you should only ask for functions like getOrientation() where you understand the values to be an array of pitch, azimuth, and roll. You can experiment with even more sensor data by checking out the Android documentation here: http://developer.android.com/reference/android/hardware/Sensor.html. At the top of this document, you can view a list of all the sensor types that Android supports. Check out whether your target devices contain these before you implement them, though.