
Building the One-Player Game
Because you’ve already done so much work in previous chapters, you don’t need to change many things to build your first real game. The only files from the previous chapter that you must change for your one-character game are SpriteObject.java and GameView.java:
- Open a new Eclipse project, and name it AllTogether.
- Copy all the files from the SoundTest project in Chapter 4. Don’t forget to copy both the Java source files in the
srcfolder and the resource files in therscfolder.
Before you start making changes, let’s go over the procedure for handling motion and collisions.
Upgrading the Game Sprites
You begin by upgrading your sprites so you can more finely control their motion and detect collisions between them or with the boundaries of the game. This is a feature that will be instrumental in all your work from here on.
Adding Finer Motion Control
The speed you built into your last application is too great for your new game. To give you greater control, let’s increase the precision of the variables that control a sprite’s location and the size of each move.
You accomplish the change by converting the movement and location variables to the Java type double. Now, instead of being limited to integer values when you want to increase or decrease the speed of a sprite, you can increment those values by a decimal amount.
This ability is critical when you want slower speeds. The new game has movement adjustments of .5, which weren’t possible previously—in Chapter 4, the lowest movement value was 1. To achieve this, you need to change the functions in the sprite class as well as the variable declarations.
To change the precision of your game sprites’ motion and location variables, open SpriteObject.java and add the code in Listing 5-1 to the definition of the SpriteObject class.
Listing 5-1. Increasing the Precision of Game Positions and Speed
private double x;

private double y;

private double x_move = 0;

private double y_move = 0;
Next, you need some new code to detect collisions between objects. Collision detection is a key aspect of nearly every video game.
Detecting Collisions Between Sprites
The next big change requires an entirely new function in the SpriteObject class to deal with collisions. If you have done 2D collision detection before, the solution will look familiar. The function tests two rectangles for a collision. Recall that because the screens in Android have their origin in the upper-left corner, if the bottom of the first sprite is less than the top of the other sprite, then there is no collision because the first sprite is above the second one on the screen.
If there is a collision between the two sprites, then the new method returns true. Intriguingly, when you search for collisions, you use the bitmap to gather the width. Your sprite class doesn’t store the width or height directly because it’s already contained in the bitmap. You use this approach to get the dimensions of a sprite later for collisions with walls.
As with any function that requires a series of if statements, your collision detection is moderately expensive in terms of processing. You want to eliminate needless collision routines if possible. This is, however, much better than doing pixel-by-pixel detection that can cause games to reach a near standstill.
Add the function in Listing 5-2 to the SpriteObject class.
Listing 5-2. The collision detection function in SpriteObject class
public boolean collide(SpriteObject entity){

                double left, entity_left;

                double right, entity_right;

                double top, entity_top;

                double bottom, entity_bottom;


                left = x;

                entity_left = entity.getX();


                right = x + bitmap.getWidth();

                entity_right = entity.getX() + entity.getBitmap().getWidth();


                top = y;

                entity_top = entity.getY();


                bottom = y + bitmap.getHeight();

                entity_bottom = entity.getY() + entity.getBitmap().getHeight();


                if (bottom < entity_top) {

                        return false;

                }

                if (top > entity_bottom){

                        return false;

                }

                if (right < entity_left) {

                        return false;

                }

                if (left > entity_right){

                        return false;

                }


                return true;

        }
In Listing 5-2, you gather the x and y coordinates for each corner of both of the sprites. Remember that one sprite calls the function and uses a second sprite as the argument. It doesn’t matter which sprites calls the function. The result will be the same: either true or false. Once you have the data, you go into four if statements. These examine whether the bottom of the first sprite is lower than the top of the other sprite. If this were true, then the first sprite would be above the other sprite and a collision would be impossible. The next if statements are similar in their checks on the position of the two sprites. If none of the if statements are valid, then there is in fact a collision.
Adding Multiple Sprites
The meat of your changes occurs in the GameView class where you make some major modifications to the updating functions. Creating an array of SpriteObjects called bomb[] is possibly the most important modification. Because the bombs all behave the same, it’s much more convenient to group them this way than to deal with them individually. Doing so also eliminates needless code repetition.
The initialization of each of those new bomb sprites is also interesting because of their placement on the screen. The first and last sprites start out low on the screen, whereas the second one is near the top. This creates a staggered motion during game play to increase the difficulty. When you move to the surfaceCreated function, the first and last bombs move toward the top of the screen, and the middle bomb moves toward the bottom.
When you define the movement of the bombs, you’re putting to use the new variables from the sprite class that can handle decimals. After doing some tests, I found that moving at a speed of 1 was too fast, so I halved it and used .5. To put your bombs on the screen, the onDraw() function uses a quick loop to cycle through the three bombs.
The update function contains the magic of the game. Here you define the relationship between the bombs and player as well as define the behavior of the bombs. The first two for loops keep the bombs from exceeding the bounds of the game; you want the bombs to bounce back and forth in a band between the y coordinates 100 and 500. The next for loop checks to see if your main sprite has collided with any of the bombs. If there is a collision, the sprite is reset at the beginning of the course.
Complete the update function by changing it to the code in Listing 5-3.
Listing 5-3. The new update() function to controll the bombs.
//check for bombs going too low

for(int i = 0; i < 3; i++){

        if(bomb[i].getY() > 500){

                bomb[i].setMoveY(-.5);

        }

}


//check for bombs going too high

for(int i = 0; i < 3; i++){

        if(bomb[i].getY() < 100){

                bomb[i].setMoveY(.5);

        }

}


//check for collisions with the sprite

for(int i = 0; i < 3; i++){

        if(spritecharacter.collide(bomb[i])){

                charactersprite.setX(100);

        }

}


//perform specific updates

for(int i = 0; i < 3; i++){

        bomb[i].update(adj_mov);

}

        spritecharacter.update(adj_mov);
Finally, the update functions for the bombs and the sprite are called. The processMotionEvent shown in Listing 5-4 also has some key feature changes. The two if statements look for events that signal the user has engaged and disengaged the screen. When the user touches the screen, the sprite moves forward. Otherwise, the sprite stays wherever it currently is on the screen. This method of movement is similar to the helicopter game where you attempt to navigate a cave: the helicopter moves toward the ground unless you tap the screen to make it go up.
Listing 5-4. processMotionEvent() method handles touches and releases
if(input.action == InputObjectinput .ACTION_TOUCH_DOWN){

        spritecharacter.setMoveX(.5);

}

if(input.action == InputObjectinput .ACTION_TOUCH_UP){

        charactersprite.setMoveX(0);

}
The code portion of your work is complete. Now let’s work on the graphics involved in the game.
Adding Images for the Sprites
Your hard work is about to come to fruition. But you must add two resources to your project before you can compile it: an image of a bomb and a figure to represent the character (or player). They’re both saved as .png files, and the character uses a transparent background so it doesn’t look like a moving blob. The bomb dimensions are 30 × 30, and the character size is 70 × 120.
![]() Tip Don’t worry if your graphics aren’t impressive; the point is to have something to work with. Drawing on regular paper and then scanning the image is an easy strategy to improve your work. Touch up the drawing with a drawing program. Alternatively, learning to use a vector-based program can give your art a huge boost.
Tip Don’t worry if your graphics aren’t impressive; the point is to have something to work with. Drawing on regular paper and then scanning the image is an easy strategy to improve your work. Touch up the drawing with a drawing program. Alternatively, learning to use a vector-based program can give your art a huge boost.
Compile and run this project in the emulator as you would any other app. If all goes well, by holding down on the screen, you should propel your character forward. If you hit a bomb, you start over. Enjoy!
The next section makes the excitement even greater by incorporating a reward.
Adding a Reward for Winning the Game
There are a couple of key points about the game play of this simple app:
- You added an obstacle in the form of the bombs. This was compounded by the quirky controls, which don’t give the user precise movement.
- The repercussion for failure is returning to the beginning of the game. It’s extra severe if you get caught by the last bomb.
- Having characters that resemble people has been shown to increase the interest of players. You did this by no longer moving a star around the screen as in previous chapters.
You can make this game better by providing a real benefit for winning. To do this, try making a sprite like the one shown in Figure 5-2 and calling its draw() function when the player reaches a certain x-value. Set a variable to true so the sign continues to be rendered, allowing users to bask in their glory. This aspect isn’t covered in the final code for the chapter because it isn’t one of the core concepts. You’re free to add it, however.

Figure 5-2. Rewarding the player
Tracking the State of Game Sprites
Because a sprite or an entire game can be in different positions or states, you need to develop a way to keep track of them. To conceptualize states, look at Figure 5-3. It shows a cycle of three different states.
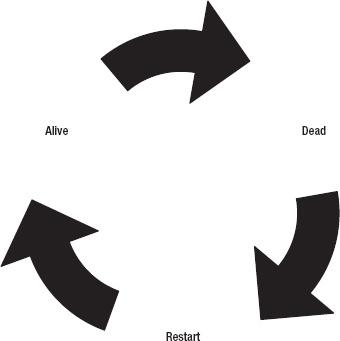
Figure 5-3. The cycle of states
As Figure 5-3 illustrates, states are liable to change through the course of the game. Games go through life cycles as well, including startup, loop, and end phases. In Android as well as many other environments, states are defined as integers that can be accessed from various other classes.
![]() Note You already used states when you were trying to find out what type of
Note You already used states when you were trying to find out what type of motionevent occurred. The if statement determined whether the eventtype was an up or a down action, both of which are integer values defined in the InputObject class.
All of this code goes into your SpriteObject class, where you handle the states of each sprite. Sprites such as bombs don’t necessarily have different states, so you don’t use these features for them. In your own games, you may prefer to create separate sprite classes that inherit basic features from the a high-level one and then differentiate the sprite subclasses with more specific methods and variables.
Follow these steps:
- Create four basic states as integers at the top of
SpriteObject.java(see Listing 5-5).Listing 5-5. The constants to represent sprite states
public int DEAD = 0;

public int ALIVE = 1;

public int JUMPING = 2;

public int CROUCHING = 3;- My personal preference has always been to assign
DEADto 0 because you often have the default state equal to 0, and it makes sense to perform some sort of action in order to make the sprite alive (for example, initiating the level).- Another important aspect of states is that they should be exclusive. This means the character can’t be in more than one state at a timeThe characters will always start out DEAD until they are initialized. From then on, they are ALIVE by default until an action is performed like jumping or getting killed..
- You need to create two quick functions to work with sprite states. Put the functions shown in Listing 5-6 into
SpriteObject.java.Listing 5-6. getstate() and setstate() functions
public int getstate(){

        return state;

}


public void setstate(int s){

        state = s;

}- These functions should look familiar because this is exactly how you access the sprite’s x and y coordinates.
- Because the states that you define are public integers, you can test to see if a sprite is dead with the code in Listing 5-7 in
GameView.java. Add this code to theupdatefunction.- Notice how simple it is to handle basic information like what is currently happening to the sprite. This become ever-more critical when you look at complicated states like jumping. Velocity is highest when a sprite first leaves the ground. It then gradually decreases until the sprite reaches its peak altitude, after which it gradually speeds up. The changing velocity of the sprite must be controlled within the
updatefunction. You need to find out what state the sprite is in, in order to changemoveYat the correct rate.- A normal jump, for example, lasts a predictable amount of time. But what if the jump is interrupted by hitting a platform? You use the state to quickly asses the new situation.
- To completely incorporate states in the game, put the line of code from Listing 5-8 in the
ifstatement that tests for a collision between the character and a bomb. This is an alternate method for resetting the character’s location when it hits a bomb instead of immediately doing it within the conditional collision test.
Listing 5-8. Starting the character as dead.
Character.setState(SpriteObject.DEAD);
All of this functionality is included in the code in Listing 5-9 and Listing 5-10. If you ever get lost, use this code in your project, and you should end up with a working game.
Listing 5-9. SpriteObject.java
package com.gameproject.alltogether;
import android.graphics.Bitmap;
import android.graphics.Canvas;
public class SpriteObject {
public int DEAD = 0;
public int ALIVE = 1;
public int JUMPING = 2;
public int CROUCHING = 3;
private Bitmap bitmap;
private double x;
private double y;
private double x_move = 0;
private double y_move = 0;
public SpriteObject(Bitmap bitmap, int x, int y) {
this.bitmap = bitmap;
this.x = x;
this.y = y;
}
public double getX() {
return x;
}
public double getY() {
return y;
}
public Bitmap getBitmap() {
return bitmap;
}
public void setMoveX(double speedx){
x_move = speedx;
}
public void setMoveY(double speedy){
y_move = speedy;
}
public void setX(int x) {
this.x = x;
}
public void setY(int y) {
this.y = y;
}
public void setBitmap(Bitmap bitmap) {
this.bitmap = bitmap;
}
public int getstate(){
return state;
}
public void setstate(int s){
state = s;
}
public void draw(Canvas canvas) {
canvas.drawBitmap(bitmap, (int)x - (bitmap.getWidth() / 2), (int)y - (bitmap.getHeight() / 2), null);
}
public void update(int adj_mov) {
x += (adj_mov * x_move);
y += (adj_mov * y_move);
}
public boolean collide(SpriteObject entity){
double left, entity_left;
double right, entity_right;
double top, entity_top;
double bottom, entity_bottom;
left = x;
entity_left = entity.getX();
right = x + bitmap.getWidth();
entity_right = entity.getX() + entity.getBitmap().getWidth();
top = y;
entity_top = entity.getY();
bottom = y + bitmap.getHeight();
entity_bottom = entity.getY() + entity.getBitmap().getHeight();
if (bottom < entity_top) {
return false;
}
if (top > entity_bottom){
return false;
}
if (right < entity_left) {
return false;
}
if (left > entity_right){
return false;
}
return true;
}
}We now look at the code in GameView.java that puts these newly empowered sprites into action.
Listing 5-10. The compelte GameView.java
package com.gameproject.alltogether;
import java.util.concurrent.ArrayBlockingQueue;
import android.content.Context;
import android.graphics.BitmapFactory;
import android.graphics.Canvas;
import android.graphics.Color;
import android.media.AudioManager;
import android.media.MediaPlayer;
import android.media.SoundPool;
import android.util.Log;
import android.view.MotionEvent;
import android.view.SurfaceHolder;
import android.view.SurfaceView;
public class GameView extends SurfaceView implements
SurfaceHolder.Callback {
private SpriteObject character;
private SpriteObject[] bomb;
private GameLogic mGameLogic;
private ArrayBlockingQueue<InputObject> inputObjectPool;
private int sound_id;
private Context context;
private SoundPool soundPool;
private int ID_robot_noise;
private int ID_alien_noise;
private int ID_human_noise;
private MediaPlayer mp;
public GameView(Context con) {
super(con);
context = con;
getHolder().addCallback(this);
character = new SpriteObject(BitmapFactory.decodeResource(getResources(),
R.drawable.sprite), 100, 400);
bomb = new SpriteObject[3];
bomb[0] = new SpriteObject(BitmapFactory.decodeResource(getResources(),
R.drawable.bomb), 400, 500);
bomb[1] = new SpriteObject(BitmapFactory.decodeResource(getResources(),
R.drawable.bomb), 650, 100);
bomb[2] = new SpriteObject(BitmapFactory.decodeResource(getResources(),
R.drawable.bomb), 900, 500);
mGameLogic = new GameLogic(getHolder(), this);
createInputObjectPool();
soundPool = new SoundPool(10, AudioManager.STREAM_MUSIC, 0);
ID_robot_noise = soundPool.load(context, R.raw.robot_noise, 1);
ID_alien_noise = soundPool.load(context, R.raw.alien_noise, 2);
ID_human_noise = soundPool.load(context, R.raw.human_noise, 3);
sound_id = ID_robot_noise;
setFocusable(true);
}
private void createInputObjectPool() {
inputObjectPool = new ArrayBlockingQueue<InputObject>(20);
for (int i = 0; i < 20; i++) {
inputObjectPool.add(new InputObject(inputObjectPool));
}
}
@Override
public boolean onTouchEvent(MotionEvent event) {
try {
int hist = event.getHistorySize();
if (hist > 0) {
for (int i = 0; i < hist; i++) {
InputObject input = inputObjectPool.take();
input.useEventHistory(event, i);
mGameLogic.feedInput(input);
}
}
InputObject input = inputObjectPool.take();
input.useEvent(event);
mGameLogic.feedInput(input);
} catch (InterruptedException e) {
}
try {
Thread.sleep(16);
} catch (InterruptedException e) {
}
return true;
}
@Override
public void surfaceChanged(SurfaceHolder holder, int format, int width,
int height) {
}
@Override
public void surfaceCreated(SurfaceHolder holder) {
mGameLogic.setGameState(mGameLogic.RUNNING);
mGameLogic.start();
bomb[0].setMoveY(-.5);
bomb[1].setMoveY(.5);
bomb[2].setMoveY(-.5);
mp = MediaPlayer.create(context, R.raw.background_music);
mp.setLooping(true);
mp.start();
}
@Override
public void surfaceDestroyed(SurfaceHolder holder) {
soundPool.release();
mp.stop();
mp.release();
}
@Override
public void onDraw(Canvas canvas) {
canvas.drawColor(Color.GRAY);
character.draw(canvas);
for(int i = 0; i < 3; i++){
bomb[i].draw(canvas);
}
}
public void update(int adj_mov) {
if(character.getstate() == SpriteObject.DEAD){

        character.setX(100);

        character.setY(400);

}
//check for bombs going too low
for(int i = 0; i < 3; i++){
if(bomb[i].getY() > 500){
bomb[i].setMoveY(-.5);
}
}
//check for bombs going too high
for(int i = 0; i < 3; i++){
if(bomb[i].getY() < 100){
bomb[i].setMoveY(.5);
}
}
//check for collisions with the sprite
for(int i = 0; i < 3; i++){
                        if(character.collide(bomb[i])){

                                character.setState(SpriteObject.DEAD);

                        }

                }


                //perform specific updates

                for(int i = 0; i < 3; i++){

                        bomb[i].update(adj_mov);

                }

                character.update(adj_mov);


        }


        public void processMotionEvent(InputObject input){


                if(input.action == InputObject.ACTION_TOUCH_DOWN){

                        sprite.setMoveX(.5);

                }

                if(input.action == InputObject.ACTION_TOUCH_UP){

                        sprite.setMoveX(0);

                }


        }


        public void processKeyEvent(InputObject input){


        }


        public void processOrientationEvent(float orientation[]){


                float roll = orientation[2];

                if (roll < -40) {

                        character.setMoveX(2);

                } else if (roll > 40) {

                        character.setMoveX(-2);

                }


        }


        public void playsound(int sound_id){

                soundPool.play(sound_id, 1.0f, 1.0f, 1, 0, 1.0f);

        }


}
With all of those changes behind you, you’ve mastered the idea of states and also handled collisions and precise movement.