
Adding Touch, Sound, and Rewards
Now you’re ready to finish the application. You need to give the user control over the game paddle, and add sound and some payoffs to engage players.
Adding Touch Control of the Paddle
The AllTogether project used the touch and release of the tablet screen to propel the character forward. In TabletPaddle, the paddle moves horizontally based on the user dragging across the screen. You let the user drag the entire paddle around the screen for the purpose of testing collisions. When you’re finished with the game, you can lock the paddle’s y position by not allowing the user to drag the paddle freely.
Follow these steps:
- Following is the new
processMotionEvent()that updates the position of the paddle according to the position of the last finger touch. Change the code of your project accordingly:public void processMotionEvent(InputObject input){
paddle.setX(input.x);
paddle.setY(input.y);
}- The code requires some minor cleanup as well. Do you remember the
playsound()function and theprocessOrientationEventcode? Well, you can safely comment those out.- With the ability to control the paddle, you’re finally ready to try TabletPaddle. Run the program as usual, and play the game. It may not be immensely entertaining, but it’s a surprisingly functional game for very limited coding. Figure 6-7 shows the result you can expect.
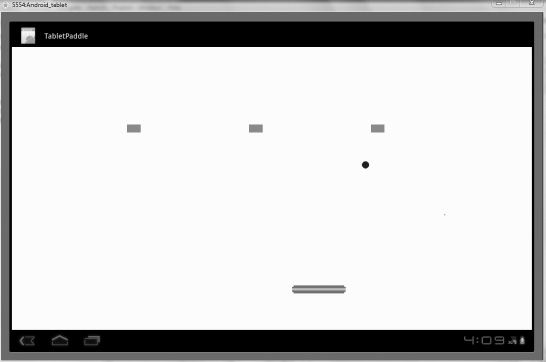
Figure 6-7. TabletPaddle
Adding Sound
The game can be played, but it’s far from complete. The next order of business is to add sound to the game. You can do this by following the procedure from the previous chapters. Because you want only one sound, you can use the MediaPlayer class rather than work with SoundPools:
- Add this variable to the variables list at the start of the program:
Private MediaPlayer mp;- Insert this code in the constructor of
GameView.java:mp = MediaPlayer.create(context, R.raw.bounce);- Listing 6-5 shows the portion of the
update()function where you place the instruction to play the sound. Recall that you play the sound no matter what side of the block the ball hits.
Listing 6-5. Update() with Sound
//check for brick collisions

for(int i = 0; i < 3; i++){

        if(ball.collide(block[i])){

                block[i].setstate(block[i].DEAD);


                mp.start();

                int block_bottom = (int)(block[i].getY() + block[i].getBitmap().getHeight());

                int block_right =(int)(block[i].getX() + block[i].getBitmap().getWidth());


                //hits bottom of block

                if(ball_y > block_bottom - 10){

                        ball.setMoveY(ball.getMoveY());

                }

                //hits top of block

                else if(ball_bottom < block[i].getY() + 10){

                        ball.setMoveY(-ball.getMoveY());

                }

                //hits from right

                else if(ball_x > block_right - 10){

                        ball.setMoveX(ball.getMoveX());

                }

                //hits from left

                else if(ball_right < block[i].getX() + 10){

                        ball.setMoveX(-ball.getMoveX());

                }

}

}
Instantiating the Blocks
With some noise going on, you can figure out a way to add a lot more blocks and make the game interesting. Instead of going through the arduous process of hard-coding the position of each block, you can put the x and y positions into an XML document. Android is very clever when it comes to storing data in another XML file. In fact, this practice is highly encouraged because it makes the code more readable and editable with only a slight lag in performance that usually isn’t noticeable.
Here are the steps:
- Create
blockposition.xmlby right-clicking on thevaluesfolder within theresfolder and selecting new, then “File”. Type the name asblockposition.xml. Following is the starting code to type into this new file. The goal is to keep the blocks in the same position but allow you to add more as you see fit:- All this code does is establish an integer value of 3 that specifies how many blocks there will be. Then, two arrays handle the x and y positions of the blocks, respectively. When you add more blocks, update the
blocknumbervalue, and add more positions for the blocks.- To access data stored in the XML file, declare these variables at the top of
GameView.java:private Resources res;
private int[] x_coords;
private int[] y_coords;
private int block_count;- You’re using the
Resourcesclass, so add the following line to your set of imports:import android.content.res.Resources;- Within the constructor for
GameView.java, delete the lines dealing with the blocks. You’re going to completely redo that portion. Following is the new and improved code that pulls the data from the XML document that you created:res = getResources();
block_count = res.getInteger(R.integer.blocknumber);
x_coords = res.getIntArray(R.array.x);
y_coords = res.getIntArray(R.array.y);
block = new SpriteObject[block_count];
for(int i = 0; i < block_count; i++){
block[i] = new SpriteObject(BitmapFactory.decodeResource(getResources(), R.drawable.block), x_coords[i], y_coords[i]);
}resis basically your handler to call the functionsgetInteger()andgetIntArray()from the XML file. The arrays and integer are stored, and then you go through aforloop, creating each of the new blocks. You no longer specify the number of blocks in the code, so it’s very easy to change the number.- Unfortunately, you originally specified 3 as the number of blocks. Now you need to replace that value in the
onDraw()andupdate()functions. Find those spots, and insertblock_countwhere you see 3 in theforloops. Theupdate()method has two locations where this change must be made because it calls theupdate()functions of each sprite at the end and needs to check each block for collisions with the ball.
![]() Note One of the reasons I like to store the layout and position of the blocks in an XML file is to be able to easily compare where each block is. For example, the three blocks that you use first all have a y value of 200. This makes it easy to slowly increment the x value because you can notice the trend in the vertical position. Because the blocks are 30 pixels high, you could make the next set of blocks at the vertical position y = 230.
Note One of the reasons I like to store the layout and position of the blocks in an XML file is to be able to easily compare where each block is. For example, the three blocks that you use first all have a y value of 200. This makes it easy to slowly increment the x value because you can notice the trend in the vertical position. Because the blocks are 30 pixels high, you could make the next set of blocks at the vertical position y = 230.
Removing Dead Blocks
One major issue must be addressed before the game can be taken seriously: the blocks must disappear after they have been hit. You already set their state to dead, but you don’t respond to the state in any way. To address this, you have some work to do in the SpriteObject.java file.
Basically, every function must have an initial if statement that checks its state. If the block is alive, then the action continues. If not, the function returns null and doesn’t worry about the dead sprite.
Follow these steps:
- Add this statement to the
SpriteObjectconstructor to ensure that all sprites that are created are made alive. There is no use in initializing a dead sprite:state = ALIVE;- Look at the code in Listing 6-6 for
draw(),update(), andcollide(). A simpleifstatement proceeds only if the sprite is alive.Listing 6-6:
draw(),update(), andcollide()public void draw(Canvas canvas) {
if(state == ALIVE){
canvas.drawBitmap(bitmap, (int)x - (bitmap.getWidth() / 2), (int)y -
(bitmap.getHeight() / 2), null);
}
}
public void update(int adj_mov) {
if(state == ALIVE){
x += x_move;
y += y_move;
}
}
public boolean collide(SpriteObject entity){
if(state == ALIVE){
double left, entity_left;
double right, entity_right;
double top, entity_top;
double bottom, entity_bottom;
                left = x;

                entity_left = entity.getX();

                right = x + bitmap.getWidth();

                entity_right = entity.getX() + entity.getBitmap().getWidth();

                top = y;

                entity_top = entity.getY();

                bottom = y + bitmap.getHeight();

                entity_bottom = entity.getY() + entity.getBitmap().getHeight();


                if (bottom < entity_top) {

                        return false;

                }

                else if (top > entity_bottom){

                        return false;

                }

                else if (right < entity_left) {

                        return false;

                }

                else if (left > entity_right){

                        return false;

                }

                else{

                        return true;

                }

        }


        else{

                return false;

        }


}
The only real trick to this is that the collide() function needs an else statement at the end because a value must be returned from the method. Otherwise you have integrated a very simple procedure that makes your blocks disappear as soon as they’re hit. You can still access the x, y, bitmap, and state of the blocks, but there is no need to do so.