
Verifying and Uploading
Taking this concept of sketching to heart by tossing together some lines of code that we are still not fully up to speed on, we’ve got a sketch entered into the Arduino development environment and we think we have all the syntax and statements correct, but now what? In the last chapter, we blindy uploaded our first sketch full of confidence, but how do we know if the code we entered will work or not before uploading it to the Arduino board? To answer these questions, let’s revisit uploading our sketch to the Arduino board, looking a little closer at the verifying and uploading process, including how to save your sketches and some of the common errors we might run into.
Verifying
As mentioned earlier, it is always a good idea to periodically verify a sketch that you’re working on, just to make sure that you’re on the right track, and even though this happens automatically before uploading a sketch to the Arduino board, it’s a good idea to verify before uploading. To verify our code is to check that our code is correct and follows all the right syntactical rules that our sketches need to follow. We verify our sketch by hitting the Verify button in the top left of the toolbar in the Arduino development environment, as shown in Figure 2-4.
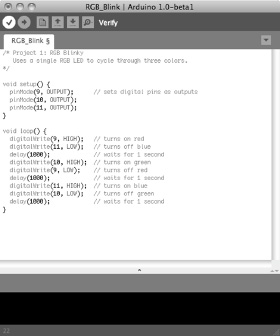
Figure 2-4. Verifying/compiling
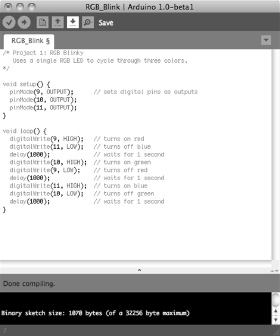
Verifying will run the sketch through a process called compiling, where the development environment takes the Arduino C code that we have written and translates it into a binary format that the actual microcontroller will understand. If all goes well, a note will appear at the bottom of the window that says, “Done compiling,” and you will be told the binary sketch size in bytes. If there is an error during the verification process, skip ahead and check out the section on common errors to see if you can figure out what went wrong. Once we have completed writing our sketch, verified it for errors, and everything completes successfully, we are ready to upload the sketch to the Arduino board; but before we do that, let’s save our hard work.
Saving
Once you’ve got a working sketch that is ready to be uploaded to your Arduino board, or even if it is still in-progress, you should probably save your file frequently. To save a sketch, all we need to do is hit the Save button in the toolbar, as shown in Figure 2-5.
The Arduino development environment saves files in the default sketchbook folder named Arduino, usually found in your Documents folder. Sketch names must contain standard characters and numbers, however, they cannot begin with a number and cannot include a space character. Instead of spaces, we generally use the underscore ( _ ) to separate words in a file name. The development environment also stores the file in a folder of the same name that it will automatically generate if the folder is not already there. Once saved, we can access our sketch from the File ![]() Sketchbook menu.
Sketchbook menu.
Uploading
Once our sketch is successfully compiled and has been safely stored in our sketchbook, we are ready to upload our sketch to the Arduino board by hitting the Upload button in the toolbar, shown in Figure 2-6.
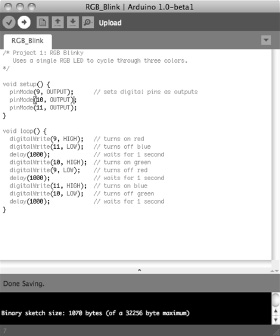
Pressing the Upload button will send a signal to the Arduino microcontroller that tells it that it needs to stop what it’s doing and pay attention to the incoming code. At this point the LEDs marked RX/TX on the interface board will blink like mad, indicating that the code is being transferred to the board using serial communications through the transmitting (TX) and receiving (RX) of data using the built-in USB to Serial converter. When all is said and done, the notice bar will tell you when the upload is complete and your sketch will begin running momentarily.
Common Errors
You’ve just punched in your new sketch with eager anticipation to see that LED blink. You hit the Verify button, and after a long second or two, an error pops up. Now what?
If things didn’t go as planned because of a compiler error, the notice bar will turn orange and sometimes give you a cryptic form of message, as seen in Figure 2-7, that basically tells you to go back and fix something.

This can be a little disappointing at first, but hang in there, I’m sure you’ll figure it out. There are two general types of errors that we should be concerned with: hardware and syntax. Coming up are steps for troubleshooting these various error codes to help you get going again.
General hardware errors occur because something does not match the hardware you have or a connection isn’t made correctly, as in the following example errors:
Serial port not found.


Problem uploading to board.
First, check that your board is connected to your computer and is indicating good power with a lit LED marked ON. With this verified, next check that the correct serial port and the proper board type have both been selected under the Tools menu. If the USB cable is not connected or the wrong serial port has been selected, the development environment will offer to connect using a different serial port. Sometimes a more serious hardware failure will generate similar errors and you will need to talk to your reseller to iron these problems out.
Other types of hardware errors might show up as something not working the way you think it should because of a bad connection. In our example project, you would expect the LED to first blink red, then green, and then blue; but yours doesn’t light up red for some reason. This type of error comes from not wiring the components correctly, reversing the direction of certain parts like LEDs, or having the wires go to the wrong pins. This can be easily fixed by carefully going back over the hardware circuit, as shown in the schematic and illustration, to find out where something went wrong. It’s even a good idea to have another pair of eyes look over it just in case they see something that you missed.
The second category of common errors are syntactical errors where you missed a semicolon, parenthesis, curly brace, or other character or form of syntax needed for the sketch to function properly, as shown in Figure 2-7 and the following examples:
The Arduino development environment will generally give you a pretty good idea where to look for this problem by moving the cursor near the problematic code and highlighting the code near where the error was found, so you can fix it by replacing the missing character before trying to verify the code again.
![]() Note Remember that at the end of every simple statement a semicolon is needed to separate one statement from the next. Also, all parenthesis, curly braces, and block comments need to be matched in pairs.
Note Remember that at the end of every simple statement a semicolon is needed to separate one statement from the next. Also, all parenthesis, curly braces, and block comments need to be matched in pairs.
Many syntax errors stem from Arduino C being case sensitive. In a case sensitive language, whether a letter is uppercase or lowercase must match exactly between what is entered and the syntax of the function, variable, or other statement being used. When writing Arduino sketches, there is a big difference between pinmode(), pinMode(), and PINMODE()—only one of these will actually work. The following are some examples of errors relating to case:
'pinmode' was not declared in this scope


'high' was not declared in this scope
These syntactical mistakes are examples of using the wrong case commonly when calling functions or using variables or constants. Look in the highlighted line of code for where you might have mistakenly typed high instead of HIGH, output instead of OUTPUT, pinmode instead of pinMode, or any other instances that are case sensitive.
No matter the error, just take a breath and think it through. I’m sure you will find it in no time. Writing code has a funny way of needing to be extremely logical and literal. If you are still having problems getting it going, you might turn to the generally helpful Arduino Forums at http://arduino.cc/forum.